The barn is the first and most necessary thing to begin with in the development of a plot of land. At first it will be a shelter from the weather, a workshop and a sleeping quarters. And then he will take on his main responsibilities of storing gardening tools, crops and household supplies. Perhaps it will also accept domestic animals.
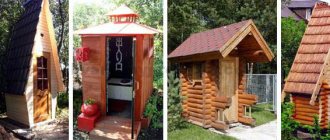
Building a shed with your own hands is not God knows what kind of science, that’s what this article is about. It is much more difficult to immediately position it correctly, taking into account the prospects for your own development and the layout of neighboring plots. The barn is a source of pollution. If initially there were no plans for mice in it, then where is the guarantee that over time chickens, or even a bull, will not appear there? In modern dense buildings, it is difficult to meet sanitary standards, especially considering the future. You may have to build a mobile shed in the fall (see below), and in the spring put it where you need it forever: it’s not so easy to guess right away so that it doesn’t turn out to be an eyesore later.
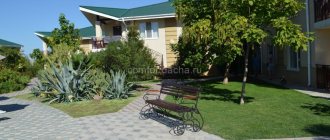
An example of the location of a shed on a site
Take a look at fig. How much is there! An earthly paradise, and that’s all, not a manor. Now take the scale: standard 12 acres and a house of 120 square meters in plan, 80 residential. Having acquired land, they argued all winter about where to start, where to put things. The family's income is average; There was no way to settle down for our own without selling future agricultural products. It was assumed that within 3 years there would be only a barn on the building site, so it had to be built cheaply, but thoroughly. The garage was moved to the far corner and estimates for the road to it were made reluctantly, but there was no other way to fit a garbage dump with a cesspool into sanitary standards, and also ensure access for a garbage truck to the tank and a sanitation tank to the septic tank.
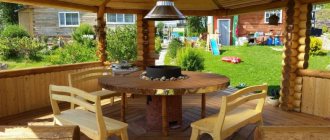
Since the construction was carried out for themselves, they decided to protect themselves from infection not only formally, but also in essence, for which purpose they planted a walnut over the utility yard with the barn. This tree exudes a lot of phytoncides, so nothing really grows under it or around it, but there are no flies and rats either; In addition, in summer it provides excellent shade. Near Lipetsk, the nut had to be nursed for a long time, but in the 8th year it still produced a harvest, by which time the arrangement was completed. This is what they noted in the gazebo by the pond, taking a sip of what they were supposed to have from the cellar; The cellar next to the recreation area came in very handy. And it all started with a barn...
What's first?
The family in question had not previously demonstrated any strategic abilities in themselves. Indeed, without being able to delve into the details, it is impossible to cover the problem globally and achieve success. A simple shed can provide invaluable experience here if you immediately perceive it as the beginning and fundamental basis of future well-being. In general, although the shed itself is not complicated, its construction must be taken with great responsibility. Especially in preparation for construction. Step-by-step preparation for the construction of a barn occurs as follows:
- We get our bearings and talk to our neighbors. The goal is to find the best place for the shed: so that it is not very far away, but also does not stick out in front of your eyes and fits into sanitary standards for distances to water sources and other objects susceptible to contamination (residential buildings, plantings of agricultural crops, especially root crops);
- Suddenly there is no clarity on point 1, we are building either a mobile shed or a temporary shed from cheap waste material. However, it is possible to build a shed at the dacha from slabs or used boards that is quite durable, inexpensive and easy to refine until it gives it a quite attractive appearance, see below;
- If you have decided on a place for a barn right away, we choose the type of upper structure, taking into account the possibility of having pets;
- We select the roof for the “box”;
- Determine the type of foundation;
- We are designing a shed based on the terrain. The latter is especially important, because supervisory authorities do not stand on ceremony with sources of pollution;
- We reduce (compile) estimates for construction and decoration;
- We may adjust the project if the barn does not fit into the budget;
- We may also be considering the option of self-building with subsequent legalization. If the shed obviously complies with SanPiNs (Sanitary Rules and Norms), then it will be cheaper and easier than building it initially according to the project;
- We buy materials and build.
What to do with the project?
A barn is a lightweight, pre-fabricated, unheated non-residential structure, from which important consequences that make things easier follow. We will talk about them for construction later, but for now you need to know that when registering/legitimizing the greatest quibbles and difficulties should be expected in relation to the location on the ground in accordance with SanPiNs. The actual design of the barn should include sheets with facades, a plan with sections, see track 2 in Fig. and a plan diagram of the foundation with a specification of materials for it, as in Fig. with plan sections.
Sheet of facades from the barn project
As a rule, free shed projects from the RuNet are approved without anything and then no one ever thoroughly checks what is actually built there. It looks like a project, and ok. Deviations from the project in construction are acceptable, but in “small-scale construction” you can do without approval. But the layout plan for the site is studied very carefully, as are the plans of neighboring sites and their consent to construction. So make sure to collect these papers in advance, they are valid for 3 years.
Sheet of plan sections from the barn project
Perhaps the corrosive bureaucrat will require another sheet with the frame structure, because... It’s not residential, it’s not residential, but people go there. In such a case, for a sample, see the drawings in Fig. By the way, this is not a bad shed for a 6-acre dacha. In extreme cases, you can sleep there, lying down diagonally.
Mini-shed frame for a small area
Note: it is not necessary to list small fasteners (nails, screws, angles, staples) in the bill of materials for the drawings, because it is purchased as it is spent. It is also not necessary to indicate soft roofing materials costing up to 3,000 rubles. If, say, 2 rolls of roofing felt are spent on the roof, then it will cost up to 1000 rubles, so we also classify it as purchased as it is spent. Keep only sales receipts, in case they come to the rescue.
About temporary sheds
A good-quality wooden shed without a foundation weighs up to a ton; with a pitched roof and if you build it carefully, but not like a merchant, you can fit in half a ton. You can move it on rollers along the sleds, see picture, using a crowbar, you can move it together. To lift and place on the base using straps (ropes), 10-12 strong men are enough. Although, who knows, the subsequent treat for this crowd will cost more than renting a truck crane...
Moving a barn on rollers
What is the point of this, besides the fact that you can build anywhere at first? Moreover, in this case the project is needed no more than for a doghouse, and for it it is not needed at all. If it stands for a year, then later, on the foundation, they will legitimize it, as long as it fits into the SanPiNs.
However, here the question arises for yourself: how to put it on the foundation? We should put them on anchors, but not dismantle the building in order to push them through the crown? There is a way, see below for details.
Construction Features
Barn foundation
Screw piles or pipes - metal or asbestos-cement - can be used as supports. In the latter case, in their cavities (to increase strength) you will have to fill the solution and insert 3 - 4 reinforcing pins. In principle, the technique is simple.
But still, in many cases it is more convenient to make a foundation from timber. If you can get ready-made sleepers (that is, dried and processed in a special way), even better.
What to build from?
What building materials are best for a shed? Strong enough, durable, inexpensive and easy to work with? First of all – boards. A barn can be built from boards alone, see below. Unedged boards are cheap, and a structure made from them can look quite neat and even elegant in the spirit of rustic design, pos. 1 in Fig.
Sheds made of various materials
Note: even cheaper than the “uncut” croaker. It is also possible to build a shed from it alone, see the video below. True, it is more difficult to bring it to an exquisite “rusticism”. The most difficult part of the work is debarking the croaker, i.e. clearing it of bark; it requires a special hand tool, see the next video.
Video: slab barn
Video: cleaning the slab from bark
Frame shed, pos. 2 in Fig. above, the most common, because The technology of small frame construction is well mastered by private developers. However, to assemble a frame from timber, as for a change house or other at least temporarily inhabited buildings (these, by the way, include a country toilet with a shower), pos. And in Fig. on the right, not necessarily. More precisely, based on strength requirements, it is mandatory for mobile sheds. And if the structure is placed immediately in its place, then the frame can be assembled from only boards, poses. B. This will make the construction much cheaper if unedged and used boards are used.
Shed frames made of timber and boards
Sometimes a country shed is sheathed with OSB for the sake of aesthetics, pos. 3, or plywood. These materials are susceptible to delamination in the open air, so before painting, a shed with OSB lining must be properly primed, and a plywood shed must be treated twice with a water-polymer emulsion.
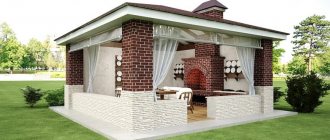
Capital barns, especially livestock ones, are most often built from foam blocks, pos. 4. Their lower strength compared to bricks does not play a role in this case, but a shed made of foam blocks is cheaper, easier to work with, warmer in winter and cooler in summer. If you choose one, keep in mind:
- A shed made of foam blocks can be built on a columnar foundation with a wooden crown, like, for example, a bathhouse.
- No more than 3 lower rows are laid on cement-sand mortar, and above that you need to switch to a special adhesive for aerated concrete. The structure is light, and the upper cement joints, which are weakly loaded vertically, can break under lateral wind pressure.
- Having laid the walls to a third of their height, work is interrupted until the masonry mortar hardens, so that the masonry does not float at the seams. The same break is made for 2/3 of the masonry.
Kits of parts for quick-assembled plastic sheds, pos. 5. However, the prices, to put it mildly, are puzzling, firstly. Secondly, for some reason, living creatures in such sheds do not take root. Perhaps for the same reasons, whatever they may be, why people do not live in plastic houses.
What material to choose for construction?
The decision of what material to build a shed from is influenced by its functional significance. The most popular material is wood . A structure made of brick or foam blocks will be more durable. A brick barn is good for raising chickens and other poultry. Suitable for pigs, goats, sheep or cows. Animals feel good in such structures in summer and even in winter with appropriate insulation. The wood-burning outbuilding can be used for drying sheaves.
It is also possible to build an extension from the following building materials:
- from pallets;
- from metal profile;
- from sandwich panels;
- from sleepers.
Models of plastic sheds are common. Making a building with your own hands is not such a difficult task for a person who understands tools. Assembling a metal or wooden utility unit with skilled hands will only take a few days.
Shed made of foam blocks
Foam blocks are an inexpensive and common material. It is produced by mixing several components into a homogeneous mass: sand, cement, water and foaming agent. Then it is cut into blocks and hardened. Foam block has many advantages :
- high speed of construction due to simple installation;
- vapor and heat insulation of the room due to the fact that the material has a porous structure;
- does not burn;
- despite its large volumes, it is light in weight, which allows the construction of a lightweight foundation and simplifies transportation;
- It is easy to cut with a regular hacksaw, so the block can be given any shape.
The advantages include the fact that it is an inexpensive material , which allows construction to be done quickly and cheaply.
Disadvantages include the ability to absorb moisture, which threatens destruction if there is a sudden change in temperature. To avoid this, the blocks are additionally processed.
Pallet shed
Sometimes, during a long construction period, even buying a prefab shed will seem like a big expense. In such cases, a very simple option for budget construction is suitable - from pallets . Such a structure can be used mainly for storing equipment or firewood, but sometimes this function is enough.
But within the weekend you will have an extension at your dacha. Durable pallets will make it reliable and durable, and the appearance will not be much different from other structures. During construction, you need to be careful with calculations and boldly imagine.
For construction, unpainted pallets to be sure that the barn will be clean and free of chemical impurities and reactions. For the same reason, you should avoid pallets marked IPPC, which indicates that the material has been chemically treated. Do not use pallets from markets or retail areas as they may have been used for products with strong odors.
Shed made of sandwich panels
Sandwich panels are becoming an increasingly popular material in construction. Sheds and small outbuildings are quickly built and have excellent performance characteristics . The material has environmentally friendly components, high functionality and the presence of insulation in the composition.
The material is lightweight and does not require a solid foundation , a strip foundation or an ordinary concrete slab is sufficient. A frame is built on top, usually from a metal profile, connected using self-tapping screws. Silicone sealant will provide a tighter connection of the panels. Next, the roof is erected.
Plastic shed
A durable shed that can be easily dismantled - these are the qualities a plastic utility block has. Ease of installation, low price and long service life make this model very common among owners of summer cottages. If you are at a loss on how to build a shed, do not waste time and buy one ready-made.
Plastic as a material for a utility unit has a lot of advantages :
- strength and long service life;
- does not rot, is not flammable, it does not need additional painting;
- easy to assemble by people without special skills or additional tools;
- Construction is possible even alone, without a partner.
Choosing a roof
What kind of roof to cover the barn: two- or one-pitched? The first has an exclusively aesthetic advantage. There is always a miasma in the barn. Let's be honest, work clothes are not washed every day. And not even every week. But sweet apples and boiled potatoes emit ethylene, which is far from harmless and safe in high concentrations. There is no need to talk about pig chickens.
Ventilation of sheds with single and gable roofs
A pitched roof will provide effective ventilation without any additional measures, on the left in Fig. Suddenly the wind blows into your forehead, the visor becomes an air intake and squeezes unnecessary fumes into the cracks. And under the gable roof they will swirl for quite a long time before leaving through the drag window on the right there. In addition, a pitched roof is much simpler and cheaper. Therefore, it is highly advisable to build a lean-to barn. The exception is if there is a hayloft in his attic.
Barn wall cladding
- For wall cladding, 25x150 mm boards are used.
- First, they are installed on the front side of the building, then the sides and rear sides are installed.
- When laying the boards, they are placed end to end.
- The outside will look better if it is treated with an electric planer. This will also make it smoother, allowing raindrops to roll down faster.
Base
A temporary shed without a foundation is placed on a crushed stone cushion 25-40 cm thick. It is poured flush with the soil surface, removing the humus. However, a durable shed still needs a foundation that is reliable enough for this type of structure, inexpensive and not very labor-intensive.
Sheds are rarely built on slab foundations: for a conventional foundation they are too labor-intensive and expensive, and in a cowshed or pigsty it is difficult to arrange stalls and a manure pit on a slab. Large livestock barns made of brick are built on a strip or columnar-strip foundation, but for small private farms this is probably unnecessary.
Pillar foundation of a barn
The optimal foundation for a barn is columnar, see fig. The technology for laying it (the so-called process of building a foundation) was described earlier; We will analyze here, make this work easier and simpler for the shed. The step-by-step arrangement of a columnar foundation for a barn looks like this:
- For concrete, we purchase sand and gravel mixture (SGM) from road workers (not builders), it is much cheaper than construction sand and gravel separately. Concrete on the PGS is not suitable for a residential building, but it will be suitable for a barn;
- We also purchase M400 cement at the rate of 1 bag per 9 bags of ASG. The concrete will be M150, enough for a shed;
- On the site we make cast-offs from 1 (yes, exactly one) cord on pegs;
- We check it as usual, by comparing the diagonals and measuring the sides;
- Using the hydraulic hose level, we find the highest angle and set the distance of the cord from the ground surface to 10 cm;
- Using the same level, set the cast-off horizontally;
- In the lowest corner we drill a hole with a 200-mm hand drill to the calculated depth plus 15-25 cm for a sand-crushed stone cushion;
- We make a mark on the drill rod;
- We drill the remaining holes until the mark on the drill matches the cord;
- We fill the wells with equal layers of sand and crushed stone, compacting each layer. ASG cannot be used here, because the solution being poured should penetrate slightly into the crushed stone;
- We roll up pile sleeves with a diameter of 150 mm from 2 layers of roofing felt. We fasten them with 2 mm soft wire. To prevent the sleeves from bursting when pouring, you need 3-4 strapping belts per 1 m of their length;
- We put the sleeves in the wells. Place the stones vertically;
- We cut the sleeves, using metal scissors or large tailor's scissors, flush with the cord;
- We prepare reinforcement cages: 3 (10-12) mm corrugated rods per post, tied with the same 2 mm wire. The vertical pitch of the bundle is 200-250 mm. The distance from the inner edge of the sleeves and their top is usual, 30-50 mm;
- We place the frames in sleeves and position them so that they do not touch the walls;
- Mix the concrete using an ASG until it becomes creamy thick;
- Fill the pillars layer by layer, in layers of 15-20 cm, with a break of 10-25 minutes. between layers. This is called a hydraulic seal fill. In practice, the layers are poured in order, starting from the same column;
- Before pouring the last (penultimate) layer, we place anchors in the pillars;
- On the 3rd day we backfill the soil with a tamper. Be careful not to knock the posts off the vertical!
- On the 7th day (the concrete has gained 50% strength), construction can continue. On the 20th day, at a temperature of 15-25 degrees, the concrete will gain 75% strength and the structure on it is considered suitable for use.
Ready-made container utility unit
The fastest and least labor-intensive option is to purchase a ready-made shed (house) in the form of a collapsible outbuilding. This is a monoblock structure (usually a container type), which is based on a rigid metal frame, which is sheathed on the sides with metal, with insulated walls, and electrical wiring is already installed in it. There are many options - it can be just a small storage shed, or a multifunctional utility unit, including a toilet, shower and even a place to relax, and some models provide a removable canopy, which makes it possible to make a small veranda.
To install such a container utility unit, pouring a foundation is not required; a columnar foundation or simple concrete blocks will be quite sufficient. In a ready-made form (although it may require minimal assembly of internal communications, for example, connecting hoses to water collectors, which can be done independently), it is delivered to the site; installation will require a truck crane. From the outside, such a barn does not look very attractive, but it can be sold after the construction of a residential building is completed.
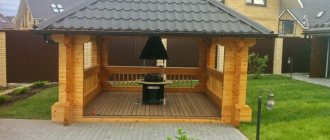
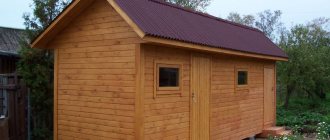
Topside
So now we're building a barn. For example, such as in Fig. It will also fit in a 6-acre dacha without any problems, but it’s a little larger: you can sleep well in it, and there is a compartment for tools. In the future, perhaps for a woodshed or poultry house.
Small country shed
For novice builders, as a rule, the difficulty is not in reading drawings and diagrams, but in how to put their hands to all this? Unaccustomed to carpentry, not roughened by calluses and not provided with special tools? We will dwell on this in more detail.
Frame connections
The barn, as stated above, is non-residential and in general, from the point of view of SNiP (Building Rules and Norms), is barely a structure. Therefore, it is possible, without fearing anything either in essence or on paper, to use thin-walled metal connectors for wooden parts. Regarding residential buildings, SNiPs are merciless: their metal parts must be at least 4 mm thick. This is dictated by fire resistance requirements: in the event of a fire, the building must resist the fire until it collapses for at least a time sufficient to evacuate people. It's easier with a barn.
Ways to connect shed parts
Mitrel, claw and tenon connections (items 1 and 2 in the figure), which require special tools and sufficient carpentry skills, do not need to be used. If you still have to, you can reinforce it with hardware not with a square or an envelope, but with a pair of nails/screws diagonally (in the inset there) or lengthwise if the part is narrow.
Connections on stamped corners (crossed out in red) without inserting wooden parts are not entirely reliable on joists and ceiling beams, because They are not adapted to shear loads, and the corners themselves are quite expensive. Perforated plates, pos. 3. They can be bent in any way you like, including: and pockets holding vertical stresses. How do you like the ceiling in Fig. on right? No cutting and cutting of tenons and grooves with painstaking calculations and inevitable mistakes for a beginner, but keep an elephant in the attic.
Ceiling frame on metal thin-walled connectors
Perforated plates for embedded anchors are especially good, also at pos. 3. Remember the question: how to place a finished shed on a foundation? Now it's clear how.
Nail plates, pos. 4 allow you to save even more on fasteners, but, firstly, they can only be used flat. Secondly, fastening them requires skill so that the nail bends do not wrinkle. The nail plate must either be gradually hammered evenly over the area, or, conversely, immediately driven in with one powerful and precise blow of a sledgehammer.
Note: for permanently loaded shear joints, e.g. floor joists, it is still better to use special thin-walled joist pockets or pockets for joists, pos. 5.
About the casing
In terms of all technical parameters, the best cladding for a barn is plank. Technologically, it is also not complicated if it is sheathed in a cut pattern (“herringbone”, see figure). And it is very cheap if the board used for the cladding is unedged, and what such sheds come out of in skillful hands can be seen in some figs. in the article.
Covering a shed with planks
Only boards
Many timber merchants sell boards cheaper than timber, because... More of them come out of one forest. In addition, if you have a circular saw, it will not be difficult to separate cheap unedged ones into measured ones. Therefore, a shed made entirely of boards is a very pressing issue.
How to solve it is shown in Fig. below. Plank beams can even be assembled from scraps, pos. a) and b). The intermediate posts are made box-shaped (pos. c) for internal partitions, and T-bars (pos. d) frame window and door openings.
Techniques for building a shed using only boards
Is it just boards?
Sheds made of corrugated sheets are most often sold ready-made on a metal frame, pos. 1 in Fig. In general, this is not the best option: such a barn is stuffy in summer and cold in winter. But perhaps, for economic reasons, you will settle on this design. Then you need to take into account that a thin profiled sheet in a building structure will not serve as a working cladding and the wooden frame of a shed made of corrugated sheets needs to be reinforced.
Actually, strengthening the frame will not cost extra money and labor; it is enough to install braces across the entire wall of 40 mm boards, not flat, relative to the lower crown, but edgewise, pos. 2. In this case, there will be a door and a window in the front wall. If there is only a door, then its opening is made in the middle and the jibs are placed on both sides of it.
Sheds with sheathing made of corrugated boards and small scraps of boards
The struts are not cut into the racks, they are simply nailed. Horizontal slats as thick as the board are placed under the sheathing; When crossing with the braces, breaks are made in the sheathing. The sheathing is attached to both the sheathing and the braces.
Note: it is highly advisable to adjust the dimensions of the shed and the selected corrugated sheeting so that the depressions of the waves of the vertical sheathing fall on the corners. Then they are attached directly to the corner posts, which will give some additional strength to the structure.
The same type of frames can be sheathed with small unmeasured boards: container board (item 3), scraps. You can make a very cute shed out of just about anything in different ways. For example, lighten old boards as described below, sand them, stain them with stain and stuff them in an artistic mess, pos. 4. Or paint the boards separately, creating geometric patterns, or dream up something else.
Very “bad” boards
Old boards are dark and unsightly. The frame of a shed can be whipped up literally from garbage, pos. 1 in Fig. The result will be a painfully familiar bawdy shack, pos. 2. However, if you inherited one from your great-grandfather, but is still quite dilapidated and crooked, it is not so difficult to bring it to a form similar to that in pos. 3:
Sheds made of substandard boards
- Take out the window, remove the door.
- Support the corners from the outside with struts made of poles, aligning the pillars. If it doesn’t go any further, it’s not necessary, why ruin something that is strong?
- Inspect carefully and secure with self-tapping screws. We don’t touch the old nails, let them rust until the end.
- Remove the roof and roof sheathing.
- Treat the entire structure with wood brightener (regenerator).
- After 2-5 days, treat with another biocidal impregnation, drying oil or, in extreme cases, treatment.
- Varnish with acrylic varnish if desired. There is no need to paint, the “rusticity” will go away, and the “crookedness” will disappear in all forms.
- Install a new window, hang a door, lay a roof.
About lightening wood
Wood restorers are made from bleach. Therefore, if lumber is processed individually, you need to work in the air or in a well-ventilated area. There is no need to apply the composition with a spray, as is often written in the instructions (they seem to be compiled by marketers, not forestry engineers), everything around will be splashed with a caustic liquid. Treat with a brush; best of all - plaster plaster; it absorbs a lot of solution and releases it evenly.
We reached the roof
The advantages of a pitched roof for a shed have already been discussed. If you are more satisfied with a gable roof, then its rafters will be quite sufficient with one suspension without crossbars, pos. B in Fig. The material everywhere is 100x50 timber or 100x40 board. The Mauerlat is not needed; the rafter trusses are attached to the beams of the upper frame on the corners or bent perforated plates. All parts of the truss are connected in the same way.
The design of rafters for a gable roof of a barn
It is not worth cutting the tops of the legs into each other, as usual (pos. A), nor is it worth fastening the ridge corner of the legs with a steel plate: the first is too difficult, the second is weak. The roof ridge is formed, firstly, on the ground with gussets (pos. B1) from scraps of boards from 20 mm thick. The scarves are placed on both sides, secured with 12 screws, 3 for each half of the scarf. And the final strength of the rafter structure is obtained after installing a ridge girder made of 2 boards, pos. AT 2; it is nailed or screwed to the legs, 2 attachment points per leg.
Preparation for construction: drawings of the future barn, dimensions
Before starting the construction of a frame barn, it is necessary to take into account some points of its construction:
- A barn, no matter how carefully it is built, remains an outbuilding that does not particularly fit into the architecture of a residential building. Accordingly, it is better to build this building in the backyard.
- Entry must be free. This will become especially convenient when it is necessary to carry large items or furniture into it, in case of renovations in the house.
- It is better to place the shed on a hill (supports, piles, blocks). The distance between the base of the structure and the ground will prevent: from rotting of its wooden parts, the appearance of moisture in the room and damage to metal equipment by corrosion.
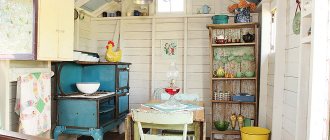
- It is necessary to carefully design the barn so that in the future there is no need to make extensions to it. It will be convenient to divide it into two rooms: in one you can set up a workshop, and in the second - the barn or chicken coop itself.
Two rooms of the barn will allow you to use them for different purposes
- The ground at the site of the future construction needs to be leveled.
- It is necessary to determine what materials will be used to cover the walls and floors. What will the interior decoration be made of and what type of roofing will be used.
The length, width and height of the future shed are selected individually, depending on the location. For such purposes, medium-sized buildings are most suitable (see image).
Option of a frame barn with typical parameters
Another option for a frame shed
Selection of materials and calculations
High-quality planning for the purchase of all necessary materials will eliminate unforeseen waste in the future.
When constructing a shed frame, the following materials are needed:
- For the lower and upper trim you need: six bars 6 m long with a section of 100x100 mm and eight bars 3 m long with a section of 100x100 mm.
When purchasing timber and boards, you should pay attention to ensure that their moisture content does not exceed 22%.
- For flooring, boards with a cross-section of 40x150 mm are required, in an amount of (minimum) 20 pieces. OSB sheets are used as the finished floor.
- For vertical supports, beams with a cross-section of 100x100 mm are needed, in the amount of 12 pieces, each of which is 2.5 m long. Two such beams will be used as a doorway.
Wooden surfaces must be free of knots, cracks, mold and damage from wood-boring insects.
- There are two ways to slope the roof: in the first case, you need from 4 to 6 bars 50 cm long with a section of 100x100 cm, in the second case, the supports on which the slope will be placed must initially be shorter in length.
- For the sheathing you will need a board with a cross section of 22x100 mm, in the amount of 16–18 pieces.
- For a rough ceiling, you can use multilayer plywood, chipboard, fiberboard or OSB sheets.
- To fasten the beams at the corners using the “paw” method, nails are needed, and “in the floor of the tree” - metal corners and strips.
The nails are selected to be longer than the thickness of the board so that they pierce it and enter the next one. This connection will be much stronger.
- When working, you will also need self-tapping screws, screws, and L-shaped metal plates to secure the timber in the corners.
- In the case of insulating the frame of a shed, you may need a thermal insulation layer (foam plastic, mineral wool or penoplex), waterproofing (foamed polyethylene foil), vapor barrier (bitumen), roofing material, polyurethane foam.
Required Tools
To build a frame shed you will need the following tools:
- Shovel (to dig holes for a columnar foundation, it is better to use a screw shovel).
- Yardstick.
- Marking cord with coated thread.
- Graphite marking pencil.
- Construction level (it is more convenient to use from 50 to 200 cm).
- Square and ruler.
- Stationery knife (for cutting insulation).
- Laser level (using this tool, a perfectly flat plane is determined).
- Chisel.
- Electric drill.
- Circular saw (with its help it is convenient to cut boards of various lengths and sizes).
- Cordless screwdriver (for attaching plywood, boards and OSB sheets to ceilings, walls and floors).
- Electric planer (necessary when calibrating boards).
- Screwdriver.
- All-metal carpenter's hammer.
- Sledgehammer (used when adjusting boards).
- Hand clamps (for clamping boards in different places).
- Wood saw (for cutting grooves).
- Construction stapler (for fastening waterproofing and vapor barrier to a wooden frame).
- Carpenter's axe.
- Construction plumb.
- Nails. For a frame shed you need from 2 thousand to 4 thousand nails. In this case, three types are used:
- GOST 4028–63 Black and zinc construction nails. Zinc ones are used for external work with wooden parts, and black ones are used for installing internal materials.
- GOST 4029–63 Zinc nails for fixing roofing felt and other sheet materials.
- DIN 1152 Galvanized nails for fastening tongue-and-groove boards, face panels and finishing surfaces.
About sheds for livestock
Sheds for productive domestic animals require a separate description, and one for each species. A cowshed with a pigsty and a chicken coop are combined only geographically on the same farm yard. From the point of view, so to speak, of general barn construction, it is necessary to take into account, first of all, that animal droppings are chemically aggressive, release a lot of ammonia (especially poultry and pork), and its consistency and drying speed are significantly different. In any case, manure must be removed as it arrives and stored, because Any kind of it except pork is a valuable fertilizer.
The first thing that follows from this is that the barn for livestock must be well ventilated, located in accordance with SanPiN and legalized. Further, a heavy pig or a young bull, scratching itself on a corner, will create considerable loads in the structure. A dairy cow weighing half a ton is not yet a giant among its kind, and it comes from 4 hooves, the supporting area of which is much less than 1 square meter. m. That is, about human according to SNiPs 250 kg/sq. We need to forget and take into account the real load.
Wooden frame for livestock shed
Finally, goats are known to be not averse to eating pieces of wood. For the barn to be completely eaten up, this has not been noticed. But the bactericidal and water-repellent impregnations required for wooden buildings will not benefit them until they die.
So, a chicken barn can be structurally ordinary, but with good ventilation and chemical resistance; for pigs - also wooden, but on a reinforced timber frame, for example, as in rice; For goats, a wooden shed is undesirable, but for cows, in addition, it must be warm, because... a freezing cow gets sick easily and will not give a good milk yield; in general, it is preferable to build a barn for livestock from foam blocks on a strip foundation. A sheepfold may be simpler, but sheep breeding in small private farms is not developed in the world, because... It is only profitable on a large enough scale.
Roof options and materials
The purpose of the roof is to protect the interior from atmospheric influences. The roof should not let water in and ensure its outflow. The roof of a wooden shed is not as important a part as the roof of a house, nevertheless it must fulfill its function.
The roof of a small building can be single-pitch or gable. The first option has the advantage of being easy to manufacture, but it is only applicable for small-width sheds. Creating a gable roof will require more material and time, but it drains water better, which will affect the durability of the structure as a whole.
Roofing felt and other rolled materials can be used as roofing material for a small shed. You can create a full-fledged roof using classic slate or modern sheet materials.
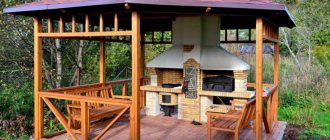
About woodburners
Good natural ventilation is also necessary in a woodshed: the calorific value of wet wood fuel drops sharply, causing heating costs to rise, and a boiler using wet wood will fail faster. For ease of use, woodsheds are most often made as an extension to the house, pos. 1 in the figure, or on the veranda, pos. 2. If this is unacceptable for aesthetic reasons, then a firewood shed is built in accordance with the mode of use and/or climatic conditions.
Woodsheds for different climate conditions
For a seasonal dacha, inhabited from spring to autumn, with low and irregular fuel consumption, you need a woodshed with wide roof overhangs (from rain) and a solid floor raised above the ground by at least 0.4 m, so that the firewood does not draw in moist fumes from land. It is also highly advisable to remove the humus underneath and cover the soil with waterproofing, pos. 3.
In places with harsh continental winters, preference should be given to ventilation, pos. 4. Ice, as is known, sublimates (turns into steam without melting) even in the Siberian frost, only slowly. But in areas with mild and even more so “rotten” winters of the Mediterranean type, firewood needs to be properly protected from precipitation, pos. 4, turning the woodshed with its rear towards the prevailing winds.
Shed frame design with a pitched roof
To form a roof, you need to raise the front part of the frame by a small amount. That is, to form a slope. The rafter legs on the front wall will rest on the raised part, with their rear ends on the upper frame.
Therefore, designers offer two options for frame design :
- It is assembled in the form of a cube. Then, on the front part, racks of small length and cross-section are added, which will become supports for the rafter legs.
Frame design No. 1 Source ristroy.ru
- The façade racks are cut longer to the height of the slope formation.
Frame design No. 2 Source ydachadacha.ru
The second option is used more often.
How to save on foundation
Look again at Fig. with a columnar foundation. Doesn't it seem like there are a lot of pillars? Yes, the load-bearing capacity of such a foundation under a barn is excessive, even if it is made of M75 concrete. But there seems to be nowhere to go: if you place the pillars less often than every 1.5-1.7 m, then the lower crown will not receive proper support. And the foundation, as anyone understands, is the most expensive and difficult part of the barn. So, it is quite possible to erect a 3 by 3 m barn on 5 pillars instead of 9, without losing at all in strength.
How to save money on a barn foundation
Let us take into account again that a barn is a non-residential, utility building and non-standard technical solutions are permissible in it. And, remembering what we learned at the university, let’s first turn the flooring from a panel into a membrane. This ingenuity can be easily implemented by hand: we lay the floor from tongue-and-groove boards from 100x40 to 150x40. It is more expensive than edged timber, but the savings on poles will be many times greater than the overexpenditure on timber.
Installing a corner post on a quarter tenon
Then let us remember that a triangular membrane is much stiffer than a square membrane of the same area. As a result, we will get the lower crown, as on the left in Fig. There is no need to tinker with trigonometry when calculating oblique grooves: they are marked in place by placing a board on the frame. The floor is laid without joists, directly along the crown beams, from edge to edge. Two 3x3 modules can be brought together for a 6 by 3 m shed, but there is no need to sculpt a large structure from such modules: the calculation is valid if the cells have no more than 1 common beam. There are additional conditions:
- Frames are only timber frames 100x100 mm; prefabricated ones made from boards are not suitable.
- The vertical frames of the module are supported with struts made of 100x40 boards flat on steel fasteners without any insertion, except for the one where the door will be.
- For a 6x3 shed, additional vertical posts from the same board are needed in increments of 1.5 m (not shown in the figure).
- The flooring of the 6x3 frame is made of boards 6 m long lengthwise, so that the floor boards are solid.
- It is highly advisable to place corner posts (the same timber 100x100) on the so-called. quarter tenon, reinforced with corners, see fig. on the right is higher, and the large intermediate 6x3 frames are half the tree, as marked in the diagram.
Step-by-step instructions for building a frame shed
To build a shed you need to perform a series of sequential steps:
How to make a foundation
To build a shed you do not need a strong foundation. Often it is simply installed on brick stands. This directly depends on the nature of the soil at the location. If the subsoil layer consists of clay or heavy loam, this can lead to significant soil movements, as a result of which the structure can be warped, damaging the walls and jamming the doors. In such a situation, you need a fairly deep foundation, the supporting part of which will be below the freezing level of the soil.
The following types of support bases meet these conditions:
- Pile-screw. Screw piles are screwed into the ground to the required depth, their upper ends must be aligned horizontally along a stretched cord. Then the heads are installed on them to secure the support beam. In addition to the quality of the soil, this choice can be made when building a barn on a slope.
- Columnar. For the device, you need to dig (or drill) holes below the freezing level of the soil. At the bottom, make drainage from sand (12–15 centimeters) and gravel in approximately the same layer, compact the backfill. Reinforcement is made with a frame of steel rods in the amount of 4–6 pieces vertically, fastened with cross members. The reinforcement support must be assembled on the surface and immersed in the pit. Install formwork of the required height on top of the ground. Concrete is poured into the ground. After seven days, the formwork can be removed and work can continue.
It makes no sense to consider other foundation designs. They are heavier and more expensive to construct: strip, grillage and other types of support bases, and they are inappropriate for a structure weighing several hundred kilograms.
Photo gallery: types of lightweight foundations for lightweight buildings
A columnar foundation with a concrete grillage serves as a reliable support
Lightweight foundation on piles will withstand loads on unfavorable soils
A pile-screw foundation with a wooden grillage for installing a shed does not require excavation work
Strip foundation - a lightweight option for installing a lightweight structure
Choosing a place to build
Determining the location of the utility unit must take into account sanitary and construction standards. Therefore, it is simply impossible to do without taking into account the plan of the land plot and drawing up an accurate drawing. Before building a shed, you need to consider the following requirements:
- The distance from a residential building to a poultry house or livestock facility should be more than 12 m. But at the same time, if the household. If the building has an adjacent (adjacent) wall to the house, the distance between their entrance doors should be at least 7 m.
- The distance from the fence to the barn with equipment should be more than 1 m, from the fence to the poultry house, pigsty - at least 4 meters.
- Water drainage from the roof should be directed onto the owner's property, and not onto a neighbor's property or onto a walkway (path) between neighboring properties.
Be sure to make a path from the house to the barn, which will ensure ease of movement. It would also be useful to have good lighting for the barn, regardless of the specifics of its operation.
Features of building a shed from profiled sheets
The construction of a shed from corrugated sheets is carried out quite quickly and at the same time allows you to get a reliable utility unit. Construction work is carried out as follows:
- Determining the optimal size of the shed, preparing the site for it. Digging a pit 5 cm larger on each side than the size of the shed.
- Digging holes with a depth of 70 cm in the corners of the pit. Filling with sand, crushed stone, installing metal racks or square pipes.
- Filling the corner parts with concrete (ratio of sand and cement 3 to 1).
- Pouring the foundation (the remaining unfilled area, which will be both the foundation and the floor).
- Installation of a frame under a pitched roof: appropriate cutting at an angle of a pair of racks, welding them with auxiliary profiles.
- Fastening corrugated sheets to the frame as walls and ceilings + separate production of a wall with a doorway and installation of a gate made of corrugated sheets and a profile frame.
The simplest barn without a foundation
A typical situation is a new site, there are no buildings, there is nowhere to simply put equipment. It is irrational to carry tools with you; an excellent solution is to build a shed from prepared boards with your own hands. A simple temporary structure without a foundation is perfect here.
The basis of such a structure is racks made of timber. Since there is no foundation, the supporting posts must be buried in the ground. To protect the wood from moisture, it must be treated with a protective impregnation. As such, you can use used motor oil or drying oil.
Horizontal strips are attached to the vertical posts using self-tapping screws and metal corners. The material for them will be cuttings of slats of suitable length. For a small shed, it is enough to lay slats at the top and bottom. The location of the door and, if necessary, the windows are additionally reinforced. The resulting frame is sheathed with boards or wood boards. The roof is made from the same material. To provide sufficient protection from moisture, the roof is covered with roofing felt.
Ready-made utility sheds for the dacha
In addition to built sheds, there are also mobile models made of metal and plastic - cabins. Their advantage is that they can be used immediately after installation. But they are suitable exclusively for organizing a warehouse for firewood, storing equipment and tools. Each of these types of objects has its own characteristics:
- Metal cabins.
Includes a channel frame and corrugated sheeting. Additionally, they can be insulated with foam plastic. The advantage of such sheds is reliability and durability. If desired, a two-story utility block can be built from such objects. The disadvantages of such sheds are their high cost and difficulty in transportation.
- Plastic sheds.
They are a prefabricated structure reminiscent of plastic playground houses. They have an average price, but are lightweight, which eliminates the need to make a foundation for them. True, such models cannot be called environmentally friendly. In addition, in harsh regions (with frosty winters or very hot summers), plastic sheds will not last long.