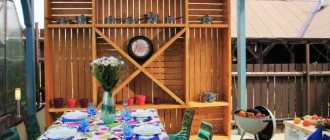
While at the dacha, sometimes you want to freshen up, relieving fatigue after working in the garden or vegetable garden. Of course, for these purposes you can build a bathhouse or arrange a swimming pool, but such solutions require a lot of free space and decent financial investments. An alternative and budget option would be to create a summer shower (portable, mobile or stationary), whose warm jets of water will help relieve fatigue and calm the nervous system. To create the structure, you can use any available materials, so setting up a summer shower in your dacha with your own hands is not as difficult as it might seem at first glance.
How to make a summer shower with your own hands
Before you start designing a shower, you need to determine the place where the used water will be drained. If there is an outdoor toilet with a waste pit nearby, then this problem can be easily solved. It is enough to lay a pipeline, making a general waste drainage. If chemicals, special preparations or bacteria are used to process waste from an outdoor toilet, then it will not be possible to combine the drainage pit, since draining from the shower will change the humidity level of the environment and disrupt the chemical composition.
For a summer shower, it is better to provide and prepare a separate hole, digging it nearby. The dimensions depend on the planned water consumption, for example, for one person, a pit with dimensions of 50*50*50 cm is enough. If several people live at the dacha, then the volume of the drainage pit can be increased to 1 cubic meter. The bottom must be covered with broken bricks or expanded clay; for sandy soils, the installation of a mesh will be required to strengthen the walls of the cesspool.
Base
An outdoor shower is a lightweight design that does not impose any special requirements on the base and the degree of its strength. For example, you can use foundation blocks that raise the structure 15-20 centimeters above the ground, which is quite enough to prevent wood from rotting. If the structure is made of metal products, then it can be assembled directly on paving slabs or a concrete surface. An alternative option is to build the foundation yourself. To do this, it is enough to assemble wooden formwork, strengthen it with reinforcement and fill it with concrete solution.
Frame making
To assemble the frame of a summer shower, you can use wooden blocks or metal, special attention is paid to the dimensions of the structure. The height of the racks must be at least 2.2 m, the width of the product depends on the presence of additional compartments and the build of the person who will be taking a shower. For example, a shower room can be combined with a pantry, locker room or small room where a water heater will be installed.
If the summer shower has a simple design and is intended only to relieve stress after a hard day at work, then a square is used, the sides of which are 0.9 meters. Let us note that the shower room should be comfortable for people of any size, which means that, if necessary, its width can be increased to 110-120 centimeters.
To assemble a wooden frame, timber is used:
- Section 100*100 or 150*100 mm - for the bottom trim.
- Section 100*100 or 100*50 – for mounting racks. The choice of cross-section depends on the presence of a tank on the roof of the shower room.
- Section 50*50 or 50*40 - for the top trim. You also need to secure intermediate crossbars, the number of which depends on the materials used for the cladding.
Fastening of wooden elements is carried out using one of the following methods:
- Joining bars and strengthening the structure with metal corners.
- Tongue and groove technology.
The metal frame provides:
- Corners whose thickness is no more than 5 mm.
- Profiled pipes, the cross-section of which is selected depending on the expected load. If lightweight materials (fabric or film) are used to cover the summer shower, then the cross-section can be minimal. When finishing the structure with heavy materials and installing a large water tank, the thickness of the pipes must be appropriate.
- The type of section does not matter; the wall thickness of the racks should be at least 3 millimeters.
- To attach something to a metal corner, you must first screw the bars to which you can attach the harness. If work is carried out with profiled pipes, then the harness can be attached to them using bolts and screws.
The metal frame can be assembled using bolts or welded. Of course, the second option will be more durable and durable, but if this is not possible, then you can purchase pipes of the same length, fastening them with thick metal corners and bolts.
Selecting a skin
To protect the external space, the frame must be covered using one of the following materials:
- Lumber (block house, lining or imitation timber). It is worth noting that purchasing raw material will be a failure, since during operation the wood will dry out, which will lead to damage or even destruction of the structure.
- Fabric impregnated with water-repellent compounds.
- Oilcloth or film - the materials will last no more than a year, but the service life is justified by their availability.
- Polymer slate . Of course, you can cover an outdoor shower with asbestos slate, but you need to understand that it is harmful to human health.
- Profiled sheet.
- Polycarbonate is an inexpensive and attractive material. Disadvantages: transparency, rapid loss of color and insufficient mechanical strength.
Tank
As a tank, you can use any container that can be found in the garage. If nothing suitable is found, then purchase a barrel made of plastic or metal. Currently we offer containers made from the following materials:
- black metal;
- stainless steel;
- polyvinyl chloride (plastic).
Speaking about plastic containers, it is worth noting that they slow down the heating of water and can only be used by summer residents who have land in the southern regions of the country. Residents of the Middle Zone are better off using metal tanks or containers supplemented with a heating system. Speaking about the advantages of plastic barrels, it is worth noting their low weight and a wide range of shapes and sizes.
Metal tanks heat water better, especially tanks painted black. Simple metal will become covered with rust in just a year, which will affect comfort, but you can solve the problem by buying a stainless steel barrel. It costs more, but the costs are fully justified.
Pallet
The drainage of a summer shower can be arranged using one of the following methods:
- lead away from the structure;
- place a drainage hole under the structure being built.
If the drain is under the shower, then it is enough to install a pouring floor made of wooden boards located at a distance of 3-5 mm from each other. For structures that drain used water to the side, you need to provide a tray, which you can make yourself or purchase at a hardware store. Ready-made structures are easy to attach and are made from plastic or wooden beams.
If you decide to make a pallet with your own hands, then the process begins by pouring a concrete slab:
- First you need to dig a hole, the depth of which is up to 0.5 meters.
- A “cushion” of gravel, the thickness of which is 0.2 meters, is placed at the bottom of the pit.
- Next comes the installation of the drain pipe and grate for water drainage.
- Formwork (removable or permanent) made of wood or brick is installed on top.
- Compacting crushed stone and filling the pit with concrete grade M 250.
- After a week, you can continue the construction of a stationary summer shower, moving on to installing the frame.
Roof
When arranging the roof of a summer shower, there is no point in complex structures, so you can opt for a pitched or gable roof made of boards. The angle of inclination of the slope in both cases should be about 15-30 degrees, which is quite enough to ensure that rainwater and snow do not linger on the roof surface.
Before installing water tanks, you need to fasten two beams with a cross section of 50*50 mm along the roof. One or two barrels with a capacity of 100 to 200 liters are placed on top. In good weather, the water in barrels can heat up to 35 degrees, and if you equip the barrels with a cap and cover it with a transparent film, then a value of +45 degrees Celsius is achieved. It is better to further strengthen the barrels, since strong gusts of wind can tear an empty container off the roof and cause injury.
For convenient filling of barrels with water, a pump with a check valve is used, which is installed in the well. A polypropylene pipe is drawn from it, the end of which rises slightly above the barrel and is hermetically connected to the opening of the container with a corrugated hose. It is important that the end of the hose is under water, and the barrels are connected by a tube, which will create communicating vessels. If you plan to use the shower in cool weather, then an electric water heater is additionally installed on the roof.
Laying the foundation
Even if the load is small, it is not recommended to install an outdoor shower without a foundation at all. Hurricane winds, a common occurrence in many regions of our country, easily overturn anything that is not securely fastened.
The foundation is made of concrete blocks or poured in the form of piles in the ground. The easiest and fastest way to lay the foundation for a small summer shower:
- drill or dig wells 60-80 cm deep;
- add crushed stone to the bottom;
- install frame racks;
- fix the supports vertically;
- fill the holes with concrete.
Metal supports must be pre-treated against corrosion, and wooden supports must be pre-treated against rotting.
It is better to lay a strip foundation under a brick building. Pour a layer of crushed stone or broken brick into a trench 30-40 cm deep and 20 cm wide, install formwork, lay reinforcement, and fill with concrete. After 3-4 days you can lay the walls.
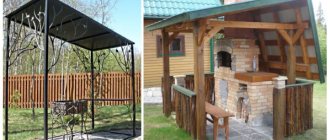
Types of summer shower designs
In order to build a summer shower at your summer cottage, it is not necessary to buy expensive structures. Anyone can make a simple and inexpensive design, just show your imagination and do a little work, armed with a set of tools. Of course, a shower room may differ in size and shape, as well as in the materials used to create it. We also must not forget that there are several types of summer showers, which we will talk about.
Mobile
In the first case, a compact shower equipped with a foot pump is meant. It does not require creating a solid foundation, building a frame or installing containers with water. The source of water can be either a bucket or any other container. To take a shower, just take a hose, one end of which must be lowered into the water, and the other connected to the pump.
A hose with a watering can is also attached to the pump, which makes the process of taking water procedures more comfortable and enjoyable. In order for the water to start flowing, you need to stomp on the foot pump; this is not difficult to do, since it has a pleasant and soft surface. This design can be used both outdoors and indoors (in unfavorable weather).
This option is suitable for anyone who has decided to save money or who visits their summer cottage extremely rarely and does not see the point in building a full-fledged shower room. The mobile shower has the following advantages:
- Possibility of adjusting water temperature.
- Easy transportation.
- Possibility to use in any convenient place.
- Leg training.
Portable
An equally simple and affordable option for a summer shower for a summer house is a portable design. Anyone can arrange this option with their own hands, because to do this, it is enough to inspect your site and find “natural posts” that will allow you to create a fence. For example, nearby trees are suitable for these purposes, between which a rope is stretched, on which fabric or opaque film is hung. It is worth remembering that after each water procedure, the rope must be removed so that it does not harm the tree bark.
This shower is suitable for all those who do not want to spend money on building a full-fledged shower room made of wood or metal. The water supply in a portable shower is carried out by a foot pump that can transfer water from a tank, bucket and any other container standing nearby.
Main advantages:
- lack of construction work;
- no need for a drain hole;
- low cost;
- The container with water does not need to be mounted on the roof; it is enough to place the barrel next to the shower.
Stationary
The arrangement of such a structure is more complex in comparison with previous options, as it requires minimal calculations. First of all, you need to determine the location of the shower, since it will not be possible to move it during operation. You also need to calculate the approximate weight of the building, which will determine the need for a foundation. It is not difficult to develop a drawing of a future building; it is enough to determine the material that will be used for construction and select the original drawing from those that are publicly available.
You need to start work by preparing the site; to do this, just level the surface of the ground and dig a drain hole located on the side of the cabin or under it. The combination of a shower pit and a toilet has a right to exist, but is not rational. If the soil is too soft and can crumble, then a mesh is attached around the perimeter, additionally reinforced with wooden boards or concrete rings are used. Crushed stone or broken brick is poured into the bottom of the pit to accelerate the outflow of moisture.
If the summer shower is made of brick or stone, then a strip foundation will be required; in other cases, a columnar foundation located under the shower supports is sufficient. For sandy soils characterized by subsidence, it is necessary to build a pile-screw foundation, going deeper by 1-1.5 meters.
The frame can be made of wood or metal, covered with clapboard, plastic panels or polycarbonate. The period of operation of the structure depends on the materials used and ranges from 3 (for wooden products) to 10 years (for metal structures). The interior and exterior finishing of the summer shower is carried out with moisture-proof materials, which will extend the service life of the structure.
To ensure that the water in the tank is always warm, one of the following methods is used:
- Installation of a black container that attracts sunlight.
- Installation of a solar collector.
- Installation of heating elements.
When creating a stationary summer shower, it is important not only to correctly calculate the amount of materials needed for the work, but also to provide for all the risks. Difficulties may arise both when choosing the location of the cabin and when working with the foundation.
Also, automation of tank filling will take a lot of time, which is best implemented using a pump with a check valve. Installing a heating element inside a water tank is another complex process, during which you need to ensure the tightness of the structure and correctly connect the tubular electric heaters.
The only disadvantage is that a stationary design will be more expensive compared to a portable and mobile shower. In addition, its implementation will require several days, or even weeks (when arranging the foundation). However, the advantages of a stationary summer shower, built with your own hands, fully justify this decision:
- long service life (3-10 years);
- attractive appearance;
- high strength and reliability;
- good protection from wind and precipitation;
- ease of use.
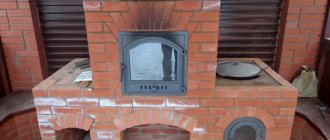
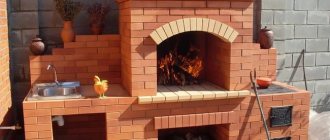
Brick
A brick option is also possible. It is more expensive, but this option has the longest service life. The first step is to make the foundation.
A hole up to half a meter deep and 20 centimeters wide is dug around the perimeter. Next, you fill it with stones, broken bricks and fill it with concrete.
In a week you can build the structure, be sure to remember the doorway. Install roof beams on the top layer.
You can cover the roof with slate and make a hole for the hose. A watering can and faucet are attached to it. With this cabin design, a larger tank can be used, since the brick can withstand enormous loads. A drain is required. If desired, you can heat the water.
A very simple shower is built on the corner of the building. You will need a tank and a metal tube. The tube is bent in a semicircle and installed at the corner of the building. A tank with a hose is installed above the height of a person. You put a curtain on the arc. Your shower is ready.
There are a huge variety of summer shower options that you can do yourself. All of them do not require special skills. Just follow the plan, don’t forget about the drainage and the summer shower will delight you on hot days.
Making a shower from various materials
To build a stationary summer shower in your country house, you can use various materials that have their own specific characteristics. Before you begin to implement your idea, it is important to understand what combination of materials is acceptable. For example, there is no point in using thick timber when finishing with polycarbonate, and a metal frame will look pale if covered with fabric or film.
Summer shower made of corrugated sheets
Profiled sheet is a material that is used for covering both metal and wooden frames. Of course, the appearance of the booth leaves much to be desired, but this solution is beneficial from an economic point of view. We also must not forget that corrugated sheeting is an inexpensive material that has a long service life due to the high-quality processing of galvanized steel sheets.
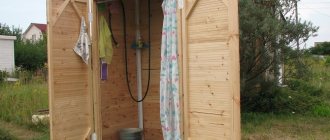
DIY outdoor shower made of wood
Of the proposed options, wood is the most attractive, but at the same time very heavy material, which means that when arranging such a structure, a pile-screw foundation will be required. The racks will be timber, which can be covered with clapboard or block house. There are no particular difficulties in constructing the structure; the service life of a wooden shower depends on the quality of the wood, the level of humidity and the treatment of the material with antiseptics, protective solutions and impregnations. Clear advantages include environmentally friendly design, as well as an attractive appearance.
Brick summer shower
A brick building that requires a high-quality and durable foundation is an excellent alternative to wood. Of course, the building looks beautiful and will last for centuries, but it is used extremely rarely, since the brick does not heat up well. This will affect the level of comfort and will require additional costs for equipment of an additional heating system. In addition, a brick building requires interior finishing, which increases the cost of building a summer shower. As a result, this option is practically not used and is replaced by simpler, but convenient and affordable designs.
Summer shower made of profile pipes
Looking for a lightweight yet durable design? Then you should give preference to profile pipes, which can be sheathed with either polycarbonate or any other material. Such an outdoor shower is not cheap, but the presentable appearance, strength and durability of the structure justify the investment. Particular attention is paid not to the metal frame, but to the finishing, for which it is important to choose high-quality polycarbonate or plastic panels.
Frame construction
If the booth has a wooden door, then 2 additional posts will be required, which are dug into the ground at a distance equal to the width of the door + the width of the door frame + a gap of 2-3 cm is left.
Vertical posts can be attached to the bottom frame of the timber or dug into holes 1 m deep. To prevent the timber from rotting, it is coated with resin, drying oil, machine oil or wrapped in roofing felt. For strength, the posts in the ground are poured with concrete.
The front pillars are made longer than the rear ones by 50-150 mm, so that water from the roof flows to the rear wall of the shower stall. All racks are fastened with upper and lower frames made of timber or boards. A DIY shower in the country can be covered with any available material. In the photo, the most aesthetically pleasing ones are: lining, edged boards or false beams. Small (up to 3 mm) gaps (slots) are always left between the boards so that when they get wet and expand, the boards do not stick out. The wood is treated with antifungal impregnation and varnish.
Ideas for a summer shower in the country
In order to equip an outdoor shower with your own hands, it is not necessary to build complex and bulky premises, because you can give free rein to your imagination and show your creativity. Water treatments in the fresh air will allow you to relax and refresh yourself, while you can organize a shower using any available means. If you have no ideas for bold experiments, then we suggest using one of the solutions presented below.
Makeshift bucket shower
Let's start with the simplest and most affordable solution, the implementation of which does not require the construction of a separate shower stall. All you have to do is take an old bucket and drill a few holes in the bottom. Then it is suspended and water is poured into it. You can make water treatments more comfortable by installing posts to which an opaque film or fabric is attached to limit your view. The idea is suitable for summer residents who rarely have a plot of land and those who do not want to spend extra money on arranging a summer shower.
Mobile shower
In this case, the design consists of a small container of water, a hose, a foot pump and a tube with a watering can. The principle of operation is as simple and understandable as possible: one end of the tube is lowered into a bucket of water, the second is connected to a pump, from which a second hose with a watering can is removed. To take a shower, you just need to work your feet a little, stomping on a pump that resembles a rug. This is an excellent solution for people who want to constantly keep themselves in shape; in addition, the mobile shower can be folded into a bag and taken with them.
Arrangement of a shower near the house
A shower near a blank wall of a country house or gazebo is another simple solution that allows you to save on construction costs. For arrangement, you can use a wooden pallet located on prepared soil or a small concreted area with a rubber mat. The wall of the building must be protected from moisture using ceramic or porcelain tiles. You can use metal pipes or beams as supports, lining the interior space with wooden boards.
Cabin with removable walls
In order to extend the service life of the casing, you can create a collapsible structure. A metal body is used as a frame, the interior of which is covered with plastic, polycarbonate or waterproof fabric used for making tents. In the fall, the walls are removed, so the shower stall for seasonal use will last for many years.
Construction made of sticks and bamboo
For lovers of bold experiments and original solutions, we suggest using a frame made of branches, reeds or bamboo sticks. This approach will allow you to create a beautiful and unusual booth, which can be decorated with climbing plants and hanging flowerpots.
Sheet metal fencing
If you don’t want to create a frame, then you can limit yourself to a metal profile sheet, placing it in a semicircle. This original approach will allow you to create an attractive shower room, the interior of which is hidden from annoying neighbors. The only drawback is that the water container cannot be placed on top, but this is not a problem, because the barrel can be placed on the side of the cabin.
Shower panel
You can use a brick, stone or wooden partition as a panel fixing the watering can. Implementation of the idea does not take much time and requires minimal financial investment. You can organize a shower panel in any style, which opens up a limitless field for imagination. For example, you can decorate the panel with bottle caps, wine corks, shells or mosaics.
Barrel shower
Another simple and convenient option, the implementation of which does not take much time. In this case, there are several approaches, for example, you can lower a hose connected to a foot pump into a black container. The barrel can also be mounted on supports, which will allow you to shower under it. Particular attention should be paid to the choice of product (plastic, stainless steel or ferrous metal), as well as the volume and shape of the barrel.
Room in a house with a separate entrance
The dacha plot is small and you can’t find a place for a stationary summer shower? Then we suggest setting up a shower in a small room of a country house, equipped with a door with direct access to the street. When implementing an idea, it is important to carefully approach the waterproofing and interior decoration of the room, since high humidity can negatively affect the house and its service life.
Shower pump
This design is as similar as possible to a mobile shower, since water is supplied using a foot pump. The pump shower is simple, cost-effective, hands-free and folds easily so you can take it with you on the go. There are also models with an electric pump, which makes water supply easier.
Shower on the terrace
Is the country house equipped with a terrace or veranda? So why not take advantage of this by running a water supply to the shower bar located in the outdoor extension area. It is worth remembering that this solution puts forward special requirements for waterproofing walls and moisture resistance of the floor. You also need to make sure that water does not linger on the terrace.
Shower stand
Another simple option that allows you to set up a shower outside. To implement the idea, it is enough to install a stand on which there will be a watering can. Such a shower is located in places where there are water connections. You can also retrofit the rack with a barrel, the water in which will be heated by the sun's rays.
Shower in front of the fence
Is the dacha surrounded by a continuous and high fence? Then there are no obstacles to installing a summer shower right in front of it, which will allow you to hide not only from the wind, but also from prying eyes.
Shower connected to home
A completely simple solution from a plumbing point of view, captivating with its elegance. To implement it, it is enough to install a pipe into the wall of a country house and equip it with a shower head. This will save on the construction of a summer shower and regulate the water temperature, since it is supplied from the water supply.
Option for seniors
If there are elderly household members at the dacha, then it is important to equip a comfortable and practical shower room. For water procedures, you can use any design and idea, but a comfortable bench where you can sit and relax will be an integral element. The bench can be made of either stone or brick, but the seating area must be made of wood treated with water-repellent impregnations.
Is it worth making a booth yourself?
When comparing a homemade design and a purchased model, both positive and negative aspects stand out.
Advantages:
- long period of use without repair work;
- the absence of a large number of moving elements that tend to rapidly collapse;
- a homemade shower has more options for alternative solutions, which makes it possible to choose the type to suit your taste;
- saving money.
Flaws:
- some limited cockpit functionality;
- Difficulties may arise during dismantling;
- the mechanism for connecting to the sewer is more difficult;
- For self-assembly, you should have basic knowledge and skills.
Costs for making a summer shower
Speaking about the economic component, it should be noted that independent arrangement of a summer shower is much cheaper than ready-made structures. Of course, manufacturers offer a wide range of products that differ in size and shape, style and materials used. The cost of finished structures fluctuates around 10-20 thousand rubles; not all summer residents are ready to spend that kind of money to take an illuminating shower.
As for a do-it-yourself design, its cost depends on the materials used. If you are planning a stationary shower with a foundation, a high-quality frame and waterproof cladding, then there will be practically no savings, and the final price of the structure will be the same 10-15 thousand rubles. True, it should be noted that in this case the owner of the dacha will receive not only a beautiful, but also a durable summer shower, the construction costs of which will be justified more than once.
If a simple shower (portable or mobile) is enough for the homeowner, and scrap materials are used to create it, then implementation costs can be reduced to zero. When arranging lightweight structures, there are no particular difficulties, but the construction of a stationary summer shower scares many. In fact, there is nothing wrong with this, and the help of specialists is not required, the main thing is to strictly follow the instructions, observing all the norms and requirements.
The time spent on constructing the structure also depends on the type of summer shower and the materials used for its implementation. A bucket shower or a simple mobile shower can be organized in a couple of hours, but a stationary shower made of brick or wood, built on a column-pile foundation, will take at least 2 weeks. Approximately 7-10 days are needed to create the base, a couple more days will be needed to assemble the frame and its cladding.
Recommendations for choosing a tank
The choice of containers for collecting water is very large. There are tanks in stores of all shapes and sizes, it all depends on your needs. The most convenient is a flat tank, black, since due to the narrow layer of water the rays do not have to penetrate far, and the black color absorbs more heat - as a result, the water heats up faster. Such tanks are equipped with special water outlets, which simplifies the installation of the system.
Flat black tank heats up faster in the sun
You can artificially heat water using a heater. Here you should remain careful - the insulation may leak and a short circuit will occur or the water will be electrocuted.
Shower container with built-in shade
If it is not possible to buy a container in a store, you can make it from scrap materials, for example, a household barrel or weld it from sheets of metal.
When purchasing and installing a tank, consider how its weight will be distributed and how much water your family will need. To make it easier to collect water, you can connect a hose to the container.
Advantages and disadvantages
To summarize, it is worth highlighting the positive aspects inherent in a DIY summer shower:
- Economical (water is heated naturally).
- Attractive appearance, an original version of garden plot decoration.
- Relieves fatigue and has health benefits.
- Hardening the body.
- Opportunity to show creativity.
- Low cost of construction.
- Wide selection of materials.
Unfortunately, this solution has not only advantages, but also obvious disadvantages:
- Wooden elements require constant treatment with antiseptics and water-repellent impregnations.
- Metal must be painted to protect it from corrosion.
- A stationary shower requires a high-quality foundation, which significantly increases the cost of work.
- Not all designs can please visually.
- To create a summer shower you need to have basic construction skills.
If you find an error, please select a piece of text and press Ctrl+Enter.
Equipment
You can purchase a ready-made container for a summer shower or assemble it yourself. Use special fittings for tapping and a float valve if you plan to fill the tank from the water supply. If you fill the water manually, then it will be enough to make one insert for the watering can.
Installing a tank is the most critical process. It must be placed centrally on the roof of the building and securely fastened. For fastening, you can use a nylon cable or a belt for towing a car.
Tank mounting method
We are planning further actions
Traditionally, we begin our work with preparation, or more specifically, with planning further actions. First, we note that it is quite possible to build a sufficiently voluminous cabin even in a small room. Moreover, there is a corner arrangement, thanks to which you can organize the interior space of the bathroom as correctly as possible. The shape of the structure can be not only square, but also rectangular or semicircular. To select a suitable door in the future, you must take into account all these nuances at the preparatory stage.
A finished shower cabin, made by yourself, will turn out to be unique, but to achieve this, you will have to work hard on almost every detail. Be especially careful if you are designing a cabin for a wooden house - in this case, you need to know how to make the connection correctly, how to select all the required structural elements (such as hoses, tiles, cartridges, faucets, doors and even bricks).
Also, before starting the process itself, it is necessary to decide on the algorithm for further actions. So, often the construction of a shower stall includes:
- site layout;
- purchasing everything you need;
- laying a waterproofing layer;
- laying communications;
- pallet installation;
- wall decoration;
- choosing a suitable door design;
- direct installation;
- checking the resulting design for functionality
We should also talk about arranging a shower stall in the country. For this reason, we strongly recommend that you read the article to the end - in this case, you will learn what and how you can do it yourself! The fact is that this way you will not only gain valuable experience in carrying out repair work, but you will also be able to please your loved ones and enjoy the results of your work.
Preparing the base
It is much easier to erect a frame structure than a permanent structure - depending on the type of structure chosen, the stages of preparing the site for construction will differ.
For a temporary structure, it is enough to simply remove 10-15 cm of the top layer of soil from the site to level it, and then fill it with sand.
For a country shower, you will need to lay a foundation, the depth of which is determined by the materials used for its construction. For example, for a brick shower, a foundation with a depth of up to 30 cm will be sufficient.
Foundation for the construction of a capital summer shower
The foundation is laid in the following sequence:
- pegs are driven into the outer corners of the future shower;
- a cord is stretched around the perimeter;
- a place for pipes is prepared (a log or branch wrapped in roofing material is laid);
- concrete solution is poured.
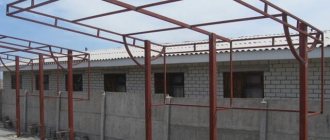
Cabin with metal frame
Choose pipes of at least 20x30 mm, angle 45x45 mm. Tools you will need:
- welding machine;
- Sander.
Cabin with metal frame
Create a drawing of a future shower stall for your cottage. Be sure to include jumpers at the bottom and in the middle. To make it easier to attach the floor boards, use a corner as the lower jumpers. Also make the upper stops from a corner, because It is easier to attach the water tank on it. Their dimensions will depend on the tank capacity and its material. If the tank is metal, the stops must be such as to support its weight with water.
Depending on what material you choose for wall cladding, you need to think about the mounting locations. For plastic or metal profiles, it is worth welding metal plates. If these are soft materials, such as tarpaulin or rubberized fabric, they can be secured using strong synthetic thread directly to the pipes.
Upon completion of the design work, we proceed directly to assembly. You will need:
- 4 pipes 2-2.2 m long for vertical supports;
- 8 pipes for central and upper jumpers;
- 4 corners for the bottom;
- corners for stops under the tank.
If you plan to make opening doors, you will need 4 more pipes and 2 hinges. All parts are cut at an angle of 90°. Clean all edges for welding. How to make the structure more rigid? To strengthen it, you can weld metal corners at the corners of the frame or bolt them to the vertical posts.
Fastening with bolts
When welding, never completely weld the seam on one side at once. First, “grab” a little from all sides and only then weld the joints thoroughly. Otherwise, the metal will be pulled in the direction of welding and it will be impossible to return it back.
It is better to take electrodes with a diameter of 3-4 mm. They are convenient for welding both thin metal 1 mm thick and thicker metal 4 mm. Select a current such that the metal melts. If you set it too high, you will burn through the walls of the pipes. At less, the electrode will stick to the metal. If you have never cooked or are not sure whether you can do everything correctly, contact a professional. After all, a poorly welded structure can fall under the weight of the tank and lead to injury.
Welding work
For painting, choose a special paint for metal. To protect the frame from rust, prime it before painting, and then apply 2 layers of paint or enamel. If you are using profile pipes, use a roller. This will save time and reduce material consumption. After the enamel has dried, we move on to making the wooden floor and installing the shower tank.
Installation secrets you need to know
We recommend making marks for drilling using a permanent marker, in this case you definitely can’t go wrong. If you are used to making notches on sharp objects, then it is better to abandon this technology, since you will not be able to remove an erroneous hole.
If you don’t know how to make plumbing in a shower room with your own hands in an apartment, then it’s better to turn to professionals for help. A mixer is installed, 2 taps are installed and a boiler is connected, this is 1 hour of work, so the technician won’t charge you much.
In order to make the floor at an angle of 1.5 degrees, it is best to call a specialist with a laser device. In this case, you will have the opportunity to apply competent markings to the wall.
If you are planning to install glass doors, then call your friends to help you; it will be difficult to complete the installation work alone.
We are sure that our article was useful for you, now you know how to make a shower cabin at home with your own hands. We wish you success in your installation work!