A garden shed may well become a decoration for a dacha. Don’t forget one more feature: many of us are simply unable to immediately send an item that has gone out of use to a landfill, be it an old coat or a lame coffee table - what if it’s good for something? No, let it lie there for a while, but not in the house! It is clear where old things are sent for foster care. As a result, it is not always possible to get a rake out of the shed without bringing down a pile of things on yourself.
A garden shed is a completely different matter. Personal, where only our belongings are stored: pitchforks and rakes, hoes and scoops, soil and pots, pegs and twine, markers and a gardening journal. And if your imagination helpfully drew a picture something like this (as in the photo below), don’t worry: a barn doesn’t have to be shabby, dusty or unsightly.
Old garden shed
A garden shed can be so cozy and charming that you'll want to spend as much time as possible around it, without having to worry about decorating it.
Ads by
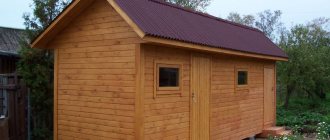
Mini house
A garden shed can be so cozy that you will want to spend as much time as possible in it. Renovating an old building is much easier than adding an extension to the main house.
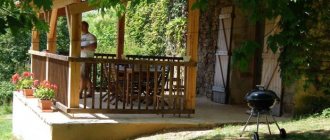
The furnished barn will be a pleasant place to take an afternoon nap or spend time with a book. If you put a bed and a table inside, the building will serve as a house for guests who love privacy.
For greater comfort, the walls should be insulated.
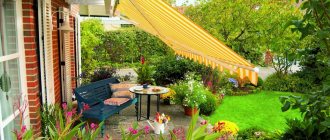
The charm of color
Here the accent of the building is the color scheme.
The snow-white structure looks very beautiful, but is perhaps only suitable for purists. I wouldn’t risk painting my garden shed white (even ordinary rain will turn it into a mess, not to mention the not always clean hands that will have to open the door), but it would be a pleasure to admire it. Snow-white garden shed: beautiful, but impractical. But the delicate lilac one is pleasant to the eye and not so easily soiled. Lavender color is an excellent solution. Noble gray will harmoniously fit into any surrounding landscape. The gray color of a garden shed is a classic. By giving free rein to your imagination, you can combine colors indefinitely: who said that a garden shed should be monochromatic?
Various shades of green and white look good
In my opinion, the design of the garden shed in the photo below is an excellent solution: a lot of natural wood texture and just a little soft pastel.
A minimum of paint and effort - and the garden shed becomes an element of landscape design
Agree, if the window frames and door were not painted, the building would look ordinary, but a minimum of paint gave it a stylish look.
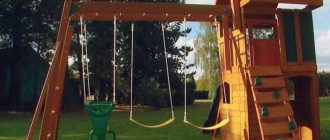
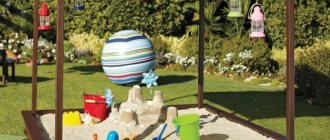
Gaming
A barn placed on a summer cottage can become a child’s favorite place: surrounded by toys and friends, he will feel like a real owner of his own home. For a room to be comfortable, there must be enough light. The wooden floor should be covered with a warm rug, and there should be seating and a storage system for toys inside the house.
By improving the site, its owner solves not only an aesthetic, but also a functional issue. Thanks to the shed, you can free up useful space in the house by getting rid of unnecessary things, or create additional space for relaxation, work or play.
Finishing the barn inside
The best way to organize the inside of a barn is to use racks and shelves. The walls are equipped with various fastenings for fixing tools and garden equipment.
A workplace will be required. You can use old furniture as a desk and store small gardening equipment in the inner drawer.
To give the barn an aesthetic appearance, it is sheathed, for example, with wood. Then racks and shelves are installed on the walls for storing equipment.
The construction of a rack does not require professional skills; the work will be cheap.
Installation sequence:
- Install support rails onto which cross members are placed. Externally, the design resembles a simple ladder; it is made in the same way: the parts are knocked down with nails. The crossbars act as supports to support the shelves. Additionally, the structure is attached to the shed frame through the sheathing (or to it, if it is made of boards).
- Under the ceiling there are mezzanines for devices that are rarely used. The material for arranging the interior space may be different, depending on the capabilities of the owner. Even scraps of wooden boards will come in handy. The most important design requirements are strength and rigidity. The edges must be processed - beveled, rounded.
- Wooden parts are treated with special compounds to protect against rotting. This way the shed shelving will last for a long time.
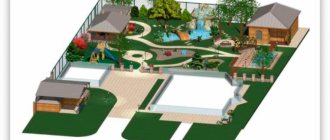
And here we also need a project
Organizing the interior space requires drawing up a project. It will help you make optimal use of the utility unit. You can view photos of similar equipped premises in advance.
Previously, small wooden or metal structures that resembled a box with doors were used to store garden tools. An alternative is to use a shed.
The latter is used for:
- Storage of old furniture, things, faulty equipment, inventory, agricultural equipment - items that are not used for a long time.
- Shelters for birds and animals (for example, an aviary for a dog).
- Equipment of an additional room with the installation of a minimum amount of furniture - bed, table, chair, washbasin. You can equip a bathhouse if you can’t build a permanent structure.
- Construction of a utility block with shower and toilet. These premises will be useful during agricultural work.
To effectively use the space, racks and shelves are built inside, hooks are attached, and loops are hung.
If the roof has a rafter system on which objects can be placed, it is used for drying fruit as an attic room.
Design plays an important role in the further use of space. Incorrect calculation of required materials and unforeseen expenses are completely eliminated.
When designing an outbuilding, you need to position it correctly. It is better to place the structure on an elevated area: this will protect the wooden structure and interior from excess moisture.
What to consider when building barns for birds and animals
The main requirement when building a barn for livestock is the correct organization of proper ventilation (if necessary, heating), compliance with the requirements for the size of the structure. For example, for one chicken, the normal size of a chicken coop is 1 square. meter, for ducks and geese - 2 square meters. m for each bird. Additionally, an aviary can be attached to such a barn. In a barn where cows, pigs, goats or horses will be kept, different standards apply. One cow should have a pen with a size of 6 square meters. m, for one pig - 5 sq. m. Wood is used for construction, since animals will gnaw the crossbars of the pens. A prerequisite is the presence of windows that will ensure sufficient natural light and ventilation of the room. The floor is made of concrete and boards with the organization of special gutters. It is with their help that individual pens will be cleaned.
Which foundation to choose?
Frame construction technology is the most common in dacha conditions. Such buildings are quite light, so it is rational and economically justifiable to install columnar or pile foundations for them.
Columnar
The supports are installed in the corners of buildings and along the perimeter in increments of up to 3 m, as well as at the intersection of walls and partitions. For columnar foundations, concrete blocks, red bricks and other waterproof materials without large pores are used. You can pour concrete into box formwork after placing reinforcement in it.
To build brick or block supports:
- In the corners of the barn, every 1.5-3 m around the perimeter, as well as at the intersections of walls and partitions, dig holes 50-70 cm deep.
- Pour crushed stone and sand to a thickness of 15-20 cm at the bottom, level and compact.
- Lay supports made of bricks or blocks on cement mortar to the desired height.
- After the solution has hardened, cover the columns with bitumen mastic. For cut-off waterproofing, place pieces of roofing felt on top.
- Cover the space around the supports with sand and soil and compact it.
The top of all pillars should be at the same level. The beams of the lower framing of the frame will rest on them.
Pile
Piles for the foundation of a shed can be steel screw or bored concrete. To screw in the screw supports, a special mounting head with a lever is used. It is put on the pile, then the structure is installed in the hole and screwed in along the blade. The rod gradually sinks into the ground. The laying depth is from 1.2 m. After screwing is completed, the top of all piles is cut off horizontally to the level, and sheet steel platforms are welded to support the grillage.
If asbestos cement pipes are used as permanent formwork, you must:
- Using a hand drill, make holes in the ground 0.8-1.2 m deep.
- Pour crushed stone or sand into the pit and compact it with a pipe or piece of reinforcement. Layer height 10 cm.
- Place the asbestos-cement pipe in the well, align it vertically, and secure it with spacers.
- Install 3-4 rods into the formwork as reinforcement.
- Pour concrete grade no lower than M300.
To make it convenient to pour the solution into a narrow pipe, you can make a funnel with a wide neck from a piece of tin.
The choice of foundation depends on the type of soil. You should not install poles on damp and clayey soils. During frost heaving they will “float”. If the site is dominated by peat bogs or bulk soils, a pile foundation is recommended.
Tape shallow
On moisture-saturated or heaving soils, pillars and piles may become askew over time. In these cases, it is advisable to use a monolithic tape with reinforcement as a foundation.
Construction is carried out in several stages:
- Dig a trench 30-40 cm wide and 60-70 cm deep according to the markings.
- Pour a crushed stone-sand cushion 10-20 cm high and compact it in layers.
- Install the formwork panels. To prevent deformation, they need to be supported along their length with supports.
- Lay waterproofing inside the formwork. It will protect the concrete from dehydration.
- Install the reinforcement cage. Fix the rods at a distance of 50 mm from the formwork, bottom and top of the tape.
- Lay concrete of a grade not lower than M300, remove bubbles with a steel rod or pipe.
- Smooth the top of the foundation and cover with plastic wrap. It will retain the moisture necessary for hardening in the concrete.
- In hot, dry weather, it is recommended to water the structure with a hose or watering can.
- Removal of formwork is carried out on the 3rd day.
To fasten the lower trim, you can pre-monolithize the studs in the corners of the foundation and every 0.8-1.5 m. They are screwed with clamps strictly vertically to the reinforcement frame, the threads are wrapped with paper to protect them from contamination.
How to lay a half-brick wall
The sand must be clean - river or sifted. Cement for laying half bricks must be used at least grade M 500. All bricks must be saturated with water, placing them in a tank and completely filling them. The time spent in the water is at least an hour. A wet brick will not absorb moisture from the mortar, which will allow the cement to set evenly, providing the design strength of the wall.
Beginning of installation: the corner supports are removed first. The second row is laid on the first brick row, and the process continues until the top row after the reinforcing mesh frame. Corner masonry has a height of 5 bricks, laid in such a way that the guide brick overlaps (ties) each other at an angle of 900. Each row must be checked for verticality and horizontality using a level. Bricks are pressed into the mortar only in the center of the product to prevent movement to the sides.
After laying the bricks up to the first layer of armored belt, a cord is pulled along the first row to control the laying. The mortar is applied in an even layer over the entire row and the bricks are laid. After the third row, the evenness of the wall is checked. After laying each subsequent row, the cord is raised to the height of the brick. To ensure the required strength, after the fifth row it is recommended to take a two to three hour break in work to allow the solution to set. To build a wall faster, it is allowed to use high-strength double brick M 150, which has dimensions: 120 x 138 x 250 mm.
Since double bricks are large in size, it makes sense to give the masonry greater strength by using more frequent mesh reinforcement. There are ready-made meshes on sale with a rectangular or zigzag profile, but you can make a stack with your own hands. The rectangular reinforced mesh should be laid horizontally every five rows. A mesh with a zigzag profile is laid in the attached places of the masonry, its rods are connected by welding or knitting with wire. When carrying out reinforcement, the mesh is laid so that the ends of the rods protrude 5 mm beyond the wall. This is necessary to control the presence of reinforcement. After the solution has hardened, these protruding ends can be cut off or bent.
Half brick barn
Peculiarities
The barn is, as is commonly believed, simply an auxiliary building. And it may seem that when finishing it, it is enough to get by with the simplest solutions, as long as the material is reliable. But this opinion is outdated - on the contrary, the aesthetic properties of coatings cannot be underestimated. There are quite a few materials that have an attractive appearance. Among them, it remains to choose those that:
resistant to negative temperatures and temperature fluctuations;
withstands precipitation;
installed without any problems.