Any personal plot cannot do without a variety of outbuildings that differ from each other in the nature of their use. The most important and versatile outbuilding is the barn. It can be small or large, of any shape and arranged in its own way.
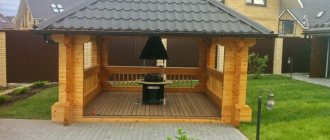
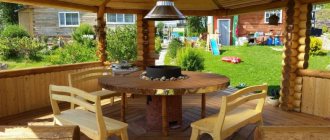
The shed is a convenient place to store tools, garden supplies, animal feed, grills and barbecues. Many people set up a barn in conjunction with other buildings. For example, they make a cabin for a summer shower or put in little ones and get a kind of gazebo.
Overall, a shed is a versatile space. This article will tell you how to build a shed with your own hands.
Selecting a site for building a shed
To choose a place for a future shed, you must first decide where it is more convenient for you. Someone wants to do it not far from the site, so that they always have garden supplies at hand.
But for others it is more comfortable when the shed is located near the house. If you can’t decide on your own, look at photos of DIY sheds or consult with a specialist.
The second point to consider is the location for planting crops. There is not a lot of space on a small plot, so it is best to decide initially where and what will be planted so that the shed can be built in the free space. Otherwise, it will greatly interfere and may take up the land necessary for planting.
When choosing a location, do not forget about other buildings. Try to decide as accurately as possible where and what will be built.
Be sure to consider the possibility of constructing other outbuildings. Once a suitable location has been selected, proceed to the next step.
Perfection in miniature
A small garden shed can be spacious and functional: the folding table makes it convenient to replant flowers or plant seedlings.
Garden shed-cabinet There is a place for shovels and watering cans, and the shelves will conveniently accommodate gloves, pruning shears and other useful items.
You don’t even have to buy the material: you can use the doors and window frames left after renovation to create a nice shed.
Mini barn made from old doors
The main thing is that everything you need for gardening work is in one place and is easily accessible.
Tools and materials for work
You must choose the material in advance according to your own preferences. However, if you are new to this business, the best option for you would be a DIY wood frame shed.
Let's consider what is needed for its construction:
- Depending on availability, a wood saw may be useful. If it is not there, then you can do it manually.
- Jigsaw.
- Circular saw.
- Drill.
- Chain saw.
- Boards and logs.
- Fiberboard.
- Ruberoid.
- Fasteners.
- Sockets and switches.
- PVA construction glue.
- Oilcloth material or film.
All this is a required set, but if necessary, other tools such as a hammer, sandpaper, etc. may come in handy. Be sure to draw up blueprints of the shed for greater accuracy.
- We buy and install an air conditioner
- Do-it-yourself windmill - the best ideas and instructions for building decorative windmills in the garden and on the site (105 photos)
Do-it-yourself walk-behind tractor - how to make a simple and reliable homemade walk-behind tractor for farming (105 photos)
What are we building from?
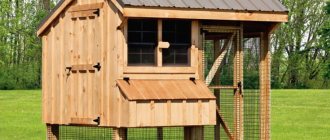
The priority, of course, is wood in all types and forms. Wooden garden shed Often the wood is not even coated with paint, leaving it in its natural state. But I still wouldn’t give up protective impregnations. An interesting solution for a wooden garden shed. By the way, one of our readers found a very original solution for finishing the shed with bark - it looks very impressive! Brick sheds are suitable for those who want to acquire a solid structure. Solid brick construction It is not at all necessary to copy the proposed ideas: rework and change them at your discretion, complement them with details that please you. After all, this is your garden shed, and only you can decide how to make it a decoration for your summer cottage.
Construction of the foundation
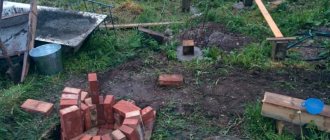
It's no secret that any building requires a solid foundation. The barn in this case is no exception. For its construction, it is best to choose the columnar option. Let's consider the process of constructing such a foundation.
Using stakes, tape and rope, you need to measure and mark the area for construction. Dig holes in the corners and at the partitions of the shed into which the posts for pouring will be placed. From the corners, at a distance of about 1.5 meters, dig additional holes along the walls.
For this type of foundation, asbestos concrete pipes are most often used. Inside they contain reinforcement that helps strengthen the base.
Pipes should be installed in pre-dug holes. Then the holes around the pillars are filled with sand and fine gravel to about 15 centimeters deep, and everything is filled with concrete on top. The foundation is left until the concrete is completely dry, after which the next stage begins.