A free-standing lean-to canopy made of metal profiles is a popular design due to its simplicity. Usually its width is 3–4 meters, since with a larger distance between the supports without changing the slope of the roof, the canopy will look disproportionate. And as the slope decreases, the price of the structure increases noticeably: you need to change the grade of corrugated sheeting to a sheet with a higher wave height and take pipes for columns of a larger cross-section and thickness.
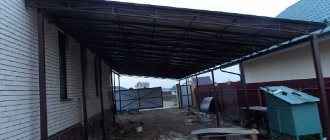
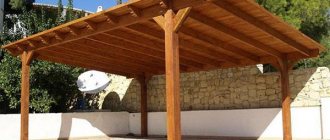
Single-pitch canopy made of metal profiles - photo of a four-support structure
The simplicity of the design, in addition to the obvious advantage of ease and speed of installation, has another important advantage - single-pitch canopies made of corrugated sheets are more reliable than gable ones due to the absence of a ridge and fewer connections. They can also be placed closer to the boundary: if you turn the slope towards your site, the precipitation flowing along it will definitely not fall on the neighbors’ land.
Of course, if you need a large canopy, for example, for two cars, then it is better to install a classic gable one. In all other cases, a lean-to structure is preferable, especially if you have no or very little experience in construction. Just follow our instructions, and you can install a lean-to shed from a metal profile with your own hands in just 2-3 days.
Preparation for construction of the structure
Before you begin installation work, you should:
- calculate the expected loads - if necessary;
- draw up detailed drawings of the canopy frame from a profile pipe - the dimensions must also be indicated on them;
- prepare a set of tools;
- select and purchase building materials.
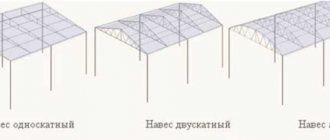
You can build several canopy options yourself from profile products, namely:
- arched;
- single-slope;
- gable.
The appearance and shape of the future structure largely depend on the personal preferences of the owner of the dacha or house and the size of the unoccupied space on the land plot. The most rapidly erected and most compact relative to the occupied space is considered to be a shed made of corrugated steel pipe.
Briefly about the main thing
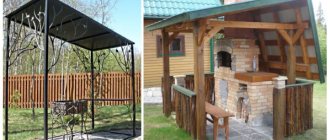
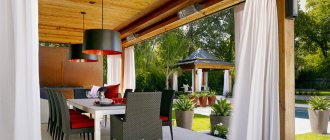
A carport made of metal profiles is the optimal solution from a constructive, functional and aesthetic point of view. Also, such structures are excellent for arranging covered areas for recreation, games, sports, for decorating terraces and entrance areas.
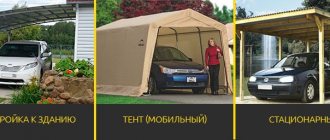
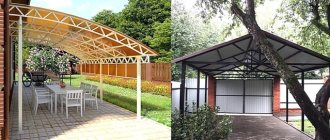
Such structures consist of a foundation, racks, hangers, slopes, rafter system and roof. Depending on the type of support, they can be free-standing, cantilevered or attached. According to the type of roof used, such structures are divided into single-pitched, gable, arched, and hipped.
It is best to entrust the calculation and installation of the canopy to professionals. This will allow you to get a reliable design that will last for many years.
Ratings 0
Approximate calculation of a canopy made from a profile pipe
As an example, the initial data can be taken as the size of the building 6x9 meters. In front of one of its sides there is a free area with sides of 7 and 9 meters. Along the wall of a house 9 meters long, it is planned to build a canopy with an overhang of 6 meters (read: “Preliminary calculation of a canopy from a profile pipe, instructions for making trusses”).
As a result, the canopy area is 6x9 meters. In this case, the height of the edge that will be raised is 3.5 or 3.6 meters, and the low one is 2.4 meters. As a result of the difference between heights, the angle of inclination will be 12-13 degrees.
To determine the degree of probable loads, wind and snow maps of the specific area where the land plot is located are used. Based on the above data, do-it-yourself drawings of a canopy made from a profile pipe are made.
In addition to the fact that you can draw them yourself, there are special computer programs. To achieve maximum accuracy when carrying out calculations, it is advisable to be in the place where the structure will be placed at this time.
Canopy elements made from profile products
The design has several main elements, including:
- racks;
- mortgages;
- base plates;
- arches;
- guides;
- roof;
- others - these could be, for example, lighting and drainage systems.
For the manufacture of racks and poles, both profile pipes and products with a round cross-section are suitable. The latter option has a significant drawback, which is the more complex configuration of the support and fastening units of the elements.
To ensure mating of frame parts located at an angle of 90 degrees, the ideal solution is the square shape of pipe products. This type of section provides an equal degree of rigidity in both directions - longitudinal and transverse.
To build a canopy from a profile pipe of any shape based on a drawing, welding is used, as well as threaded or bolted types of connections. When creating trusses or purlins, experts recommend using rectangular products, since they are subject to a significant load in the transverse direction, namely from top to bottom. In this case, there is practically no effort along the axis.
How to make a roof?
The canopy has a simple design. It consists of only two elements: the frame and the roof. Since the topic of this article is a canopy made of timber, there is no question about choosing a frame material. But there are options with the roof.
Preferred Design
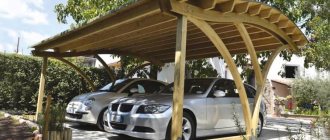
Since the frame is wooden, we will not consider the arched roof, which is popular for awnings. This is not to say that it cannot be made from timber - it can, but it is expensive. For the rafters, you need wooden boards bent with an identical radius into an arch in factory conditions, and they must be well dried and calibrated.
This feature makes arched timber canopies, if not exotic, then at least a rather rare design. There are three options left: single-pitched, gable and hipped roofs.
A lean-to canopy is the simplest and cheapest. But it has two significant drawbacks. Firstly, when one of the sides of the roof is strongly raised, the canopy turns out to be skewed and often unaesthetic. Secondly, such a slope is an excellent sail, so a strong wind can, if not tear out the canopy itself, then at least rip off part of the roofing.
A gable roof is slightly less common than a single-pitch roof, but is more suitable for wide timber canopies. It is much more resistant to wind loads and looks good with a large width. But you have to pay for this in the literal sense of the words - the construction of a gable canopy made of timber will cost 10-30% more. The final difference in price depends on whether you do it yourself or hire a construction team. In addition, there will be more worries with the construction of the skate.
Hip awnings and tent awnings made of timber are quite rare and solve the same problem, so it makes sense to combine them. The essence of the design is the slopes along the entire perimeter. They are needed both for aesthetic and purely practical purposes: the air flow flows around such roofs, and does not tend to tear them off, resting against the back of the slope.
Therefore, they are chosen when the timber canopy must be large in area or if it is placed in an area with strong winds (mountainous areas, shores of water bodies). But even hipped canopies are significantly more expensive and more difficult to install than gable canopies, not to mention tent ones.
Choosing a roofing covering
If a canopy made of timber rests on the wall of a house, it is better to choose for it exactly the same type and color of covering as that which lies on the roof of the main building. However, you can replace expensive material with a similar, but more affordable one.
For example, if there are expensive ceramic tiles on the roof of a house, the canopy can be covered with metal tiles with a similar profile. Seam roofs can be “accompanied” with corrugated sheeting with an asymmetrical wave and narrow ridges.
In addition, there are universal materials that can be used to cover a timber canopy. These are all types of transparent coatings: tempered glass and triplex, as well as monolithic, profiled and even cellular polycarbonate.
Of the opaque roofing coverings for free-standing timber canopies, corrugated sheeting, metal tiles and ondulin are best suited. All these materials are laid on a sparse lathing. They are light enough, so they do not require a powerful frame. Corrugated sheeting and metal tiles are preferable - these materials are more aesthetically pleasing and will last longer. But ondulin is significantly cheaper.
All types of piece materials, from bitumen shingles to ceramic, are not the best choice. Natural tiles are expensive in themselves, while bitumen tiles are expensive due to the need to lay them on OSB boards. And this does not include installation costs. In addition, most types of piece roofing are heavy - 1 m2 usually weighs 20-30 kg.
Characteristics of profile pipe products
In order to build a canopy frame from a profile pipe and make all the necessary calculations, you should determine the characteristics of the manufactured pipe products. For products with a square cross-section, the required values are given in special tables.
For rectangular pipes, the maximum load size is calculated on the larger side. The result can also be seen in a specially compiled table, where, in addition to the desired value, the span length and pipe dimensions are indicated.
Calculation of values for canopy posts
When selecting the parameters of the racks, they first calculate the loads exerted and draw a detailed drawing. The rigidity of the product is affected by the width and thickness of its walls, which in turn depend on the length of the product.
For example, when choosing which profile pipe to use for a canopy, you can use either a thick-walled product with a small cross-section, or one with thin walls, but with a large shelf width.
It should be taken into account that the vertically directed load exerted on the rack by the canopy floors is insignificant and therefore a thin corrugated pipe will withstand it without the slightest deformation. The diagram of a canopy made from a profile pipe must contain the exact dimensions of each element. Quite often, a garage frame from a profile pipe is made using the same method.
For buildings with average parameters, the best option would be products with a cross-section ranging from 50 to 100 millimeters. If racks are located frequently, it is acceptable to reduce the size of the pipes used. In the case where a lean-to canopy has four supports, then large-section pipe products will be used.
Support installation depth
Before proceeding with installation, you need to decide at what depth to bury the poles for the canopy. Each region of the country has its own soil freezing scale. Insufficient installation depth of the supports can lead to soil deformation moving them, violating the geometry and integrity of the entire structure.
Concreting depth – at least 80 cm Source stroika-dom24.ru
In the middle zone, the freezing depth is about 1.2 m. This means that the minimum depth of the pillars for a canopy should be exactly this figure with a small margin. The parameter must be taken into account when determining the length of each of the supports. If the height of the canopy is about 3 m, each pillar, taking into account its immersion in the ground, should be at least 4.2 m. In the northern regions, the freezing depth is much higher. In southern latitudes, structural elements can be strengthened by 50-80 cm.
Trusses as frame elements
Trusses serve as an additional connecting part when arranging a canopy. They give the frame greater stability and strength (read: “How to make a frame from a profile pipe for a house - theory and practice”). You should draw a special drawing for them. According to the standards, calculations are required for pipe trusses with an inclination angle of more than 6 degrees. But experts believe that you need to start from 8 degrees.
The fact is that in winter, fallen snow will accumulate on the roof surface at a slight angle of inclination. The optimal value is 15 - 20 degrees. This slope of the roof slope is suitable for coverings made of corrugated sheets, slate, plastic, polycarbonate and other modern materials.
Farms can take the following form:
- triangular;
- arched;
- rectangular;
- broken;
- trapezoidal.
Inside the trusses, racks, purlins, braces, and struts are additionally installed. The drawing must indicate both the dimensions and the list and quantity of materials that will be required.
Since the trusses consist of hollow parts, the weight of the frame for arranging the canopy will be insignificant. Horizontally, they are fastened together crosswise using elements made from profile metal products with a small cross-section (read: “Characteristics of fasteners for profile pipes, “Crab”, clamps, advantages of use”).
Next, install a sheathing of timber 50 millimeters high. It is needed to fix the roof covering. Wooden beams should be pre-treated with an antiseptic or painted to prevent damage to the wood.
Roof
The lightness of the profiled sheet (on average 5 kg per square meter) makes it an attractive material for arranging the roof of new country houses or those being reconstructed - the pressure of the finished structure on the foundation and walls in this case is minimal.
When installing corrugated sheets on the roof, you do not need to build a powerful rafter system. The high strength of the profile allows you to double the sheathing pitch, which makes construction based on corrugated sheets more economical.
You can fasten the material alone, without involving assistants in the process. The sheets have a significant area and are installed quickly and easily.
A roof made of corrugated sheets will become a practical and aesthetic protective element of any structure in the country, be it a country house or a garage.
Construction of the structure
Installation work is carried out in stages:
- Before making a canopy from pipes, first prepare the foundation.
- Then the materials listed in the drawing are measured and cut.
- Trusses are made.
- The side walls of the structure are assembled.
- Connect roof trusses and finished sections.
- Check the correct assembly of the elements using a level and tape measure.
- Mount and securely fasten the frame to a previously prepared area.
- Metal surfaces are treated with protective compounds.
- Prepare materials for roofing, install them and fix them.
- Trim off excess roofing.
- They restore order in the surrounding area.
When preparing the foundation for the structure, soil is removed from the places where the supports from the profile pipe will stand. A layer of crushed stone is poured onto the bottom of the dug holes. Then, in order to secure the racks, a mortgage is installed on which bolts are welded. If desired, reinforcement is used to add additional strength to the structure.
Manufacturing of sheathing
A wooden sheathing is placed on the trusses, on which the roofing covering is installed. The easiest and most reliable way is to lay a simple-shaped flooring made of metal profiles. It is reliable, quite durable, and relatively inexpensive. Nowadays, the use of polycarbonate sheets or metal corrugated sheets for the manufacture of canopy roofing is common. In addition, no one has canceled slate, and you can also use sheets of polymer. The choice is yours. To ensure that wooden sheathing lasts longer, wooden structures should be treated with antiseptic preparations. The polycarbonate roof is laid directly over the girders of the truss.
Selection of materials and preparation of tools
The main requirement for the quality of profile pipe products is strength. To ensure the stability of the load-bearing parts of the structure made from them, you need to select pipes with minimum parameters equal to 80x80 millimeters. For additional elements, the optimal cross-sectional size will be 40x20 millimeters.
To determine the amount of roofing material, first calculate the area of the surface to be covered, and then increase the result obtained by 5%. Fastening is carried out with roofing bolts and special gaskets.
The structure is assembled in one of the following ways:
- Welding . But for this you need not only to have a welding machine with electrodes, but also to know how to properly weld a canopy from a profile pipe. Without skills, such work cannot be done.
- Using threaded connections . This requires metal corners and mounting bolts.
- Using special clamps.
A do-it-yourself canopy costs much less than a purchased one. It will meet the requirements subject to strict adherence to the technology of its construction.