It’s rare that a vacation outside the city is complete without barbecue. An inopportune rainfall can disrupt the long-awaited event. By building a barbecue shelter, you can avoid this situation and have a great time even in inclement weather. Owners of dachas, in addition to lightweight structures, equip permanent canopies with not only a barbecue or barbecue located under them, but also recreation areas. It's a nice place to spend time with family and friends. A wide selection of building materials allows you to realize your ideas in terms of constructing a vacation spot.
How to make a barbecue shelter with your own hands?
Making a simple roof is not difficult. The structure consists of 2-4 supporting posts and a canopy attached to them. The rafter system is most often made single-pitched, although you can also find examples with complex arched or double-pitched roofs.
The barbecue canopy is built with your own hands in several stages:
- installation of supports and construction of a foundation for them;
- production of strapping;
- assembly of the rafter system;
- fastening of roofing material;
- finishing.
You can make a barbecue with a canopy for your dacha yourself from different materials.
Why do you need a roof for the barbecue area?
It is worth purchasing a barbecue canopy or making it yourself in order to protect yourself while preparing barbecue not only from the sudden torrential rain, but also from the scorching rays of the sun. In addition, a well-thought-out design can become the main decoration of the landscape in a recreation area.
Attention : the barbecue canopy warms vacationers on cool summer evenings. Because it prevents heat from dissolving into the air too quickly.
Frame material
For a small house above the fireplace, it is better to choose non-combustible materials: metal, stone or brick. Even with a well-designed fryer, sparks and intense heat will always form, which can cause a fire.
If the building will cover part of the recreation area, the supporting elements can be made of wood impregnated with a fire retardant compound. The distance from the barbecue to the wooden parts should not be less than 1.5 m, so the minimum size of the wooden structure is approximately 3x4 m. Non-combustible parts can be located at any convenient distance from the brazier.
Wooden beam
An easy-to-process material that allows you to get by with a minimal set of simple tools. For support posts, take a block of at least 10 cm in cross section. You can replace the timber with a simple or rounded log.
The thickness of the rafters is calculated depending on the area and type of roof. For 2 small and steep slopes, thinner material is suitable, and for an almost flat 1-slope roof over the same area, you will need a thick beam or boards at least 3 cm thick, installed on the edge.
Metallic profile
The profile for the roof frame above the barbecue is selected depending on the expected load. Like the wooden beam, the steel parts that support the entire structure should be the thickest. Most often, for a large gazebo, a pipe with a cross-section of 10 cm and a wall thickness of at least 5 mm is used.
For rafters and trim parts, you can take a corrugated pipe or a smaller corner. Most often, in small structures, hardware with a cross section of 4-5 cm is used. For large gazebo sizes or increased snow load, it is advisable to use thicker material.
Working with metal requires skills in cutting and welding parts. If you have the skills to work with cold forging equipment, the canopy can be decorated with metal tracery.
Stone or brick
Most often, stone structures are erected using a metal frame inside. This way the posts will be more durable and will be able to bear the weight of the roof and the snow on it in winter. It is convenient to lay out protective walls from stone if the gazebo is located in an open place. Wooden buildings are sometimes combined with brick and stone masonry, laying out a wall near which a fireplace can be placed.
The rafter system on stone buildings is made of wood or metal.
Types and Types of BBQ Sheds
What designs can be considered when building a canopy yourself?
Simple designs
These include metal and wooden structures. They are needed solely to cover the roasting area.
There are no areas where the griller or vacationers will sit.
Metal profile
The easiest option to build a canopy is to bend metal sheets.
Such buildings are particularly fire-resistant and resistant to weather conditions. This is very important for a barbecue shelter.
Bitumen coating
A shed with a tile roof would be a stunning option. It will be a very cozy design without any unnecessary elements and materials.
Reference! Choose from specialty materials that are impregnated with special fire-resistant chemicals .
Polycarbonate
The material bends well and resists natural influences. However, during extreme heat, such a canopy is very uncomfortable, since there is no ventilation, and the internal area becomes very hot.
Reference! To avoid negative sun exposure, choose a high-quality tint for the coating.
What is the roof made of?
Modern roofing materials make it easy to create a beautiful roof for a gazebo or canopy of any size. The standard size of metal or plastic sheets is 2x6 m, which makes it possible to lay a roof with only 1-2 sheets. When choosing a roofing material, sheets of the same color and texture as those on the house are often used.
Tree
Wooden parts are used as a frame for any type of roof. But the ceiling itself can be made from boards, placing them in 2 rows and covering the gaps in the bottom with the top layer. You can also install the boards horizontally, with an overlap on each underlying one. But due to its susceptibility to rotting, wood is rarely used on roofing.
Polycarbonate
Plastic material allows you to make an unusual roof. A homemade polycarbonate barbecue canopy will be transparent and create the impression of a light and airy structure. The material is plastic, it can be shaped into an arch or semi-arch. Over a large area with a high snow load, it can burst, so it requires installation of sheathing in increments of no more than 50 cm. Both cellular and monolithic polycarbonate can be used for the roof, but the latter is more durable.
Plastic sheets are available in a wide range of colors. You can choose either completely colorless sheets or painted, matte and transparent.
Profiled sheet
Metal roofing sheets are produced in different modifications:
- galvanized;
- coated with polymer dyes of different shades;
- wavy;
- smooth, etc.
Any variety is suitable for a roof over a barbecue. The sheets can be used to form arched roofs.
The material is quite durable and can withstand snow loads well. To prevent the roof from deforming, frequent sheathing is installed.
Other materials
The roof over the barbecue can be made from other modern materials:
- metal tiles;
- ondulin;
- soft roofing with different patterns;
- slate;
- plain tin or thin metal sheets.
The main requirement for roofing products is non-flammability.
Types of roof and materials used
It is worth saying that such a design is not necessary for independent construction. You can purchase a ready-made canopy and not bother with the process of building it yourself.
But if the user decides to make a recreation area on his own, then it is worth understanding the main types of roofing for such a canopy.
Wood
For tree support, it is customary to use beams, trunks and wooden beams. The ideal option would be pine timber without black stains. This is the best option not only due to its appearance, but also due to its hygroscopicity and resistance to rotting.
Such supports do not require careful and constant maintenance, and their installation does not require complex installation. The design looks very neat, aesthetically pleasing and does not take up much space.
Reference! If there is a large amount of vegetation on your territory, then such a canopy will fit perfectly into the overall concept.
But this design has a number of disadvantages:
- a lot of wood rots;
- fungal infection;
- the tree can become food for insects and rodents.
Of course, you can choose an effective impregnation that will add fire resistance to the material. But you can focus on other materials.
Metal
Another good option for a canopy, but it’s worth considering that the metal structure will get very hot in direct sunlight.
For a metal canopy, the main element is the roof, which covers the barbecue area, and it is supported by metal rods.
Despite the fact that this design is quite inexpensive and profitable to maintain, a metal barbecue has a number of disadvantages.
These include:
- possible overheating in the sun;
- the need for anti-corrosion treatment;
- For construction you will need a welding machine and a number of special tools.
If the user does not like the ideas of a wooden and metal canopy, there is another option.
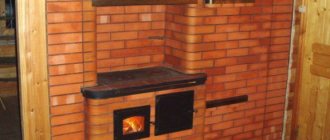
Stone
A very popular type of barbecue canopy. True, this is a large structure made of stone and concrete.
In order not to waste space just like that, such canopies are combined with a gazebo. The design looks very beautiful and expensive.
Reference! The main purpose of the construction is to hide the grill from rain and gusts of wind.
This type of canopy is chosen because it is very durable and does not require correction and does not require additional maintenance. True, many users are put off by the high cost of the design.
Drawing of a canopy over the barbecue
Before you make a canopy over the barbecue with your own hands, you need to determine the dimensions of the building and draw a schematic plan. It should indicate all the parameters of the canopy, determine the angle of inclination of the slopes or the bending diameter of the arch. A detailed drawing helps to correctly calculate the amount of materials and calculate the dimensions of each part.
When drawing up a drawing, you need to take into account that the support pillars must be dug into the ground at least 50 cm. When choosing a pitched roof, 1 pair of supports must be higher than the other. The slope angle of the slope also depends on the difference in heights. When making a canopy attached to a house, the role of higher supports is played by a horizontal support beam mounted on the wall of the building.
Popular varieties
There are a large number of simple designs for barbecue canopies that will look great in the country or in the house. The possibilities of craftsmen are almost limitless, given the variety of building materials and types of fastening.
In modern construction, there are many options for visors:
- According to the criterion of the main material used, metal, wood, and stone-brick can be distinguished.
- According to the criterion of roof shape, they distinguish between single-pitch, gable, broken, arched, semi-arched and others.
- According to the location criterion, it is customary to distinguish free-standing canopies with gazebos, as well as those attached to other buildings, corner ones, etc.
Required Tools
Preparation for construction also includes the selection of tools needed during work. When installing a large stationary canopy for earth and concrete work, you need:
- roulette;
- cord and poles;
- shovel;
- container for mixing concrete mortar;
- building level.
After installing the supports and pouring the foundation under them, the construction of the above-ground part begins. For this purpose, different tools are used depending on the material used. When building a wooden structure you need:
- circular saw or hand saw;
- hammer and nails;
- measuring instruments.
To make a metal canopy you will need:
- Bulgarian;
- welding machine;
- tape measure, level, square.
When installing the roof, you may need a screwdriver or a hammer, depending on the type of fasteners used.
Constructing a metal canopy yourself
To build a canopy for a barbecue area made of metal, you need:
- Build a foundation. To do this, holes are dug half a meter deep and metal pipes with a diameter of 80 to 120 mm are inserted into them. In this case, it is necessary to use a building level so that all work is completed accurately and accurately.
- Next, the holes are filled with concrete.
- After it has completely dried, profile pipes with a diameter of 50 mm are welded to the supports and a metal profile is attached.
- Next, you can construct a roof from slate, metal tiles or polycarbonate.
Attention: to build a barbecue canopy made of metal, you must be able to work with a welding machine.
Pouring the foundation for the supports
When constructing a stationary canopy to design a recreation area in a dacha, the first stage - installation of supports - is carried out according to general rules, regardless of the material used. Using a tape measure and a cord with pegs, the installation sites for supports are marked on the site according to the plan. Under each post you need to dig a hole with a diameter of 0.5 m and a depth of at least 0.5 m. In sandy or heavily frozen areas, the depth can reach 80-100 cm.
Sand is poured onto the bottom and compacted; the thickness of the cushion is 15-20 cm. A pole is installed on it and the vertical is leveled to the building level with a plumb line. The pillar must be strengthened with spacers made of stone, brick or pieces of timber.
Prepare a concrete solution from 1 part cement, 3 parts sand and 4 parts crushed stone. Fill the hole around the support with the prepared mass to the ground level. During the pouring process, it is recommended to tamp the solution to make it solid. Check the verticality of the post again and correct the distortion before the concrete hardens.
The prepared supports must stand for 7-10 days for the concrete monolith to gain strength. Only after this, work on the construction of the above-ground part continues.
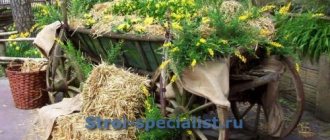
Shed for firewood - what is it?
A wood shed can create an architectural feature in your backyard or be a free-standing shed. Only properly seasoned wood is suitable for fuel in a fireplace, home boiler or sauna. This period can range from 18 to 24 months. During this time, the goal is to keep the wood's moisture content at 20%.
The wood then burns longer and produces more heat because it generates more thermal energy. It is important to note that such seasoned wood emits less pollutants into the atmosphere, produces less smoke and produces much less soot.
How to make brick and stone pillars?
For masonry, you need to prepare a solution of 1 part cement and 3 parts fine sifted sand. The simplest brickwork - 1.5 bricks:
- place 1 block next to the installed steel support pipe;
- lay out a second one perpendicular to it, aligning the edge of the end with the long outer side of the previous one;
- put elements 3 and 4 in the same way, closing a square around the pipe;
- the next row is placed with the seams bandaged: where adjacent stones are connected, the body of the next one should be located, and the connection will shift by 12.5 cm (by half a brick);
- continuing, again closing the square around the stand;
- perform the next rows according to the same principle, alternating the location of the joints of adjacent masonry parts.
Natural stone is more difficult to lay out, because it does not have clear geometric shapes. For ease of work, the pieces can be chipped, making them approximately equal in length and width, or additional pieces can be used if the layer is not long enough. When making treasure from pieces of natural stone, you should try to follow the principle of bandaging the seams, placing a solid piece above the junction of the pieces.
While the cement composition has not hardened, the protruding mortar is formed into a neat roller with a special jointing tool or pressed between the masonry elements with a stick. To obtain seamless (Chechen) masonry, a thin rod is placed between the bricks of adjacent tiers at a distance of 1.5 cm from the edge. The solution will not be squeezed out onto the outside, and the seam will remain clean. The rods are removed immediately after laying the next row.
Instructions for making a wooden frame
The support columns need to be connected with timber or logs, nailing them along the upper ends. Most often, first, those sides are connected on which the rafters will not rest, and then they are placed transverse to them. With this arrangement, the roof rests evenly on all installed posts. To connect in the corners, you can use the half-tree method, removing part of the wood at the very end or making a decorative extension of the beams beyond the roof. Sometimes, when using a beam, the method is not used, installing 2 load-bearing beams opposite each other on top of 2 others.
For strapping, you can also use strong boards (at least 3 cm thick). They are nailed on the outside of the support posts around the perimeter. If the load on the roof is large (large area, 1 slope), then the load-bearing pair of sides of the frame is made double, strengthening the same boards on the inside of the posts.
Support construction technology
Whatever the type of roof, it needs to rest on supports that are dug deep into the ground or concreted.
Wooden supports are the easiest method of fixation. They are easy to make yourself, even without special skills. At the same time, preference should be given to deciduous wood, as it is the most durable and less susceptible to rotting. Additionally, they are impregnated with antiseptics, which prevent rotting.
Supports made from corrugated pipe are an even more durable material for supports. They will reliably hold the roof over the brazier for many years. Before driving or burying, it is advisable to treat the lower ends with anti-corrosion substances. They are more expensive than wood, but require less repair and can be painted many times.
Stone or brick pillars are the most solid. They are more expensive and more labor-intensive to install. It’s good when they are made of the same material as the facade of the main building. Depending on the decorative features of the site, red, white, and silicate types of bricks can be used.
Step-by-step instructions for making a metal frame
The general principles for assembling a metal frame for a stationary gazebo and a small canopy over the brazier itself are approximately the same. In the second case, the support columns are not dug in anywhere, but are welded to the legs or body of the barbecue. Next steps are as follows:
- Cut a corrugated pipe or a corner for making a trim to the size of the area that it is desirable to cover (most often, the ends are made at 50-60 cm along the perimeter around the fryer).
- First weld the sides that do not support the rafters. Across them, at the ends of the made outlets, lay load-bearing beams and weld them to the bottom ones.
How to make an arched roof?
If you need to make an arched or semi-arched roof, before making the frame, 2 parts of the lower trim are installed at ground level (10-15 cm above the soil). Their length is equal to the diameter of the arc of the arch or the radius of the semi-arched part of the arc. When making a small canopy, the center of the arc should be shifted to the front legs of the roaster. This way it will be shifted from the highest part, where it is more convenient for a person to stand.
The side parts of the roof frame are bent to the required diameter and welded to the ends of the lower trim and to each vertical support. Transverse load-bearing beams are installed above the verticals in increments of 0.5 m along the entire semicircle for an arched roof. If a semi-arch is being made, 1 load-bearing beam is placed on the upper edge, 1-2 above the vertical supports and 0.5 m to the bottom trim.
Covering installation
The complexity of making a roof depends on what kind of roof the canopy over the barbecue will have:
- For a single-pitch roof, rafters made of timber, logs, thick boards (3-5 cm) or metal parts (pipe 5-10 cm) are laid along the slope. The distance between them is 1 m. A sheathing of 2-2.5 cm boards is placed across it under the metal profile and other opaque roofing. For polycarbonate, make a neat sheathing from a bar or corrugated pipe, placing the parts at a distance of 0.5 m.
- They begin to install a gable roof by making trusses from 2 rafters connected at the top point. For rigidity in the upper third they are connected by a cross member. The rafter systems are lifted and secured to the top frame with nails or a weld, depending on the material. The distance between the trusses is no more than 1 m. Connect the upper corners with a ridge element running along the entire length of the structure. Make a plank sheathing between the rafters in increments of 30-50 cm.
The ends of the rafters and sheathing should extend beyond the perimeter of the trim by 20-30 cm, forming roof overhangs.
Sheets of roofing material are laid so that the wave on the profiled material is located along the slope. Installation begins from the bottom edge of the slope. Each next tier of short sheets should overlap the edge of the bottom by 7-10 cm. The fasteners are driven or screwed into the top of the wave after 20 cm. Adjacent sheets must be laid with an overlap of 1.5 waves or 10 cm. Polycarbonate is laid without overlap.
Self-construction from wood
Before starting construction, you need to take measurements and prepare tools. A wooden canopy goes well with a roof made of polymer material. We will consider this option in more detail.
The first step is to draw up a project, showing the main components and dimensions of the structure.
Choosing a location for the barbecue. It is better to stop at a place away from the living space, at least 5–6 m. We mark with pegs and pull the rope. There will be holes for the foundation in the corners. Their approximate depth is 60–70 cm. The distance between the pillars is up to 2 m. Make sure that the canopy is located away from neighboring houses.
Construction of the foundation:
- We fill the bottom of the dug holes with sandstone and crushed stone and tamp it down.
- We form a reinforcing frame from corrugated rods.
- We pour 10 cm of concrete and fasten the frame. We provide it with waterproofing.
- Fill everything with the solution.
It is advisable to wait a couple of weeks until the concrete hardens completely. We install timber poles on the metal corners. We measure the height of the supports and adjust them to the required size. In order for the roof to have an optimal slope, the front pillars will be approximately 25–30 cm higher than the rear ones. We tighten the structure above the barbecue with timber along the perimeter of the upper heads of the pillars.
We will make the rafters from edged boards. We install the mount. The optimal distance between the rafters is 50–60 cm. To prevent water from entering the frying zone, the edges of the rafter leg should extend 30 cm beyond the top trim. Wooden components must be treated with an antiseptic. Once the impregnation has dried, you can coat the material with paint, varnish, etc. All that remains is to install the polycarbonate roof.
Tools you will need:
- shovel;
- fastening components: screws, bolts, self-tapping screws;
- building level;
- hammer;
- hacksaw;
- roulette;
- rope, etc.
The construction process should not cause difficulties.
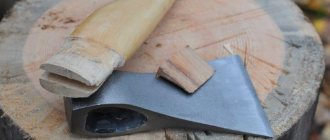
Don't forget about the tool for creating a canopy
Frame and roof
Typically, a wooden canopy is equipped with a pitched roof. If the grill is portable, then it is advisable to build a symmetrical gable structure. The rafters are assembled on the ground, then raised and secured. For such work you will need at least one assistant. If you perform the assembly on the roof, your own strength will suffice.
The frame and roof are the main components of a canopy. Their combination is possible using different resources. A good combination is wood for the frame, corrugated sheeting or polycarbonate for the roof. There are plenty of pictures of such construction solutions on the Internet.
To make the frame reliable, a foundation is made for it. It is better to assemble the roof on the ground and then lift it up. Before installing the roof, take care of its waterproofing. Before finalizing, make sure that everything is in order according to the geometric canons.
Painting the structure
Coating with paints and varnishes not only decorates the building, but also serves to protect it from adverse environmental conditions. Compositions for painting wooden and steel parts are selected with the marking “for external use”. Before painting, you can additionally treat the structure with anti-corrosion or antiseptic compounds.
Painting is done manually, using a brush to cover all the details of the structure in 2 layers. After applying the first one, allow the composition to dry according to the instructions for it. It is advisable to renew the layer of varnish or paint annually to cover damaged areas. You can completely repaint the canopy once every 3-5 years.
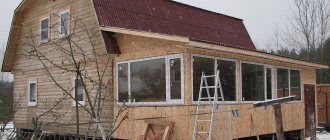
A simple option for a summer house - a canopy against the wall of the house
For the most ordinary canopy adjacent to the wall of the house, a lightweight structure and materials will be required. To do this, there is no need to attach pile supports, concrete holes for them, etc. An excellent option for roofing material is polycarbonate, which is available in different designs.
If you add stiffening ribs to it, it will cope perfectly with climatic loads. You should buy high-quality polycarbonate - one that can withstand bends and not crack. We will install it on a metal bracket with a concave diagonal. During installation, a special fastening is used, with a thermal washer.