- October 15, 2018
- Miscellaneous
- Timoshenko Mikhail
Every outdoor enthusiast who enjoys organizing forays into the wilderness should understand how to build a shelter from scrap materials. Knowledge will help you survive a night in the forest if you don’t have a sleeping bag and a tent with you. We invite you to read our article to learn about the construction of huts of various configurations.
About choosing a place to create a hut
Before I tell you how to make a hut in the forest with your own hands, I would like to say a few words about the right choice of place for organizing a shelter. Do not place your homemade structure near steep, steep earthen slopes. Landslides often occur when it rains. The roof of the hut will be covered with earth. There is a possibility of falling trees, which is unsafe, especially when resting at night.
Build a hut at a considerable distance from the river bank. Placing the shelter close to a water source will force you to be in conditions of high humidity. At night you will have to rest in wet clothes, suffering from unbearable cold.
Building a hut in the middle of an open clearing doesn't seem like the smartest idea. In such a place it is difficult to protect yourself from strong winds, rainfall and the hot midday sun. It is better to go a little deeper into the forest, sitting under the branches of large trees.
Lean hut
How to make a hut in the forest with your own hands? The simplest option is to organize a lean-to shelter. It is enough that there is access nearby to spruce branches that can be plucked from low trees.
Proceed according to this scheme:
- Look for a tree fallen at an angle. Make sure the soil in this area is dry. Assess how stable the trunk is, which will serve as the basis for the future structure.
- Cut out a whole row of strong, even poles about 2.5-3 meters long. Place such crossbars at a slope on a fallen tree.
- Cover the formed frame with spruce branches. Move from bottom to top. This way, water will flow down the flooring during rain without getting inside the hut.
- To avoid having to lie on cold soil, cover the space under the pitched roof with the same spruce branches, dry leaves or grass. It is advisable to make the pillow about 30 centimeters wide. The heat emanating from the body will be retained in the air layer and will not go into the soil.
What is a hut and what is it for?
A hut is the simplest shelter that is built in camping or extreme conditions using available natural materials (Figure 1). Being the simplest structure, a hut has long been used by travelers, foresters and hunters for spending the night in the forest. In addition, such a structure has become firmly established in children's games. As children, we all built similar shelters ourselves, or with the help of adults.
Figure 1. Hut options
Gable hut
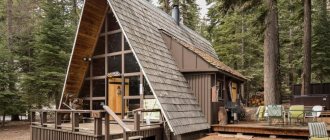
Let's look at how to make a hut in the forest with your own hands with a gable roof. Cut down a couple of strong poles with spears at the ends. Drive the sharp ends into the ground at a slope. Bring the stags together at the top. The result should be the shape of an isosceles triangle with a base in the form of soil.
Place the end of a long pole on the slingshots at the top point of the structure. Secure the connection with rope or wire. Place the other end of the pole against the soil.
By following these steps, you can get a stable hut frame. All that remains is to prepare the ribs of the structure. Place all kinds of branches on both sides of the inclined pole, clearing them of leaves and protruding twigs in advance. If desired, connect the edges of the hut with a cross rope.
Place a layer of spruce branches or coniferous tree branches tightly on the formed walls of the shelter. The main task is to make the walls monolithic, without cracks or holes. Place bedding inside the hut. Light a fire in front of the shelter entrance.
Relevance of the tree house
A house for children built on a tree will certainly become their main entertainment. It can be designed as a real residential property with windows, furniture and lighting. Children will really enjoy equipping such a house with slides, a hanging ladder, a rope and other entertainment.
A competent approach to arranging such a house will help bring bright colors into the lives of children. The simplest solution is to purchase a ready-made structure.
But you can make your house truly exclusive by building it yourself. To do this, you don’t even need to order a project from an architect, just ask the children about their fantasies.
Consult with your child regarding the design, size and color of the house. Look at the photos of finished houses with him and choose the best option.
Wigwam
How to make a hut from branches in the wigwam format? The shelter is built quite simply. Draw a wide circle on a flat area. Prepare about a dozen straight, long poles. Dig the ends of the sticks around the perimeter of the circle at identical intervals. Secure the tops collected in a “bun” with wire, rope or tape.
Place branches and a layer of dead wood on top of the crossbars. Cover the walls with fabric or tarpaulin, if such materials are available. Alternatively, cut large pieces of bark from tree trunks and use them as the outer lining of the shelter.
Having made a large hut, you can place a fire inside. The main thing is to leave the top of the structure open to create a chimney. Be careful that sparks do not fly onto the walls of the wigwam.
Children's tree house
When building a house, it is worth considering many nuances. This object can be quite dangerous if basic safety requirements are not taken into account.
Ideally, it is better to entrust the construction of a lady on a tree to specialists. But this does not mean that it is impossible to do it yourself.
In order to decide on a design, you can look at photos of tree houses and choose the most interesting option for yourself.
Tent hut
How to make a tent-shaped hut from branches? Find a place in the forest where there is an abundance of young, flexible trees. Bend the tops of such shoots in one direction and tie them securely. Tie the transverse stiffeners with rope or strips of tree bark. The result will be something like a dome.
If the structure turns out to be too flimsy, cut an additional row of poles. Stick the thick bases into the soil, and weave the upper parts into the dome of the existing hut frame. In the central part of the structure, you can additionally place a large trunk, which will not allow the top of the tent to fall inside.
Cover the walls formed from young trees in a circle with dead wood, grass, and leaves. Place spruce branches on top. Place a fire inside the tent hut, first leaving the top of the dome open for smoke to escape.
Coating materials
Coverings of huts can be divided into 2 groups: those laid directly on the frame (or integral with it), and those requiring additional reinforcement of the frame. The first ones, naturally, are less labor-intensive, and often more reliable and durable, but can be made from fairly high-quality materials that are not always/everywhere available.
Hut coverings that do not require additional reinforcement of its frame
Ideal materials for covering a hut are reeds, pos. 1 in Fig., and, somewhat worse, reeds. The reed-reed cover is covered with sheaves tied together with thin bunches of the same plant. Firstly, this material does not burn well. Summer burning of reed roofs in the southern regions is caused by dryer grass on parched soil; setting fire to dry reeds on damp ground or sticking out of water is not so easy. Secondly, dry reed stems are strong and resilient; reeds - less. N. M. Przhevalsky described the satma - reed huts of the natives of Lop Nor. In the monstrous Central Asian climate, in wet conditions in the swamp, Satma served for 3-5 years with minor annual repairs. Thirdly, reed bundles are quite heavy. Only a very strong wind can blow them away, and a double-slope hut with a reed roof can be safely built without ropes (see below).
Straw is often used to cover fields, pastures, gardens, apiaries, etc. huts. A hut with a thatched roof provides excellent protection from bad weather and, without additional heating, from slight cold. But, firstly, it catches fire very easily, forming a fire club inside, so lighting a fire in a straw hut is unacceptable. Secondly, the straw on the hut cover must not only be tied into sheaves, but also tied up, pos. 2. Why do you need, first, the skills of laying thatched roofs; second - quite a lot of purchased material (ropes, twine). Third. Nowadays there is an additional disadvantage of straw huts: the straw may come from plants treated with herbicides. Staying in such a hut will not be beneficial to your health.
Note: the straw covering of a double-pitched hut in not particularly windy places can be reinforced without tying the sheaves with loosely laid additional poles, see fig. on right.
No worse than straw in all respects, but spruce spruce branches are not as flammable (item 3 in the figure above). Unfortunately, it is only available in spruce forests, which are not available everywhere where a hut is needed; In this regard, we also consider firs and larches to be Christmas trees. Larch spruce branches are suitable only for a summer hut, because... larches lose their needles in the winter, which is why they are named so. Additional advantages of fresh, fragrant spruce tree huts - mosquitoes do not bite in them, and in the morning you get up fresh, invigorated, feeling a surge of strength. In addition, spruce branches make an excellent lining for a hut.
A spring-summer hut-shelter can be covered with leaves of the ubiquitous bracken fern, well protected from wind and rain, pos. 4. You can make a fire in a fern hut (and completely dry fern leaves do not burn well), and mosquitoes do not fly into it either, but the next morning you can wake up with a severe headache - fresh fern leaves release substances into the air that are not harmless to humans. Therefore, fern huts are strictly contraindicated for children; children in such a hut can become very ill.
A hut covered with moss (pos. 5) is somewhat less effective at repelling mosquitoes, but sleeping in it is also not very pleasant or useful. The heavy “earthy” smell is disturbing, some bugs fall from above from time to time, and if the moss starts sporulating, you can develop an allergy.
In an abandoned clearing, there may be enough bark to cover a hut (item 6). This, in this aspect, is an unsurpassed material - practically non-flammable, retains heat well, fumigant for flying bloodsuckers, but useful for human respiration, and in addition is much stronger and more durable than others. The record holders for longevity are huts covered with conifer bark. There is only one drawback - there are no more, unless it turns up in poacher's cutting areas. And on legal ones they pick it up outright: tree bark is a valuable raw material for many industries.
Fresh pine branches are an excellent material for a hut-shelter, the frame is integral with the covering, pos. 7. The branches are stuck in a circle into the ground (in pine forests it is usually soft). The tops are either tied (for insulation with snow) or simply woven (for a summer hut). The mosquito drives away. Of course, you can’t light a fire inside, but a pine children’s hut on a picnic reveals an unexpected property: on the way back, the children are less capricious or not at all, they eat dinner at home with an appetite and sleep sweetly. It is not without reason that pine extract for therapeutic and prophylactic baths is made from pine needles.
Finally, old burlap, tarpaulin, etc. technical fabrics - neutral in everything (except, perhaps, dirt) lining of the hut, which underneath is more likely a wigwam, pos. 8. With its height and diameter of more than approx. 2.3 m you can light a small fire inside. The downside is that mosquitoes keep crawling inside, and there’s no romance for you: just a shelter, a hut, a hole.
Additional materials
To cover the hut with some other materials, you will have to make something like a lathing, throwing branches and twigs on the frame. To do this, the frame itself will have to be strengthened by taking poles on it with a thickness of 6-7 cm from good, not rotten wood. The poles must also be dug deeper than usual (see below), somewhere on the bayonet of a camping folding shovel. Those. the complexity of construction increases, and additional tools are required. But the range of coating materials is expanding. What is more important in which case is decided on the spot depending on the circumstances.
The most common case is small branch covering, pos. 1 in Fig. In deciduous and mixed forests there is almost always enough dead wood and brittle dead wood for it; perhaps leafy. For reliable protection from bad weather, the branches are thrown (thin ends up) in a thick layer, from 20-25 cm.
Coverings of huts requiring additional reinforcement of the frame
A hut covered with dry grass (item 2) is equivalent to a straw hut in all respects (including herbicides), but tying into sheaves and sheaves is not required. Reinforcement of the frame is minimal: intertwine often with thin branches (vines, vines of climbing plants) so that grass dust does not fly inside.
It is possible to build a reed hut much faster without retying the material. In this case, you will need much less of it, which is important if you simply don’t have it in the vicinity. Then the frame is also made reinforced (from thicker poles, dug in deeper), covered with fill, and the outside of the tire is pressed down with additional poles, pos. 3.
A very strong and reliable frame is needed for an igloo hut, pos. 4. You can spend the night in it without heating at -20 and below, but if the building collapses, there is a risk of freezing and dying buried in a snowy grave without waking up. Therefore, igloo huts are built almost exclusively conical according to the full design, see below.
Covering the shelter hut with fallen leaves (pos. 5), on the contrary, is an option for the case when there is no risk of freezing, but your hands no longer obey and your legs can’t hold up. Small branches are thrown onto the frame, leaf litter is raked, that's all. You can cook dinner if you still have energy left, or go straight to sleep.
Hut in the snow
How to make a hut in the forest with your own hands from snow? Look for a large snowdrift on a hill. Dig a trench in the middle. Compact the walls thoroughly with your hands. Place even branches close together on the floor of the recess and make a covering of coniferous spruce branches. Place transverse poles on the walls of the snow hut. Cover the roof with pine branches and then with a thick layer of snow. Make sure there are no gaps in the structure. Cover the entrance behind you with the same snow so that the structure is warm and cozy for an overnight stay.
Making a dugout
This shelter cannot be made in a lowland or ravine; streams of rainwater can cause problems or completely destroy the dugout.
The construction will take a lot of time and effort, but the shelter will be spectacular.
Step-by-step installation:
- Dig a pit at least 150 cm deep, 200 cm long and wide. If a stove is used, then an outlet hole for the chimney is formed on the side of the recess.
- Inside the pit, lay a frame made of logs with a diameter of at least 20 cm.
- If necessary, a primitive stove is built from stones and clay. The side hole will serve as a chimney, so the structure is placed near a wall that discharges smoke to the street.
- The roof of the dugout is covered with thick branches or logs, it is advisable to use film. A thick layer of moss is laid on top.
They install a sun lounger and think about a light source for the room: use a candle or make part of the roof collapsible.
Hut in the ground
How to build a hut in the form of a small dugout? First, find a dry area on a small hill, away from the roots of large trees. Dig a pit about a meter deep. Select the width based on the number of people who will be located in the hut. Dig a small trench on the side, which will later serve as an entrance.
Place strong transverse poles on top of the walls. Cover the formed roof of the hut with a thick layer of small branches. Cover the structure with the earth that remains after digging the pit. Inside the earthen hut, lay a pillow of spruce twigs and leaves.
Gable shelter
Such a shelter, unlike a lean-to building, will save you from snow, hail and strong winds. The design differs from a simple hut in the presence of a rear wall and an entrance.
A gable shelter is made according to this plan:
- The length of the structure is 200 cm, the width on the ground is 150 cm and the height is 150-200 cm. At the edges, 2 supports with spears are installed at the edges. The crossbar is placed in the grooves. The connections are secured with ropes.
- Thick wooden rods are driven into the ground at an angle on one side of the frame with minimal gaps. On the reverse side they do similar work.
- The back wall is formed from even branches. These pieces of wood will have to be trimmed to make the top of the back triangular. The rods at the top are connected with a rope to the main poles located along the edges of the product.
- The entrance is partially covered with sticks so that the opening is not a triangular one, but a rectangular one.
- The gaps in the shelter are covered with small branches. A thick protective layer is formed, but the strength of the supports must be taken into account. If you put a lot of wooden rods and add moss, the structure may collapse. After uniform pressure is distributed on the roof, the remaining gaps are closed with moss.
- A lounger is made from poles, moss and leaves 25 cm thick. It is better to make a primitive bed so that there is a gap between it and the ground.
Plastic film will completely protect a person from rain inside the hut. Only oilcloth is laid on the first layer of branches, covered with another, and then leaves are laid on the roof. If you fix the film before laying the moss, the material will slide off the structure. Rainwater will not flow into the room if grooves are made along the perimeter of the shelter, diverting streams to the side.
How to heat a hut?
To keep the building warm, light a fire right in front of the entrance. Behind it, organize a kind of shield that will reflect heat in the desired direction. Drive a pair of stakes into the soil on opposite sides. Place straight branches between such poles. If desired, make a wattle fence. Thanks to the peculiar wall, the heat from the flame of the fire will be directed inside the hut.
There is a more effective option that will allow you to create a real “steam room” in the shelter. Cover the inside of the hut with foil. Alternatively, you can use a thermal blanket. Cover the entrance to the structure hermetically with a layer of stretched plastic film. Light a large fire in front of the hut at a safe distance, at which the cellophane will not melt. Thermal energy will begin to penetrate inside the hut and be reflected from the metal surface of the foil. The plastic film will not allow the heated air to escape outside. Proper implementation of the idea will create a greenhouse effect in the shelter. The method should be adopted when a sleeping bag is not available.
Useful tips
Take advantage of a number of valuable tips, following which will make the construction of a hut easier and will make spending the night in the forest more comfortable:
- When going camping, take a compact folding saw with you instead of a heavy ax. Having a tool will speed up the work of constructing a shelter from scrap materials.
- Place a roll of strong rope or tape in your backpack. The materials will not take up much space and will serve as an excellent means for strengthening the hut.
- Buy a large piece of plastic film from the market. The latter will be an excellent covering material for the walls of the hut. Polyethylene will make a good layer for a bed that will protect from moisture when in contact with damp soil. Ultimately, you can securely cover the entrance with the material, protecting yourself from the wind.
- When planning to build a hut, pay attention to the size of the structure. Select the width of the shelter depending on the number of people who plan to spend the night inside.
- Keep a close eye on the fire near the shelter. Place the flame at a safe distance for a wooden structure.
- If you are suddenly hit by rain or heavy snow on the way, look for an old spruce with a spreading crown. Bend the lower branches closer to the ground. The result will be some kind of hut where you can wait out the bad weather.
How to make it yourself
Having prepared the necessary material and chosen a suitable location for the construction of the structure, construction should begin.
Method No. 1
You can simply build a hut at home if you follow the following sequence of steps:
| № | Stage | Description |
| 1 | Prepare furniture for construction | If you have large sheets of cardboard in the house, you can also use them. They will help strengthen the structure. |
| 2 | Arrange the furniture | It should be located in a circle so that it does not fall during the operation of the future home. |
| 3 | Create a roof | If you have a large blanket, cover the furniture placed in the previous step with it. If there is none, you can use several blankets. They must first be connected with clothespins, paper clips or other fasteners. To prevent such a roof, represented by a blanket or several blankets fastened together, from falling during the operation of the house, it is better to secure it using rubber bands. |
| 4 | Decorate the hut door | To do this, you need to leave an open hole, the size of which will be sufficient to allow you to get in and out. The door can be located in any part of the structure: in the front or back. |
| 5 | Fix the hut | Place heavy objects around the edges of the hut that could prevent falls. The role of such objects can be played by books or large candles. |
| 7 | Give the name of the building | So that everyone knows the name of a cozy house in which you can have a good rest, you should write its name on a piece of paper and secure it near the entrance hole. |
| 8 | Decorate the interior | To make the interior soft and cozy, you can throw blankets, poufs, and pillows. |
To make spending time in the hut not boring, you can take a smartphone or laptop with you. If the new room seems too dark, you can bring a few flashlights or use extension cords to turn on an electric lighting fixture. In that case, you can read here.
You can also bring non-perishable food and drinks inside.
The following edibles may be a good option:
- fruits;
- chips;
- cookie;
- bottled drinks;
- straw;
- juice in bags.
Method No. 2
You can build a hut at home from pillows as follows:
- Prepare pillows and cushions from the sofa.
- Pillows and bolsters, which will be the most dense, should be used as the walls of the future structure. Place them vertically, not horizontally, otherwise the structure will quickly collapse. The role of the supporting wall for such a structure can be played by the back of the sofa. You just need to place pillows on the sides and then cover them with a blanket.
- When the soft walls are ready, place a hard pillow on top or simply cover everything with a large blanket.
- Make the floor. You can also take pillows or other soft products for this.
Method No. 3
You can build a hut from chairs, a sofa and pillows.
To do this you need:
- Choose a room that will be well suited for construction . It is best to choose a room that already has all the necessary elements. Chief among them will be the sofa: it must be in the room. Chairs, blankets, pillows and other “building materials” can be brought from neighboring rooms.
- Having chosen a room, remove the pillows from the sofa installed in it. They must be removed from both the seats and the backs. It is important to consider that valuable items, such as coins and toys, may be found underneath them. If any are found, put them in a box, which in the future can serve as a chest stored in the fortress. Before moving on to the next step, you need to remove crumbs, dust and other debris from the sofa.
- Build the walls of the fortress. Their role will be played by the pillows that were removed from the sofa at the previous stage. The walls are erected as follows: the pillow must be placed on the seat of the sofa so that its flat side rests on the armrest. You can also use ordinary pillows taken from the bed to build walls. Then you should put 2-3 pieces on each armrest. It is important to ensure that the top edge of the pillow is flush with the back of the sofa. To do this, you need several pillows, which must be stacked one on top of the other.
- Create a roof. For this, as a rule, a blanket is used. Its narrow edges are best placed on pillows, while the long edge should lie on the back of the sofa. The canvas, which will act as a roof, must be well stretched over the fortress. You can use a sheet instead of a blanket. It is lighter, so it will not put much pressure on the pillows, which means they will not fall inside the structure. It is worth keeping in mind that light does not pass through heavy thick blankets, which creates a cozy and mysterious atmosphere in the hut. However, they have a lot of weight, which can cause the structure to collapse.
- Expand the space . Other pieces of furniture and a few more pillows will help increase the strength. One of the simplest options for enlarging such a hut is to install 2 chairs with backs on the sides. They should be positioned so that they “look” at each other. Then you need to lean pillows against their legs and cover them with a blanket on top.
Method No. 4
In winter, you can arrange a wigwam in the children's room. It can become a temporary home for children or a permanent attribute of the room.
To make it you will need the following materials:
- wooden sticks;
- rope or rope;
- thick fabric.
Building a home wigwam is quick and easy:
- Wooden sticks are tied together to form a frame.
- The fabric is attached to them and distributed evenly.
Such a hut can serve as a place to store toys.
Method No. 5
To create a tent-fortress you need the following materials:
- pillows, it is best to use hard types from under armchairs and sofas;
- blankets, bedspreads;
- heavy books;
- furniture.
The stages of creating a soft fortress will be as follows:
- Install heavy furniture, such as a sofa, armchairs, or bookcase, as load-bearing walls.
- Stretch blankets and bedspreads over the walls. If their ends reach the floor, secure them with stacks of books; if not, secure them by clamping them with the cabinet doors.
- Check the strength for strength and stability.
- Cover the floor with a warm blanket and pillows.
Method number 6
The simplest version of a hut can be made from chairs, blankets and pillows.
To create it you need to prepare:
- 4 dining chairs with backs;
- medium sized bedspread;
- large bedspread;
- decorative pillows for game participants;
- books, candles.
The stages of construction of the structure are as follows:
- Place 2 chairs with their backs facing each other. The distance between them should be 1.5-2 m.
- Place a middle blanket on the floor between the chairs. Place pillows on it.
- Cover the backs of the chairs with a large blanket.
- Secure the blanket roof with books or other heavy objects placed on the seats of chairs.
It’s easy to build a cozy hut for children at home using available materials.
For children under 3 years old, you can create a simple hut by throwing a blanket or blanket on the dining table and covering the floor with soft objects.
