Along the edges or in the center?
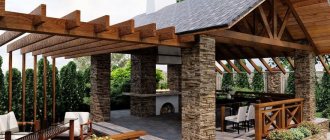
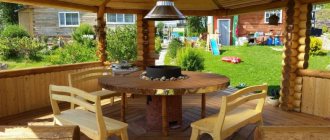
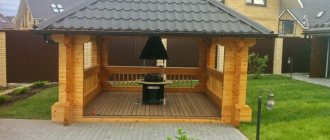
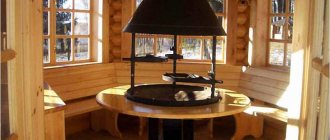
The structure itself is traditionally located either in the center of the canopy, or in a corner, or - playing the role of one of the walls of the building.
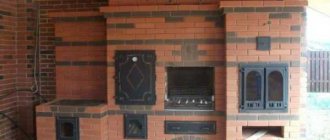
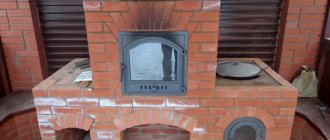
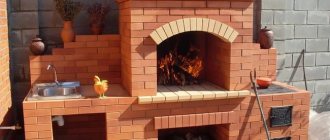
Photo 4. A complex brick barbecue complex with a hob in the center, a stove, a barbecue and several niches. The successful corner location in the gazebo leaves a lot of free space, and makes the cooking process convenient.
The central location is the most traditional option, reminiscent of those times when the stove was not placed in the house, but the house was built around it. However, in this option it is quite difficult to place both a table and a cutting surface inside.
A barbecue in the corner allows you to significantly save space, but requires construction according to drawings that provide for a corner location of the stove.
Therefore, it is most optimal to place it as one of the walls of the gazebo - in this case, there will be space for the table, and it will be more convenient to cook and load the stove with fuel.
Preparing the site for construction
The location for construction is chosen after assessing the direction of the winds. Smoke from a barbecue should not spread to nearby buildings, your own or neighboring ones. The stove should be located away from trees and bushes to ensure fire safety.
During the cooking process you will need water and firewood. It is important that the stove is located close to the woodshed and a well or borehole. If water is only available in the house, then you need to choose a location so that you don’t have to walk far.
The area where the stove will be installed is leveled and the top fertile layer is removed. They dig a small hole for the foundation, fill it with crushed stone and install reinforcement. Then formwork is constructed and cement is poured.
Fire safety
The location of the barbecue stove should not only be convenient and fit well into the landscape, but also comply with safety regulations. There should be no trees, power lines or other obstructions above the structure. The foundation should not come into contact with the foundation of the house - at least half a meter of distance should be left between them. It is also prohibited for there to be outbuildings, playgrounds, etc. in the immediate vicinity.
It is unacceptable to use two types of heating in one design - solid fuel and gas-cylinder equipment. The distance between the fire door and the gas source must be at least two meters, so installing a gas burner in a gazebo with a fireplace is a violation that can lead to serious consequences.
Important! The distance from the barbecue to the firebox should be at least 30 centimeters, this will help protect against burns when manipulating the barbecue and cauldron.
Choosing a place to build a barbecue
When choosing a place for a barbecue, you need to take into account the distance from the house to the stove; it should be at least 5 meters. It is advisable to have a nearby approach to the kitchen, since cooking always requires food, cutlery, water, etc. A barbecue is usually built in the same style as a house, but some nuances must be taken into account:
- oven design and size;
- foundation;
- barbecue location (gazebo, terrace);
- canopy for protection from rain;
- height and shape of the chimney;
- firebox lining;
- cladding materials;
- design of the grate, brazier or spit;
- additional elements, such as oven, smokehouse, sink.
Drawing up an action plan
During construction, you must follow the general instructions that apply to any type of barbecue:
- the grill should be made at least 70-80 cm, taking into account the height of the owner;
- the stove is traditionally located 10 cm below the grill level;
- a niche for firewood and cabinets, and a hook for tongs should be provided.
In this case, it is necessary to take into account all the small details so that later it will be convenient to use the structure. When the drawings are ready, you should make calculations, draw up an action plan and prepare a list of building materials (including for the foundation).
The list of materials for main work should include:
- fireclay and facing bricks;
- clay and ordinary mortar;
- metal rod d-30 mm;
- steel sheet 5 mm;
- doors for the firebox and ash pan;
- grate.
And for arranging the base:
- construction mixture;
- reinforcing bars;
- boards for formwork construction;
- crushed stone and sand.
The construction of the furnace takes place on a slab base, the frame is erected from fireclay bricks. After which it is lined with stone. Granite, sandstone, dolomite, and rubble stone are suitable. You can show your imagination and give the fireplace any fancy shape.
Low-heat and cold parts
To decorate the outside of the barbecue, clinker facing bricks or clinker tiles are suitable. These materials can withstand slight heat without problems.
Sand-lime brick or aerated concrete can be used for cold parts, such as a pedestal. But only if the grill is protected by a roof, and also if the brick does not come into contact with the ground. Sand-lime brick tolerates freezing/defrosting cycles well, but is destroyed by heat and absorbs water.
Source of the article: https://izkirpicha.com/pechi-kamini-mangali/mangaly/kakoj-kirpich-ispolzovat-dlya-mangala.html
Stone tile covering
When you have finished laying the walls, install the top floor made of treated natural stone. On the upper surface of the inner and outer walls, place a layer of mortar designed for a joint thickness of 1 cm. Lay a tile floor, one edge of which should be flush with the inner surface of the refractory brick. Make sure the tiles are level. Treat the seams when the mortar begins to set. After a week, seal the joints between the plates with a special compound and install the grill.
https://www.youtube.com/watch?v=wgBoHNSs6WI
Making your own brick version
Laying refractory bricks For a barbecue with your own hands or at the expense of workers, the fertile layer of soil is first removed.
Next, they make a pit with a depth of 20-25 cm. The parameters of the foundation on all sides are 50 cm higher than the parameters of the planned barbecue. The bottom is leveled. Filled with medium-sized crushed stone. The thickness of the crushed stone layer is 15 cm. It is carefully compacted with a vibrating plate or metal tamper. This implies the use of reinforcement. The diameter of the reinforcing bars is 1 cm. The bars are laid along and across the base. The distance is 20 cm. The areas of their intersection need to be tightly connected. Here you can use special wire or plastic clamps.
Formwork is installed on the extreme sides. All of these components are poured with concrete. His required brand is M250.
Other stages of work can begin after 7 days, if it’s at least +20°C outside, if +17°C, then you should wait a week longer.
Advantages and disadvantages of a brick barbecue complex
Outdoor brick barbecues have a number of undeniable advantages:
- have an aesthetically attractive appearance;
- can be used for a comfortable pastime at any time of the year;
- allow you to prepare tasty and healthy food;
- the roasting pan has a fairly large area;
- allows the use of various types of fuel;
- the design features of the fryer contribute to the uniform distribution of heat, so even a large dish is baked evenly;
- quite functional and versatile. Can be used for cooking fish and frying kebabs.
Presentation and functionality are the main advantages.
The disadvantages of a brick barbecue complex include its large dimensions. We have to look for a site that will not only accommodate the building, but will also fully comply with fire safety requirements. You will also need space for a smokehouse, hob and exhaust hood.
Installation of the complex requires a lot of space
The sea worries once, the sea worries twice...
When you want to fill the interior with some realism, then you should bet on the trendy “wave” wallpaper pattern. This trend is more popular than ever in 2020.
The stunning effect when the wave comes straight out of the wall will not leave anyone indifferent. This sample can use a different gradient transition.
They will fit perfectly into the interior of the living room or bedroom. This option looks win-win and stylish.
Whatever the fashion, wallpaper will always remain the most popular way to decorate walls.
Buying them is not an easy process and requires a careful approach. It is necessary to take into account both the aesthetic and functional side. At the same time, we must not forget about the fashion trends in this area.
If you still have problems in this matter, you can turn to the advice of experienced designers. They will always help you make a modern and stylish choice.
Brick BBQ foundation
slag metal Recent posts Chainsaw or electric saw - what to choose for the garden? 4 mistakes when growing tomatoes in pots that almost all housewives make. Secrets of growing seedlings from the Japanese, who are very sensitive to the soil.
For the foundation, the solution is prepared as follows: for 10 kg of cement you need to take 30 kg of sand, about 40 kg of crushed stone or gravel and about 45 liters of water. The consistency should be such that it can be mixed with a shovel without extra effort. But it shouldn’t flow off the shovel quickly and easily. It is advisable to use a concrete mixer to mix the solution, then it will be homogeneous.
It is advisable to pour the foundation in the warm season. When it is cold outside, then it will be necessary to heat the water to prepare the solution, otherwise it may set earlier. In addition, the mortar will not be strong and will not bond tightly to the reinforcement.
BBQ area location
The open type of combustion requires a responsible approach to choosing a place for a barbecue oven. The allocated area must meet the basic requirements:
- absence of flammable objects near;
- location on the leeward side of residential buildings and at least 6 m from them;
- the presence of a nearby source of water or a convenient approach to it;
- distance from greenhouses or valuable vegetation that could be damaged by smoke;
- possibility of supplying electricity for lighting and other needs.
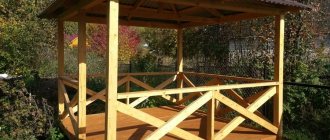
If there is already a gazebo on the site, then the stove should be brought as close as possible to it in order to make future rest all-weather.
Construction materials
To build a complex barbecue oven with your own hands, shown in section in the drawing, you will need to buy the following set of materials:
- clay bricks of standard sizes – 720 pcs. (full-bodied recommended);
- fireclay stone grade ША-8 for laying fireboxes – 80 pcs.;
- loading door 25 x 21 cm, ash pan - 25 x 14 cm;
- cleaning doors 13 x 13 cm – 3 pcs.;
- equal angle corners 40 x 4 mm, 4 studs with M12 threads and nuts (length - 70 cm) for assembling the floor frame;
- cast iron panel for 2 burners 71 x 41 cm;
- sheets of basalt cardboard and roofing felt;
- periodic profile reinforcement Ø 12-16 mm in the base.
For fireclay masonry, you should purchase special refractory clay or mortar. The body of the furnace is laid out on a clay-sand mortar with the addition of M400 cement. Crushed stone, sand and Portland cement will be used to construct the foundation. How much building materials are needed depends on the stability of the soil and the depth of its foundation.
Questions and tips for laying a barbecue grill yourself
Here we will look at the most frequently asked questions about laying a brick barbecue (grill) with your own hands and the answers to them.
What size should the smoke collector be?
The size of the smoke collector depends on the size of the firebox portal. The optimal ratio should be at least 100-120%. So in our step-by-step instructions, the height of the portal is 6 rows, and the height of the smoke collector is 8 rows.
How tall should the pipe be?
The height of the pipe is proportional to the height of the smoke collector and is at least 100-120% of its height.
What diameter should the chimney be?
The cross-section of the chimney pipe depends on the area of the firebox portal. The optimal chimney area is 1/8 - 1/10 of the portal area. Extreme sizes from 1/6 to 1/13.
How to fill the gap between the firebox and the lining?
In front, around the portal, you can fill the gap with basalt cardboard. There is no point in filling the rest of the space. Therefore it is left empty.
Do I need to paint the metal corner in the lintels?
We advise you to prime the corners well and paint them with heat-resistant paint. But even if you don't do this, nothing bad will happen. The service life of an unpainted corner will be sufficient.
How to choose a brick barbecue design: information relevant when developing a project
Among the many different barbecue options, the most popular are:
BBQ only
barbecue complexes with wide functionality;
The building provides ample opportunities
barbecue fireplaces.
A fireplace that is always comfortable next to it
Complexes are performed angular and frontal. They can have many elements, the need for which in each specific case is determined individually. Judging by the drawings and photographs, the dimensions of a front-type brick barbecue are usually 3.7 × 1.3 m, corner ones - 2.5 × 3 m. A good design can include not only a brazier, but also a smokehouse, a countertop, and an area intended for cooking food, various cabinets and much more.
Frontal complex with wide functionality
Preparatory stage
At this stage, we prepare the tool and purchase the material. We assume that our outdoor oven will have a cauldron, a barbecue, a frying surface and a fireplace compartment, in which the classic barbecue is actually prepared. Plus, this kitchen complex has a coal preparation chamber and a woodshed.
Tool:
- Master OK;
- Grater - wooden and metal;
- Hammer - rubber and ordinary construction hammer;
- Buckets - at least 2;
- Concrete mixer, if you don’t have one, prepare a trough and a couple of shovels;
- Grinder with discs for cutting ceramics;
- Levels - regular construction and hydraulic levels;
- Plastering rule.
Without good tools, you won’t be able to build a high-quality oven.
Material
To build the furnace itself you will need:
The supporting structure of the stoves is made of solid red brick.
- Red solid brick - forms the basis of the structure;
- Fireclay refractory brick - for lining fireboxes from the inside;
- Doors for the ash pan - 2 pcs;
- Doors for the firebox - 2 pcs;
- A metal box with a door is a chamber for preparing charcoal, made from a sheet with a thickness of 5 mm;
- Grate bars - 2 grates;
- Angle 50 mm - 12 m;
- Cast iron plate for the frying surface of the oven - 1 piece;
- Metal plate with a thickness of 10 mm or more for arranging the base for a cauldron - 1 piece;
- Cement mortar - for laying the main structure, a 1:3 cement-sand mortar is used;
- Fireproof mortar - for laying fireboxes and fireplaces, you can buy ready-made stove mortar or make it from clay (1 part), sand (1 part) and cement (0.1 part) with your own hands.
It is much easier to work with a professional oven solution.
The instructions are simple:
- Soak the clay for a week and stir it until it becomes a jelly;
- Add sifted sand;
- Add cement and mix everything well.
To build a foundation for a barbecue on the site you will need:
- Cement grade 500, the same cement can also be used for masonry mortar;
- Sand;
- Gravel or crushed stone of medium fraction;
- Reinforcement or ready-made reinforcing mesh with a cell size of 50–100 mm;
- Board for formwork, preferably planed.
A hundred advantages of a summer barbecue
Since ancient times, man has learned to cook food over an open fire. Pans and pots had not yet been invented, and our distant ancestors were already frying pieces of meat from hunted animals over smoldering hot coals or on a hot stone. This tradition is still alive.
In order to organize a full-fledged place for summer cooking over an open fire, it is enough to build a summer gazebo on your garden plot and equip it with a classic brick oven. The possibilities of such a device are truly limitless. With a well-designed design, you can not only fry shish kebab, but also cook aromatic pilaf, bake or smoke meat or fish.
Outdoor stoves with this functionality have a common name - barbecue. Despite the fact that such a furnace is a rather complex engineering structure, you can easily build it with your own hands in a fairly limited amount of time.
Getting ready to build a barbecue
First of all, you need to choose a place to build. Any stove is a source of increased fire hazard, so do not plan to locate it near buildings made of flammable materials. In addition, our stove will be equipped with a chimney, so calculate the location so that the smoke from the chimney goes outside your area and does not rush between the walls of nearby buildings. Consider the prevailing wind direction - the frying area should be protected from drafts on three sides. A brick barbecue oven must be positioned with its “back” to the constantly blowing wind flow.
stove design option
Let's leave aside the project of building a gazebo and see what materials we need to build a brick oven - a barbecue.
- The barbecue oven is built from refractory bricks. Usually these are solid bars of red color.
- To fasten the bricks together, you will need a gloss-sand mortar - stock up on these materials as well.
- To build a foundation under a barbecue oven, you will need cement-sand concrete mortar, crushed stone, boards for creating formwork and metal reinforcement for the frame.
- Our oven will also have finished metal products, such as grates and a frying grate.
- The chimney in the stove can be made of brickwork, or it can be combined - in this case you will need an asbestos-cement or metal pipe.
The drawing of each barbecue oven is made independently. However, you can also use ready-made drawings, creatively complementing and expanding them. A good drawing should have all the internal and external dimensions of the structure. It can be done on a sheet of graph paper or using a specialized computer program. In addition to determining the design of the future furnace, the drawing will also help you make the correct calculation of the necessary building materials.
Recommended oven sizes
Like ordinary kitchen furniture, a barbecue oven must be calculated based on your own height. After all, this is your site and your oven. For example, tall people will find it uncomfortable to work on a cutting table with a height of 80 centimeters. You can also individually calculate the area of working surfaces, design a variety of shelves for spices and even cabinets.
barbecue oven diagram
For ease of operation, the barbecue oven can be equipped with additional devices, such as a place to place blades and brushes for cleaning the grill. Such ready-made barbecue maintenance kits can also be purchased in specialized stores. However, a place to accommodate these tools with convenient access to them must also be provided at the initial design stage.
Selection of bricks and mortar for barbecue construction
The body of the barbecue oven itself, as already written, should be built from solid refractory red brick. In addition, facing bricks can also be used during the construction process - they are used for decorative finishing of external surfaces.
If you use two types of bricks, then for masonry you will need two types of mortar. Clay-sand mortar is used for fixing refractory bricks, and ordinary sand-cement mortar is used for fixing facing bricks.
Clay mortar for refractory bricks is produced using the following technology. It is based on a red wedge, which is soaked in water for five days before mixing. After soaking, the solution is thoroughly mixed, the consistency of which should resemble jelly. After this, sifted construction sand and approximately 10 percent of cement are added to the solution.
Let's start construction
If you are serious about building a structure such as a brick barbecue with your own hands, be prepared for several stages of work.
In particular, when building such complexes for cooking food in the open air, you must be able to do the following work:
- prepare a solution;
- do brickwork;
- pour the foundation;
- carry out the necessary finishing work.
Below we describe in detail how to perform this or that stage of the work. Read the recommendations carefully, then you will not have any problems with building an outdoor stove.
64bdc64c32e58b2e9314db29c57e048c.jpe
d10c2042c62d67cc5166c7bccf411693.jpe
952789c4b726cae0aaac324df7367461.jpe
Features of pouring the foundation
Since a brick barbecue can still rightfully be considered a capital structure, it will require a full foundation. The best option in this case would be a strip foundation, which is characterized by ease of pouring and relatively low production costs.
Pouring the foundation for a barbecue
The instructions for pouring a strip foundation provide for the following work:
- marking (the best way to do it is to hammer in the pegs and pull the string);
- prepare a trench up to thirty centimeters deep, but not less than twenty centimeters;
- pour a layer of gravel onto the bottom of the trench, which is well wetted with water and compacted;
- a foundation mesh or any old metal products that you no longer need are laid on top (crowbars, elements of a steel fence, etc.);
- formwork is prepared from boards, which should rise above the trench by about ten to twenty centimeters;
- after this, you can fill in the solution, for the preparation of which three parts of sand and one part of M300 cement are used;
- be sure to monitor the level of the foundation being poured - it must be the same.
How to choose a brick and prepare mortar for laying it
You can start laying on the fifth day after pouring the foundation. Many people are interested in how much brick is needed to build a barbecue on a summer cottage. The answer to this question will be given to you by the project according to which the furnace will be built.
If we talk about what kind of material to select, it should be noted that ordinary building bricks are not entirely suitable for these purposes.
You will need the following type of building material:
- facing;
- refractory.
There will be no problems in choosing the first one - it all depends on personal preferences, as well as what kind of stove you want to see. To create the base, double silicate brick m 150 is suitable, with which the lower rows are laid out.
Basic preparation for the oven
But regarding fireproof, we note that it comes in several types:
- carbon;
- basic;
- quartz;
- fireclay.
Each of them has its own properties, but fireclay refractory brick, also known as alumina brick, is best suited. It contains clay that can withstand temperature changes, as well as withstand the elevated temperature characteristic of a furnace for a long time.
Features of preparing the solution
For external masonry, standard cement mortar is used, but for laying refractory bricks, it is customary to use clay mortar, which has certain preparation features.
To make it, you need the following ingredients:
- cement m200;
- fine, dry sand, preferably pre-sifted;
- clay.
Preparing such a solution will require some time. For example, clay should be infused in water for about five days. Then mix thoroughly. You may need to add a little more water.
Sand and cement are added to the clay in a ratio of one to ten. As a result, the price of such a solution will be minimal.
We use rubble concrete
Some owners prefer to use rubble concrete for construction. This material will be much cheaper.
- If you decide to build a barbecue from rubble concrete, then know that for the foundation of such a structure you will definitely need formwork, which must be of high quality and reliability.
Attention: It must be covered with roofing felt, it can also be coated with bitumen, because in this way there will be no problems in the future.
- Next, you can lay the first layer of large stones, while knowing for sure that you will be able to carry out this work; do not forget to fill the pores between the stones with crushed stone, because this is an important condition.
- On top of the stones you need to pour cement mortar, which will be properly prepared; several layers are needed, here it all depends on the size of the future structure.
Attention: Each subsequent layer should only be completed when the previous layer is completed, which means you should take these important recommendations into account in any case.
- When the final layer of work comes, you just need to level it, checking the horizontalness; naturally, this can be done with particular ease using a building level.
Concrete foundation
When creating a concrete foundation, you must definitely dig a hole, the dimensions of which you must determine yourself, because again, a lot depends on the size of the future building.
- As soon as this is done, the bottom of the pit must be covered with a small layer of wet sand, then carefully form the formwork.
- The reinforcement must be carefully placed at the bottom of the pit, pouring a mixture of concrete, all work must be done carefully.
- If you make concrete yourself, then you need to fill the hole with crushed stone and then pour it with a solution of sand and cement. It should be liquid enough to shed all the pores. There should be no air left.
- When the foundation is completely dry, you need to make the necessary waterproofing; for this it is best to use a special polyethylene film.
- Increasingly, to carry out such work, people choose a concrete foundation, but at the same time you must understand that everything depends only on your decision, so decide for yourself what you should do. It is quite possible to make a block one, only its price will be much higher.
Attention: The size of the foundation must exceed the dimensions of the structure by at least ten cm. Then the stability of the barbecue will be much higher.
Types of bricks
Ceramic brick
made from baked clay, it has high strength, thermal conductivity, frost resistance and water resistance. Thanks to these properties, ceramic brick holds a high position among the variety of masonry materials. Ceramic bricks can be used for laying channels and chimneys in barbecues. And Vitebsk ceramic brick can also be used to build a barbecue firebox (barbecue).
Hollow brick
, also slotted and facing, is a brick with through holes, which can be round, oval, rectangular or square. Oval and round voids significantly reduce the formation of cracks during brick production. Also, voids make up a significant part of the volume and therefore less raw materials are required to produce such bricks than to produce solid bricks. Well, closed volumes of dry air increase the heat-insulating properties of the material, but only in this case, the masonry mortar must be thick enough so as not to fill the holes. This brick is not suitable for laying barbecues in places where there is contact with fire.
Solid brick
used for laying stoves, barbecues, fireplaces and chimneys. It can be embossed, in which case its use will be necessary in places requiring plastering (walls, partitions), because such a brick provides good adhesion to the plaster mortar. Solid bricks can be produced with technological voids in order to relieve internal stress during firing, which significantly reduces the number of cracks. Well, since solid bricks are generally produced without voids and with low porosity, its water absorption will be low to 8%, and its calorific value will be high. In cases where such bricks are used, additional insulation may be required. If we talk about the construction of a barbecue, then it is solid brick that needs to be used so that the structure is durable and not subject to destruction.
Clinker brick
has unique physicochemical properties. This brick has very low water absorption, which provides it with a high level of operational and decorative properties. The material can be used in aggressive environments, both for finishing and cladding. It has a rough texture that ranges in color from light yellow to dark brown. There are about a hundred shades developed by adding various additives to the raw materials. The main raw material for the production of clinker bricks is a special type of clay (lean clay), and mineral additives from igneous rocks are used as a charge. Solid clinker brick, well suited for laying barbecues in places such as ducts and chimneys.
Pressed (silicate) brick
is one of the most budget options for choosing bricks. Pressed brick has good compatibility with any type of masonry mortar; pressed brick also has high sound insulation. But qualities such as high moisture absorption and low thermal conductivity and fire resistance do not allow this brick to be used for laying stoves and barbecues.
af3f48d82b0f56ee074a49cca009da9b.jpe
01cfd8924e127f00a69e2d2e764eadbd.pic e3cc4f6b648109c2203905171e6434cb.jpe
Installation sequence
A brick barbecue is a fairly heavy structure, so on soft ground it needs a solid foundation. The best option is a concrete-crushed stone fill, reinforced with a wire frame.
- As anti-capillary waterproofing, you can use several layers of rolled bitumen-polymer material such as euroroofing felt.
- The new foundation will take 5-7 days to harden, after which masonry and installation work can begin. To lay bricks at the base of the barbecue, standard concrete mortar is used.
- The firebox of the structure is laid out on a solution of fireclay clay, which is also known as kaolin. Another option is heat-resistant cement, but this material is very rare on sale.
- An alternative to special masonry compositions is a sand-clay solution, which, after the first roasting, is sintered into a fairly strong and heat-resistant conglomerate.
The design of the barbecue provides the possibility of decorating with forged metal, plaster or tiled finishing. Grills lined with natural stone or facade tiles look great.
Exterior decor should fit organically into the local area and landscape design of the site. In all respects, the costs of arranging a lightweight and fireproof canopy that protects the barbecue from precipitation are justified.
Main preparatory stages
To build a brick barbecue for a summer residence, it is necessary to carry out certain preparatory work. The quality of the future furnace depends on how correctly they are carried out.
Photo of a simple barbecue
First - the construction site
First of all, it is necessary to take into account fire safety requirements. Because during cooking, unextinguished sparks may fly out of the chimney and land on flammable objects. It is also necessary to consider which direction the wind most often blows.
In this case, a barbecue for a brick cottage should be located near the main buildings:
- Houses;
- gazebos where you can eat all the food cooked on the fire;
- baths, etc.
It is necessary to provide a convenient approach to the barbecue, and pave the area around it with hard materials.
It is recommended to immediately provide for the possibility of constructing a roof, which will not only allow you to cook food in the rain, but will also protect the stove and extend its service life. (see also the article Available projects of brick gazebos with barbecue for free - a detailed description of the construction process)
Barbecue in the form of a Russian oven
Variety of projects
Before starting construction, you should decide on the design of the future furnace. Of course, there is nothing complicated about this. Firstly, there are many projects in the public domain. Secondly, if the dimensions of a brick barbecue are small, and the stove itself does not include any frills in its design, then the project is easy to do yourself. (see also the article Brick barbecues: projects and stages of construction)
When creating a drawing, the following indicators must be taken into account:
- size;
- design features;
- the presence of additional elements (roof, food stand, dishes, etc.);
- personal preferences.
If you don’t want to pore over the project yourself, but the options presented on the Internet do not suit you, you can contact a specialized company.
Of course, in this case, you will have to pay for the creation of the project, but all your preferences will be taken into account, and the stove itself will be original and exclusive. For example, it could be a brick corner barbecue.
What building materials will be needed
Once the project has been selected, proceed to the selection of building materials.
In particular, you will need:
- two types of bricks; cement, sand and clay;
- mesh to strengthen the foundation;
- material for waterproofing (roofing felt or roofing felt).
A little clarification should be made, since a barbecue brick must be not only ordinary clinker, but also fireproof. It is the second type that is lined inside the oven.
Beautiful barbecue oven project
You should also select equipment for arranging the furnace itself, including:
- grill;
- coal tray;
- chimney valve;
- tabletop.
It is imperative to provide for where the firewood will be stored, as well as other items and materials used in cooking. For example, why not provide several small shelves at the end?
How to set up a grill
The main element of a garden stove is the grill.
So, barbecue grills are installed as follows:
- at a height of about seventy centimeters from the ground, which corresponds to approximately eight rows of bricks;
- match the height of the person who will be cooking.
Today, in retail outlets it is easy to easily purchase everything you need to set up a barbecue inside the oven.
In particular, such sets include the following components:
- pallets;
- necessary fastenings;
- reliable, fire-resistant grille.
Parameters and drawings
The drawings are drawn in such a way as to reflect the parameters and exact position of each individual component of the planned barbecue.
An outdoor brick grill, as a rule, has a structure divided into two horizontal sides. In the lower part there is a place for storing firewood and coals, in the upper part there is a grill and a brazier itself.
If additional surfaces are needed, their convenient and safe operation must be thought out.
The drawings must contain a projection of the finished model reflecting the exact proportions. This way you can clearly evaluate the appearance and ergonomics of your barbecue.
An example of a simple design circuit:
Typically, the standard height of a grill is 90 cm. When working on your project, the height can be adjusted to suit your height.
The width of the roasting pan must be at least 50 cm. The width of the working surface must be such that it can be convenient to cut food, place dishes and prepared dishes. At the design stage it is also important to take into account the parameters of the materials used.
In addition to bricks, when working outdoors you will need:
- cement-clay composition,
- concrete,
- reinforcement bars,
- metal corners,
- cast iron fittings.
Then comes the preparation of the construction zone. All dirt and debris are removed. It is carefully leveled. Markings and supports are made.
Finishing work and decoration of the stove
A brick oven built with your own hands should look beautiful and neat. It is with such a design that it will be pleasant to work and relax next to it. It is better to lay out the floor around the stove with beautiful decorative tiles. Stone is usually used to decorate countertops and other horizontal surfaces.
fb827e9515b946d65b0797939cfbfc06.jpe
Did you know? On the island of Lanzarote (Canary Islands) there is a restaurant called El Diablo, where visitors are offered to try dishes prepared over the mouth of an active volcano.
The marble finish looks very nice. When the stove is completely ready, it should be allowed to dry for 4-5 days, and then a test fire should be carried out with a small consumption of firewood (2-3 kg). The stove must be lit with the windows and doors in the gazebo open.
So, if space and possibilities allow, then at your summer cottage you can build a gazebo with a stove for cooking over an open fire. This is not difficult to do. It is enough to purchase the necessary materials, prepare tools and use the above recommendations and masonry schemes.
Best Steel Charcoal BBQ Grills
Weber One-Touch Original 57 cm
The grill is a steel ball with a diameter of 57 cm, mounted on a triangular stand with a pair of wheels. Handles are provided for moving and safely opening the lid. A grille is installed in the housing. There is a damper to regulate the temperature, the change of which can be monitored using a stationary thermometer. The ash is removed in a non-contact manner by pouring it onto a plate intended for it.
Main characteristics:
- dimensions 101x65x57 cm;
- weight 13 kg.
Watch the product video
Pros of Weber One-Touch Original 57 cm
- Compact sizes.
- The spherical shape reduces heat loss.
- Cold handles with protective screens.
- Convenient One-Touch bowl cleaning system.
- The set includes a basket for carrying briquetted coal.
- 10 years warranty.
Cons of Weber One-Touch Original 57 cm
- Expensive additional accessories.
- Over time, rust appears on the metal.
Weber Compact Kettle 57 cm
A small spherical grill is mounted on a high support with wheels. The body and lid are made of heat-resistant steel coated with ceramic enamel. The meat grid does not rust and is easy to clean thanks to multi-layer chrome plating. The heat level can be adjusted with aluminum dampers. Fiberglass-reinforced nylon body handles and lids are shielded and won't burn your skin. A container is provided for storing and carrying coal.
Main characteristics:
- dimensions 97x66x58 cm;
- weight 12.2 kg.
Watch the product video
Pros of Weber Compact Kettle 57 cm
- Compactness.
- Prefabricated structure. Can be transported in a passenger car.
- Comfortable height.
- Economical fuel consumption.
- Always cold hands.
Cons of Weber Compact Kettle 57 cm
- Over time, the temperature melts the threads of the bolts and difficulties arise with disassembly and assembly.
- Weak legs.
Conclusion. Convenient grill for cooking for a small company. You can take it with you outdoors. It requires very little coal for lighting and retains heat for a long time.
Weber Go Anywhere, 43x31x41 cm
A camping version of a charcoal grill looks like a traveling bag. It consists of a rectangular body with a lid. The heat level can be adjusted using rotary flaps. Bent legs made of thick steel wire are attached to the bottom. The set includes two types of grates (for fuel and food), a stew pan and a coal storage container. The lid handle is made of heat-resistant nylon and does not heat up thanks to the protective screen.
Main characteristics:
- dimensions 43x31x41 cm;
- weight 6 kg.
Watch the product video
Pros Weber Go Anywhere, 43x31x41 cm
- Light weight and compact dimensions.
- Mobility.
- Convenient shape.
- Possibility of cooking meat and vegetables.
- High-quality metal protected by heat-resistant enamel.
- Easy to clean.
- It retains heat for a long time, which can be adjusted using dampers.
Cons Weber Go Anywhere, 43x31x41 cm
- You can prepare a dish for only a small company at a time.
- Low and unreliable legs.
- There are no side handles for carrying.
- Over time, the gratings begin to bend.
Conclusion. This grill is good for outdoor trips with a small group. Occupies a minimum of space and is quickly brought into working condition. For home use it is small and not so convenient, but it can be used.
Go Garden Weekend 54 Comfort
Inexpensive, functional model, consists of a rectangular body with rounded edges, a hinged lid and a stable support with two rollers. There is a main grill for cooking and an additional shelf for sorting or heating food in a gentle mode. The degree of heating can be adjusted using the damper. A folding cutting board made of heat-resistant plastic serves as a convenient stand for dishes and is easy to clean.
Main characteristics:
- dimensions 84x93x55.5 cm;
- weight 7.6 kg.
Pros of Go Garden Weekend 54 Comfort
- Thoughtful design.
- Ease of cooking and cleaning.
- The grill is roomy enough to simultaneously cook a couple of dishes for an average crowd.
- Low price.
Cons of Go Garden Weekend 54 Comfort
- Over time, the housing begins to deform due to temperature. Gaps appear at the point of contact with the cover.
- Poor corrosion protection.
Conclusion. The manufacturer worked carefully to create a functional design, but decided to save on materials. The model turned out to be convenient. There is no need to count on a long service life during intensive use. You can buy it for your dacha to sometimes diversify your diet and be able to surprise your guests with delicious food.
Preparing for construction
To begin, cover the hardened concrete slab with 2 layers of roofing felt to ensure waterproofing of the brick structure. Assemble the standard set of stove-maker tools shown in the photo: trowels, brushes, measuring devices, and so on.
You can make the mortar for a backyard barbecue oven yourself or buy a ready-made building mixture. In the first case, proceed in this order:
- Soak the clay, as free of soil as possible, in a trough with water for 1-2 days.
- Pass the clay solution through a sieve, separating the pebbles and kneading the lumps.
- Sift the sand and mix with liquid clay in a ratio of approximately 1:1.
- Before laying, add cement in the amount of 200-300 grams per bucket.
The finished solution should not stick too much to the trowel, and when squeezed by hand, give a minimum of cracks. To achieve better properties, experiment with the proportions of sand and clay.
The simplest grill
The simplest brick barbecue can be built with your own hands even without a foundation and mortar. An example is this small barbecue, which can be called a small barbecue complex.
However, this is more of a trial option that will show whether the design suits you, whether it is comfortable, or whether improvements need to be made.
Barbecue grill - minimalistic design
One of the simple and convenient barbecues, which have several varieties, is the U-shaped kebab grill. Its standard size is 3 bricks deep, 4-7 rows wide.
At the level of the expected bottom of the firebox, an overlap or ledge is made for installing a brazier in the form of a box or metal sheet. The installation height is usually determined by the size from the ground to the wrist and is 85-100 cm.
The protrusions, located every 2-3 rows, are designed to place grates on which food will be cooked: on the bottom - meat, on the top - vegetables.
Anyone who gets down to business can build this brick kebab maker with their own hands. This version of a homemade barbecue grill is usually the first in the stove practice of a beginner.
The structure with a floor on which the roaster is built requires more time.
Outdoor barbecue
Overlapping can be done in several ways:
build formwork and pour a concrete slab;
drill holes in the bricks and pass a pin through them, resting on the side walls of the structure;
lay metal corners, strips or rods on the side walls on which the brick will rest.
Example of a jumper
Above the ceiling you can place either an open, U-shaped or closed roasting pan.
The somewhat improved design has an W-shaped section, thanks to which the barbecue has a table on which it is convenient to place dishes, spices, and food. In its place a stove for a cauldron can also be placed.
How to build a simple grill with a table: order and photo:
Construction of a simple barbecue grill with a cutting table
Street with a cauldron
If the menu is not limited to dishes cooked over coals, you should think about building a barbecue combined with a stove for a cauldron. The grill and cauldron make the range of prepared dishes almost unlimited. And in the fresh air they are much tastier not only to eat, but also to cook.
A simple outdoor barbecue grill with a stove under a cauldron is based on an W-shaped design, the difference from the previous one is that the stove is placed in place of the table. The oven will need a grate, a door and a cover with rings.
The work algorithm is shown in the photo.
We are building a barbecue complex with a hob
Any home craftsman who knows how to work with brick can make an outdoor barbecue oven in his dacha. The purpose of this article is to help the homeowner correctly build a garden stove with his own hands, using a ready-made project with instructions. For convenience, we provide some drawings and examples of masonry.
To build an outdoor stove on a summer cottage, we propose to implement the project shown in the photo. Let us list the technical features of the structure:
- 2 workplaces capable of functioning simultaneously - barbecue and hob;
- overall dimensions in plan – 1660 x 1020 mm, height – 3220 mm (including the chimney with the cap);
- the collection of flue gases from both fireboxes is organized into one pipe;
- the design is simplified as much as possible - instead of the arched arch of the firebox used in the Russian stove, there is a direct ceiling on a metal frame;
- under the kebab grill there is a niche for storing and drying firewood;
- the chimney is equipped with a closed brick cap, which prevents precipitation from entering the flue.
At first glance, the design of a universal barbecue stove seems complicated, but in reality it is quite simple to implement. It is better to place the structure under a canopy or inside a gazebo so that the masonry is not washed by rain and lasts longer.
Before starting construction, a platform measuring 176 x 112 cm must be provided on the veranda (a margin of 50 mm on each side of the stove body). Make sure that the chimney pipe does not coincide with the load-bearing roof beams, otherwise the roof will have to be redone. Reference. There is a simpler solution - build a barbecue outside in the form of a corner fireplace in which you can fry kebabs
Choosing a barbecue project
The first step is to think about the barbecue project and make a drawing. In principle, if you are planning a simple barbecue, then you can do it yourself, but if there is a more serious design, then it is better to order from specialists or select a ready-made project.
Simple barbecue A schematic drawing is developed unique for each occasion, according to your preferences and wishes.
There are many companies that create drawings - their experience will be useful to you for calculating the parameters of the future design. The drawings will also help you assess the quantity and quality of the materials needed.
If the drawing of the barbecue oven is ready, then you can safely go to the store for building materials, the main one of which will be brick; it is its choice that must be approached with the greatest responsibility.
Preparing material for barbecue
The most common materials will be required, without which no construction can be completed.
- Brick (refractory and clinker will be required).
- Materials for mortars (cement, sand, clay).
- Boards for formwork.
- Reinforcement or mesh for foundation construction.
- Ruberoid for waterproofing.
- Board for the countertop (if planned).
- Grill (grid).
- Coal tray.
- Pipe (for the installation of a chimney, which can be made using a pipe or brick).
- Gate valve for brick pipe.
A few words about barbecue oven models
The oven presented above is far from the only barbecue option on the site; you can use these instructions as a basis and develop your own model.
Here are some of the most popular designs:
| Image | General characteristics |
| Fireplace. Convenient small design designed exclusively for barbecuing. A small countertop around the perimeter of the base of the fireplace will be a good help. | |
| Complex: cauldron, grill and smokehouse. The central element of this complex is a smokehouse for hot smoking. The cauldron is built into the countertop, and the fireplace under the barbecue simultaneously acts as a barbecue. | |
| Stove with fireplace and sink. There is no barbecue here; instead, stands for skewers are made in the fireplace. A countertop with a sink and convenient cabinets for dishes turns the barbecue into a full-fledged kitchen. But the stove is not installed very conveniently; it is located too far from the work table and the owners will have to make too many unnecessary movements. | |
| Metal stove. A compact mobile barbecue oven made of metal is very convenient, the quality of cooking in such ovens is quite high, and the main advantage is that the structure can be easily removed if necessary. In addition, in terms of cost, such barbecues are several times cheaper than brick ones. | |
| Light brick oven. The easiest brick oven to make. Under such a structure there is no need to pour a powerful foundation slab. You can build this stove with your own hands right on the asphalt in your yard in one weekend. | |
| Corner stove. Perhaps the most convenient design, it follows the principle of the golden triangle, when the distance between key sectors does not exceed 2.5 m. The stove on the frying surface of the oven is also convenient because it has round removable rings, after removing which you can insert a cauldron into it. |
Design
1. Fryer (bowl) – for burning fuel.
The main component, the size of which determines the operating time without adding fuel. There are holes at the bottom for air to enter during the combustion process.
By form:
- rounded;
- rectangular.
2. Grid – for placing food.
Dimensions affect the number of servings prepared at the same time.
By form:
- round – for universal use;
- square - for barbecue.
To prepare different dishes at home, fixation is provided in several positions:
- low – for steaks;
- medium – for meat and kebab;
- high – for vegetables in foil.
3. Stand – for a stable position that ensures safe use.
4. Lid – for uniform heating of food with reduced cooking time, which leads to fuel savings.
5. Temperature sensor in the form of a thermometer with a sensitive element placed inside the bowl - to control the cooking process and reduce the risk of getting undercooked meat or raw vegetables.
6. Baking trays – for making pizza.
7. Double racks – for baking vegetables.
8. Tongs – for turning fried pieces of meat, fish, sausage or frankfurters.
9. Spatulas or brush - for cleaning the bowl from ash or ash.
Difference from barbecue
Despite the similar principles of operation, a barbecue differs from a conventional barbecue in the use of a grate rather than skewers.
In addition, a fryer with a lid is used, which allows you to effectively maintain the desired temperature during the cooking process, ensuring uniform heat treatment of products on all sides. As a result, the meat can not be cut into pieces, but baked into large steaks.
Fire brick
Fireproof (fireclay) brick
used in places where high temperatures are present, these can be: fireplaces, stoves, chimneys and other types of heating structures.
A simple red or ceramic brick will not last long in such conditions; it cannot withstand high temperatures and can begin to melt at temperatures above 1200 degrees Celsius. Due to the regular cycle of heating and cooling, this brick crumbles, which subsequently leads to its complete destruction. In such conditions, where there are high temperatures and regular cycle changes, fire bricks
will be the best choice.
It is made from fireclay refractory clay
, which is the main component in its production.
In appearance, fire brick
almost no different from simple red brick, but it can easily withstand temperatures above 1350 degrees.
The ability to withstand high temperatures is explained by the fact that refractory brick consists of 70% fired fireclay clay and 30% graphite or coke powder (these components are binders, they are added so that the brick does not crack during firing.) The weight of refractory fireclay brick is 3 .4 kg. scope of application - furnaces, chimneys, simple home stoves, fireplaces and even combustion chambers for oil and gases in the production of glass, porcelain and steel. Refractory brick
can withstand high temperatures for a long time and has a high heat capacity, thanks to which it is able to transfer heat to the room for a long time after the end of the fire.
Refractory bricks are divided into subtypes: basic, carbon, quartz and alumina. Two of these subtypes - carbon and basic - are used in steel production.
- The main one
is that a lime-magnesia base is used for its production; this type of refractory brick is used for the production of Bessemer steel. - Carbon
is the main material for constructing blast furnaces. - Quartz
- This brick is primarily composed of quartz and sandstone and does not involve contact with anything other than metal and fire. In particular, quartz brick has poor contact with various alkalis. - Alumina
- the temperature range of application of this type of brick is 1000 - 1300 degrees Celsius. It tolerates repeated sudden changes in temperature well. Convenient for use in household stoves; most household fireboxes are made from this brick.
How to check the quality of a brick?
Photo 3. The master lays out the walls of the barbecue oven, row by row.
Lightly tapping the surface of the brick with the handle of a trowel helps to lay it more densely. You can use the following methods to select quality materials :
- By chipping - one unit of product is bought, split into two and examined. The mass from the inside should be homogeneous, without pieces of clay or other inclusions. Such phenomena indicate a violation of production technology;
- In appearance - with smooth edges and dimensions not exceeding the standard by 2 mm;
Attention! A mica-like film on the surface indicates an inability to withstand sudden temperature changes.
- To the ear - a clear metallic sound after being hit with a hammer indicates a high-quality product, a deaf sound - cheap raw materials, poor drying and hardening. After the hearing test, there should be no dents or chips left on the surface.
All these methods will help you choose which barbecue brick to use from the supplies you already have.

