The barn is the first and most necessary thing to begin with in the development of a plot of land. At first it will be a shelter from the weather, a workshop and a sleeping quarters. And then he will take on his main responsibilities of storing gardening tools, crops and household supplies. Perhaps it will also accept domestic animals.
Building a shed with your own hands is not God knows what kind of science, that’s what this article is about. It is much more difficult to immediately position it correctly, taking into account the prospects for your own development and the layout of neighboring plots. The barn is a source of pollution. If initially there were no plans for mice in it, then where is the guarantee that over time chickens, or even a bull, will not appear there? In modern dense buildings, it is difficult to meet sanitary standards, especially considering the future. You may have to build a mobile shed in the fall (see below), and in the spring put it where you need it forever: it’s not so easy to guess right away so that it doesn’t turn out to be an eyesore later.
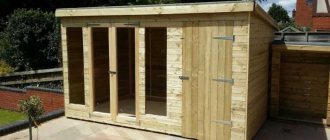
An example of the location of a shed on a site
Take a look at fig. How much is there! An earthly paradise, and that’s all, not a manor. Now take the scale: standard 12 acres and a house of 120 square meters in plan, 80 residential. Having acquired land, they argued all winter about where to start, where to put things. The family's income is average; There was no way to settle down for our own without selling future agricultural products. It was assumed that within 3 years there would be only a barn on the building site, so it had to be built cheaply, but thoroughly. The garage was moved to the far corner and estimates for the road to it were made reluctantly, but there was no other way to fit a garbage dump with a cesspool into sanitary standards, and also ensure access for a garbage truck to the tank and a sanitation tank to the septic tank.
Since the construction was carried out for themselves, they decided to protect themselves from infection not only formally, but also in essence, for which purpose they planted a walnut over the utility yard with the barn. This tree exudes a lot of phytoncides, so nothing really grows under it or around it, but there are no flies and rats either; In addition, in summer it provides excellent shade. Near Lipetsk, the nut had to be nursed for a long time, but in the 8th year it still produced a harvest, by which time the arrangement was completed. This is what they noted in the gazebo by the pond, taking a sip of what they were supposed to have from the cellar; The cellar next to the recreation area came in very handy. And it all started with a barn...
Site selection and site planning
The building can be connected to an existing bathhouse or garage, or installed separately. Basic requirements when choosing a site on the site:
- the structure should be conveniently located in relation to the house and other outbuildings;
- do not occupy the area for designated gardening plantings;
- fit harmoniously into the complex of surrounding outbuildings;
- comply with fire and sanitary safety standards.
The owner can resolve the first 3 points independently. But according to the requirements of urban planning and sanitary standards, there are certain restrictions. If you plan to keep poultry or small pets in the barn, you need to retreat:
- from the neighboring property at least 4 m;
- from a residential building at a distance of 15 m;
- from the drinking water well 30-50 m.
The place should be elevated enough so as not to be flooded by melt or rainwater. To protect the area from winds, you can place the shed on the windward side.
The structure should not interfere with neighbors and block access to sunlight to their site. Otherwise, they can file a complaint, and the court will force the building to be demolished or moved to another location.
Choosing a roof
What kind of roof to cover the barn: two- or one-pitched? The first has an exclusively aesthetic advantage. There is always a miasma in the barn. Let's be honest, work clothes are not washed every day. And not even every week. But sweet apples and boiled potatoes emit ethylene, which is far from harmless and safe in high concentrations. There is no need to talk about pig chickens.
Ventilation of sheds with single and gable roofs
A pitched roof will provide effective ventilation without any additional measures, on the left in Fig. Suddenly the wind blows into your forehead, the visor becomes an air intake and squeezes unnecessary fumes into the cracks. And under the gable roof they will swirl for quite a long time before leaving through the drag window on the right there. In addition, a pitched roof is much simpler and cheaper. Therefore, it is highly advisable to build a lean-to barn. The exception is if there is a hayloft in his attic.
Selection of technology and materials
When building a barn with your own hands, budget options are considered first of all:
- frame technology;
- from concrete blocks.
Frame barn
This technology allows you to build a structure in just a few days. The wooden frame is installed on a prepared base, filled with insulation, and sheathed with finishing materials.
Advantages:
- the lightweight structure does not require a powerful foundation; it is enough to build a pile or columnar foundation;
- walls are erected quickly, there is no need to wait for the mortar to gain strength;
- you can decorate the building with any decorative materials to your liking, for example, timber, brick or stone siding;
- When the joints are properly made, heat is well retained inside the room.
A frame shed is an economical and quickly erected structure. The disadvantage is low fire safety, since the structures contain wood.
Important. To avoid rapid fire, it is recommended to treat the wood with fire retardants and use non-flammable insulation materials such as mineral wool. In the case of thermal insulation made of moderately flammable polystyrene foam, decorate the walls with materials that do not support combustion.
The frame is often sheathed with oriented strand board, a practical and affordable material made from wood chips and polymer resins. An OSB shed without insulation can be used for storing tools or temporarily housing animals during the warm season. If you add additional thermal insulation, the room is quite suitable for winter use.
OSB is positioned as a moisture-resistant material, but it is not intended for direct exposure to water. The sun's rays, which destroy the polymer glue, are also unfavorable for it. Therefore, there is no need to neglect exterior finishing, for example, painting with waterproof compounds.
Concrete block barn
For the construction of sheds, blocks of foam, expanded clay or slag concrete are often used. Such structures are distinguished by their strength and durability. The thermal conductivity of materials is quite low. A 20 cm thick block replaces 40-50 cm of brickwork, so the room can be used in winter.
To build a shed from concrete blocks, a solid foundation is required. Most often this is a shallow-depth tape structure with reinforcement. The walls are laid with bandaged seams.
Important. Due to the insufficient frost resistance and high moisture absorption of porous blocks, exterior finishing is desirable.
Advantages and disadvantages of wood frame construction
The construction of a frame outbuilding from wooden blocks has a number of advantages:
- In specialized construction stores you can purchase ready-made parts for assembling the frame structure of a shed.
- It is not difficult to build such a structure yourself, since the assembly of parts occurs according to the principle of a designer. To do this, it is not necessary to have special knowledge in construction. All elements and connections of the frame are adjusted to size, and the presence of instructions will make the construction process easier.
- A frame wooden shed will last for many years if it is properly cared for and all rules were followed during its construction.
- The construction of the structure will not take much time. Usually one week is enough to build the entire shed. This time includes: installation of the foundation, assembly of all frame elements, wall cladding, insertion of doors and windows, roofing.
- Wooden parts of the structure are easy to further process.
- When building a shed with a pitched roof, there is no need to install a rafter system.
- The frame structure of a shed can be easily dismantled and rebuilt in another location. In this case, we are talking about light buildings, without a foundation.
- The cost of purchasing materials for such a structure is much less than, for example, a brick one. Many are of the opinion that wooden structures are short-lived and unreliable. However, if you take into account the service life of these parts and the money spent on materials, then this option is much more profitable.
The disadvantages of this design are as follows:
- Wooden elements are flammable material.
- Frame parts may be subject to rotting and damage from wood-boring insects. To prevent this from happening, all wooden elements must be additionally treated with antiseptic pastes, organic solutions or oily antiseptics.
- Wood, depending on its moisture content, tends to dry out, swell, warp and crack over time.
Drawings and diagrams of sheds
A barn is a capital structure, so the drawing is the basic basis for both the calculation of materials and for further construction. When compiling, it is important to take into account, in addition to your wishes, the sizes of blocks, sheets, and measured products, so that during construction there will be as little scraps and waste as possible.
The drawing must be drawn up in several projections, preferably all 4 facades, if there are any differences. Indicate the dimensions of the building along the axes, height, opening dimensions, and wall thickness. Indicate the layout of the main structural elements and other technical details. You can use a diagram from the Internet and then work it out in detail.
The layout can be quite simple. If there are rooms for different purposes under one roof, they need to be separated by partitions. It is advisable to arrange at least one window. This is especially important for raising animals, since sunlight has a beneficial effect on their behavior.
Examples of drawings:
Made
A ready-to-assemble set of frame elements, fasteners, seals and panels (SIP, sandwich, plastic). Can be assembled independently according to instructions or by hired specialists.
This model is durable, quickly erected, and does not require additional finishing inside or outside. The cost of construction will be higher than a block one, but less than a brick shed.
When purchasing a model with plastic panels, you should check whether insulation is included in the package.
DIY shed - step by step guide
Before building a shed, prepare the site with your own hands:
- clear away debris;
- cut down bushes, remove roots and vegetation;
- level the ground.
Lumber, cement, insulation and anything that is afraid of moisture should be stored under a canopy or at least light shelter from the rain should be provided. The concrete mixer, tools, stepladders and other equipment are also stored under a canopy.
Important. Before you start building a shed with your own hands, you need to ensure safe conditions. The power tool must be connected to the mains through a socket with a grounding circuit and protection against water ingress. It is necessary to limit access to electrical equipment for children and animals.
As a result, about the economic feasibility of building a turnkey barn
If you have no experience in construction work or simply don’t have enough time to build a shed, then this is what you need. When signing the contract, your only task will be to choose a suitable design, and the rest will be done by the construction company’s specialists. This means that you don’t have to worry about where to get tools, how and when to purchase building materials, look for workers and make sure they do their job correctly.
Construction company specialists will prepare a standard or custom project and build a country shed. In addition, they will be able to carry out complete interior finishing and equip with shelves and racks. As a result, within a few days you get a good-quality building with a conveniently organized space.
For examples of beautiful outbuilding projects, watch the video:
Having figured out how much it costs to build a shed, you can come to the conclusion that the costs of high-quality construction for a suburban area can hardly be called cheap, but if the work is done professionally, the investment will more than pay off. A convenient utility room will serve not only the owner himself, but also his grandchildren.
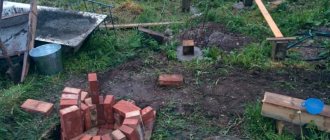
Barn foundation
For light frame sheds, it is advisable to use pile or columnar foundations, for heavier walls made of blocks - shallow-depth strip ones. The design also depends on the type of soil. It is not recommended to build columnar foundations on clayey, heaving soils. Seasonal movements lead to extrusion and distortion of the supports. On peat bogs or very weak soils, piles are preferred.
Marking
The foundation is first marked on the ground. You need to prepare stakes, a long cord, and a tape measure.
A quick and correct breakdown of the structure can be done in the following ways:
- Using a theodolite. Fix the position of the longest wall of the barn and two corner points with a cord and pegs. Then, using a tape measure and a measuring device, determine the corners of the foundation, drive in stakes, and tighten the cord.
- Using the "Egyptian triangle" method. Mark a point on the already stretched cord at a distance of 4 m from the base angle and set aside 3 m in the perpendicular direction (approximately). There should be exactly 5 m between the points. Correct the position of the second point and fix it with a peg. Further constructions lead from this right angle.
You can check the correctness of the markings along the diagonal of the resulting rectangle or square. Its length is calculated using the Pythagorean theorem.
To more accurately fix the axes of the barn, it is recommended to make cast-offs - temporary devices made of racks and transverse slats, placed outside the pit. A cord is attached to the nails hammered on them, which can be removed before excavation work, and after completion, the contour of the building can be restored again.
Strip foundation
The construction of a monolithic strip foundation includes the following steps:
- digging a trench 50 cm deep and 40 cm wide;
- backfilling of crushed stone-sand cushion to a height of 10-20 cm with layer-by-layer compaction;
- installation of formwork;
- laying waterproofing materials;
- installation of reinforcement frame;
- pouring concrete.
The surface of the foundation is covered with a film to protect it from premature drying. This is especially important in hot weather. You can periodically water the set solution from a watering can or hose. Further work begins after 7-10 days, when the concrete gains initial strength.
You can lay not a monolithic, but a prefabricated strip foundation made of concrete blocks. The material should not contain porous aggregates - expanded clay, slag. They increase water absorption and, as a result, contribute to the rapid destruction of the base.
Columnar
The foundation of free-standing supports is made of clay bricks, concrete blocks, asbestos-cement or PVC pipes with a diameter of 150 mm, railway sleepers or even car tires. The posts are installed in the corners of the building, every 1.2-1.5 m around the perimeter and under the partitions.
Supports made of blocks or bricks are constructed in the following order:
- Dig holes 35-40 cm deep.
- Cover the bottom with a 20 cm layer of sand and compact it.
- Lay out columns with a section of 40x40 cm and a height of 50-60 cm.
- After the solution has hardened, it is treated on all sides with coating waterproofing.
To install columnar foundations from pipes:
- They do it with a hand drill or dig holes to a depth of 70-90 cm.
- Cover the bottom with sand 10 cm thick.
- Waterproofing, for example roofing felt, is placed in the well.
- Install asbestos cement pipes and fix the position.
- Place 3-4 bars of reinforcement inside.
- Filled with concrete.
- After the mixture has hardened, the pit bosoms are backfilled with compaction.
Asbestos-cement or plastic pipes act as formwork. If the soil is not loose, you can pour concrete directly into the prepared well, having previously lined the walls with waterproofing.
Pile
Installation of piles is usually carried out by a specialized organization. Most often, screw metal structures are used, which are screwed in using mechanized equipment or a manual lever device.
After installation, you need to cut off the top of the supports horizontally and pour concrete into the pile cavity with layer-by-layer compaction with a vibrator. Cover the fresh solution with film and let it harden for 5-7 days.
Barn without foundation
A structure for temporary operation can be built without a foundation. The materials used are timber and boards. It's essentially an upside-down wooden box on a frame. The load from it is small, so it is quite possible to save money and do without constructing a full-fledged foundation.
The area of the shed should not exceed 20 m² and the height 2.5 m, since a large structure has a high windage capacity, and without reliable fastening, a strong wind can overturn it. If the soil is clayey, a lot of moisture accumulates in the upper layers during seasonal precipitation. This leads to rapid destruction of wooden structures in contact with the ground. On sandy, permeable soil, buildings without a foundation may well stand for more than one season.
The boards must be treated with antiseptics, this is especially necessary for the lower tier. There is an area of high humidity here, and without protective impregnation the tree will “live” for a very short time.
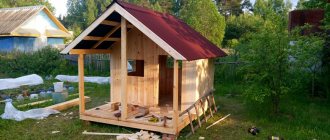
Stages of building a barn without a foundation with your own hands:
- The site is prepared - leveled, compacted, sprinkled with fine crushed stone and sand.
- Corner posts are buried 60-70 cm into the ground.
- The frame is assembled from 50x100 mm timber.
- Sheathed with boards or any finishing materials for exterior use.
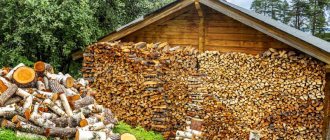
The roof can be made of metal corrugated sheets. It is lightweight and will not create additional load on the walls or soil. An economical shed for storing equipment or firewood is ready.
Cellular concrete blocks
These include blocks made of foam concrete, foam silicates, gas silicates, aerated concrete, aerated cellular concrete. Construction from such materials will not require large financial and time expenditures.
Foam concrete. The porous structure provides good thermal insulation, the light weight allows you to get by with the simplest foundation, and the large size of the blocks compared to brick significantly reduces construction time. Vapor permeability helps create a favorable microclimate inside the building. The material is fire-resistant, moisture-resistant, not susceptible to rodents, and is not susceptible to rotting or mold.
Disadvantages: fragile when transporting individual blocks and during the construction process, prone to shrinkage and cracking. Damaged blocks are able to accumulate and retain moisture, which leads to their destruction at temperatures below freezing water. If the aesthetic appearance of the barn is important, finishing and cladding will be required.
Aerated concrete has a more attractive appearance, correct geometry and strength; exterior finishing is not necessary. The price is slightly higher than that of foam concrete. Otherwise, the characteristics are the same as the previous material, however, it absorbs water more easily and quickly collapses without good moisture insulation.
Gas and foam silicate blocks are endowed with the same advantages and disadvantages with even less resistance to water. Ordinary plaster can serve as finishing and protection for such blocks.
Arbolite or wood concrete does not have a clear block geometry. It has the same advantages as cellular concrete, but is less resistant to external factors. A barn made of this material will require mandatory exterior finishing.
Construction of a barn frame step by step: detailed instructions
The frame is a structure made up of racks, upper and lower beams, lintels, and inclined jibs. Installation can be done in 2 ways:
- connecting all elements in series;
- using the “platform” method, fastening parts into large sections on the horizontal surface of the subfloor.
For the frame, timber 150x100 mm and dry planed board 150x50 m are prepared. All lumber must be treated with antiseptics and fire retardants.
Fasteners - galvanized screws, nails, bolts, plates, staples. Additionally, you can use wood glue.
Do-it-yourself frame shed, according to step-by-step instructions, is installed in the following order:
- The bottom trim beam is laid on the waterproofing layer along the foundation. Secure with anchors, studs or bolts.
- Install floor joists.
- Starting from the corner, racks are installed in increments of 60 cm, and fastened along the top with a strapping beam.
- The openings are reinforced with boards laid on edge.
- The frame is reinforced with jibs made of boards or perforated steel strips with inserts into the lower and upper horizontal beams.
- The structure is sheathed with finishing materials, windows and doors are installed.
- If necessary, install wooden floors or a concrete screed on the ground, install communications, and carry out interior finishing.
If you use OSB or multi-layer plywood to cover a frame shed with your own hands, jib bars are not required, since rigid sheets give the frame stability. The facing slabs must be staggered with the long side parallel to the foundation.
Let's decide on the purpose of the outbuilding
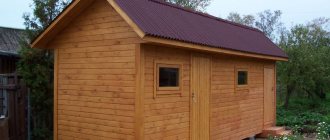
If you study many photos of sheds for a summer cottage or a country house, you can see different shapes and sizes. Therefore they are divided into many categories:
- A building for storing gardening or gardening equipment. Usually this is a simple room made of wood covered with slate with an area of 6-12 square meters;
- The multifunctional version is designed for storage, used as a gazebo and offers access to the cellar through the interior;
- There is a modification for keeping birds, rabbits, pigs with a corner for various useful things;
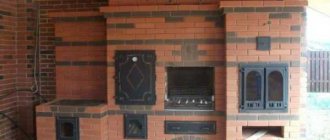
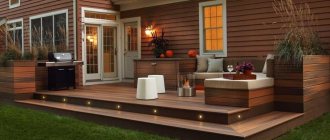
- Extension for a summer kitchen and barbecue.
But most often this structure is used to store household tools: hoes, scythes, forks, axes, hacksaws, hammers and others.