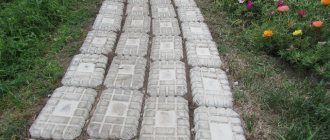
Concrete paths: strengths and weaknesses
The material from which the paths are made plays a key role. Therefore, do not forget that the convenience and aesthetics of the path will depend on the characteristics of the concrete mixture. For example, its advantages include the following points:
- affordable cost of raw materials and tools;
- durability of the constructed path;
- concrete can be reinforced with metal components to increase the rigidity and stability of the path;
- the prevalence of the material - it can be found and purchased in any city;
- it is possible to build a structure in areas with high groundwater levels;
- room for imagination in terms of design: a summer resident can fill roads of any shape and width, guided by personal preferences or inspired by architects’ designs publicly available on the Internet;
- the use of special additives makes it possible to improve the properties of the concrete mixture - increase its resistance to water, frost, temperature changes, various loads, and so on.
Disadvantages of concrete paths:
- the risk of cracks on the trail caused by soil displacement or flooding;
- the construction of permanent paths from dry concrete does not involve a simple dismantling process, so they cannot be moved to another place or removed without the use of special equipment;
- To pour the concrete solution, it must be warm outside, no rain. Also, the concrete must be completely dry before the path is ready for use;
- the procedure of mixing the components of the solution - concrete, sand, gravel and additives takes a lot of effort and time, it will be difficult to do it with a shovel, so most likely you will need a concrete mixer;
- In order to achieve the ideal appearance and high strength of finished concrete paths in a summer cottage, the installation of a formwork structure will be required during their construction. For this, the dacha owner will have to allocate time and money to purchase boards for formwork.
Buy a ready-made base or make it yourself
Nowadays, there is no problem buying anything. Ready-made products for creating paths of various shapes and sizes are available in most retail outlets for gardening and vegetable gardening.
A rare configuration can always be ordered individually. The cost of most basics is within 1 thousand rubles, so the costs will not become burdensome.
Anyone who still stubbornly refuses to purchase a ready-made plastic mold can easily make an analogue on their own. A hand-made base will not provide geometric accuracy. But the path will turn out natural and original.
Creative original work is always worthy of high marks, and the master himself receives satisfaction from the process and the result.
Why you should use pour molds
Filling molds are gaining great popularity, and all thanks to the following advantages:
- affordable price . Thanks to the use of molds, you can make an unusual garden path for almost pennies;
- unique design . Using homemade molds, you can make a unique design that no one else has. The shape, dimensional characteristics and color scheme will fully correspond to the site and its design.
- strength . Since the path is made of a cement-sand mixture, it will last a long time and will easily withstand heavy loads.
Important! However, do not forget that working with forms will take more time; with ready-made tiles, everything can be done several times faster.
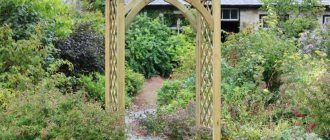
What are the tracks for?
Garden paths perform two important functions:
- Improve landscape design, give the garden a well-groomed appearance;
- After precipitation, it will be possible to cross the site along the paths, get to the gazebo, etc. The paths are easy to clear of snow. So improved trafficability, zoning, emphasizing the boundaries of flower beds - these are the functional tasks of the paths.
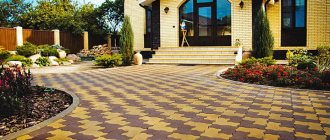
Advantages and disadvantages of using walkway molds
Few people know why forms are so popular. The main advantages of such products:
- when using a special form for pouring the concrete mixture, it is easier to complete the installation;
- the stencil is used to construct artistic paths for the garden; not everyone can make such patterns with their own hands;
- aesthetics of the structure; in comparison, a solid strip of concrete does not look so impressive;
- the ability to create the appearance of laying natural stone in the ground, thanks to the irregular shape of the cells;
- minimal costs when constructing paths; for beautiful decoration you only need stencils;
- you can easily change the color of the coating by painting;
- the path can last a long time, and that’s all, because it is created from a cement composition and sand, the combination of these building materials ensures high strength;
- tiles made using a stencil can easily withstand temperature changes;
- the simplest production technology.
How to cast paving slabs
Before work, prepare the following equipment:
- Capacity 20–40 liters.
- Measuring bucket.
- Drill with a power of more than 700 W.
- Mixer attachment.
- Master OK.
- Jar and brush.
- Gloves.
Tools for casting concrete tiles.
Technical oil and a piece of polyethylene will come in handy. When buying cement for casting tiles yourself, take a high grade (400 or 500). Take sand that has been cleared of clay and plant inclusions, and use only clean water.
Operating procedure
Pour one share of cement and three sands into the container, stir the contents. Adding water little by little, continue to work with the mixer until a homogeneous porridge-like mass is obtained.
Preparing mortar for tiles.
After letting the solution sit for a few minutes, stir again. Check the consistency - the mixture should be plastic and not slip off the trowel.
Ready solution for pouring into molds.
To make the product easier to remove, apply oil to the internal surfaces with a brush, carefully coating the corners and protruding edges.
Lubricating plastic molds.
Fill the mold two-thirds full with the solution, compacting thoroughly with a trowel.
Fill the form with the solution.
Shake and rock the container to distribute the mixture evenly. Try to completely get rid of air voids.
Distribute the solution over the mold.
Fill the substrate to the top with the solution, compact again and shake. Smooth the back of the tile, leaving small uneven surfaces for better adhesion when laying.
Completed form.
After filling out all the forms, place them in a shaded, draft-free area and cover with plastic wrap.
Drying tiles in molds.
At temperatures of 20 °C and above, the tiles can be opened the next day, keeping the containers stationary.
Drying the tiles in molds - the second day.
After two days, remove the castings by carefully turning the molds over and lightly pressing on the plastic bottom. Stack them in rows no more than 5 high to dry.
Drying the finished tiles.
Keep the homemade tiles under cover for three weeks until the concrete solution reaches its design strength.
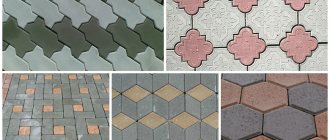
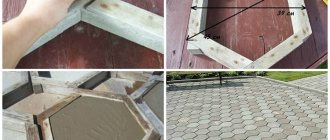
Forms for the path: how to make them yourself?
It is best to buy blocks of wood with a cross-section of 50 mm to create a stencil; they need to be sanded and treated with an antiseptic. For a tighter connection, cut grooves at the ends of the beams, and fix the outside corners with metal corners.
The workpiece can be of any size and type. Much depends on the manufacturer’s imagination, design and type of site. You can divide the mold inside using bars into several parts to cast 3-4 small tiles at once. The bottom of the stencil can be a laminated plywood sheet, which is attached to the bars with nails or self-tapping screws.
Important! A mold made using this technology can be used to pour the mixture many times. Before adding the mixture, the walls and bottom are coated with waste oil so that the frozen product can be easily pulled out of the mold. If you have formed a large template, then when pouring the mixture in the center, lay a reinforcing mesh.
Making a Metal Mold
To make a mold for a garden path with your own hands, you can use sheet metal (even barrel hoops will do, but they will have to be coated with a protective agent). Strips of the required width are cut from metal using a grinding machine or special scissors, which correspond to the height of the path: a centimeter for the pedestrian area and 6 centimeters for the parking space. It is easy to make shapes of the desired shape from such strips. All that remains is to secure the workpiece using a welding machine or self-tapping screws.
What tools and materials will be needed
Before making a road from a mold for paving slabs, you need to prepare materials and tools for work:
- plastic mold;
- cement M500;
- sand;
- fine crushed stone;
- water;
- hammer;
- geotextiles;
- construction mixer or concrete mixer;
- level;
- pegs;
- strong rope;
- oilcloth, boards for temporary shelter;
- curbs;
- trowel or spatula;
- container in which you can mix cement.
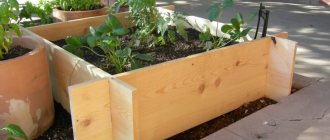
You can make a garden path yourself from scrap materials
What solution is used to fill molds for a garden path?
Special attention should be paid to preparing the solution. It is made from high-quality cement M500, sand and crushed stone of a very fine fraction of no more than 20. The ratio of the components cement, sand, crushed stone is 1: 3: 3.
Most often, a plasticizer is also added for strength. Although if the cement is good, this is not necessary. For the same reason, crushed stone is added. If you plan to make the path colored, a special dye is added to the mixture, the mass fraction of which should be from 2% to 5%.
How to calculate the required amount of solution
When determining the volume of the solution, you can focus on the ratio: a bucket of ready-made solution (10 liters) per path 10 m long and 50 cm wide. It turns out that approximately one liter of solution is spent for every meter. But if the path is wider, the number needs to be increased. It is better to prepare a solution with a small reserve.
How to make mold mortar for pouring a garden path
When preparing the solution, proceed as follows:
- All components are measured in advance.
- Pour M500 cement into the bucket.
- Add two liters of water.
- Pour sand and small gravel.
- Add some water again.
- Mix thoroughly with a mixer or concrete mixer.
- The solution should be moderately thick. If its consistency resembles sour cream, you can start working.
How to make a concrete path using a mold: step-by-step instructions
First, you need to choose a place for a path from a mold at your dacha with your own hands, make a design, make calculations, and stock up on building materials and tools. And later, based on this, it will be possible to calculate the width and shape of the path.
You will need a simple piece of paper on which to make a plan. Indicate the location of buildings and important areas. Connect them with lines that will be the axes for the paths. It’s better to make the paths a little curved - this way you can make your site more original.
The tools you will need are a hammer, a concrete mixer, shovels, spatulas, and so on. It is also worth preparing cement mortar, sand, crushed stone, a mixture for moisture insulation, and components for the formwork structure.
Formation of a work plan is the most important stage of any construction. Before building a garden path with your own hands using a form, you need to plan everything and calculate the amount of building materials. More information about choosing a layer of solution depending on the soil:
- for clayey 4–6 centimeters;
- for sandy, light loamy 8–10 centimeters;
- for a marshy one, you will need a gravel cushion 5 centimeters thick.
You can’t do without arranging a sand cushion. Its thickness should be approximately 12–15 centimeters. Calculating proportions is also simple. For example, you make a path 1 meter wide (W), 10 meters long (D), 10 centimeters thick (T), and the bottom layer of sand (P) is 10 centimeters. Before creating a sand cushion, you need to find out how much artificial material is required.
Use of available materials
If you don’t want to make your own mold for paths in the garden, you can, using your own imagination, use any available means to cast tiles.
In action are:
- plastic food containers;
- silicone and metal baking dishes;
- For small tiles, even children's Easter bags for playing in the sand are suitable.
Use any container of a suitable size that can hold the mixture and not deform from moisture.
But there are a few points to consider:
It is necessary to ensure that there are a sufficient number of forms, given that such products are not durable.- The tiles must fit tightly enough to each other; large gaps are unacceptable - do not forget about this when choosing a shape.
- You should not use containers whose walls are too thin and can bend under the weight of the mixture, or molds made from materials that are susceptible to moisture. The larger the tile size, the more important it is to comply with these requirements.
How to care for a garden path
Monitor the condition of the laid paving slabs, promptly clear leaves and prevent the path from flooding with melt water.
In winter, remove freshly fallen snow, do not let it cake, otherwise, with the advent of thaws, ice will form on the surface, which is difficult to remove without damaging the concrete slabs. debauchery and anal sex with prostitutes Troitsky Autonomous District of Moscow
Photo of a garden path in winter.
A clean, neat path or naturally overgrown spaces between the slabs with grass is a matter of taste.
Laying weed control material does not completely solve the problem. The vegetation still appears, but it is smaller and it is easier to remove - just pull out the shoots and replace the backfill of the joints.
Caring for a “wild” garden path is not difficult, and the procedure does not have to be performed every year. To return the path to its previous state you will need:
- Bucket.
- Knife.
- Manual weed remover.
- Grass shears.
- Broom.
- Garden fan.
Tool for clearing grass from garden paths.