Woodsheds or woodsheds are devices for storing firewood until it is used. Almost always they are located in the open air (less often in sheds and other utility rooms), and they always have a canopy and enclosing structures. A wood shed is more often called a shed for firewood adjacent to the wall of a residential building, while a wood shed is a separate storage facility.
Basic elements of a woodshed for a summer residence
Regardless of how the storage is located - next to the building or separately - it has mandatory elements, the presence of which is determined by the rules for storing firewood:
- high-quality wood ventilation;
- lack of direct contact with wet environments - for example, open ground or a wet wall;
- protection from precipitation from above.
To ensure that these rules are followed, the storage design includes:
- foundation. It is rarely capital; blocks and beams laid on prepared soil or a sand and gravel bed are sufficient. In very damp areas (near a river, lake, swamp, with a high groundwater level), pile foundations are used;
- ventilated flooring-base. It is most often made of lattice or planks with rarefaction (gaps between the boards) and is supported by foundation elements. The flooring must have high strength, since it can withstand the load from the weight of the entire bunch of firewood, which can be up to several hundred kilograms;
- ventilated fence walls. The design is made in the form of a lattice or a continuous fence, but in the latter case it is necessary to provide at least one open side so that the firewood is well ventilated. Otherwise, mold and woodworms will become frequent “guests”, or even permanent “residents” of the storage facility;
- waterproof roof. It does not require insulation, but the waterproofing must be at the level - there is no need to wet the future fuel in the autumn rains. This requires sufficiently large overhangs and good drainage of rainwater. Otherwise, drops falling from the canopy, bouncing off the ground, will fall onto the woodpile and lead to damp wood.
Important: in addition to arranging the woodshed itself, it is necessary to provide for the preparation of the site next to it and the approach. The best option is a trampled (rammed) platform and path based on gravel (crushed stone, pebbles, sand) or paved/concrete/tiled areas.
How to make a firewood shed at your dacha with your own hands
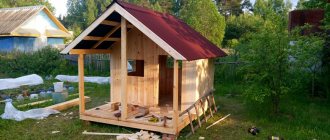
Keep firewood dry. Here you can learn how to make a firewood shed at your dacha with your own hands from old pallets, boards and corrugated sheets for the roof. Pallets are used for the base of the structure so that the firewood does not become damp from the ground, remains dry and does not spoil. Treat the wood before you start building. The author suggests doing this the natural way, using steel wool soaked in apple cider vinegar. A chemical reaction dissolves the steel wool, leaving a rich brown solution that perfectly saturates the wood as it dries.
Note that steel wool must be soaked in solution for several weeks to reach condition, so do this in advance. Use a sponge to apply the mixture to the wood
Start construction with measurements and markings. The fences need to be cut into three pieces to form the back and two side walls of the firewood box. To form two side walls, saw the top of the fence panel in half. The roof line on the side walls will be angled to allow water to drain properly. Measure 20cm down from the top corners of the fence panel and make a mark on each side. Then measure 1.20m inwards to mark the center point and from this point line up a straight edge to connect the two points. Repeat the same on the other side. Then cut the fence along the marked lines
You should have one rectangle measuring 2.50 x 1.80 m and two wall pieces. The design must “breathe”, this is important for storing firewood outdoors. Clearance between the soil and the deck helps air circulate and keeps the wood dry
Pallets are ideal for this design, especially since getting them is not a problem. Place pallets near where your firewood will sit because it will be heavy when you're done. For additional reinforcement, you can join two pallets together so they sit flush and move as one. If you need to adjust the wall panels to fit the size of the pallet, cut the tall two pieces so that each side panel is the same depth as the pallet. Three vertical fencing panels will also be separated from the back wall according to the width of the connected pallets. Frame the rear wall so that the fencing slabs are reinforced with a horizontal cross brace at one end. Cap the loose ends flush with board, which will provide additional support for the back wall and roof. A simple structure with center braces will be strong enough to support the weight of a corrugated roof. Make vertical supports for the roof line by measuring from the top of the pallet to the top of the beam and secure with nails. Vertical supports will strengthen the structure and prevent the roof from sagging under its own weight and snow. The board previously installed on the top of the back wall serves as a third beam member to support some of the roof's weight. Although in principle the wall itself provides sufficient support. The cellulose fiber panels that the author used are sold in sheets measuring 1.20 x 2 m. Two sheets are enough to cover the width of the firewood box. The ridges should be positioned so that rainwater can flow down easily. Buy special roof fasteners with polycarbonate washers for installing corrugated roofing. Drive screws into every second or third ridge space along each of the three ceiling joists.
Photo source www.diynetwork.com/how-to/make-and-decorate/crafts/how-to-build-an-outdoor-firewood-shed
Where to locate the firewood storage
Our ancestors built a warehouse for firewood next to the wall of the house, under a canopy, not far from the front door. This was done not only because it was the fastest way to get to the woodpile. An important factor was the constant heating (and, accordingly, drying) of the wood with the heat of the wall of the heated house. The heat influx was very small, but stable, which made it possible to stack the firewood more densely without fear of molding.
Naturally, the firewood was stored along the blank wall of the house. Firstly, it did not spoil the overall appearance of the site, and secondly, the storage did not block the light.
What’s interesting: firewood stacked along the wall additionally serves as a heat-insulating layer for the home.
In modern realities, when there are windows in almost all walls, firewood can also be laid around window openings. It looks peculiar, but there is a certain meaning in it. In this case, the roof overhang should be significantly increased, and large stones laid along the wall are used as a kind of “foundation” - firewood is piled on them.
If we’re not talking about a woodpile, but about building a full-fledged woodshed with our own hands, then they recommend placing it:
- near the back wall of the house or in a part of the site invisible from the street;
- at a distance of at least two meters from sources of open flame and sparks. For example, if there is a specially equipped place for cooking over a fire or coals, the woodcutter should be away from it. You cannot set up a welder’s or metal cutter’s workplace next to a woodpile;
- at some distance from beds, flower beds and other plantings. Since the woodshed, as a rule, is quite large, it also provides a lot of shade, which is not always beneficial. However, shade-loving plants can be planted in its shade;
- away from water sources and places where it is splashed.
In addition, it is not recommended to place the woodshed, even the most spectacular in appearance, in the center of the site - after all, it should not be the main decorative element.
Where is the best place to build?
The rules for placing a woodshed on a personal plot are approximately the same as in the case of drying lumber after unraveling the log. Firstly, you cannot place the firewood shed in an open, well-lit space. On the one hand, it is simply a pity to use the territory of the dacha for storing firewood; on the other hand, this method of storage often leads to the woodpile being washed out and burned out. The fuel can dry out, as a result, the wood in the dacha stove burns out in a matter of minutes, all the heat evaporates with the draft. In winter, such woodpile becomes damp to such an extent that organizing heating of the dacha becomes a huge problem.
The storage location should be moderately illuminated by the sun and have a draft.
Secondly, when planning even a simple firewood shed for a summer residence, it is absolutely forbidden to build it with your own hands in places where water is drained from the roof of the house or next to drainage gutters. A large amount of splashes will cause the lower layers of firewood to rot.
An acceptable option for placing the woodshed would be a site not far from the cottage, in a small draft and preferably under the canopy of a large tree. In addition, if you plan to cover the canopy with bituminous tiles or roofing felt, then you will need to take the firewood away from the possible emission of sparks from the chimney of the nearest cottage stove or summer kitchen.
Materials for building a firewood shed
The simplest and most obvious option is natural wood. It may not have the quality that is necessary for capital residential construction, but strength and resistance to rotting are required. For the construction of woodsheds, timber, round timber, untreated logs and poles, boards, and slats are used. If you want to give the building an aesthetic appearance, cladding with clapboard or imitation timber, lattice or blind-type panels with surface treatment is appropriate.
Timber with grooves was used for the racks; clapboard was used for the cladding, similar to the cladding of a house.
Timber and board treated with stain with an antiseptic effect
Round timber, board and timber
Unprocessed round timber (log) and slab
Less commonly used are combinations of wood and other materials - stone or concrete.
Massive timber and concrete walls
Also in use are metal structures with canopies made of metal tiles, ondulin, polycarbonate and other modern materials.
Frame made of profile pipe on brick posts, canopy made of metal tiles
Wood and polycarbonate
Bent profiled pipe, perforated metal sheet, corrugated sheet
Cellular polycarbonate and profiled pipe, timber for decking
It is important to understand that any material chosen for the construction of a woodshed must be protected from mold, corrosion (metals) and be as close as possible to wood in terms of performance characteristics.
How to make calculations and choose a size
The dimensions of the storage room and its walls for firewood depend on the expected volume of fuel. It is measured in cubic meters. At the same time, the height of the firewood shed should be such that it is easy to get logs even from the top row, and there should be a gap of at least 10 cm between the roof and the firewood. The width of the structure is equal to two rows of logs, stacked end to end.
Reference! When calculating the volume of the woodshed, the need to leave an air gap between the wood is taken into account.
How to calculate dimensions using the table for converting folded measures to tight ones
1 folded meter is a cube with a side of 1 m. The conversion of a folded measure into a dense one is carried out according to the formula:
Vpl = Vcl × K
First, the fold volume is calculated - Vcl. To do this, determine the cross-sectional area of the firewood and multiply it by the length. Then the resulting value is multiplied by the number of such elements.
Then find the value K in the table - the full wood coefficient.
It will be different for round and split firewood. After this, K is multiplied by Vcl and Vpl is obtained.
How to determine the strength of the load-bearing part
When building a firewood shed, the strength of the load-bearing part is determined, because the mass of the tree changes depending on the degree of humidity. It is measured in kg/cubic meter. m.
Attention! Proper drying of cut logs results in a loss of 0.25–0.33% of the tree's weight. Determine the value using a table
Different types of wood correspond to different indicators. For example, with a humidity of 15%, poplar has an indicator of 460, and oak has an indicator of 700
Determine the value using the table. Different types of wood correspond to different indicators. For example, at a humidity of 15%, poplar has an indicator of 460, and oak has an indicator of 700.
Construction of a simple wood shed
If the wall of a house or other building is used as a base for the woodshed, a canopy with a slope from the wall downwards will become a mandatory element of the design.
The dimensions shown in the diagram are in inches.
In order not to increase the load on the external fencing of the building, racks are used not only on the side walls, but also on the rear. The pitch of the racks depends on the selected section of the timber: for lumber 100x100 mm it is permissible to install racks in increments of 1.2...1.5 m, for 50x50 mm - only in increments of 0.5...0.7 m.
This structure does not have its own foundation, since it is mounted on the blind area of the building. All wooden elements must be treated with an antiseptic before installation. It is advisable to tar the lower ends of the posts and rafters or paint them with waterproof paint.
Required materials for a storage facility measuring 3x1.5 m, height 2 m:
- racks made of timber 100x100 mm – 3 pcs. 2 m long, 3 pcs. 2.2 m long (for the rear wall to ensure a normal canopy slope angle);
- cross strapping made of timber 50x100 mm – 6 pcs. 1.3 m long;
- longitudinal strapping - four beams 100x100 mm, 2 m each (fastening the racks at the top and bottom);
- rafters made of timber 100x100 mm - 3 pieces, 2 m each (a little more can be done, up to 2.2...2.5 m to increase the roof overhang);
- ready-made lattice panels 2x1.5 m - four pieces, or mounting rail 50x20 mm (board with a thickness of at least 10 mm) for sewing up openings on the side and back;
- board or beam with a thickness of at least 20 mm for flooring - fragments 3 m long or 1.5 m long in the required quantity. The maximum gap between the flooring fragments is 20...30 mm;
- metal tiles or monolithic or honeycomb polycarbonate (thickness not less than 8 mm) for a canopy - 6 sq. m. When calculating, it is necessary to take into account the amount of overlap and the number of sheet joints;
- rivets or other fasteners for installing roofing material;
- metal corners, plates and screws for assembling the frame.
For convenience and greater strength, you can also fasten the frame elements with hammer-in staples - accordingly, you need to stock them as well, two staples for each connection node
Sequence of work:
- assembly of a frame from racks, transverse and longitudinal strapping;
- arrangement of the rafter system;
- performing flooring and sheathing of side and rear walls;
- laying roofing material.
Making a shed for firewood on your estate with your own hands
The process of self-building a shed for firewood at the dacha does not require expensive materials at all. You will need:
- timber
- Rounded log
- Boards of various widths
- A mixture of cement, sand, gravel
- Roof covering
You can also build a wall shed for storing firewood.
Let's choose a place for the canopy
The location of the canopy is of great importance for the future safety of firewood, so when choosing a location we follow the rules:
If the woodshed is still in a recess, then it is necessary to create outlets for water.
Firewood shed project
This construction is not at all tricky, it is easier than building a shed, so the project of creating a woodshed in the country is quite simple. But you will need a drawing.
To create a drawing, follow the plan:
- We measure the area for construction in order to understand what dimensions and geometry the future canopy will be.
- We transfer the idea to paper and arrange all the dimensions.
- In accordance with the drawing, we select the material and calculate the required quantity.
Important! You can mark the work area with pegs and a cord stretched across them. You, of course, can draw markings on the ground, but it will quickly be trampled and this will cause inconvenience
Formation of the foundation
The foundation is suitable from six to eight columns, it all depends on the size and shape of the planned guide. We dig holes: diameter – 0.3 meters, depth – 0.5 meters. Along the edges we make formwork with a height of 0.1-0.15 meters. Next, fill everything with a mixture of cement, sand and gravel. The foundation will harden in approximately 4 days. Before drying, everything is covered with polyethylene.
When the foundation is ready, we install the piping. It is formed by a beam with a cross-section of 15x15 centimeters. They are fastened together with a notch and steel corners. We use anchors to fasten the strapping across to the concrete. Using a steel angle, stiffening ribs for the deck of the structure are attached.
Finishing and covering the firewood shed
Using corners, we install racks in the corners of the frame, which act as supports for the roof. The side and rear wall cladding is also attached to them. During the work we check the building level. The outside of the racks is covered with boards (15 centimeters) with an interval of 15-20 centimeters. We attach logs on top for covering.
The slopes on the roof should be made as wide as possible so that the firewood does not get wet in bad weather.
Roof for canopy
Let's move on to forming the roof:
- We stuff the sheathing across the joists
- The lathing should be sparse if slate, professional flooring or metal tiles are used for covering
- If the coating is of a soft type, we make the substrate continuous
- We attach the covering in a suitable way
- We form the floor with gaps between the wood
- We treat all parts of the structure with an antiseptic to protect it from rot and the spread of fungus
The work on the canopy is complete! The finished building needs to be painted or varnished - according to your taste. A canopy is not only a reliable shelter for firewood, but also a decoration for your yard. Photos of the firewood shed can be viewed on the website.
Installation of a free-standing woodshed
The design of the product is similar. The difference is in two points - the canopy can be beveled in any direction, a foundation is required.
Please note that the diagram is similar to the previous one and can be used for a firewood shed adjacent to the house. Elements of longitudinal and transverse strapping have been added here.
If desired, you can make the wall cladding continuous or sparse, including the front wall, and additionally hang the door.
The foundation in this scheme is shallow blocks or a shallow strip foundation.
The scheme with a gable canopy is also close to the previous one.
In this option, there is no sheathing as such - its role is played by crosspieces made of timber on the side walls of the woodshed. Instead of individual rafters, simple triangular trusses are used, and the role of the longitudinal strapping is performed by rafter beams at the top and timber flooring at the bottom
If trusses are used for a gable roof, they are assembled separately using a template and only then attached to the frame. Another difference between a design with a gable roof is that the ridge needs to be protected from leakage. For this purpose, additional elements are used, which can be purchased complete with roofing material.
Attaching the frame to the foundation
If the firewood shed is installed separately on a foundation made of concrete, brick or blocks, it is necessary to properly attach the wooden or metal frame to the foundation.
There are several options:
- mortgage with a U-shaped holder, used for monolithic bases. The mortgage is installed at the pouring stage, the frame is fastened after the base has reached its design strength;
- anchor bolts (dowels) on top of the waterproofing. To increase the service life of the support (crown) beam or board, lumber is impregnated with an antiseptic;
- studs to the foundation over the waterproofing.
The last two methods are applicable for both monolithic and block foundations. The first method is suitable for block bases to a limited extent, only when using a fastening profile with a supporting plane.
When using a foundation, there are two options for the installation sequence:
- first secure the racks to the foundation, then assemble the frame;
- fasten on the base of the post of the already assembled frame.
The first option is convenient for small point supports with already concreted embeds, since otherwise it is difficult to guarantee the correct placement of the posts. The second method is universal.
What is a woodcutter
There are several varieties! A wood shed is a separate shed for drying and storing firewood. Once upon a time, this word was used by wood merchants, and it was also the name given to boats or barges on which timber was melted down the river. The woodshed is an extension to the house made for storing lumber for heating the stove. A firewood rack is a metal stand that resembles a basket. A bundle or two of firewood is stored and transported in it (they are placed near the fireplace, solid fuel boiler, barbecue, etc.).
Woodshed - a separate shed for firewood
The most convenient place for storing logs is considered to be a woodshed, since it is dangerous to attach it to wooden surfaces if the house is made of wood - wood-boring beetles (grinder) and its many relatives may appear.
Household block with woodshed
This building combines separate compartments for storing household equipment and firewood. Accordingly, the part for storing equipment should be more protected from bad weather and uninvited guests. Partially, the degree of protection depends on what kind of equipment will be stored - for power tools you need good waterproofing, but for wheelbarrows, hoses and shovels, a normal roof and the absence of strong humidity are sufficient.
Since a large supply of fuel is usually stored in a woodshed attached to a utility block (or built together with it), a foundation will be required. For it, you can use monolithic supports, block or piles. If there are wooden ridges (butt parts of large trunks, at least 0.7...1 m in diameter), they can be used as supports. To do this, the ridges are cleared of bark and possible damage (rot, fungus, blue stains), impregnated with an antiseptic (for example, waste motor oil) and coated with molten bitumen. For greater safety, you can make a second layer of waterproofing - after hot coating with bitumen, wrap it in roofing felt.
Approximate plan of the foundation for a utility block with a firewood shed
An example of a utility room with a woodshed. Please note that the part where the tools are stored has a solid sheathing, and the side and rear walls of the woodshed are sheathed “staggered”
An example of a frame design on columnar supports. The woodshed is located on the left
The construction principle is the same as for a conventional free-standing storage facility:
- organization of foundation supports (preferably on a previously prepared site with gravel/crushed stone/sand filling and compaction);
- fastening racks to supports using studs, mortgages or fastening profiles;
- assembly of transverse and longitudinal frame elements;
- arrangement of the rafter system;
- wall cladding (solid for the utility block, sparse for the woodshed). Part of the sheathing can be replaced with crosses or several beams packed transversely (parallel to the ground);
- roof installation (waterproofing, roofing material);
- hanging the door on the utility block.
The video will help you figure out how to build a firewood shed with your own hands.
Please note that the utility unit does not have to be designed for storing useful things. There may be a summer toilet or shower, even a summer kitchen or a place to spend the night
What tools will you need?
To make a firewood box, you will need to stock up on a standard set of carpentry tools:
- A jigsaw is for small structures; for a frame firewood cutter you will need a circular saw. Most of the work can be done with a hand hacksaw, but the construction time at the dacha will drag on for several days;
- Measuring tools – tape measure, construction and hydraulic level. Despite the simple design, assembling a woodpile by eye is a risky task, since the mass of firewood inside reaches one and a half tons and can easily collapse the woodpile under unfavorable circumstances;
- A tool for cutting roofing, it can be metal scissors, a punching attachment on an electric drill, or a regular hacksaw.
The specific selection is determined by what material the walls and roof will be built from; in addition, it would be nice to make your own drawings with dimensions or at least a sensible sketch in advance. Much depends on whether the dacha has the opportunity to connect to electricity. For example, it will be quite difficult to make a metal frame without electricity; you will have to cut and weld the parts in a garage, after which the set of blanks can be transferred to the dacha and assembled.
Types of woodpiles
The woodcutter can be portable or stationary, in the form of a stand, rack, bowl or shelf. Dimensions are determined individually, taking into account the dimensions of the site chosen for storage, as well as ease of use and safety.
The optimal depth of the woodshed depends on the length of the logs that will be used for kindling:
- for a bathhouse or stove it is at least 50 cm;
- for an indoor fireplace, 25 cm is enough.
The height of the storage should not exceed the height of a person, otherwise it will be inconvenient and possibly even dangerous to use. If it loses stability, the woodpile can collapse and injure a person.
Adviсe
In order for the fireplace to delight you with warmth, and the firewood to always be dry and at hand, you must follow the recommendations of manufacturers and specialists: properly care for the fireplace and store fuel for it. Before firewood is brought into the room, it is usually stored outside.
It is recommended to make an outdoor woodshed from wood, on a wooden base, under which a drainage cushion of sand and crushed stone is poured. This way you can reduce humidity and eliminate contact with the soil so that the lower layers do not begin to rot. A canopy is required to protect the firewood from rain and snow, because wood absorbs moisture well. Before installation, all fuel material must be thoroughly dried to avoid the formation of unwanted condensation. To prevent the wood from becoming rotten and rotten, there must be sufficient ventilation in the woodshed.
It is better to stack firewood in the following order: place the largest and thickest logs at the bottom, gradually lay out smaller firewood, and place thin kindling on top for ignition. The wood chips can be placed on a separate shelf or in a specially designed sector of the woodpile. A canopy or terrace attached to the house will allow you to store fuel near the entrance for easy replenishment of the indoor firewood in bad weather.
Fire safety is a very important aspect of the operation of a fireplace, so a log burner with dry fuel should not be placed too close to an open flame or faulty wiring: the slightest spark can lead to a fire. But with knowledge and compliance with safety measures, these problems can be prevented. Under the fireplace and in front of the firebox there must be a platform made of non-combustible and fire-resistant material: metal, stone, concrete. A platform is also made under hanging and wall-mounted models. The wall behind the fireplace, located in the wall space, is also finished with heat-resistant, non-combustible materials. Special glass screens and doors, fireplace grates prevent sparks and embers from reaching the floor surface.
Another piece of advice on properly packing fuel for the winter: as you pull logs out of the woodshed, it is unacceptable for the woodpile to fall over or warp, and for the firewood to spill out of it. Large logs must first be chopped and wood chips prepared for ignition. Additional supports should be installed on the sides so that the rows of firewood do not subsequently fall apart and crumble. Stack stacking is possible, where logs are laid out row by row around a circumference. As a result, a stack of fuel is formed.
Special long-burning briquettes have been invented as fuel for the fireplace. They are sold in packaging and stored dry in a firewood rack.
Additional accessories
Let's consider useful additional things that will help when operating fireplaces and stoves.
Types of firewood
Depending on the original design of the fireplace, a firewood rack can be installed. Some products initially already have a technological niche for storing logs, but in its absence, you have to store the firewood either simply on the floor or near the fireplace. Freestanding firewood boxes can be of several types: stand, box or basket.
If you have the materials, time and desire, you can easily make such an element with your own hands, and use the main directions of the interior of the room where the fireplace is installed as decor. Forged accessories for the fireplace are in demand; they resemble products of past centuries, adding a special character to the design.
The firewood box is located in the immediate distance from an open fire and does not come into contact with the flame, so there are no special requirements regarding manufacturing materials for it.
Ignition accessories
Most specialty stores stock fireplace matches and lighters for biological analogues. The main difference between such matches and ordinary products is their length, and it reaches 20 centimeters, which will not allow you to burn your hands. Accessories can be packaged in boxes with interesting designs or original glasses.
Manufacturers offer kits consisting of special rolled paper for ignition and matches. To store paper, it is better to purchase a holder that will allow you to easily unwind the desired piece and ignite the flame.
Flame protection
If you have an open firebox, it is necessary to install protective equipment for fireplaces, represented by screens and grilles. These accessories are made exclusively from materials that are resistant to open flames and high temperatures. Most often, people prefer products made of tempered glass, with a metal frame, or without a frame at all.
Some interiors are more suitable for grilles, which also perform a protective function. They are made of durable steel and decorated with forged elements.
Depending on preferences and design, you can create a screen of any size and shape: flat, convex, round, square, oval, double-leaf, etc. Metal products can be installed as close as possible to an open fire, but glass screens are best moved away from the firebox by about 30 centimeters.
Cleaning accessories
An essential tool for the fireplace is a scoop or brush. These accessories are essential for cleaning up ash and coals after the fire has gone out. If you do not clean it, the firebox will soon clog.
It is best to choose a brush that has natural hard bristles or a fairly thin wire. When using accessories with artificial bristles, there is a possibility that incompletely extinguished coals will simply ruin the accessory.
To select the ideal proportion, you should start from the formula: the length of the handle is at least 20 centimeters greater than the depth of the firebox.
Vacuum cleaners
There are now many vacuum cleaners available in stores, the main task of which is to remove soot and ash. It works exactly like a typical household appliance, but is made from special, heat-resistant materials. The design is also significantly different.
The maximum temperature that vacuum cleaners can withstand is 50°C, which makes it possible to clean even before the coals have completely cooled. The devices have high suction power, and their containers reach volumes of 20 liters.
What accessories the fireplace needs is up to the owner to decide. Every detail plays an important role in the selection process: quality of materials, product design, manufacturing company, etc. Therefore, before going to the store, you should answer these questions for yourself, then the purchase will definitely bring joy, and the accessories themselves will be used constantly and for their intended purpose.
Design
Once upon a time in the villages there was no philosophizing about the construction of woodpiles - the simplest and most convenient construction from boards suited everyone. Today, for many, the dacha is not so much a garden as a place of relaxation, and the attitude towards it has become accordingly. A beautiful facade of a building, outbuildings in the form of log houses or aesthetic stone structures, landscape design of the territory - all this suggests a woodpile made of stone or log wood, convenient and effective. Entire projects are being developed to create such beauties. The photographs show the best of them.
The owner combined the fence with the firewood shed into a single building. The result is a beautiful, practical, ergonomic and environmentally perfect structure.