Do you like to spend time outside the city, but don’t want to give up the benefits of civilization? Agree that a comfortable holiday in nature is a hundred times more pleasant than the “wild” one. Have you decided to surround yourself with basic amenities and want to build a washbasin for your summer house with your own hands? However, don't know where to start?
We will help you figure it out - the article discusses the main options for washstands and the step-by-step stages of their construction, arrangement and connection to communications. The material is accompanied by detailed instructions, step-by-step photos and video recommendations for constructing a washbasin.
Classical
As a classic washbasin, a metal container is used, in which a sufficient hole is made on top to pour water inside.
A hole is also made from the bottom for the valve; by pressing on it, water will flow out through the hole. The simplest design is hung on hooks on the wall, it is very easy to make yourself in just 15 minutes.
Organization of drainage
- Most often, a regular bucket is used as a primitive drainage container, which must be periodically emptied into the compost pit.
- A more expedient and practical option is to organize drainage into a special hole, ditch or sewer. For this purpose, a corrugated pipe is used.
- If the washbasin is installed outdoors, it is permissible to drain the water directly into the ground. With this option, it is necessary not to equip the washbasin cabinet with a floor, but be sure to pour 30 centimeters of coarse crushed stone under it.
Wood
Wooden models of washbasins are very popular. They look more stylish and can be used as a permanent structure. In order to make it more convenient, it is necessary to use a different water supply system.
You can purchase a faucet for a country washbasin at any specialized store. Embedding it into a wooden structure is quite simple.
You also need to remember to put a lid on top so that you can add water to the container. Such models can very often be found in the garden, on verandas, and summer kitchens. They are very beautiful and comfortable, they are easy to make with your own hands.
In the form of a bucket
Styling to match various objects allows you to maximally adapt the washbasin to the specific style and design of your summer cottage. In a bathhouse, for example, you can use only wooden objects, because steel ones will heat up very quickly, and plastic ones will lose their shape.
To make a washbasin in the form of a bucket, you will need a wooden bucket itself, which can be bought at a specialized store. Next, you need to make a hole in it from the bottom. There you need to embed a plastic tap for a country washbasin.
Manufacturing method and materials
The material is familiar to everyone - a 1.5 liter plastic bottle, suspended with the neck down. To ensure that water flows only at the right time, you can do the following:
- Screw the nail tightly into the cork, the head should be inside. This method is bad because rust appears on the nail due to constant humidity.
- Attach a small tap to the bottle to supply water. In such a design, it is difficult to regulate the degree of opening of the tap, which entails the lid falling off.
- In addition to the bottle, you can use a bucket, basin, or plastic container. It all depends on your goals and capabilities.
We would also like to recommend visiting an interesting portal about the green world: https://zeleniymir.org
There are also a number of more complex designs that require more time and sometimes cost.
With your own hands
If you wish, you can make a country washbasin with your own hands. To do this, you first need to decide where it will be located; the choice of the necessary materials directly depends on this.
As mentioned above, if you plan to place the washbasin in the bathhouse, the only best option would be a wooden structure. It heats up less, is durable, looks aesthetically pleasing and fits perfectly with the classic design of a bathhouse.
The easiest way is to make a structure from plastic; you don’t even have to do anything special for this. It is enough to find a plastic container of a suitable size, make a couple of holes and build a pressure valve. The best option for camping trips or a temporary washbasin.
It is more difficult to create a structure made of metal, because in this case it is necessary to weld the parts. In addition, such a washbasin will be heavier, but also much more reliable, durable, and more resistant to various types of influences. In addition, metal structures can be decorated in almost any way, creating different patterns, additional elements, etc.
The most common option is wooden models, because in virtually every summer cottage you can find a couple of unnecessary boards and a few nails.
This will be quite enough to build a beautiful washbasin that can last for a very long time. The classic model is the square; it is the easiest to assemble, easy and convenient to decorate, and is optimal for a wide range of styles.
Features of a wooden sink
Before purchasing or making your own sink from natural wood, you need to learn about the existing nuances of the material:
- Using a sink made of natural wood, you can create a specific design. The product will become the highlight and accent of the room. The naturalness of the material, its unusual pattern, and the stylish shape of the washbasin will emphasize the excellent taste of the owners.
- The fiber is environmentally friendly, so it can be used where allergy sufferers or small children live.
- In order for your sink to last for many years, it must be properly cared for. So, for care you cannot use detergents containing abrasive particles, acid, or alkali.
Reference! You can extend the life of a sink made of natural wood by regularly treating it with special compounds and impregnating it with oils.
With cabinet
This version of a country washbasin without heating is more complex, but at the same time very convenient. It is actually a full-fledged, stationary sink, in which it is convenient to carry out various hygiene procedures, such as washing food and vegetables, washing dishes, etc.
The design seems complicated at first glance, but in reality it is quite simple. There are several options for its implementation.
Classic with bucket
In this case, a sink is located at the base, under which a bucket is installed to collect used water. Above the sink there is a cabinet into which a classic washbasin with tap is built in. This design is very simple and convenient.
The bucket located under the sink is hidden by panels, which provides an aesthetic appearance.
Without a bucket
The previous option can be simplified by making the frame virtually monolithic, integrating a sink and washbasin into it on top.
There is nothing under the sink, but the boards below should be spaced about 1 cm apart from each other.
This way, the used water will flow into the soil, and sufficient gaps will ensure air circulation, which will prevent the boards from delaminating and dampness.
However, it is necessary to understand that with this option you cannot use detergents, because they will then get into the soil, spoiling the soil. This option allows the use of only clean water.
Plot
0 votes
+
Vote for!
—
Vote against!
Not everyone at their dacha has running water, but the need for water arises quite often: it is necessary to rinse your hands repeatedly after gardening work, to wash vegetables or fruits, or to wash dishes after eating. All this can be done using a washbasin. It comes in handy not only inside a country house where there is no running water, but also on the street, in the garden or next to the gazebo where there is a dining table. The good thing about a portable washbasin is that it can be installed anywhere. There are several types of washbasins that differ in design: from the simplest to convenient units with a cabinet and heating. The latter are so convenient that they can partially replace a full-fledged plumbing system. Until recently, in order to make a washbasin for a summer house with a sink, you had to make many of the elements yourself. Now the modern market can offer various ready-made options. However, let's remember how you can make a washbasin with your own hands. After all, a handmade item is not only unique, but may also have many elements or functions that you need, but they are not provided in ready-made models.
- Types of washbasins for the garden
- Simple wall-hung washbasins for a summer residence
- Outdoor washbasin for a summer house on a counter
- Washbasin with cabinet for a summer residence - “moidodyr”
- Heated washbasin for a summer residence
- Do-it-yourself washbasin for your dacha
- Water container - which washbasin to choose
- How to organize heating in a washbasin
- Washbasin cabinet frame
- Vanity unit and countertop for washbasin
- Sink and washbasin drain
Types of washbasins for the garden
The main difference between all washbasins is functionality. To make the right choice, you need to understand exactly what you want to see and how you are going to use it. Is a simple wall-hung washbasin enough for you or do you need a unit with a cabinet or even hot water?
Simple wall-hung washbasins for a summer residence
The simplest washbasin is a slightly barrel-shaped container with a press-on spout. The volume of such washbasins does not exceed 3 - 5 liters. Thanks to special fastening elements, such a washbasin can be hung anywhere where there is a suitable vertical surface. For example, on a fence, on a tree, on a board driven into the ground or other convenient surface.
You need to pour water into a simple washbasin manually. But drainage can be organized in different ways. A lot depends on where the sink hangs. For example, you can place a container under the sink to collect waste, and then, as the bucket fills, take its contents into the compost pit. If the washbasin is used quite rarely, you can not place anything at all - let the water pour on the ground. And to make water seep through more easily, you can pour a layer of crushed stone or small gravel under the washbasin.
Such simple washbasins are still popular, as they allow you to easily and quickly wash your hands after dirty work in the garden or garage. But due to its small volume, it is difficult to use for washing dishes after a family dinner.
Wall-mounted washbasins with a larger volume from 10 to 18 liters are more convenient due to the fact that they require less frequent filling of water. The shape of such washbasins can be different: rectangular, oval, slightly rounded. The material of manufacture is either plastic or stainless steel. As a rule, washbasins with a volume of more than 10 liters are equipped with a valve located on the front wall. Such taps are very convenient: turn off the valve and use water, turn it on and the water stops flowing. In models with a pressure spout, you need to constantly press it, which can sometimes be inconvenient or difficult.
Large wall-hung washbasins can be attached to a vertical surface, such as a wall, or hung on a cabinet. They are used both indoors and outdoors.
Outdoor washbasin for a summer house on a counter
A rather unusual version of outdoor washbasins is a unit on a counter. The water container is mounted on top of a metal stand. You can install such a washbasin anywhere, including where there is no vertical support. At the bottom of the rack there is a crossbar, after pressing with your foot the horns - supports are firmly driven into the ground. Thus, the washbasin on the counter is quite firmly fixed in any part of the garden.
It can be used to wash your hands or face while working; just unscrew the valve and the water will flow by gravity. The capacity of countertop washbasins is usually from 8 to 15 liters.
You can make a similar counter for a washbasin yourself. You will need steel pipes, a grinder and a welding machine. For greater stability of the racks - supports there should be at least two and the distance between them should be 20 - 25 cm.
- We measure the required length of the supports and cut off two pipes.
- In order for the posts to easily penetrate the ground, the end of the pipes from which they are made must be cut at an angle. The sharp end of the stand easily pierces the ground.
- We cut off the lower jumper and the upper bar to which the washbasin is attached.
- We weld the jumper and the top bar to the supports.
Instead of pipes, you can use reinforcement or steel corners 25x25 mm.
Washbasin with cabinet for a summer residence - “moidodyr”
The Moydodyr washbasin is a structure consisting of a cabinet, a sink and a washbasin (filler tank). It is more functional, it can be installed both inside the house and outside. Despite the fact that a washbasin with a cabinet is heavier than simpler models, it can be dragged from place to place by two people. A bucket or other container for drainage is installed in the cabinet under the sink.
Thanks to the presence of a sink in a washbasin with a cabinet, you can not only wash your hands and face, but also conveniently wash dishes or fruits and vegetables. For example, a bowl of freshly picked strawberries can be placed inside the sink. The valve on the wash basin allows you to thoroughly wash the berries under running water.
As you can see in the photo showing a washbasin for a summer cottage, similar models of washbasins can be equipped with a mirror, a towel hook and a soap stand. Inside the cabinet you can store dishwashing detergents and washcloths.
If you are going to install a washbasin with a cabinet inside the house, then you can choose any model, including one with a wooden cabinet. On the street, wood, chipboard or plywood will quickly become unusable. For outdoor use, washbasins with a painted metal cabinet or a cabinet lined with polycarbonate are better suited.
Heated washbasin for a summer residence
The heated washbasin is a more advanced model of the washbasin with a cabinet. In fact, they differ from each other only in that a heating element is installed in the water tank, which heats the water. The sink and cabinet are exactly the same.
In early spring and autumn, the water in the washbasin is practically not heated by the sun. And if water from a well is used, then it is simply ice-cold. The heated washbasin allows you to feel complete comfort. Wash with warm water, wash dishes with hot water. All this is possible thanks to the thermostat. Using it you can set the required temperature from +30 to +70 °C.
A container with a volume of 10 to 20 liters is usually made of durable plastic, similar to that used in electric kettles. Sometimes heated models have a stainless steel body. Ready-made heated washbasins, which can be bought in a store, have standard dimensions: cabinet width and depth 0.5 m, cabinet height 1.0 - 1.5 m.
Do-it-yourself washbasin for your dacha
The cost of washbasins is not that high. For example, prices for a washbasin with a cabinet and heating start from 85 USD. So if you have an extra hundred dollars, then there is no point in going to the trouble of constructing a washbasin with your own hands. But if you really want to do everything yourself, or you have a unique functional design in mind, then below we will give recommendations on how to make a washbasin for your dacha with your own hands.
Water container - which washbasin to choose
If you want to make a washbasin with a cabinet for your dacha, then it makes no sense to fool yourself and make a water container yourself. It is unreliable, unaesthetic and ineffective. For example, you can make a tank from an old 5-10 liter water bottle, but why? The cost of a washbasin with a valve tap does not exceed 10 USD, but it looks much more beautiful.
The water container for a washbasin with a cabinet should be from 10 to 20 liters. It makes no sense to take less.
The material used to make the container also matters. Most often, washbasins are made of plastic and stainless steel. Which one to choose depends on personal preference, but there is an important caveat.
Important! A stainless steel washbasin for a summer residence is more preferable because it is more reliable and durable. If you accidentally drop a plastic sink filled with water, the chance of it bursting, cracking or splintering is much greater than if a stainless steel sink is dropped. We rarely think about such things, but when we encounter them with our own eyes, we regret wasting money.
The shape of the washbasin is also important. Usually few people pay attention to this, but in vain. It's all about the pressure of the water that will flow out of the tap. If the container is flat, almost horizontal, then water will flow out of it in a small stream. The higher the water column in the washbasin tank, the greater the pressure. For example, among rectangular washbasins, it is better to give preference to one that has an elongated shape. Better yet, take a washbasin whose bottom is not flat and slopes towards the faucet.
Faucet location . Recently, washbasins with a valve tap on the front wall have become very popular. Have you noticed that the water pressure from such a faucet is less than from a small 3-5 liter washbasin with a pressure tap? The thing is that in a valve tap, water pressure is lost due to the rotation of the spout of the tap itself and due to the fact that it is located not at the bottom, but on the front wall. Choose a washbasin model in which the faucet is located as low as possible. Otherwise, you will encounter the following problem: you will have to add water to the washbasin before it runs out, from about half the capacity. The reason is a loss of pressure.
How to organize heating in a washbasin
The cost of ready-made heated washbasins starts from 20 USD. This is quite inexpensive, considering that the heating device is equipped with a temperature controller from +30 to +70 °C. You can also make a similar unit yourself. To do this, you need to buy a heating element with a thermostat and install it in the tank.
Important! Please note that the heating element is most effective if installed at the bottom of the container, at a level of 2 - 5 cm from the bottom. It makes no sense to install the heating element at the top.
The difficulty of installing a heating element in a washbasin yourself is this. The heating element cuts into the body of the container and the block with the thermostat remains on the outer wall of the washbasin. It is quite difficult to seal the washbasin body after insertion. You can, of course, immerse the boiler into the container through the lid without making holes in the body, then there will be no problems with sealing.
Washbasin cabinet frame
When planning to make your own washbasin with a sink for a summer house, the frame of the cabinet and the cabinet itself are the most obvious design elements that make sense to make yourself.
The easiest way to make such a washbasin is if you still have a dishwasher from Soviet times. The shape and size of the old kitchen sink are completely suitable for constructing a washbasin. A cabinet with an opening door and bottom, a place under the sink and the sink itself. You only need to attach a board to the finished sink body on which you can attach the washbasin container.
If the old sink is not available, then you will have to make the cabinet yourself. The cabinet frame can be made from wooden blocks with a section of 50x50 or 80x80 mm, as well as from a steel angle 40x40 mm or 25x25 mm.
- Convenient height of the sink cabinet is from 85 cm to 1 m.
- Take a steel corner or a wooden beam and cut 4 pieces 85 cm long.
- We measure the sink that we are going to install in the cabinet. The size of the frame should be such that the sink fits easily on the edges of the frame.
- Then we cut 8 pieces to fit the size of the sink, usually 50 cm.
- We weld or knock the frame together.
Remember that the sink will be placed on the inner edges of the frame, so use them as a guide. After manufacturing, the steel frame must be primed and painted, since it will quickly rust in frequent contact with dampness and water.
Vanity unit and countertop for washbasin
The frame of the cabinet can be covered with different materials:
- Wooden boards;
- Plywood panels;
- Steel sheets;
- Polycarbonate sheets.
- Plastic panels.
Wood and plywood will quickly get wet outdoors. Although if the wood is varnished, it can last a long time.
We cover the back and side walls of the cabinet completely, firmly securing the material to the frame of the cabinet. On the front wall of the cabinet you need to make a door, which you then hang on its hinges.
It is advisable to make the floor inside the cabinet plank with a distance between the boards of 1 - 1.5 cm, so that air can circulate, and even accidentally spilled water can seep into the ground.
You don’t have to limit yourself to just a cabinet under the sink; you can make a countertop and a convenient drying rack for dishes:
- On one side or both sides of the cabinet we make a tabletop or drying rack.
- We take wooden boards with a cross section of 25x15 mm.
- We knock them together in such a way that we get a drying rack. Between the boards we make a distance of 1.5 - 2 cm.
- The dryer can be made two-level, then at a height of 35 cm above the ground we make another frame for the dryer and fill the boards.
A drying rack next to the sink is convenient because you can place freshly washed dishes in it. The cups can simply be turned upside down and left to dry. Plates and pot lids can be inserted into the gaps between the boards and fixed vertically to drain excess water. And simply place pots and pans upside down on the drying rack.
It is not necessary to connect the dryer frame to the washbasin cabinet. The wooden dryer must be varnished.
Sink and washbasin drain
The sink for an outdoor washbasin can be plastic, enameled or stainless steel. The last two are the most durable and practical. You can buy a new or used sink and carefully install it into the frame of the cabinet.
Draining water from a washbasin can be organized in different ways:
- Place a bucket, which you empty as it fills.
- Drain into a sewer or into a ditch.
- Drain the water directly into the ground, having first poured a 25–35 cm layer of crushed stone under the cabinet.
The option with a bucket is the most optimal. The fact is that in the washbasin we not only wash our hands and face, we often wash vegetables and fruits here; along the way, the tails come off and are thrown straight into the sink; also, when washing dishes, food residues are also washed into the sink. As a result, wastewater is obtained with organic residues. It is better to take a bucket with such slop to a compost pit or heap, where the remains will rot.
It is possible to arrange the drainage of water into the sewer, but then it will not be possible to dump cleaning materials and food debris into the sink, as they can clog the pipe. A regular corrugated sewer pipe connects to a sink drain and is routed underground to a septic tank or drain. Some people simply dig the pipe in at a depth of 25–35 cm at a distance of 1–2 m from the washbasin, and the water simply soaks into the soil.
If desired, an ordinary dacha washbasin can be turned into a real masterpiece, especially if you use wood for decoration. But remember that it is better to put wooden products in a dry shed or garage for the winter. This also applies to heated washbasins.
Heated
A country washbasin with heated water is the most complex of all design options. In fact, this is a more complex variation of the previous model.
The base also serves as a frame with a cabinet and a sink. Above it there is a built-in washbasin and tap. You can also place a bucket underneath or leave an empty space, if desired. The possibility of heating water is provided by the use of additional electrical appliances.
Using a boiler, the design will be simpler and more cost-effective, and it will also be much easier to monitor the degree of water heating. You can use a thermostat, but in this case it is necessary to carefully select the power according to the volume of the water tank.
All wires must be properly insulated and a mechanism for controlling water heating must be provided.
Master class “Moidodyr”
Master class “Moidodyr”
To make it you will need: a box, self-adhesive tape, sheets of white A4 paper, felt-tip pens.
We give the box the desired shape, cut out a hole for storing washing accessories
Cover the “sink” with white paper and cover the edges with self-adhesive strips
Cut out a circle of blue color, this is water
Let's draw the face of our Moidodyr
We hang the basin, add a washcloth and “Moidodyr” is ready
Moidodyr took his place of honor in the washroom
Now we show him how clean our hands are
“Stop for a moment” (Photo Moments) Kids are very wonderful, interesting and inquisitive. They love to be photographed. Those photos turn out to be very interesting when they... Our excursions (photo report) Since we are still kids, we have to travel around the territory of the kindergarten and around the kindergarten. But you can always see it here too.
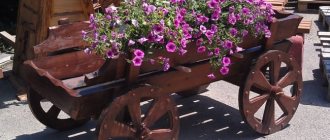
Photo ideas for homemade country washbasins
Dimensions
The main parameter among the dimensions of the moydodyr is the width of the product. Such washbasins are available in a wide variety of sizes from 40 to 120 centimeters. You should choose a suitable model taking into account your personal wishes and the installation location of the country washbasin. As for the depth of the cabinet, in most models its value is 30-50 centimeters.
Different variants
The following types of country washbasins are distinguished:
- With a nightstand. This is a fairly popular type of washbasin for a dacha, the bedside table for which is made of chipboard, metal or some other material. A sink made of steel or plastic is attached to it. The appearance of such a country washbasin is quite beautiful. The advantage of similar models is also the possibility of connecting to the sewer.
- No nightstand. It is located on a support treated with anti-corrosion agent. Such washbasins withstand changes in weather conditions well, and therefore are often placed on the street. Thanks to the metal frame, the system of such a product is quite strong.
- Mounted. This kind of washbasin is attached to the wall, placed either in the middle of the house in the country or on the street. To drain the water, place a bucket under it. One of the advantages of this option for country washbasins is their light weight.
Types of washstands
The simplest washstands for the dacha are so easy to make that every lover of home crafts can make them without much labor and special tools.
There are several models that are most commonly used:
- Mounted on a rack. It is portable and installed in unprepared places. Equipped with a tap or pressure spout;
- Washstand with cabinet. The so-called “moidodyr”. There may be a tank inside to collect draining water;
- Washstand made from a plastic bottle. Since its design is the simplest, it is most often made by hand.