With the onset of warm weather, city residents go to their dachas to relax in nature, cook barbecue and other dishes over a fire. For owners of the private sector and summer residents, cooking food outdoors has long become commonplace. An outdoor stove installed in the yard is perfect for this. This design is durable and multifunctional. You can order the construction of a furnace from specialists, buy a ready-made factory model, or do it yourself, following the step-by-step recommendations of the masters.
Cladding an outdoor stove with bricks and making a smoke extractor (with photo)
The surface of the cornice is usually covered with clinker slabs, and its edges are decorated with facing bricks cut to the size of the end.
During facing work, it is necessary to ensure that the seams between the bricks are of the same width. After completing the masonry, use a narrow trowel to press the mortar into the seams so that they are completely sealed. Then smooth out the solution, let it dry, and then remove the seams.
After completing work with the fireplace, you can proceed directly to the manufacture of the smoke extractor. Blanks made of sheet copper 1 mm thick should be pre-cut. The width of all allowances for creating the sides should be 29 mm, and the height of the pipe should be 50 cm. To make it, you will need four blanks, each 25 cm wide. On the two outer blanks on the left and right, you need to carefully bend the edges 25 mm wide at a right angle. After this, you need to attach the smoke eliminator hood to the fireclay insert guard. Instead of copper, you can use other sheet metal (stainless steel or galvanized iron) for the smoke eliminator.
To create the edges of thin sheet metal, you need to fix the workpiece between two pieces of hardwood, then use a rubber mallet and a mounting block to carefully bend the protruding edge. Then, on the workpieces at equal distances from each other, you should first make markings, and then drill holes with a diameter of 4 mm for the rivets. For a fastened smoke extractor, it is recommended to strengthen the edge of the hood using brass corners.
On top it is necessary to install a square chimney with a weather vane. You can simply put it on the cap, but it is still recommended to attach it using rivets. In this case, the pipe will definitely not be blown away by the wind.
The smoke extractor must be fixed to the furnace fence using galvanized steel brackets. Before this, they need to be bent and attached to the cap with rivets 12 mm long. In order to correctly mark the points for drilling holes for dowels, the cap with the pipe must be attached to the fireplace, determine the future location of the brackets, only then make the markings, remove the cap and drill the holes. The cap can then be placed and screwed on.
In the hearth there is a frame for hanging the grill grate and installing an ash pan. To make it you will need steel corners. They must be connected to each other with screws or welding. As supports for the grill grate, it is recommended to attach two vertical elements made of strip steel to the rear transverse element of the frame.
In addition, you will need a weather vane, which is a cap that crowns the chimney. It is necessary to prevent precipitation and birds from entering the mouth of the pipe and to protect it from moisture.
You can purchase a ready-made grill for cooking roast, but you can save money and weld it yourself from pieces of steel rod with a cross-section of 8 × 8 mm and a length of 540 mm each, having previously bent them. Do not forget that two pieces of such a rod will be needed for the grille frame, which is made first, and then the remaining rods (about 18 pieces) are welded onto it. Screws can be used instead of welding. After assembly, it is recommended to chrome plate the grille. Two similar pieces of rod must be attached to the longitudinal elements of the frame from above, which are used as guides for the retractable ash pan. The distance between them should be slightly larger than the width of the ash pan. The retractable ash pan itself is best made from black sheet metal 1.5 mm thick.
Watch step by step how to make an outdoor fireplace in the video below on this page:
Calculation of basic parameters
Bricks
To calculate the required amount of material for a country stove, you can use the diagram below, which shows the bricks in each row of masonry. The image shows that the width and length of the future building are the same, so the design of the stove will have a square shape.
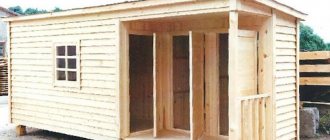
The small size of the structure is convenient for construction in the countryside
According to established standards, a single red brick has dimensions of 250x120x65 mm.
Standard Material Size
Knowing these parameters, it is not difficult to calculate the length and width of the building. Let's substitute the values: 250+250+120=620 mm - the size of one of the sides of the furnace.
To build a furnace, you will need 300 bricks, excluding damaged material.
Foundation
Construction of a brick kiln for a summer cottage requires the installation of a foundation. For this, a slab base is used. The length and width of the foundation must be made 150–200 mm wider than the furnace parameters, and its thickness must be at least 150 mm. Let's substitute the values: 620+200=820 mm - this is the length of one of the four sides of the base.
Having these parameters, it is easy to calculate the area of the furnace base. To do this, you need to apply the formula for finding the area of a figure, which looks like this: S=a², where “a” is the size of the sides of the figure being studied. Let's substitute the values: 820·820=672400 mm² or 0.6724 m².
To find out how much concrete mixture is required to fill the base, you need to use the geometric formula for determining the volume of a cube, which looks like this: V=h, where “h” is the length, width and height of the foundation. Let's substitute the values: 0.82·0.82·0.15=0.10086 m³.
Armature
The concrete base of the furnace must be reinforced with metal rods 10–12 mm thick. To do this, the reinforcement is fastened in the form of a lattice, with cells measuring 10x10 cm. To calculate how many linear meters of reinforcement are required to make the reinforcing mesh, it is necessary to determine how many rods are needed for the width and length of the structure. Since each rod is located at a distance of 10 cm from each other, you need to divide the length of the base by the width of the cell: 0.82:0.1 = 8.2 pieces.
It is also necessary to take into account that you will need a mixture for laying bricks.
The thickness of the adhesive layer between bricks should be at least 15–18 mm.
The foundation has a square shape, so the perpendicular side of the lattice will have a similar number of rods. Let's add these values: 8.2 + 8.2 = 16.4 pieces of reinforcing rods. Now let’s set the total length of the metal rods: 16.4·0.82=13.448 linear meters of reinforcement, rounded to 13.5 m.
Design features
This design can have either one or two hearths. It consists of:
- internal combustion chamber for loading fuel;
- countertops for preparing dishes (optional);
- external hob;
- woodshed - a special compartment in which fuel is stored for drying (optional);
- space for a grate – can be combined with the internal combustion chamber.
Note! The larger the combustion chamber, the larger the dimensions of the structure itself and, accordingly, the greater the functionality. But remember that heating up an oven that is too large will take a long time, as will it take a long time to cool down.
Stage 1. Selecting material for manufacturing
Despite the huge selection of building materials, there are actually not many of them that can be used in our case.
- fireclay brick or aerated concrete - both materials are very resistant to high temperatures;
- finished metal or cast iron products are an expensive option, but installation time will be significantly reduced.
Let's look at the problem from a practical point of view. Aerated concrete blocks will cost less than brick, but in terms of aesthetics they are definitely inferior. In addition, these blocks require additional cladding.
Note! Many people resort to buying ready-made stoves, and the reason for this is their undeniable advantages: easy installation (using glue) from a kit of parts according to the included instructions.
If we talk about the combustion chamber, then everything is more complicated here, because it is extremely difficult to purchase a suitable option. Therefore, you need to do it yourself. And the design itself, in theory, should be the way you want it to be - from the preferred design to the cladding method.
Accommodation
If you decide to install a barbecue stove on your property, then regardless of the type of stove you choose, you first need to think about fire safety - the place where it will be installed. It should be understood that any device with an open flame, if neglected in its placement and rules of use, threatens serious burns, large fires, which result in harm to human health (often fatal), surrounding buildings and nature.
It is safest to place a resting place with a barbecue on an area that is located at a considerable distance from the main buildings (country house, outbuildings, premises with animals and birds). But this is not always convenient, especially for an open outdoor brazier and those models that are under a roof, but do not have electricity, running water and other amenities of civilization.
Gazebos with barbecues can be placed on the same foundation as the house and under the same roof. But in this case, you must adhere to all fire safety requirements for buildings and residential premises.
It is not recommended to place such devices in the following places:
- near the storage area for firewood, hay, lumber and their waste;
- near dry grass, fire hazardous debris;
- close to fences and walls;
- directly under trees and overhanging branches.
When installing a collapsible barbecue in the garden or on the street, you need to take into account the speed and direction of the wind. Smoke should not go towards neighboring buildings and houses, and in cases of installing a stationary outdoor barbecue (including in a gazebo), you should take an interest in the local “wind rose” and build a protective screen on the side of the most possible “wind blower”. Special portable protective screens are available for sale, which is the best option for solving the problem of wind direction.
You also need to take care of the convenience of using the stove in the selected location of the site.
The following questions must be addressed here:
- a free approach to the device from at least two sides, because it is always more convenient and fun to cook with an assistant;
- there should be space for a table and seats nearby;
- the ability to provide a recreation area with clean water and lighting;
- Convenient access to the place from the house.
The following points should also be considered:
- how much time is expected to be spent at the dacha (this means constantly or only in the summer) - the installation of the stove indoors or in an open gazebo depends on this;
- how many people the recreation area is designed for;
- what design to choose for the barbecue area and gazebo.
Each owner will probably have a lot of questions about the design and selection of stoves, but they can already be solved in the process of creating the interior.
Prices for factory stoves
Owners of dachas and country cottages should consider stationary or mobile purchased stoves.
A barbecue oven made of red refractory brick with a length of 1.4 m, a firebox width of 0.98 m, a height of 2.12 m, and a depth of 1.3 m without installation will cost 78 thousand rubles. The same structure made of aerated concrete costs 55 thousand. The price of a brick oven 2 m long and deep, equipped with a cutting table and a built-in sink, will be 105 thousand rubles.
A product of smaller depth, 71 cm, without additional devices and cladding will cost 54 thousand.
Building a stove yourself will be much cheaper. Regardless of the type of design chosen, it will delight the owners with delicious dishes over a fire and make evenings with family and friends warm and cozy.
Installation of an outdoor stove
An ordinary garden stove in the classical sense is a stove made of brick or stone with one or two hearths.
It contains:
- internal firebox where firewood is stored;
- external hob;
- in more thoughtful designs there are places for smoking (usually in the chimney);
- places for a barbecue grill or grill, they can be combined with an internal firebox, or can be made separately;
- stoves come with two internal fireboxes - one open, the other closed;
- many stoves are equipped with a woodshed - a section or niche where firewood is stored for drying;
- For ease of use, there should be a countertop for preparing dishes (flat surface, ledge) on the front side of the oven.
The more spacious the firebox, the larger the oven itself, the more functionality the oven will have. But do not forget that a stove that is too large has great inertia - it takes a long time to heat up and takes a long time to cool down.
fire-resistant fireclay and decorative veneer, heat-resistant insulation, choosing bricks for laying stoves
The chimney can be made of brick, or a metal pipe of suitable dimensions can be used. There are also completely metal stove designs. Most of them are lined with brickwork during installation.
Types of stoves, which option is better to choose for self-production
To heat the premises of a country house, use:
- buleryan;
- brick;
- metal stoves;
- on used oil;
- long burning stoves.
Brick
Brick stoves for cottages have a simple design. It is easy to find suitable material for its construction. However, this heat source will require a heavy base in the form of a concrete slab, so it is rarely found as a heating structure in a small room in a country house.
Heater-cooking oven
Buleryan
The Buleryan heating device is a source of high heat output, which uses wood chips, small firewood and peat as fuel material. Despite its high performance, this device is expensive and requires special knowledge during installation.
Small and efficient heat source
Potbelly stove
A potbelly stove is usually small in size. This heating device allows you to create heat by burning wood. The potbelly stove is very popular due to its simple installation, reasonable price, simplicity of design and the ability to make this stove yourself.
Frequently encountered stove
On used oil
This type of stove is often used by dacha owners. This option is very convenient, since many of them have vehicles, and when servicing a car, there is always fuel oil and other liquid fuel left over. In addition, this stove is safe to use, since the fuel burns completely inside the structure.
Dual heat source design
Long burning "bubafonya"
When installing a long-burning stove, the room in the country house will be heated for a long time. It is not difficult to build such a stove yourself. All you need is skills in handling a welding machine.
The design saves fuel material
Considering the cost and performance of these heating devices, a brick option and a long-burning stove are most suitable for a summer residence. The cost of materials, production time and functionality of these heat sources make them the most popular among owners of summer cottages.
When making these stove options yourself, you will need skills in handling a welding machine and experience in bricklaying.
It should be noted that a big role in good heating of a country house is played not only by the functionality of the selected stove, but also by high-quality insulation of the walls of the building.
The stove for a summer residence is often modernized, so that not only firewood and sawdust, but also waste oil are used as fuel material.
Functions of an outdoor stove
A well-functioning oven provides the following types of cooking:
- cooking;
- baking;
- frying;
- stewing;
- smoking;
- cooking kebabs (barbecue, grill, barbecue).
Well-made stoves also have the ability to heat water for various purposes. This could be a small fireplace for heating water for household needs, or it could be a built-in boiler with a storage tank. Most often, a garden stove is placed under a reliable canopy, but some options may be without it, simply having protective canopies on top.
In addition to cooking, great attention is paid to the opportunity to sit comfortably next to the stove and admire the living flames of the fire. Such stoves are classified into the group of fireplace stoves
Some types of stoves can be used to heat greenhouses or other buildings. There are also furnaces for various types of crafts - firing clay products, hardening iron parts. We will not consider them in this article; they are more related to industrial facilities than to household ones. Although, if you wish, you can burn a homemade cup in a simple oven or heat a stone for household needs.
Why a wood stove?
If we exclude gas and electricity, the first - due to the complexity of installing a separate pipeline, the second - as an expensive energy source for heating, there are not many types of fuel left for a country stove. Coal has a high heat capacity and produces long-lasting and persistent heat . But its cost in regions that are far from coal mining areas negates its advantages. Wood pellets and briquetted fuel have now become popular. The calorific value of these materials is higher than that of firewood, but they are also more difficult to obtain and the price is higher.
At the same time, firewood is a renewable material that grows in abundance throughout most of Russia. In forested regions it is the cheapest type of fuel . A wood-burning stove is also convenient because, if necessary, it can burn not only quality firewood, but also wood waste - old boards and wood products that are not covered with varnish and paint. Although this is not the main source of fuel, such recycling can still be beneficial.
Firewood continues to be the most affordable fuel
Types of structures
In the open air, when a summer cottage is being arranged, it is enough to install the simplest version of an outdoor barbecue. This device, made of bricks 5 or 6 rows high, two and a half bricks wide and four bricks long, is a temporary structure. It weighs little, so no foundation is required. For such a stove, you should find a flat area with dry soil (but not sand), compact it to good density and lay out brick walls without any binding materials.
You can place a thin reinforced concrete or cast iron slab on the bottom of the resulting oven. Air will flow to the fire through leaks in the brickwork. The fireplace is located inside; kebab sticks are placed on top directly on the walls of the masonry or on the barbecue grill. The grill allows you to cook simple dishes in a frying pan or in a saucepan. It is advisable to build a canopy over such a device to protect the fryer from precipitation and wind.
Often, outdoor cast-iron stoves with a roof are installed at dachas. The roof is built after the “cast iron” with a pipe is installed. If you do the opposite, you will either have to cut through the roof for the pipe, or run the pipe around the canopy (with elbows). This remark is true for any stove devices in rooms or sheds.
The most popular among summer residents are the designs of barbecues in gazebos. Some of these ideas may be of interest to most summer residents.
Prefabricated furnace complex. Suitable for large arbors with the prospect of winter living in the country. The complex includes a stove, barbecue and auxiliary devices: a countertop, a sink, built-in compartments for firewood or coal, shelves for utensils and accessories for frying, cooking, as well as a corner for placing fireplace accessories. A unique oven, a tandoor, is sometimes introduced into the complex. Using such a device, you can bake not only delicious Asian flatbreads - it can replace a barbecue, kebab grill, and even a smokehouse.
- Stove-grill with the design and functions of a Russian stove. A very complex design that only a professional stove maker can complete. It is best to arrange it in a permanent building with a good foundation and a reliable roof.
- An expensive stove model with three fireboxes. This device is a compact two-level option, characterized by convenience and practicality. Suitable for spacious and high gazebos. Here are combined options for cooking stoves with fireboxes of various functions: barbecue and smokehouse, barbecue and smokehouse, barbecue and Pompeii oven (pizza oven).
- The factory-assembled metal model is inexpensive. It can be used both permanently in gazebos and portablely outdoors. When these stoves are used indoors only, they are often lined with brick for safety and a beautiful design.
- Fireplaces have the same structure as stove fireboxes, but they have a different purpose. Fireplace stove models are a good solution for combining the functions of cooking and heating a room. Such models with a chimney exist only for closed outdoor gazebos. For open gazebos and terraces, these devices are impractical - the heat from the fireplace will not be retained in windy weather.
Models of ready-made stoves with barbecues have different solutions - they can be outdoor, garden, with or without awnings. You can also find options with chimneys of different designs, with and without pipes, expensive and budget ones. But if the owner has the hands and the material, then equipping his dacha with a beautiful and convenient stove device will not be difficult.
Cooking questions
In order to correctly make the stove you like, and before that, choose the right design, you need to know exactly what which outdoor stove can do. Therefore, before the technical and construction aspects, we will have to be distracted by culinary issues.
Oven or smokehouse?
An oven and a smokehouse are completely different devices. The furnace is required to “squeeze” as much heat as possible from the fuel load and not allow it to be wasted in space. Therefore, furnaces are designed (perhaps intuitively, based on the experience of generations) to burn fuel to the final combustion products - carbon dioxide and water vapor.
On the contrary, what is required from a smokehouse is not high thermal efficiency, but as much smoke as possible. But not just smoke that eats your eyes. Firstly, smoke for smoking should ideally not contain solid particles of unburned fuel. The final product should be smoked, not soot-encrusted. Anyone who has seen how a good industrial smokehouse works has probably noticed that in the area where the product is loaded, there is almost no visible smoke.
Secondly, smoke for smoking should not contain substances harmful to health. It is impossible to organize this chemically when burning organic fuel, so smokehouses are built in such a way that harmful impurities either “skip” past the smoked substance, or are neutralized and settle before it.
There is an important point here: in the temperature range of approx. It is extremely undesirable to smoke at 35-50 degrees, because... It is at such temperatures that there is a high probability of acid condensation; it is formed as a result of the interaction of chemically active particles of unburned fuel, the so-called. free radicals, water vapor and air oxygen. The acidified product not only tastes disgusting, but is also dangerous to health. Therefore, a trace is distinguished. types of smoking:
- Cold – the temperature in the smokehouse is up to 35 degrees. Preparation of products - salting in brine (saturated solution of table salt) and soaking immediately before loading into the smokehouse. Smoking time – from 5-6 days; breaks are not allowed. The taste of the finished product is the highest; shelf life without the use of means and methods of additional preservation can be calculated in months and years.
- Semi-hot (semi-cold) – smoking temperature 60-70 degrees. Preparation of products - short soaking in brine. The smoking period until ready is 0.5-2 days. Taste qualities are very high; the taste and bouquet are similar to those of cold smoked products. Keeping quality up to a month; usually up to 5 days.
- Hot – at a temperature of 85-120 degrees. Product preparation is not necessary. Smoking time – 1-5 hours. The taste qualities are very high, but the taste and aroma are not the same as those of cold smoked products. Shelf life without additional preservation up to 36 hours.
Considering the above, we can conclude that, firstly, the smokehouse for an outdoor stove must be a separate device. Any stove is not a smoke generator for smoking and it is impossible to set up the smoking process from the stove only by loading fuel and supplying air into the firebox; you also need to select the length of the flue from the outlet of the stove to the smoking chamber. Secondly, to feed a smokehouse with smoke, the simplest stove with low efficiency and a smoke tooth is best suited, see below.
Grill, grill and barbecue
An open flame is the enemy of any cooked food. Burning is only the visible and palpable “tip of the iceberg”: exposure to high temperatures on food products causes hydrolysis of fats, breakdown of carbohydrates and deep denaturation of proteins, saturating food with substances that are very harmful to health. In simple cooking ovens using solid fuel, direct contact of the food with the flame is avoided in various ways. What they have in common is that the food is not only baked, but also smoked, which is why, when properly prepared, its taste improves.
Grill
The hearth oven, which is commonly called a barbecue, is actually a classic Anglo-Saxon grill, the diagram of which is given on the left in Fig. Confusion arose in Canada, where French and English were mixed together. The grill structure follows from Anglo-Saxon culinary traditions, the essence of which was exaggeratedly but accurately expressed by Stubb from Melville’s novel “Moby Dick”: “You must take a piece of meat, from afar for a moment show it a slightly smoldering coal and immediately serve the steak to me!” Remember “bloody roast beef” from Eugene Onegin? In restaurants, baked meat is still offered rare - half-raw with blood, medium - baked until soft, juicy, like a kebab, and well done - crispy in a crispy crust.
Grill, barbecue and barbecue equipment
Note: if you find yourself in the southwestern United States, there may be something strange on the menu - hanaban (pronounced hanaban). This is a kebab in spices, removed from a skewer, something like Arabic khusal.
The grill is suitable for cooking rare, medium, and well done meat. This is achieved by placing the grate with the product at different levels above the brazier with coals. Coals rarely flare up, because... scattered in a thin layer over a dense floor and air access to them is limited. If they flare up, then the piece is simply moved to the side.
Brazier
Rare meat can be very tasty, but in southern countries, where pathogens of various diseases thrive, it can also be very dangerous. In addition, in many countries of the South they do not eat pork at all, and beef and lamb are rare and harsh. Hence the design of the barbecue (in the center in the figure): a holey under and partly the walls of a deep tray, a thick layer of coals. The meat is heated not only by thermal radiation, but also by a flow of hot air.
B-B-Q
In a real French barbecue (oh, those pampered paddling pools!), heat radiation is not involved at all in cooking. The design of a barbecue oven is quite complex (on the right in the figure), but reliable and multifunctional:
- Thanks to the separate cooking chamber with a hood, wind and outside temperature have almost no effect on the quality of the finished product.
- If you close the chamber portal with a flap lid, like in a Russian oven, the chamber turns into a semi-hot or hot smoked smokehouse.
- You can bake bread, cook pot roast, etc. in the oven. If salting the dish is undesirable, it is cooked in a container with a tight lid.
- Woodshed and dryer are relative concepts. Here and there you can dry mushrooms, berries, and fruits that require different drying modes. Additionally, it is regulated by dampers.
Note: pay attention to the protrusion of the hearth, which does not completely isolate the firebox from the oven. This is the so-called. a smoke tooth or jib is a radical means of reducing the dependence of the technical performance of any outdoor stove on weather conditions, see below.
Simple brick outdoor oven for bread and pizza
You can build an outdoor oven for bread and pizza from various materials - refractory bricks, concrete slabs or from special ready-made modules for the construction of ovens, which are assembled like a construction kit. It will take no more than three hours to build an outdoor pizza oven from ready-made parts, and more time is needed to build a house around it.
The location for the construction of an outdoor cooking stove should be chosen especially carefully. Although such a stove does not use open fire, it is still necessary to choose an area protected from the wind, away from wooden buildings and trees (at least 6 m), but not too far from the house, since you will have to carry food and dishes.
The mass of a simple outdoor stove is at least 400 kg, so a special foundation must be built at the site of its installation. To do this, you need to remove the soil to a depth of 20-40 cm and put a compacted sand-gravel mixture.
Reinforced paving slabs 5-10 cm thick must be laid on top. One row of brickwork should be laid on the foundation, which will serve as a support for the furnace walls. Then you need to build an underbowl - a frame made of 9x9 cm timber, overlapped with fastening bolts. A fireproof heat-insulating board 8 cm thick will be mounted on the finished frame.
The main part of a simple outdoor stove is the firebox, or crucible, which is a rectangular box where wood is burned. Food is also prepared in it. In the furnace there is a mouth for the exit of flue gases. Above it is a chimney. The depth of the furnace is usually 75-100 cm.
Brick or concrete slabs are used to build the furnace. In addition, you can purchase a ready-made construction kit for outdoor stoves, the parts of which are made of special heat-resistant concrete. This brick summer stove is easy to assemble as a construction set.
The finished blocks are connected to each other using a special heat-resistant mastic adhesive. Instead, you can use a solution of 2 parts ordinary cement, 4 parts heat-resistant cement and 4 parts mortar. Before laying, it is recommended to moisten the seams and then avoid gaps in the mortar layer. If you couldn’t get a ready-made kit for building a bread and pizza oven, you can build it yourself out of brick. For masonry, it is recommended to use normal fired red brick, and the firebox should be built from refractory brick. As a solution, it is best to use a mixture of refractory clay and sand (in a ratio of 1:2) and mix with water until the consistency of thick cream.
While the finished bread and pizza oven is drying, you can begin to protect it from precipitation. To do this, the rafters in the lower part must be fixed to the foundation slab and covered with clapboard formwork. In this case, you should leave at least 20 cm of space between the stove and the roof slope for further thermal insulation of the stove. The top of the roof should be covered with bitumen shingles, and the roof ridge with sheet steel.
The pipe should be inserted into a lead-lined sleeve filled with mineral wool. To protect the pipe from moisture penetration, it is necessary to fill the gap between the cuff and the pipe with high-temperature silicone. A layer of mineral wool should be laid between the pipe and the roof. Insulation is very important in outdoor ovens. Between the stove and the roof slope you need to pour a layer of non-combustible expanded clay 10 cm thick and lay mineral wool. This layer will protect the roof from overheating and create the optimal temperature for baking. In addition, high-quality thermal insulation will allow you to cook food even in the cold season - down to -10 C. At lower temperatures, it is not advisable to use an outdoor stove: a large amount of firewood will be consumed.
The roof overhang in front of the mouth of the furnace is a fire hazard, so it must be lined with fire-resistant slabs 30 mm thick. Due to the intense heat from the stove, it is recommended to build the pediment not from wood, but from cellular concrete 50 mm thick and tiled. For greater reliability, all wooden parts should be coated with a special protective compound - fire retardant. In addition, any open-air wooden structure must be protected from fungus, insects and rot. You can use special chemicals for this. The easiest way to protect wood is to apply moisture-resistant paint to the wooden parts of the structure.
Required materials and tools
To build a brick stove for a summer residence, you will need the following materials:
- Ceramic brick.
- Fireclay brick.
- Kiln mixture for masonry.
- Metal parts of the oven: doors, grate, valves, cooking platform with rings.
- Cement grade M250.
- Sand.
- Ruberoid.
To build a brick stove for a summer residence, the following tools are needed:
- Small pickaxe.
- Trowel for mortar.
- Building level.
- Plumb.
- Rule.
- Large square.
- Cord for masonry.
- Grouting tool.
- Container for solution.
To make a bubafonya country stove you will need the following materials:
- Thick steel pipes;
- An empty gas cylinder or solid metal drum. If these materials are not at hand, the furnace body can be made from sheet steel with a thickness of at least 5 mm.
- Cold rolled steel sheet, at least 8–10 mm thick. A piston will be made from it to transport air and residual flammable gases.
- Hinges for doors at the bottom and top of the structure.
- Asbestos cord used as a seal for the loading and operational cavity.
- Trimmed fragments of metal corners, channels or profile pipes.
- Gear with a diameter of 15 cm with a mounting hole of at least 5 mm.
When creating a long-burning furnace, you cannot do without the following tools:
- Autogen.
- Welding machine.
- Grinder with grinding and cutting disc.
- Hammer.
- Bit.
- Medium sledgehammer.
- Yardstick.
- Building level.
- Graphite pencil.
Style and design
It is better to equip the summer kitchen area with a barbecue and cooking stove in the country house taking into account the already established natural landscape. Even a beautiful hedge with trees nearby can be a great starting point for stylishly decorating a seating area.
A view of a river or pond also suggests an original plan in relation to the surrounding view. The main thing in the arrangement is that the design of the recreation area should be in harmony with the surrounding landscape and match the design style of the house. If there is no house structure yet, then the plan for the kebab shop site needs to be developed in the same style as the plan for the future house and surrounding areas.
In more difficult circumstances, when there is neither a house nor the beauty of the landscape around, there is only one way out - to choose the style direction for arranging the site and housing to your liking. Landscape designs of smooth, flowing lines using natural wood and stone, as well as the Art Nouveau style with the obligatory presence of forged elements are now popular.
Gazebos can be of different shapes - from round to polygonal options, and barbecues - cast iron, wrought iron, brick or metal. The main thing is to maintain the chosen style.
Choosing a place
To decide on the place on the street where the stove will be installed, you need to take into account the following nuances:
- The stove should be close to the place where you plan to eat: in the summer kitchen, near the gazebo, not far from the dining table.
- It is better if there is a source of water nearby, as well as electricity.
- It is preferable to place the stove away from the cesspool, toilet, or livestock barn.
- The road, a source of harmful gases and dust, should be as far as possible from the stove.
Bricks for outdoor barbecue ovens
Many design projects for outdoor stoves and barbecues cannot do without modern building materials. Therefore, to add originality and sophistication to the facades of fireplaces, ceramic bricks that have appeared long ago are used. It is one of the types of facing bricks. And new shades and colors of brick will complement the uniqueness of this modern material and will allow you to easily decorate any barbecue complex project.
1) Clinker brick. During its production, a higher temperature is used, which makes it more durable and lasts longer. It is absolutely frost-resistant, extremely wear-resistant, has low porosity, and is easy to clean (a brush and water are enough to clean it). Clinker bricks can be figured; they are sometimes used in lining garden kiln complexes. Thanks to its varied shape, this type of brick is perfect for a variety of designs, allowing you to realize any fantasies. It combines perfectly with other materials and is environmentally friendly. There is also façade clinker brick, which is usually colored.
2) Kiln brick
Such a brick can withstand significant temperatures, it has a high thermal conductivity coefficient (it accumulates and releases heat well, which is very important for outdoor fireplaces, as well as garden barbecue stoves), and has an attractive appearance and color. This type of brick is indispensable for garden fireplaces where high temperatures are used.
Such bricks contain a large percentage of clay; sometimes graphite or coke powder or quartz are added to it, producing different types of bricks with fire-resistant properties. 3) Fireclay brick. Designed for the internal parts of barbecue fireboxes. It is obtained by firing fireclay and refractory clay, but it is important not to overcook the brick, otherwise a glassy film will form on it. Fireclay brick has a yellow color and a granular structure; it is used in laying out fuel chambers, hearths, stoves, fireplace inserts, and chimneys due to the fact that it is highly resistant to high temperatures. Before laying, the brick is checked for quality - they tap it (there should be a metallic sound) and try to break it (it should crack, not crumble).
4) Hollow facing brick. It comes in several types - hollow thermally efficient brick (it has an air layer, which prevents the walls from freezing and reduces the efficiency of heat exchange between the internal and external fireboxes of an outdoor fireplace), hollow ceramic brick, in addition to thermal insulation, retains moisture well, which has a beneficial effect on the future operation of the complex . Ceramic hollow bricks come in two types: glazed (glossy) and engobed (matte). They are used as a design solution in a variety of projects.
5) Textured brick. It has a number of advantages, which is why professionals are so interested in it. And already in its first use it proved its usefulness and reliability.
1. Unusual appearance. Ordinary building brick has always been a top seller, but it is very simple and unremarkable in appearance. Therefore, brick manufacturers decided to create a brick that would look like a work of art. Projects made from textured bricks are amazing and unique.
2. Technical characteristics. Having changed the appearance of the brick, its technical properties were not affected at all. Textured brick is also durable and practical, for which builders value it very much, since facing building materials are short-lived, and over time they deteriorate and crumble. And also this textured one protects the object from the negative effects of the environment.
4. Bricklaying. Some types of material are sometimes abandoned due to their complex masonry technology. A lot of experience or specialization in a certain field is required, so specialists are looking for other solutions. And although textured brick has changed in its design, the installation process remains the same as with ordinary bricks.
To summarize, ceramic brick is not a new product, and at the same time it remains the same good old brick.
Barbecue complexes. Video
Articles:
| Building a brick barbecue for a summer cottage is not always a complex construction; it all depends on the option chosen and your capabilities. The simplest project can be laid out on a platform or slab in a tower without using mortar, each row is laid with the seams bandaged, keeping the masonry vertical. Such a country house will be ready for use within a day. |
Memo
for those who still decide to install it themselves
- Decide on the type of stove to be installed outdoors.
- Decide on the location where the stove will be installed.
- Prepare a drawing of your future stove.
- Make a list of the necessary materials and tools, analyze the building materials market, and based on it, make a cost estimate.
- Develop a step-by-step plan for installing the furnace; this will help you navigate the time frame that construction will take.
- Start construction! And may your stove please you and your loved ones for a long time with delicious dishes cooked on it.
Furnace designs and sizes
The design and size of an outdoor stove depends on its type.
Russian
This option has the most complex design, which consists of the following parts:
- Opechek is a cavity intended for storing firewood.
- A stove is a recess for drying fuel.
- A shelf is a platform in front of the firebox for placing dishes before placing them in the oven or after preparing a dish.
- Under - the lower surface of the cooking chamber.
- The firebox is a cavity where firewood is stored.
- The overpipe is a place for collecting smoke from the firebox, which goes into the chimney.
- Dushnik is a small window that serves as a place for smoke exhaust. It also leads directly to the chimney.
- View - a damper for completely blocking the chimney. Inside there is a second damper that controls the draft of the stove.
- A lounger is a space above the firebox that is used as a sleeping place or for storing kitchen utensils.
The external dimensions of the stove may vary and are selected in accordance with the wishes of the homeowner and the size of the site on which the structure will be erected. In addition, you need to take into account the length of the lounger and the presence of additional functional features, for example, recesses for a cauldron, etc.
The depth of the foundation depends on the external dimensions of the furnace and the characteristics of the soil, but cannot be less than 50 cm. There are established standards for cast iron structural elements.
| Name | Size in cm | Quantity in pcs. | |
| Door | Firebox | 20x20.5 | 2 |
| — | Blowing | 25x14 | 2 |
| — | Ventilation | Arbitrary | 1 |
| Lattice | grate | 38x25 | 1 |
| Gate valve | 26x26 | 1 | |
| 18x14 | 1 | ||
| 14x14 | 1 | ||
| View | 23 | 1 | |
| Damper | Firebox | 45x38 | 1 |
| Water heating box | 50x12x28 | 1 | |
| Hob with two burners | 40x70 | 1 | |
| Steel rods | 100x5x1.2 | 1 | |
| 143x2.5x0.2 | 1 |
Fireplace
When building an outdoor fireplace stove, the draft is not calculated, since the device is not intended for heating. To organize the correct chimney, you only need to comply with the established standards for fireplace pipes. The cross-sectional area should not be less than 12% of the diameter of the firebox inlet.
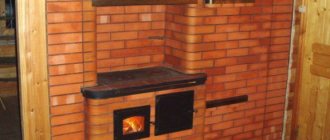
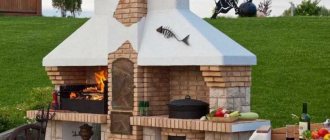
Photo 1. Outdoor brick stove-fireplace. Installed under the roof of the gazebo, it additionally has countertops and a sink.
The external dimensions of the fireplace depend on the wishes of the homeowner, but when laying the foundation, it is made 50 cm larger than the future stove. The depth of the base is from 40 cm or more. For construction you will need:
| Name | Size | Magnitude | Quantity |
| Concrete plates | 75x50x5 | cm | 5 |
| 50x50x5 | cm | 2 | |
| Aerated concrete blocks | 65x40x10 | cm | 3 |
| Fireclay slab for firebox | Depends on the desired size of the firebox | 1 | |
| Copper sheet | 1 (thickness) | mm | 1 |
| Brass corner | 20x20x2 | mm | 1 |
| Mineral fiber board | 120x60x1.9 | cm | 1 |
| Brass rod | Arbitrary | 1 | |
| Galvanized steel brackets | 15x15x0.5 | cm | 10 |
| Facing brick | 230x114x65 or 250x120x65 | mm | Depends on the external dimensions of the fireplace |
| Clinker boards | 20x20 | cm | 20 |
| Square rod | 8x8 | mm | 1 |
Tandoor
The tandoor has a round shape, so the foundation is made the same. Since this is the lightest version of an outdoor stove, its depth can be from 20 cm.
The exact value is calculated taking into account the characteristics of the soil.
The optimal height of the tandoor is 100 cm.
The lower diameter can be increased at the request of the owner, but the ideal parameters are from 60 to 80 cm.
The upper part of the structure is narrowed to sizes from 40 to 60 cm.
Important! The amount of narrowing is indicated taking into account the optimal diameter of the tandoor - 60-80 cm. When laying the first tier of the stove, a blower is made
This could be a removable brick or a damper. The blower is designed to supply air when igniting fuel or increasing the temperature inside the furnace
When laying the first tier of the stove, a blower is made. This could be a removable brick or a damper. The blower is designed to supply air when igniting fuel or increasing the temperature inside the furnace.
Procedures to help independent stove makers
There are a lot of nuances in choosing the design of a country stove that cannot be ignored. The vast majority of wood-burning units in dachas are not constantly heated, which does not have the best effect on their functionality and performance.
Due to the limited free space at the dacha, they try to build one stove. They mainly prefer universal designs that have both a heat-conducting surface and a cast-iron stove with burners for cooking. Although there are adherents of purely heating units.
Image gallery
Photo from
Brick oven with forged appliances
Large heat-intensive stoves
Small heating unit
Furnace with heat storage array
Let's look at three options for the construction of brick kilns for dachas, the construction of which is quite possible to handle with your own hands. Let's consider universal and heating designs of an extremely simple device, which can be quickly and easily cleaned even with irregular fires.
You can read about the most popular types of brick ovens in this material.
Option #1 - stove with a single burner panel
This is an extremely simple and compact design, seemingly elongated in the vertical direction. In the example, it is equipped with a door with heat-resistant glass, which allows you to monitor the process. If it is not possible to purchase just such a door, the cast iron variety is quite suitable.
The oven can be made in two versions: universal - with a hob designed for preparing hot dishes, heating - without a chamber for the hob
The width of the small-sized brick structure is 510 mm, which allows it to be placed in traditionally small country houses without any problems. The depth of the stove is 640 mm, while the depth of the firebox does not exceed 500 mm. The height of the structure is 2150 mm, the height of the chimney is determined by the position of the pipe relative to the ridge.
There is an oven that can be replaced with a drying chamber or a tank for preparing hot water. The presence of functional compartments not only allows you to prepare delicious hot dishes at the dacha, but also increases the heat transfer of a brick structure.
During operation of the stove, the air and flue gases heated by the stove rush upward, pass along the rear wall of the cooking compartment, after which they flow into the smoke circulation and further into the chimney. Thermal energy in this building is used to the maximum.
A narrow, vertically oriented design takes up minimal space in a country house, but does an excellent job of heating the space
The described brick structure includes 31 rows of flat laid bricks. In order for the structure to function flawlessly, the following procedures must be strictly followed.
During masonry, you need to constantly check the horizontalness of the structure being built and check the size of the diagonals of the laid sides. There are strict requirements for the thickness of seams that must be strictly taken into account. The maximum thickness of seams when laying the body and smoke exhausts cannot exceed 5 mm, when making lining - 3 mm.
For independent masonry of this stove structure, orders have been developed and material consumption has been calculated, which is a tangible help to independent builders
The presented order does not indicate the foundation for the stove, the specifics of the construction of which are presented in another article on our website. It is poured or built of brick according to standard rules. We will assume that the foundation has already been erected, and we will proceed to the actual laying of the stove.
No comments are needed for laying the first three rows; everything is extremely simple. In the 3rd row we put a door for the blower, in the 5th row we put a grate. Before installing the 6th row, we place the firebox door: we temporarily secure the frame with the door with wire braces and immediately support it with two side bricks.
At this stage, the ash door is installed, the grate is laid and the firebox door is mounted. A cast iron hob is placed in row 11
Next, follow the ordering instructions up to the 11th row. After laying it, we lay a metal corner or a steel strip, stepping back from the rear edge of the already constructed part of the structure exactly the width of one brick. This is necessary to install the hob.
After installing the hob, we continue laying, strictly following the instructions. Starting from the 12th and continuing to the 15th row, we simultaneously build the walls of the rear smoke channel and the cooking compartment.
At this stage of construction of a brick stove, a cooking chamber and a chimney are formed, located behind its rear wall
Upon completion of the laying of the 15th row, we place metal corners or install a slate sheet. They will serve as the basis for the upcoming continuous masonry.
In the 17th row we install and secure the cleaning chamber door. We lay it out up to the 22nd row. The result should be a hollow section connected to the smoke channel.
At the third stage of stove construction, the oven is installed and bricked, as well as chimney valves are installed
In the 24th row, we lay out asbestos scraps along the inner edges of our structure. Next, we wrap the oven body with asbestos rope, and then place it on the stove, resting it on the scraps. The asbestos rope will serve as thermal insulation and at the same time protect the device from burnout.
From the 24th to the 27th row we line the oven with bricks, observing the thickness of the seams regulated by the rules.
In the 28th row we install a door through which we will clean the chimney. We fix it as it should be with two bricks on the sides and continue construction.
In the 29th and 31st rows we arrange channels for chimney valves. We simply lay them down and carry out further masonry without connecting the devices to the bricks with mortar. Then from the 32nd row we build a chimney.
Option #2 - stove for heating adjacent rooms
We can unconditionally classify this design as a heating unit. It is not equipped with a hob with burners and an oven. But it perfectly warms several adjacent rooms, in which it is part of the interior partition.
A stove without a hob and oven is used as a heating unit. It is installed so that no more than three adjacent rooms are heated
The design, just like the previous type, is compact due to its elongation in height. It is only 510 mm wide and 890 mm deep.
The height of the heating stove without a chimney is 2380 mm, which is equal to 35 rows of laid bricks.
A brick building has a minimum of functional chambers. A novice stove maker can easily handle its laying
We will divide the manual for laying a heating type of a country brick stove into three conditional parts. We will assume that the foundation for it has already been built in accordance with the general rules.
The orders for masonry from the 1st to the 12th rows represent the construction scheme with the installation of a blower door, grate and arrangement of the firebox
The first third shows the ordering patterns from the 1st to the 12th row. We build the starting rows with special care, because... We will focus on them in the future. In each row we check the equality of the diagonals, using a building level we control the verticality of the rows.
To ensure that the walls are strictly horizontal, we will periodically check them during laying with a plumb line. In case of deviation, errors must be corrected immediately, before the solution has time to set and begins to harden.
The 1st row is laid over roofing felt, roofing felt or similar waterproofing material laid in two rows. For convenience, we fix the waterproofing with a binder solution and mark the outline of the stove under construction on its surface.
In the 2nd row we install a frame with a blower door and begin building a chimney. In the 5th row we place a grate, which is the overlap of the blower. In the 6th row we place a frame with a fire door and secure it with two bricks on the sides at once.
From the 5th to the 15th row we carry out the masonry with fireclay refractory bricks, thanks to which there is no need to carry out lining, which would essentially significantly reduce the volume of the already small firebox.
The second stage of building a brick stove consists of forming vertical smoke channels, a firebox and a cleaning chamber
After laying the 16th row in the formed recess in the 15th row, we strengthen its bottom with cement-sand mortar.
This is necessary to strengthen the bottom of the chamber intended for cleaning smoke channels. Then in the 16th row we install a cleaning door.
At the third stage of construction of a brick heating structure, further laying of vertical smoke channels, a second cleaning chamber, and installation of furnace valves are carried out
Afterwards we cover the cleaning door and form this chamber, at the same time we continue to build vertical channels for the smoke exhaust up to the 24th row.
Next, we proceed to the third stage of masonry. In the 25th row we begin the construction of the second cleaning chamber. We again strengthen the bottom of the previous row with a clay-cement composition, install another door and continue building the chimney.
In the 28th and 32nd rows we install valves, which are used as draft regulators. We add the furnace mass up to the 35th row, so that after that we can begin building the chimney.
Option #3 - a stove with a shield and a low trestle bed
A very practical design with a low brick couch that serves as a heated sleeping place in Russian huts. The construction is more complicated than previous options, but more practical, because includes a heating unit, some furniture, and a hob.
This stove design also has two flooring options. The differences are confined to rows 5 and 6, 5a and 6a. In the second option, a steel corner is placed on the corner of the top row
In order for the shield of the heating part of the stove to be 1020 mm wide, protrusions are formed on both sides. If you plan to increase heat transfer, the number of smoke rotations can be increased to 5. For normal operation of this design, it is necessary to rotate the chimneys above the stove.
This stove has two solutions, the differences of which are determined in rows 5 and 6, as well as in 5a and 6a. The second solution involves installing a steel angle on the corner.
There are developed procedures for this brick kiln design, and the material consumption required for the construction of a universal structure has been calculated. If the summer valve is not intended to be used, it is closed with a brick.
The dimensions of the bed are selected individually. It may not be a solid brick structure with chambers for burning and cleaning, but some kind of trestle bed on pillars instead of legs.
Between the posts you need to leave holes 120 mm wide. However, a structure with chambers retains heat better.
The ordering is essentially an exact instruction for novice stove makers who want to build a brick stove in their dacha with their own hands.
It is recommended to build this stove on a monolithic foundation, on which asbestos sheets are placed before constructing the stove. Fireclay refractory bricks are used only in the construction of a firebox as a lining. Typically, the firebox is built one brick lower than the installation level of its door.
The lining is carried out with bricks installed on the edge. We will not describe in detail the procedures given for the construction of this stove, because... the reader has already received an idea of the symbols and specifics of stove construction.
This stove is suitable for both summer and winter use. In the summer they cook food on it, in the winter they not only cook, but also warm themselves, dry it, and treat colds.
It is important to follow the given sequence diagrams, as well as strictly adhere to the proportions and compositions of binding solutions used in the construction of brick stoves.
Do-it-yourself construction of a stove for burning garbage, cooking or decorating a site
In order to choose the right project for the construction of a furnace, the following conditions are calculated:
- functions are the main criterion; the type of device chosen and its features will completely depend on it; it is also better to immediately decide whether the stove will be used only for cooking or will also have a decorative function;
- availability of sufficient space - it is best if a separate area is allocated for the stove, where it will be convenient to place the devices themselves, and then put up a gazebo or canopy for relaxation;
- foundation - more compact varieties, for example, a stove under a cauldron will require only a special platform, larger and heavier devices are provided with a serious foundation;
- budget - depending on the amount of funds, more expensive and high-quality or more economical materials are used, the dimensions of the stove and decorative elements are also calculated.
After choosing the type of device, it is best to make a detailed drawing, taking into account the dimensions and costs of materials.
Materials
Refractory bricks are well suited for building a garden stove; for an economical option, fireclay bricks are used only for laying out the combustion chamber.
The walls of the furnace are made of ceramic bricks; you will also need a mortar made from a mixture of fire-resistant cement and sand.
It is recommended to use ready-made mixtures, which are sold in construction stores). The necessary parts are purchased - dampers, doors, hinges, most often made of cast iron.
Preparing the site
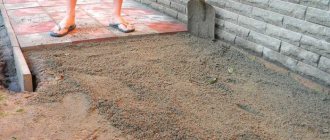
Installation of a garden stove is ideally planned at the same stage as the construction of a house. It is most advantageous to place it next to a relaxation terrace, a gazebo, or next to a convenient clearing or the shore of a pond, where it will be good to organize family evenings and relax with friends. The location near the house is most convenient, as it will save time in the future - it will be close to carrying food for cooking, fuel, and it will be easier to maintain equipment.
The foundation is made based on weight and dimensions. A pit is dug, at the bottom of which a cushion of crushed stone and sand is poured, formwork and a mesh of reinforcing rods are installed on it. Then the foundation is poured with concrete and left for a week to dry. The resulting platform protrudes above the ground by 10 - 15 cm.
Photo 1. Scheme of preparing the foundation for an outdoor stove with dimensions and explanations.
Step-by-step instructions for laying a stove. Order
Before starting, it is recommended to lay out the masonry according to the scheme without mortar, prepare and cut the bricks, mark them - this will greatly facilitate the work process and help avoid mistakes. Laying is carried out in the following order:
- Waterproofing is laid on the dried foundation.
- The base is laid out according to the diagram - while carefully monitoring the evenness of the rows (check with the building level).
- The combustion chamber is laid out - when using ceramic bricks, two rows are often made - an outer ceramic one and an inner one made of fireclay bricks. To lay out the device under the cauldron, bricks are cut according to the diagram to obtain beveled walls of the firebox.
- The cooking chamber is laid out - in models of two-chamber fireplaces.
- A chimney is laid out, and in some cases, smoke channels are laid out.
- Very often, garden stoves are lined to protect them from the elements, to better seal seams, and also for decoration.
Photo 2. Layout diagram from the first to the seventeenth row of a simple oven with one oven and a cutting table.
After construction is completed, the stove is left to dry, and after several days they begin to gradually heat it - first only with paper, then increasingly increasing the amount of fuel and heating temperature.
Tabletop of a Russian stove
The countertop was filled with concrete, which was made independently. Concrete for the countertop: 1 bucket of cement, 2 buckets of sand and 1 bucket of crushed stone. It turned out too liquid, so half a bucket of sand mixture was still needed. When the mixture was poured into the formwork, there wasn’t enough, so I had to mix a bucket of sand mixture with cement and add it without crushed stone. But the good thing is that there were no pebbles sticking out on the surface.
90 pieces of fireclay bricks were purchased for the furnace. It is necessary to clarify and look at the documents from what raw materials the fireclay brick was made - this is important for the Russian stove in which food is cooked. Fireclay bricks should not be made from broken bricks. The holes were also cut out of Lego bricks, plugged with foam and the bricks were laid on the corners.
The aerated concrete blocks were laid dry, the countertop formwork was made and concrete was poured. After this, it was also laid out to dry. The length of the vault will be three bricks, 75 cm. The total length together with the protruding pole will be 120 cm. It is necessary to decide whether the vault will be inclined or not with the existing length of 75 cm.
As for lifting the hearth, with a certain length of the Russian stove, it is more convenient to rake out the ash. This circumstance may slightly affect the flow of air to the rear wall. Its absence will not affect the operation of the oven as a whole or its culinary qualities. Lifting the rear part of the arch will change the gas distribution inside the furnace; an additional cap will be formed to concentrate hot air and flame. Historically, this particular design developed because they prepared food for livestock in huge cast iron, heated water for washing and other things in large dishes, so the mouth could not be small in size. And in order to minimize heat loss, they built a slope for the vault.
Next, the vault itself was laid out, but there was not enough fireclay. And to the existing 90 pieces, 48 more were purchased. We tried on a cauldron with a volume of 8 liters and a baking tray 33 cm wide - they fit well together.
Next, it was time to make the vault pattern. It was specially placed on bricks, taking into account that it could be easily pulled out after laying, carefully removing the bricks. The solution was made from mortar and water. Working with it is easy and simple - a pleasure compared to the solution. Next came the laying of the vault, and again there was a shortage of bricks, 12 bricks were missing.
48 - 24 additional bricks were quickly purchased. and 8 - 12 pieces, as well as diamond discs. The sawing did not work with the end - sparks were flying, I had to sharpen the disks, the last row of bricks of the vault with the side of the disk, there the diamond had not yet been worn off. I had to grind down half the brick, there was a lot of dust, but the vault turned out great.
After laying the last row of the vault, there is no need to immediately remove the pattern; it must be left so that the solution releases its water, after which the vault is cleaned. It was decided to order the cutting of bricks from a professional and make the structure according to a beautiful design. Next, you need to start laying, and the pattern was pulled out immediately.
Stage 3. Let's get started
First, work out an action plan and draw up a diagram, preferably in great detail. Think about where the stove should be located, what it will look like, etc. This way, the time spent on work will be significantly reduced, and the amount of materials needed will be determined as accurately as possible.
Note! It is advisable to use only high-quality building materials - this will help avoid problems in the future. If, for example, the brick is of good quality, then when laying it you use a minimum of mortar (at least that’s what experienced stove makers say). You can, of course, use used bricks, but before using them for internal elements, thorough cleaning of the surfaces is required.
- The prepared solution should be plastic, but in no case liquid! This way the seams will be completely filled and drips will be eliminated.
- It is recommended to sift the mixture through a fine-mesh sieve (cell diameter is maximum 1.5 millimeters).
- If oily clay is used, it must be mixed with sand.
- The solution is mixed with utmost care. Recheck the entire mixture with your hands at the end of kneading, knead the lumps and eliminate unnecessary impurities. Remember - the solution must only be homogeneous!
- Before working, the clay should be checked for fat content. Do it as follows: take 1 liter of each clay and sand solution, then roll into balls with a diameter of 0.5 centimeters. When the balls are dry, drop each one onto a hard surface from a height of one meter. A ball that will not break and will be the ideal ratio of components.
- The clay should be soaked at least two days before starting work. During this period of time it will “sour” enough and acquire the required plasticity.
An outdoor oven also involves the use of tools and materials such as:
- brick (preferably fireclay), the quantity of which is determined by a previously drawn up project;
- nylon rope;
- clay;
- shovel;
- cement;
- trowel;
- sand;
- mounting level;
- ash door;
- door for the combustion chamber.
Stage 2. Selecting a suitable location
Let’s immediately make a reservation that the outdoor stove should be located in the most convenient place. Ideally, its location should be determined at the initial stage of building a house. But if the house has already been built, then the choice of location will depend on specific conditions.
In this case, you must adhere to a number of mandatory requirements:
- the structure should be placed near the recreation area, terrace or veranda (otherwise you will have to build a canopy and install several benches);
- there must be lighting;
- Regarding the dimensions, we cannot give any specific advice, since they depend only on your personal preferences and needs;
- between the gazebo and the stove (if the distance is large enough) you need to lay a path;
- the structure should be located on the leeward side so that smoke does not enter the house;
- It is better not to build it next to plants and bushes, because they may suffer from high temperatures;
- the space around the stove must be laid with stone or tiles;
- and most importantly, there should be no flammable materials nearby!
Oven with tandoor
An interesting option is a tandoor oven
The complex may include a unique element that can completely replace many of the functions of a garden stove - this is a tandoor. Not a very familiar word, but most likely many have seen how oriental flatbreads are baked. But this oven can also become a roaster for cooking barbecue, vegetables or fish, and allows you to prepare pilaf or pizza. In addition, you can also make a smokehouse out of it. For each dish, there are various devices that are installed on or in this stove. Everything cooked using the tandoor has a special taste, so it is perfect for those who love either oriental dishes or just delicious food. If you look at this stove in cross-section, it looks something like this.
Sectional view of a tandoor oven
The tandoor can be built into a brick barbecue complex, which is located in a gazebo, or it can be installed separately. This oven looks like a large jug inside. It has a vent and a grate in its lower part - they make it possible to obtain coals from the firewood, with the help of which various dishes are prepared.
If the furnace is built separately from the complex, then a shallow reinforced cement podium needs to be prepared for it. When it is ready, you can begin laying it, which is quite complicated, since the tandoor has a semicircular shape, tapering at the top. It is this configuration that is necessary to retain the heat inside for a long time.
If additional walls will be laid around it later, this must be foreseen when laying the foundation, and space must be left for them, or better yet, the first row must be made common.
Stove diagram with tandoor
To lay the tandoor, they use clay mortar, and begin by laying out a brick base. If you work according to the presented scheme, the oven will gradually narrow towards the top and converge into a circle. In order for everything to work out as planned and a beautiful vault to be built, the bottom layer of brick is cut off.
After completing the work, the inner surface of the tandoor is well cleaned of any mortar that has protruded from the seams.
On the outside, the seams between the bricks are traditionally filled with dry ground clay, and the inside surface of the tandoor is coated with a solution that consists of soaked clay mixed with very finely chopped grass. Next, the stove is left to dry, after which it must be carefully fired. This is done first using plain paper, but newspapers should not be used, since printing ink consists of substances that are not entirely useful for the human body. After warming the tandoor with paper, you can gradually add dry firewood to it.
In the east, the tandoor is coated with a layer of clay on top and decorated with various ornaments. If you plan to build a stove with a tandoor in its design, smooth walls are placed around the jug, and the distance between the walls of the tandoor and the smooth walls is insulated using a mixture of clay and vermiculite. The top of the oven is placed in the same way as a regular barbecue oven. In autumn and winter, the tandoor must be closed from above, since precipitation and dirt can damage the interior decoration.
Complex brick oven
Multifunctional garden stove
A garden stove, which has many functions, will help out in any case and will help you prepare different dishes - from barbecue to smoked products. An oven built into the stove will be able to bake bread or a pie, thereby allowing you to avoid leaving the dacha for a long time to go to the nearest shopping center - you just have to stock up on all the necessary products when going out of town.
This design is heavier and has built-in elements and additional extensions. Therefore, to build it, you must first think about building a foundation. You don’t need to make it too massive and make a deep pit for it, but you can’t do without it if you want the stove to last for many years and not fall apart in the event of slight soil subsidence.
“Ordering” a garden stove with an expanded set of functions
The diagram shows an option that is slightly different from the photo, but also has a stove and barbecue grill. The figure clearly shows what each of the rows of a complex furnace looks like. Based on the proposed drawing and following the recommendations, it is quite possible to do the work yourself.
We choose and build a garden stove with our own hands: diagrams and procedures
A stove in the garden will help out in many cases.
DIY garden stove
When you come to your dacha to relax, you don’t really want to stand at the stove in the kitchen to feed the whole family or invited guests. Cooking outdoors in good summer weather is much more pleasant, so you can’t do without such an assistant. But a garden stove can be built with your own hands if you carefully select the right model, understand its installation and purchase the necessary materials.
Furnaces may have several functions, or may be limited to one or two. To focus your attention on one of them, you need to consider their different types.