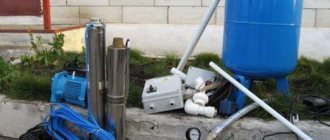
Criteria for choosing an Abyssinian well
Any country resident, before starting to build an Abyssinian well, must find out whether it is suitable for him. After all, the Abyssinian is a shallow well (up to about 10 m), and it is placed in flooded sand of coarse and medium fractions . If the water-bearing layer is located lower, for example, at a depth of 12-15 m, then you need to think carefully about whether it is worth making an “igloo”. The reason is that a self-priming pumping station will not lift water through the pipe if the distance from the top point of the well to the water surface exceeds 8-9 m .
One of the options for solving the problem of a deeper aquifer could be the construction of an abyssinian and installation of a pumping station in the underground, basement or well.
I have a 15-ring well dug on my property, but there is not much water. In fact, the level is maintained only on the last ring. This is about 500 liters, which is completely insufficient to properly supply a large family. I don’t want to deepen the well with repair rings. I'm thinking of hammering the Abyssinian right into the well. The question is - is it a working idea or not?
In such a situation, in order not to throw money away, you need to act according to the following algorithm:
- We find out the flow rate and depth of neighboring wells.
- We find out whether the wells are drilled for sand or limestone.
If there is about 5-7 m left on the sand and up to the water-bearing sand layer, then you can try to hammer in the “needle”. If the sand is below 10 m, then the pump will not be able to lift water from such a depth.
In addition, it is necessary to take into account that if you place the pump in a well above the water surface, then in the event of seasonal fluctuations in the level, the station may flood. Secondly, if it is necessary to service the pump and the “needle”, for example, to air the Abyssinian, you will have to climb into the well to eliminate the problem.
Therefore, if there is not enough water in the well, but at least one ring is collected overnight, it makes sense to deepen the source another 1-2 m. For example, using a plastic HDPE pipe with a wall thickness of 6-8 mm, the required diameter and with ribs instead of repair rings rigidity. It also makes no sense to install the Abyssinian in clay or hard layers of soil, the “needle” simply will not work.
You can find out about the structure of the soil and the depth of the aquifer by asking neighbors who have wells: at what depth from the surface is the water, and were there any problems when digging. For example, workers ran into a thick layer of clay or came across quicksand. A clue may be the wide distribution of active Abyssinians in a town or village.
The second way is to carry out exploratory drilling, for example, to find out the type of soil and choose a foundation design. The results can say a lot about the possibility of developing the Abyssinian well.
I want to make an Abyssinian well on the site. The question is whether it will suit me if the soil on the site is as follows.
As can be seen from the borehole passport, water-saturated sand of medium coarseness lies at a depth of ten meters. Those. the best option for the “needle”, but at a depth of 4.5 m there is fine sand, saturated with water with inclusions of gravel. And gravel and stones are a serious obstacle to plugging an Abyssinian well, because... the tip of the “needle” may break, the filter mesh may become tattered, pipes may bend or fittings may burst. The solution is to drill a “needle”.
Hydrophore volume and its adjustment
The main factor that you need to pay attention to when choosing the total volume of a hydraulic accumulator is the maximum amount of drinking water consumed by family members in a certain time. Productivity is usually calculated based on the total amount of drinking water consumed per hour. Experts have derived average values, however, they should be taken as a minimum.
For example, a family of 3 people living in a small country house should install a hydrophore with a capacity of 2 cubic meters of water per hour. A larger family that lives in a large private house with a garden plot must rely on a pumping station with a capacity of at least 8 cubic meters of water per hour.
Drilling an Abyssinian well using casing
I need to get water on the site for technical needs - for irrigation and building a house. According to neighbors, the aquifer lies at a depth of 7-8 meters. The next water carrier is at a depth of 15. I decided to make an Abyssinian well, but not to hammer the “needle”, but to drill a well and only then finish the Abyssinian into it. The reasons are as follows:
- Study the water-bearing layer and make sure that there is no dirty water from neighboring septic tanks and cesspools.
- Study the composition of the soil on the site to select the type of foundation before starting construction of the cottage.
- Achieve a higher quality of “needle” installation, because when drilling, there is less chance of hitting a stone or breaking the filter than when clogging an abyssinian.
According to the user, he already has experience driving a metal corner with a sledgehammer to create a 3 m grounding loop. Although the corner was sharpened, he had to sweat and work hard physically.
I personally don’t like the option of plugging the Abyssinian well, because... the result is unpredictable, and the work is carried out blindly. You can get into a stone and break the “needle”, but in this case it is difficult to get it out.
Klopus' idea of pre-drilling is correct. The top layer of soil is dry and compacted, and it’s difficult to hammer a “needle” into it, but as soon as you reach the watered layers, the installation goes like clockwork. When you beat an Abyssinian, you don’t see the cut and structure of the soil. Hydrodrilling also provides much more complete information about the composition of the soil.
So, to install the Abyssinian well, Klopus bought:
- High-quality auger drill with a diameter of 77 mm.
- A complete set for the Abyssinian - an “igloo” with a stainless steel filter.
- Galvanized pipes: 3 pcs. 2 m each, one by 1.5 m and another one meter long, couplings and headstocks.
- Pumping station with a power of 900 W.
The installation of the Abyssinian well consisted of several sequential operations:
1. Selecting a location for the well and digging a pit 50 cm deep.
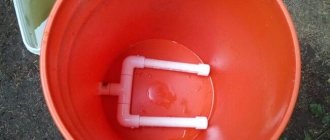
2. Start of drilling. First came the loam. After two meters from the surface, wet yellow sand began to appear, and the deeper Klopus drilled, the thinner it became. As a result, the work stopped - the slurry from the sand flowed back into the well, and it was impossible to lift it with a drill.
I went to the market and bought a regular gray 110 mm sewer pipe. I enlarged the well with an ordinary garden drill and then began to drill in the casing. Those. the pipe is pressed into the sand at the same time as drilling with an auger drill, which quietly fits into it. I scooped out the slurry with a cut-off plastic bottle attached to a wire.
Source
Connection procedure: step-by-step instructions
Pumping stations are suitable for equipping relatively deep water intake workings. If the depth of the groundwater table exceeds the maximum value specified by the equipment manufacturer, remote ejectors are used.
To install, perform the following steps:
- A trench is laid connecting the well and housing.
- Pipes are laid in it.
- Install a water supply system (if it is missing).
- Install the unit in the selected location.
- The supply pipe is equipped with a filter and a check valve.
- Connect the line to the receiving pipe.
- Connect the unit to the water supply.
- Connect the equipment to the power supply.
- Fill the hydraulic tank with water.
- Perform a test run of the station.
- Check the joints.
- Set up the pressure switch.
The pipes of the external pipeline of the water supply system must be laid below the level to which the ground freezes. It is recommended to make a slight slope from the house to the well so that the water returns to the pump if it stops working. This will protect the device from overheating and damage due to dry running, i.e. work in the absence of water.
The same protective function is performed by a check valve, which does not allow liquid to leave the pipe and go into the well. When connecting a surface pump equipped with an ejector, it is necessary to connect another one to the suction pipe, which is connected to the ejector.
This unit directs part of the incoming liquid to the base of the pipe through which the liquid flows, which significantly increases the productivity of the equipment. If a submersible pump is used, the work is performed differently. It is connected to the suction pipe and suspended on a durable stainless steel cable.
Submersible pumps are conveniently attached to a finished head. Such a device is mounted on the top of the casing pipe. It is believed that sealing a well with a cap allows it to slightly increase its flow rate. To prevent the cable and cable from getting tangled, they are fixed to the pipe using plastic ties.
If the filter is already in the pump, you are limited to installing a check valve. The edge of the surface pump supply line should be located at a height of more than a meter. This minimum distance is half a meter for a submersible pump.
Connections between the unit and pipes must be made using American taps; valves are used to shut off any section and disconnect it for repairs without damaging the remaining elements of the system.
Do-it-yourself diagram for connecting a pumping station to a well - instructions, tips
Having a country property, be it a house with permanent residence or a summer cottage, it is not always possible to connect to the central water supply. For this reason, water sources are equipped independently. The question arises of how to deliver water to the desired point; for this, water pumps are installed. For any installation, a pumping station connection diagram is required. As you know, pumping units have different modifications. There are with an external ejector and a built-in one or without it at all, affecting the pressure in the pipes, with or without a storage tank, automatic or with a float.
The best furniture for a large hall
Many people wonder what furniture to choose for a large hall so that the room does not look empty and can be divided into zones. For a large room, a good option would be to create a dining room together with a living room.
The dining area should have display cases, a table, and comfortable chairs or armchairs. This area needs to be arranged in such a way that the whole family can gather during lunch or dinner.
In the recreation area you need to create the most comfortable environment so that you can relax after a difficult day at work or receive guests. This zone should emphasize the overall style as much as possible and show the refined taste of the owner.
Purpose of pumping stations
Such a station is intended for the functioning of the water supply system of a household, dacha, cottage and maintaining the required pressure in it. Thanks to its operation, it is possible to equip an extensive water supply network, creating conditions for connecting household appliances to it - a washing machine, dishwasher, shower stall, boiler, etc.
According to the installation diagram of the pumping station, it contains a pump, a hydraulic tank, filters, automation and a pipeline structure. The source of life-giving moisture is a well or borehole. In some cases, water intake may be carried out from open reservoirs or other reservoirs.
When installing a pumping station at a dacha is needed to supply water from a pond, lake or river, it can be used exclusively for watering the site or other household needs. Samples of liquid supplied from wells and wells must be taken to a laboratory for analysis - their results will show whether it can be used as drinking water.
Typically, the depth of a well in a personal plot is approximately 20 meters - this is the optimal parameter for placing automatic equipment. This distance allows liquid to be supplied to water collection points without the use of additional devices.
Water supply pumping units operate in cycles consisting of two stages. When the unit is turned on, water rises from the source, fills the system and the hydraulic accumulator. This happens until the pressure reaches the upper limit, after which a special relay turns off the pump and the liquid supply stops.
When you open the taps or operate household appliances that consume water, it flows from the storage tank. The liquid from it is consumed until it reaches the bottom mark. Next, the pump comes back into operation and begins to pump water into the hydraulic tank.
The number of cycles per hour must not be allowed to exceed the permissible number of starts of the pumping equipment being used.
The advantages of installing a water pump in a private home are undeniable:
- Autonomous water supply is provided;
- the efficiency of the water supply system is increased;
- equipment and pipelines are operated in safer conditions;
- it is possible to create a supply of water and, in the event of a lack of power supply, supply it;
- the system maintains a constant pressure and stable liquid pressure;
- the service life of various household appliances connected to the water supply structure increases;
- energy consumption costs are reduced.
In addition, such a station has compact parameters, relatively light weight, and is easy to install.
Installation diagrams
Before installing a pumping station, you need to choose the optimal location for it.
This takes into account:
- distance from the station to the source;
- humidity and temperature conditions at the pump location;
- availability of space for repairs and maintenance;
- the ability to soundproof the room.
After choosing a location, the water pumping station is installed step by step:
- Work begins with preparation. A solid base with a flat surface made of wood, concrete or brick is created for the transfer pump. You can use a special metal bracket.
- Since the unit begins to vibrate strongly during operation, leaks may appear at the joints of the pipes. Therefore, before connecting the pumping station, a rubber mat or special pads are placed under its supports. Anchor bolts can be used to securely fasten the legs.
- In order to ensure uninterrupted water supply, it is necessary to ensure a constant supply of liquid from the source. It is necessary to follow the instructions on how to properly connect the pumping station to the well, protecting it from freezing. To do this, dig a straight trench in the direction from the source to the foundation of the house to lay pipes in it, preferably with a cross-section of 32 millimeters.
- Pipes are laid below the freezing mark of the ground. When forming a trench, take into account the slope in the direction of water intake. When groundwater lies close to the surface, the pipes are placed above the critical level, but at the same time they are insulated or a heating cable is used.
- When the pipeline is located above the ground, high-quality thermal insulation and heating are required; for this, basalt-based mineral wool can be used.
- Before connecting the pumping station to the water supply, they complete the water intake unit with a surface device and a built-in ejector, connecting polypropylene pipes to the end along with a check valve and a metal mesh, which performs the work of a coarse filter. The check valve ensures stable filling of the pipes with water. To fix it, use a coupling with an external thread. When operating a submersible pump, you only need a pipe and a check valve - it already has a filter of this type.
- The pump weighs a lot, so a strong cable is required to hang it. When lowering the water intake unit of a structure with a surface pump, take into account that the gap between it and the bottom of the well or borehole must be at least 1 meter. For a submersible unit it is 0.5 meters.
- Next, in accordance with the connection diagram of the pumping station, a hydraulic accumulator and a control unit are placed using a five-pin fitting; it is placed in a convenient location in the pressure pipeline. Then a pressure switch and pressure gauge are mounted to it. The storage tank is connected to the side entrance of the fitting.
- All piping elements of the pumping station are complex units, and the breakdown of one of them leads to a malfunction of the water supply system. For this reason, shut-off valves are installed at each site so that it is possible to carry out local repairs by disconnecting a certain part of the structure. This is best done using an American type tap (for more details: “American tap - rules for using fittings for connections”).
- It is advisable to provide in advance the possibility of draining water from the system. Therefore, a branch is made in the pipeline from a tee with a drain valve. A coarse filter is installed on the water supply branch, and a fine filter is installed on the pressure branch.
- Then consumers are connected to the station, the first of them will be the distributing collector.
- The electric motor of the pump is characterized by high power, so a separate power line must be allocated for it. The electrical connection diagram for the pumping station provides for grounding and connection of a voltage stabilizer.
- During the installation process, you need to check the pressure in the air chamber of the accumulator. Its value compared to the switch-on pressure of the unit should be 10% lower. The setting is performed in operating mode. Preliminary values for a tank with a capacity of 20 - 30 liters are 1.4 - 1.7 bar, and for a tank with a volume of 50 - 100 liters 1.7 - 1.9 bar.
- When you install a pumping station with a surface-type product yourself, you need to fill the working part of the system before starting. Unscrew the plugs from the filler hole located at the top of the pump. When the pipeline is equipped with a filler funnel, use it. Water is poured in until it begins to flow out, and then the valve is tightly closed.
- The pump is connected to the power supply during startup. To remove any remaining air that has entered the funnel, open the valve on the pipeline.
- You need to not only know how to properly connect the pumping station, but also how to start it. After turning it on, water should appear from the outlet of the pressure pipeline or a slightly open water tap. When this does not happen, the pump is stopped, water is added and it is started again. After a successful start of the equipment, it is run in and the pressure switch and valve body are adjusted. Most often, adjustment of the pressure switch at the pumping station is performed by a specialist.
Basics of operation and design features
The most important, main components are the pump unit itself and the storage tank. Depending on the design, the mechanism is controlled by an automation unit or a float element. As a result, it turns out that each of the operating nodes is found in different versions. For example, a storage device exists in the form of a hydraulic accumulator and a tank . The pumping unit itself may or may not be equipped with an ejector. Moreover, the first of these options can be made with a built-in or external ejector.
Devices with a storage tank have a long list of disadvantages, including the main ones: large dimensions, and therefore difficulties during installation, as well as the lack of forced action on water, which does not contribute to an increase in pressure in the system.
A pumping station with a storage tank is quite cumbersome equipment
The most common versions today are those with a hydraulic accumulator . The principle of their operation is based on the features of the main unit, which is divided inside the cavity into two compartments. Both of them are responsible for different functions: pumping air or water.
The pressure level is monitored by a relay, which turns off the device when the pressure reaches a certain level. If the value of this parameter drops to the minimum limit, the relay is activated and the device is put into operation. Despite its popularity, this type of equipment also has its drawbacks, in particular, the tank is not very spacious.
Construction of a pumping station with a hydraulic accumulator
Pipe selection
Water supply polyethylene pipes
To install a water supply system, you need to purchase pipes for external and internal mains. It is better to lay the external line using HDPE products. They are not afraid of temperature changes, static and dynamic soil pressure. They have a smooth inner surface, which ensures normal water flow.
It is better to lay polypropylene pipes inside the house. Their installation is carried out by soldering. As a result, the melted polymer forms a perfectly sealed connection.
Technical indicators
If you plan to install a pumping station for a dacha or household, when choosing it, pay special attention to performance. The best solution would be a design that will provide the required pressure from the well, capable of satisfying the need for water for domestic needs and for a personal plot.
For a comfortable stay outside the city for a family of 4 people, installing a water station of medium or low power is suitable. Typically, such designs are equipped with a hydraulic tank designed for 20 liters. They lift liquid from the well in a volume of 2 - 4 cubic meters per hour and create a pressure of 45 meters or more.
In addition, before installing a pumping station, when purchasing, take into account its dimensions, the water level when the pump is off and running, the type of filter and the cross-section of the pipes.
How to install a hydrophore in a private house
The supply of water to your home, which is located far from the centralized water supply system, is based on its supply from various sources. They can be wells, wells or storage tanks. The main feature of such sources is the absence of pressure, which is necessary to raise water to the surface. It follows that for uninterrupted supply to a personal plot or house, it is necessary to buy regulating equipment for water delivery. This may be a pumping station or a special hydrophore.
The purchase of a pumping unit is based on careful consideration of the technical characteristics of all components of the circuit, their full compatibility, compliance with the water source and the choice of installation location.
Installation of pumping equipment must be carried out at the following stages:
- during the construction of a private house;
- when drilling a well;
- when carrying out repair work.
The pumping station requires a flat surface with an area of up to 2 square meters, which is located on the street or in a special room. If the most suitable installation location is a corner in a private house, then you should take care of high-quality sound insulation. This also applies to equipment that is equipped with all kinds of quality certificates.
Pressure parameters in the accumulator
For proper operation of kitchen and sanitary fixtures, a pressure of 1.8-2.7 atmospheres must be maintained in the water supply of the home. To maintain the wear resistance of the membrane for a longer period of time, manufacturers recommend that the pressure there be 0.4-0.5 atmospheres higher than the tap pressure.
The pressure in a building with one floor is often 1.7 atmospheres; this is the indicator that should be taken into account when monitoring a hydraulic tank. For buildings with a large number of floors, it is recommended to increase the pressure so that the main pipes reach distant floors.
If the calculated pressure in the hydraulic pump exceeds the recommended values for sanitary and kitchen appliances, they become inoperable. Then you need to choose a different system for distributing water supply pipes.
Installation of a submersible electric pump for installation in a well
To install a submersible electric pump in a well, work is performed in the following order:
- Screws a plastic adapter coupling into the outlet of the unit to connect the pressure pipeline. If there is no built-in check valve, install your own, mounting it first at the outlet of the electric pump, then screw on the fitting for connecting HDPE pipes.
- They attach a pipe to the pump and fix it with a plastic cuff, thread a cable through the ears of the housing and connect its ends at the outlet using two special clamps, the free end is screwed to the main cable with electrical tape.
- Connect the power cable, cable and pressure hose together using electrical tape or zip ties in 1 meter increments, making sure that the power cord is secured without tension.
- The electric pump is lowered into the well to a predetermined depth. To do this, measure and cut the pressure pipe to the required length, insert it into the head, to which the cable is tied.
- After a dive, you can immediately check the operation of the electric pump without connecting to the pipeline, if the liquid supply corresponds to the passport data, connect the entire water line and then monitor and regulate the operation of the equipment with automatic devices.
Rice. 8 Preparing the downhole electric pump for immersion
To connect a well pump to a water supply system, devices are used that automate its operation, prevent frequent startup and reduce the load on the line. They can be independently assembled in one module, installed in a living space, or left in a caisson pit with a borehole head.
Using recycling
The recirculation line serves to maintain water pressure in the supply and protect the pump from idling. It is necessary to understand that this wastes part of the pump power.
To organize recirculation, a tee must be installed on the pressure pipe of the water supply system. It is advisable to install a shut-off valve on the recirculation line. It will provide regulation of water flow. The second tee must be installed on the suction pipe in a convenient place and connected to the recirculation pipe.
1 - tee; 2 - shut-off valve; 3 - recirculation pipe
When repairing or servicing the water supply system, in order not to relieve the pump pressure and refill it with water, install a tap on the accumulator, then you will leave water under pressure in the accumulator. After the repair, simply unscrew the valve and the pump with the pressure pipe will fill with water. In most cases, the hydraulic accumulator reserve is sufficient to fill the pump and start it.
Such simple actions will increase the reliability of the uninterrupted operation of the system.
Connecting a station with a surface pump
Pumping stations with a surface pump can only be used if the distance from the water surface to the pump inlet pipe is no more than 8 m.
For example, if you have a well or borehole with a depth of 12–13 m, and the distance to the water surface is 10 m, then the pumping station must be “buried” to a depth of 2.5–3 m.
In such cases, pits are installed or a more technologically advanced solution is the use of a caisson.
It should be remembered that although all manufacturers call their products self-priming, neither a vortex nor a centrifugal pump are. In order for the pump to work and not fail, it is necessary to fill the pump housing and supply pipe with water. This will ensure reliable starting of the pump.
The end of the suction pipe should be at the maximum depth, and the height from the bottom should not be less than 100–120 cm.
Installation should begin by installing a check valve with a coarse filter on the pipe. The filter will prevent large impurities in the form of stones and sand from entering the water supply. The check valve will provide support to the water column and protect the pumping station from idling. Connections must be carefully sealed to prevent air from entering the plumbing system.
1 - check valve with filter; 2 - pumping station; 3 — adapter for a plastic pipe; 4 - shut-off valve; 5 - caisson; 6 - to the water supply of the house
A shut-off valve, an American valve, and, if necessary, an elbow and an adapter with a coupling to a plastic pipe are installed at the entrance of the pumping station.
In the case of a well, you can use ready-made heads that are already equipped with a pipe outlet and an eye bolt. Additionally, the head seals the mouth of the casing pipe, increasing the flow rate of the well.
A water supply system is connected to the pump output.
Station assembly
To assemble a pumping station, you need to understand what it is and how it functions.
The station has the following main components:
- a centrifugal pump that pumps out and transports water into the house;
- pressure switch;
- hydraulic tank preventing hydraulic shock;
- an electric motor connected to a relay and a pump;
- pressure gauge for pressure control;
- intake system with check valve;
- line connecting the pump and water intake device.
The installation of these units is carried out in accordance with the water supply diagram of the pumping station of a private house.
The pressure switch regulates its value in the system. When it is below the required parameter, the pump starts, and if it is higher, then it turns off. Using a pressure gauge, the pressure is adjusted. A mandatory element of any water supply station scheme for a home is a hydraulic accumulator. It is sometimes replaced with a storage tank, but this design is considered obsolete.
How to do it?
The supply of water from the well to the premises can be provided either exclusively in the summer or on a regular basis throughout each season. To prevent water from freezing due to winter cold, it is wise to run the water supply system directly under the ground. There are several options for independently arranging a water supply system that do not require significant labor or material investments. However, even during such work, you can encounter a number of difficulties, the main of which is the correct connection of the hose to the sides of the ring where the hole is made.
To prevent surface water with contaminants from entering the well, the joining point is isolated using a special composition, which must be made from cement and liquid glass. When a country house or private house has a constant water supply, it is very comfortable for residents. However, in order to conduct water at home and do it correctly, you will need to work hard.
In addition to a number of building materials and tools, certain skills and theoretical knowledge will be needed. The main ways to ensure an uninterrupted water supply include supply through a pumping station, through special tanks or using a hydraulic tank. Proper organization and configuration of such a water supply system will allow you to get excellent water pressure at the tap.
To begin with, you will need to allocate a place in the room where the pump will be installed. A small storage room is perfect for this purpose - such a room is not so difficult to convert to the necessary needs. Next, they usually proceed directly to the construction of the water supply system. First, you need to lower a pipe into the well to collect water at a distance of approximately half a meter from the bottom. One end of this pipe is closed with a special filter made of a special mesh - it is this that will purify the water from all kinds of debris.
It should be noted that the filter will need to be cleaned occasionally. Don't be alarmed - it's quite easy to do. If a metal pin is mounted at the bottom of the well, then the cleaning hose is attached to it; otherwise, this is done in any convenient way.
Before the pumping station, it is necessary to connect a check valve and a filter system for rough cleaning. A filter for fine cleaning is installed after the pump. This installation procedure is dictated by the fact that dirt particles should not enter the device, because they can simply break it. Installing a valve is required to prevent water from flowing back to where it came from.
If all connection rules are followed, supplying water to the house will not be difficult. This homemade system works extremely effectively. However, there are a number of nuances and subtleties that will make water supply wiring even easier. In many cases, installation of pumps can be done directly above a well or borehole, for which all equipment is installed in a special container - a caisson. This method of supply is very popular. First you need to dig the pipe to a depth of 2.5 meters, and the diameter of the hole should be 2 times larger compared to the caisson. A standard concrete solution is poured into its bottom in a layer of 20 centimeters, after which a caisson is placed there.
The pipe is cut so that its end is approximately another half meter above the caisson. Then you need to dig a trench about 2 meters deep. After this, you can begin installing the pump and connecting it to the water supply system. And finally, at the final stage of installing a water supply system with your own hands, you need to fill the caisson with a concrete solution along the contour and cover everything on top with soil.
How to do a test run
The main condition for this is that the pumping station is filled with water, including all lines, as well as the hydraulic accumulator. Water enters the device through the filler hole. Turning on the power and starting the engine is carried out after the shut-off valves have been opened. After this, water gradually fills the pressure pipe. This is necessary in order to displace all the air from it. As a result, pressure increases. As a rule, this parameter can take values from the range from 1.5 to 3 atmospheres; when the limit is reached, the equipment turns off.
Performing the first run
It will not be possible to put the system into operation until the pump itself is filled with water. There is a hole on the top of the pump body that is closed either simply with a plug, or with a valve built into it. It is necessary to open access to water and fill the entire system with it. You need to pour the liquid until it starts to come back out.
When starting the pumping station for the first time, it is necessary to check the operating pressure in the accumulator. If it is below normal, then you need to add it by pumping it with a car pump. When there is an excess, it is better to bleed off the excess through the nipple.
Rules for opening the system:
- After filling the entire pipeline with water, the plug or valve is tightened tightly.
- The pump is connected to the electrical network.
- Launch is in progress.
- To remove air from the system, open the nearest tap above the sink.
- It may take time for water to flow out of it.
- After the liquid appears, allow the unit to operate for 2-3 minutes.
- After this, turn off the system and proceed to its full configuration.
If water from the tap does not start flowing a couple of minutes after turning it on, this means that the system is not completely filled with water. It is necessary to turn off the pump and add liquid to it again.
Installation location
Usually the pumping station is assembled in a heated room. The ideal place would be a boiler room with well-equipped sound insulation. There are other options for installing a water supply station. Often it is placed in the basement or basement, but subject to their heat, sound and waterproofing. You can also use a special box - it is placed in the underground with a hatch providing access to the equipment.
A platform is used to place the station in the well. It is installed below the freezing level of the ground. In this case, the structure of the well should be insulated from above. But this method of placing a water station is characterized by problematic access to it.
You can also provide space in the caisson for the pumping station. To do this, a structure is built around the well, buried below the freezing level of the soil. The caisson is closed and thermally insulated at the surface of the earth. For maintenance, a small hatch will be sufficient.
You can also build a house for a pumping station or place equipment in an extension. If this is a separate building, it must not only be insulated, but also heated in cold weather.
Self-installation allows you to significantly reduce the cost of installing a pumping unit. Depending on the type of source, different connection schemes for the water station are used. Correct installation depends, among other things, on small elements such as an oil seal, check valve, filters, etc. They can improve and make the operation of pumping equipment longer.
Briefly about the main thing
Before starting a system for drawing water from a source underground, you need to make sure that the equipment is connected correctly. If an ejector is used, check the presence of a recirculation line and its connection to the storage tank. When using a single-pipe connection to the pump, you need to prepare the hydraulic accumulator for operation in advance.
To start the system for the first time, you must completely fill it with water. And after checking the functionality, carry out the final adjustment of the automation. This will allow you to achieve better system functionality. Also, after adjustment, the equipment will be able to operate in a more gentle mode with greater productivity.
Ratings 0
Types of well pumps by operating principle
If you are thinking about which pump to choose for a well, then first of all you should pay attention to the principle of their operation:
- Centrifugal. Devices operating on this principle have a rotating impeller inside the housing, under the influence of which centrifugal force occurs. Water is sucked into the inlet pipe and flows to the top at the outlet. Centrifugal pumps are the most inexpensive among all types and at the same time have a fairly high efficiency. However, their pressure is relatively small (up to 100 m) in comparison with vortex or auger devices. Centrifugal pumps are worth buying if the well depth is no more than 50 m.
- Vortex. Vortex, like centrifugal, have working blades. They create vortex flows, due to which water can rise to a much greater height than with centrifugal models. However, vortex machines are very sensitive to water quality, so heavily sanded wells will quickly kill the unit. If you have a deep well with relatively clean water, then vortex well pumps are suitable for you. Which to choose? It all depends on the depth of the well and the height of the water surface to the surface of the earth.
- Auger. Screw units have a kind of rotor in the form of a screw. Because of this design, pumps of this type can easily handle the most sandy water, so they are perfect for pumping out process water for watering a garden (or for your own needs if you have a high-quality filter).
Connection with submersible pump
Pumping stations with submersible pumps are successfully used for wells and wells of any depth. Submersible pumps come in several types:
- vibration;
- centrifugal;
- drainage (well).
Regardless of the type of pump, they must all be below the water level. The water cools the pump, preventing it from overheating.
The connection and operation of the vibration pump is highly dependent on the frequency of the electrical network. To operate, some models of pumps from Western manufacturers require a network frequency of 60 Hz, instead of the 50 Hz that we have. Such a pump will work, but its effectiveness will be debatable.
Before lowering the pump into the well, it is necessary to check the tightness of the connecting screws. Since the pump is vibrating, they tend to unwind. The vibration pump must be inspected regularly.
Centrifugal submersible pumps in some cases are the only solution for lifting water from any depth. They have a large number of impellers (20 or more), which provides high pressure at the pump outlet. This in turn increases the length of the pump. Therefore, such pumps cannot be used in wells with a small water column.
The pump is installed at the maximum depth of the well, at least 50–70 cm from the bottom of the well. The pump is secured to a metal or polyamide cable. A check valve is installed on the pump, and then a pressure supply pipe.
1 - check valve with filter; 2 - submersible pump; 3 - cable
Depending on the manufacturer and model, the length of the electrical cable may not be sufficient for installation in the well, then it is necessary to arrange a hermetic cable coupling. The other end of the cable is attached to the eye bolt of the head, securely fixing the pump in the well.
The advantage of this scheme is that the hydraulic accumulator with the automation unit can be placed in any convenient place.
Submersible drainage pumps can also be used to organize a water supply system for a small house with 3-4 water outlets. Depending on the model, they create a pressure of up to 1.5 bar and have high performance. Drainage pumps operate quietly in contaminated water or water with solid impurities up to 5 mm, industrial models - up to 120 mm.
Expert advice
When, thanks to the operation of the station, an uninterrupted water supply has been established in the household, it must be periodically serviced. First of all, you need to monitor the condition in which the coarse filter is located. If necessary, it must be cleaned.
If this is not done, the performance of the equipment will decrease and water will flow in fits and starts. When the filter is completely clogged, the pump will run idle and then turn off. The frequency of cleaning depends on the amount of impurities present in the water.
It is advisable to check the pressure in the air compartment of the hydraulic tank once a month after installing the water station. The same should be done in case of preservation for the winter, repairs, or downtime. Its value should be 1.2-1.5 atmospheres. If necessary, air is pumped up with a car pump or compressor.
When the station is used exclusively in the warm season, the water must be drained from it before frost sets in.
If all the recommendations on how to correctly install the pumping station specified in the instructions have been followed and the equipment is connected for debugging and determining the pressure at which it will turn off, two liters of water are poured into the receiving device and the unit is started. When the station turns off, you need to record the fluid pressure. You should also know this parameter when starting the unit automatically.
The station may not turn off at a certain liquid pressure. You can deal with this problem using the screws on the pressure switch. They adjust the compression ratio of the springs. To do this, first remove the cover on the device, then tighten the screw with the letters “DR” towards the “plus” or “minus”. To regulate the pressure at which the start will occur automatically, you need to engage the screw marked with the letter “P”.
Setting up automation
A properly functioning system should function automatically. To do this, a pressure switch is installed in the hydraulic accumulator. It is necessary to turn off the pump when the maximum specified value is reached. And also, so that the pump turns on and starts pumping water again when the pressure drops to the minimum specified in advance.
All settings are made independently:
- The pump turns off and water is drained from the hydraulic tank. This can be done by unscrewing the special tap at the bottom of the system with a key.
- The pumping station start is activated again to fill the accumulator.
- When the pump is turned off, you need to record the pressure gauge readings. This will be the upper limit.
- After this, the tap farthest from the pump opens. While the water is flowing, you can adjust its pressure. To do this, you need to tighten the nut on the relay on a large spring.
- You must wait until the pump starts again. This will happen as the pressure decreases as water flows out.
- The recorded readings will correspond to the lower threshold.
Taking readings Source gaz-test.ru
- Next you need to find the difference between the upper and lower pressure.
- If the found parameters are close to 1.4 bar, then nothing else needs to be done. The system operates in optimal mode.
When the reading is below the standard value, the pump will start to run more frequently and the flow may become intermittent. This will lead to premature wear of working units. Higher values from the norm will allow the station to be operated in a gentle manner. But the difference between the maximum and minimum pressures will be very noticeable.
To adjust these parameters, the relay has a small spring. And its tension can be changed by unscrewing the nut. After completing the settings, the system is restarted. And if the results are not satisfactory, all actions are repeated.
Correction of errors in operation
Before proceeding with more serious intervention in the operation of the equipment, it is necessary to take the simplest measures - clean the filters, eliminate leaks. If they do not produce results, then proceed to further steps, trying to identify the root cause.
The next thing you need to do is adjust the pressure in the accumulator tank and adjust the pressure switch.
Below are the most common malfunctions in the operation of a household pumping station, which the user can try to solve on their own. For more serious problems, you must contact the service center.
Preparing the hydraulic accumulator
The hydraulic tank can be installed in the basement of the house, since this unit builds up pressure in the system; water can be supplied even from water intake points located above the installation level of the hydraulic accumulator itself.
If the pressure is very high, this can cause the pump to start and stop very often, which will subsequently lead to its rapid wear. The reduced pressure in the air chamber will cause the bulb with water to overstretch, which will cause it to quickly fail.
Rules for preparing the hydraulic tank:
- Before pumping air into the air chamber of the accumulator, you must make sure that the rubber bulb is empty. If there is water in it, drain it by opening the bottom tap.
- After this, air is pumped into the chamber using a car pump. Pressure is also measured with a car pressure gauge. As a rule, the pressure in the hydraulic tank should be 10% less than the lower value. But since we have not yet set up the system and did not make the first start, we adjust the pressure like this:
- for a hydraulic accumulator with a capacity of 20 to 25 liters, the pressure should be in the range from 1.4 to 1.7 bar;
- for a storage tank with a volume of 50-100 l, the pressure is set in the range from 1.7 to 1.9 bar.
Operating principle of pressure equipment
Ejector-type installations are more powerful
The station installed on the surface is designed to supply liquid from sources at shallow depths: up to 8–9 meters. Pressure equipment does not need to be immersed in water.
The surface pump works according to this principle:
- The expansion tank or hydraulic accumulator connected to the pump is filled with water to the set level due to the design.
- The automation turns off the pump after the liquid reaches a certain point. Water intake stops.
- When the liquid level in the accumulator drops, the automation turns on the pump and it fills the hydraulic accumulator.
The principle of operation is based on the fact that a vacuum is created in the part of the suction hose that is not lowered into the liquid. Water rises through a conduit due to differences in pressure between its ends.
Installation of the installation itself is not difficult. To do this, you just need to carefully study the attached manual and connect the parts to each other. The installation diagram at the desired location and connection to the well is more complicated.
Design and varieties
A hydraulic accumulator is a special sealed metal tank, which inside is divided in two by an elastic membrane. The membrane itself is made in the form of a diaphragm or cylinder. The first one is mounted across the tank, and the bulb is mounted at the inlet near the inlet pipe.
Hydraulic accumulators are equipped with two-level protection - a pressure gauge and a mechanical valve Source montagtrub.ru
See also: Catalog of companies that specialize in water supply and sewerage.
Hydraulic accumulators have different purposes. First of all, devices are divided into those intended for hot and cold water supply and heating systems. The latter are painted red, and the water ones are blue. Tanks used in heating are usually smaller in volume and more affordable. This is due to the poor quality of the membrane material, because in a regular water supply there is drinking water, and in heating there is industrial water.
Hydraulic accumulators are also divided by type of placement - devices located vertically or horizontally. At the bottom of the vertical models there are legs with which they are placed on the surface, and some models provide special plates that allow them to be attached to the wall.
Connecting a hydraulic accumulator, as well as selecting its characteristics, is not the easiest task Source sharanavti.ru
Hydraulic accumulators installed in heating systems are equipped with radial membranes that look like plates. For plumbing systems, devices with a rubber bulb are more often chosen.
Video description
How to connect a submersible pump and a hydraulic accumulator, see the video:
If you plan to install a hydraulic accumulator, then it is important to know how to determine the critical pressure. Based on the operating value, you must first determine the minimum pressure, that is, the one at which the pump starts operating. The pressure switch is set to this value. Next, the pressure in the empty battery is measured. The result should be below the critical parameter by approximately 0.5 - 1 atm. Then the system is assembled. Its center, as in the previous situation, is a fitting with five connectors, where they are connected in turn: a battery, a pipe from the pump (it is connected to a water source), household water supply, a relay and a pressure gauge.
What is required for self-assembly?
The first step is to select a pump. In this case, it all depends on the type of source: a surface device is suitable for wells, and submersible equipment is suitable for deep wells.
Set for work
Other elements:
- Hydraulic accumulator. This is a kind of damper that allows you to avoid “pulling” the pump and regulates processes - accumulation/consumption of water.
- Automation block. The simplest option is a relay with a pressure gauge. A model with a built-in thermometer will allow you to monitor the condition of the system.
- A check valve is a mandatory element designed to prevent the outflow of water when the pressure decreases or when the pump stops.
- Filters. The fine cleaning product is installed on the pipeline behind the pumping station. Coarse filter - in front of the main unit. These elements (removable or non-removable) can be included with the check valve. These are the models that are recommended to buy.
Mandatory additional elements - hoses, fittings, pipes. When independently assembling a pumping station, products made from two competing materials are traditionally used to connect all components into the system - polypropylene or polyethylene. To seal the joints, purchase FUM tape, flax or sealing paste (plumbing sealant).
The main “duet” and its features
This “bundle” deserves to be stopped and examined in more detail. The pumping station can be assembled on any unit - surface or submersible. However, the main requirement for any device is sufficient power to lift liquid from depth.
Pump and its characteristics
This point can be considered using the example of surface equipment that will be located on a hydraulic accumulator. For example, in one of the rooms of the house. The main parameter that needs to be taken into account is the suction depth, indicated by the letter “H”. Find it using the formula:
H = (L/8) + h
L here is the strictly horizontal distance from the pumping station to the water source, and h is the distance from the surface of the earth to the water surface.
Suction depth is the maximum possible value, the distance from which the pump can reliably lift water. In order not to encounter problems, the unit must be purchased with at least a small reserve.
The choice of pump type depends on the source. The well requires a high-power submersible pump. The well offers two options - either deep equipment or surface equipment. But in the latter case there is a mandatory condition: the distance from the surface to the water surface should not be more than 8 m.
Pump in combination with a hydraulic accumulator
When choosing a storage container, first of all, look at its volume. The larger it is, the better, as stock is always welcome. More often they choose models designed for 25, 50, 100 or 200 liters. But in this case, the main condition is the appropriate pump performance. It is generally accepted that it is better to focus on the following ratios of pump power and accumulator volume:
- 0.5 kW - for containers up to 25 l;
- 1 kW - up to 50 l;
- 1.5 kW - up to 100 l.
In addition, the storage device must match the pump parameters (pressure) and be suitable for the system’s automation unit.
Basic parameters for choosing a pump
So, we have already written about the height to which you need to raise water
What else should you pay attention to when choosing? We need to know exactly the distance of the well from the house, and the volume of pumped liquid, which will depend on the total volume of the water supply network and the maximum possible water consumption at any given time. A trivial example: we open the tap closest to the point of entry into the building - we get good pressure, open the second one - the pressure drops, and at a remote point the water flow will be the smallest. The calculations here are, in principle, not complicated, you can do them yourself by using an online calculator, or simply by studying the instructions from the manufacturer
The calculations here are, in principle, not complicated; you can do them yourself by using an online calculator, or simply by studying the instructions from the manufacturer.
What does the pressure in the system depend on? It depends on the power of the pump and the volume of the hydraulic accumulator - the larger it is, the more stable the average pressure in the water supply. The fact is that when turned on, the pump does not work constantly, since it requires cooling, and when the operating pressure is reached, it should not continue to increase it. The system is designed in such a way that it pumps water into a hydraulic accumulator, in which a check valve is installed, which prevents water from flowing back when the pump is turned off. When the pressure in the tank reaches the set threshold, the pump stops. If water withdrawal continues, it will gradually drop, reaching a minimum level, which is a signal to turn on the pump again.
That is, the smaller the accumulator, the more often the pump is forced to turn on and off, the more often the pressure will rise and fall. This leads to accelerated wear of the engine starting equipment - in this mode the pumps do not last long. Therefore, if you plan to use water from a well constantly, buy a tank with a larger capacity for the pumping station.
When constructing a well, a casing pipe is installed into it, through which water rises. This pipe can be of different diameters, that is, it may have different throughput. Based on the cross-section of the casing pipe, you can also choose the right equipment for your home.
All the necessary information will be in the instructions for the purchased pump. You can also get recommendations from the specialists who are drilling your well. They will know exactly the optimal operating parameters. It will also not be superfluous to make some reserve in the power of the unit so that the pressure in the system rises faster to a comfortable threshold, otherwise water will constantly flow sluggishly from the tap.
Connection sequence
Connection to a well and borehole
First, let's look at how to properly connect a pumping station to a well or well.
In this case, we will pay attention specifically to the two-pipe connection diagram, since it is more complex. We work in this order:
- First, we assemble the ejector with our own hands. As a rule, this is a monolithic unit made of cast iron, which has three outlets.
- We install a coarse filter made of propylene mesh at the lower outlet of the ejector.
- There is a plastic socket at the top of the cast iron structure. You need to put a squeegee of the required length with a diameter of 32 mm on it.
- Next, you need to assemble a squeegee to fit the diameter of the pipeline. Usually two parts with adapters are enough for this.
- A bronze coupling is installed at the outlet of this outlet. With its help, the transition to the polyethylene pipe will be made.
- Next, trenches are dug from the hydraulic structure to the house below the freezing point of the soil.
- Water pipes are laid in the trenches.
- A cap is installed at the exit of the well casing. If you can't find it, you can use a knee with a smooth angle.
- To connect the ejector to the water supply pipeline, couplings are used.
- Before lowering the second end of the pipe, it must be passed through the elbow at a right angle.
- Polyurethane foam is used to seal the space. After this, the pipe can be connected to an adapter (angular), and it, in turn, must be connected to the outer part of the water supply.
- Now you can lower the ejector into the well. In this case, the immersion depth must be determined in advance, taking into account the elevation of the top of the casing pipe.
- The head is fixed to the casing using reinforced sanitary tape.
Features of connecting to the water supply
If there are centralized water supply networks near your home, then the pumping station can be connected to them. Typically, the need for such a connection arises when the pressure in the system is too low, which does not allow the heating equipment to function efficiently and correctly. This situation can arise for several reasons:
- the hydrogeological conditions of the area have changed;
- outdated equipment is used;
- As the number of residents has increased, water consumption needs have become greater.
To connect to the central water supply you need to perform the following sequence of actions:
- The place where the pipeline will be disconnected is selected in advance. After stopping the water supply, the water supply is divided into two parts.
- So the part that comes from the city highway is connected to the storage tank.
- The liquid from this tank must flow through pipes to the pumping unit. A pipeline leading to a residential building is connected to the outlet from the pump.
- Next, the electrical wiring is laid and connected.
- After this, you can perform a test run, configure and adjust the equipment.
The main thing in setting up a pumping unit is to select the correct pressure in the system. To adjust the equipment, a small amount of water (about 2 liters) is poured into a special hole on the pump unit. Now you need to open the tap and measure the pressure in the system at which the pump turns off and on.
If the pressure at which the unit operates does not fall within the specified limits, it is necessary to adjust the device. It's very easy to do this:
- The cover on the pressure switch opens.
- To adjust the device shut-off pressure, use a screw marked “DR”. It needs to be twisted towards decreasing or increasing depending on the results.
- To adjust the switching pressure, you need to turn the screw marked “P”.
- After adjustment, the cover on the relay is put in place.
Also, do not forget that the long-term and proper operation of pumping equipment is affected by the composition of the water, namely various admixtures of sand and clay. To protect the equipment from impurities, a filter is installed at the suction inlet of the station.