table for the dacha
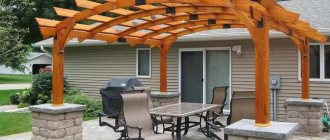
For example, what do you associate the word “dacha” with? Some with hard work in the garden, and some with a hammock under a shady tree. And I immediately imagine a country table on the open veranda, with an abundance of fresh herbs and kebabs. At the dacha, it can be said to be a cult place, where food mystically becomes much tastier.
Naturally, if you make a table for your dacha with your own hands, it is also a source of pride . You can always say to guests: “Well, how do you like the table? I did it myself” and tell an interesting story of his labor feat. This article provides several examples of how to make a country table; you can choose the appropriate option.
Note . Most of the diagrams in the photo are taken from English-language sites, and they have everything there, as you know, in inches; to convert to centimeters, simply multiply the indicated dimensions (excluding degrees) by 2.54.
conclusions
Many people prefer to make garden furniture with their own hands. It turns out very well, even if you use only the remains of boards left over from construction. Even chairs made from old pallets compare favorably with store-bought plastic furniture; and there is nothing to say about more serious work. One can only be glad for the garden that belongs to the master.
On FORUMHOUSE you can find many ideas for making garden furniture with your own hands, garden furniture for relaxation from rattan, read a detailed article on how to make a chaise longue and rocking chair with your own hands, an article on how to make garden furniture from concrete blocks, watch a video , teaching how to make a brutal table for a gazebo.
Subscribe to our Telegram channelExclusive posts every week
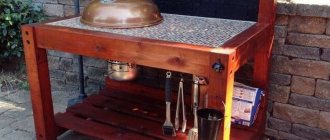
Picnic table of the most comfortable sizes
I like a table with benches of this design for its solidity and durability: I set it up and it stands, you can’t take it anywhere. The most difficult thing is to find the optimal sizes. The benches cannot be moved or moved away from this table, but it needs to be comfortable for all guests, regardless of their height and build.
Before starting work on creating such a table, our participant with the nickname keednex asked himself a few questions.
- At what height should I make the countertop?
- At what height should I make the bench?
- What should be the ideal gap between the table top and the bench to make it comfortable to stand up and step over the bench?
In his work, he decided to focus on the standards from the picture below.
And make a table with these dimensions.
KeednexFORUMHOUSE Member
It turned out very comfortable. This was appreciated by people with heights from 160 to 195 cm and different builds.
The table was made using boards lying idle and 0.147x0.037-0.05x6 m.
Keednex
First I measured the board. I built a table using these dimensions in sketchup so that I could see the angles and the required number of cuts in advance.
The resulting specification is:
- bench and tabletops – 1.8 m, 9 pcs.;
- bench holder -1.7 m (in the drawing it is 1.68 m; the master decided to round it), 2 pcs.;
- table top holder – 0.73 m, 3 pcs. (two side holders and one – a tensioner in the center, also known as a stop for the jib);
- bench puller in the center – 0.29 m, 2 pcs. (when assembling the table it turned out that these parts were not needed, so they were not used);
- jib – 0.83 m, 2 pcs. (cuts at 30 degrees);
- table legs – 0.92 m, 4 pcs. (with cuts of 30 degrees).
The cut of the legs is calculated using a special application on the phone. You need to specify the width of the board and the required angle - the program showed at what height to place a point by drawing a line to which it would be 30 degrees.
Assembling the table took several hours. When finished, it is better to round off all the elements of the table to avoid bruises on the corners, especially if there are children in the garden, sand the product with an emery wheel on a grinder and paint.
What type of wood is it made from?
Before you start building a country table, carefully select the wood. Since the service life of the product, its wear resistance and appearance will depend on its technical characteristics. Most often, outdoor furniture is made from:
tika _
Furniture made from this breed will delight its owners: reliability, aesthetics, and resistance to negative environmental factors. Teak products become stronger and more attractive every year. Such furniture will fit into any landscape design and will become the main decoration of the dacha;- oak _
Oak tables amaze with their noble appearance, elegance and durability. But keep in mind, despite the strength and reliability of wood, before assembling a piece of furniture, the wood must be treated with special antiseptics. Then insects will not appear in the product, and it will not rot; - coniferous species . This material is affordable. Products made from pine will not be as durable, but they will be different: safety, ease of use, environmental friendliness and presentability. A pine table does not require special care and attention;
- linden, alder . These tree species, in addition to their original texture and texture, have high technical characteristics. They are easy to process and can withstand high loads.
As for the advantages of wooden outdoor furniture made from any type of wood, these include:
resistance to damage;- long service life;
- elegance;
- simplicity in convenience.
The disadvantages of wooden products include:
- possibility of ignition;
- insect damage;
- likelihood of rotting.
Advice : to increase the wood’s resistance to all negative factors, it must be treated with special means.
Also, most people consider the disadvantages of wooden country tables to be their heavy weight . But such products are installed outdoors once a year. At the request of the owners, they can be put away in the summer kitchen or any household for the winter. construction.
Attention: when placing a wooden table outdoors, you need to consider the space for water drainage.
Manufacturing and assembly
The main components of the table are:
- supporting frame;
- table top;
- support strips.
The table assembly process is carried out in the following sequence:
Before you start assembling furniture, each board is pre- sanded, leveled, and burrs are removed from their surfaces .- Next, according to the applied markings, we connect the tabletop to the base with self-tapping screws.
- After this, we fasten the legs with bolts.
- Next, the product is treated with special impregnations that prevent damage to the array.
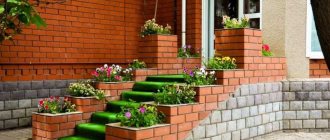
A round table will look very attractive on a summer cottage. For this you need to prepare:
- base;
- racks;
- table top;
- base for table top.
The assembly stage will consist of the following sequence:
The base is assembled by fastening the crosspiece together with glue and self-tapping screws.- All irregularities are processed with a grinding machine.
- we attach 4 racks to the base , which will act as legs of the product.
- Using a jigsaw, cut the edges of the boards fastened together for the tabletop evenly in a circle.
- Assembling the base . To do this, we fasten the tabletop boards together and connect everything to the bottom of the table.
- To make the product decorative, the screw caps are covered with wood putty .
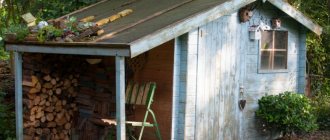
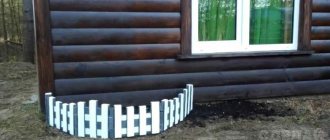
Remains of boards - put to use
After almost every construction of a dacha or after its renovation, a lot of pieces of wooden boards, as well as wooden beams, remain. The following design involves the use of boards 25 mm thick and 50x15 mm wide. First of all, you should decide on the size of the table by making a frame for it. The table is not wide, only 60 cm, so it can be installed on a veranda that is longer than wide. The length of the table is about one and a half meters, with a height from the floor (standard) of about 85 cm.
Assembling the frame, attaching the legs to it
First of all, the frame is assembled. To do this, take 2 boards and cut them to a length of 140 cm, with a tabletop width of 0.6 meters. The transverse boards should have a length of 5 cm less, that is, 55 cm. So, 2 blanks of 1.4 m each and 2 blanks of 0.55 m each are fastened in the form of a rectangle, with dimensions of 140x60 cm. At the same time, it is necessary to check the presence of corners in 90 degrees. Self-tapping screws are used as fastening elements, with pre-drilled holes.
For the legs, 4 blanks are cut of such length that the final height of the table is no more than 85 cm. The legs are attached to the inside of the frame in the corners, using 4 self-tapping screws (2 on each side).
Making jumpers for the shelf
The jumpers between the legs can be fixed at half the height from the ground or slightly higher. The higher they are installed, the less they will interfere. The installed jumpers will give the structure a certain rigidity. In addition, by connecting them together, you can make a wand that will never be superfluous.
The frame is ready
If everything is done correctly, the frame will be quite stable and rigid. After this, the frame is carefully sanded.
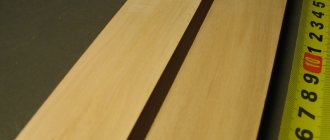
Then the formation of the tabletop begins, for which boards of various types of trees are suitable. The main thing is that the boards have the same thickness. To create an original pattern, the boards are alternated. It is permissible to cover some of the boards with stain, which will help create a very attractive surface.
Making a table top
To fasten the tabletop boards, it is better to use finishing nails, which are achieved with a metal attachment. After attaching them, the boards are also carefully sanded. Painting is the final stage, on which not only the quality of the coating depends, but also the decorative appearance. In the photo below you can see what not to do, turning your work into wasted work. It’s better to take it, sand it and cover the table with a lighter varnish, achieving a more attractive appearance.
Homemade table for the cottage is ready