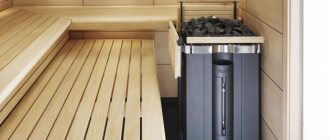
Design and principle of operation
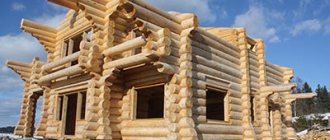
A stationary tandoor is a cylindrical clay oven, the neck of which is narrowed so that the structure resembles a large jug. But there are also designs in the form of a regular cylinder or shaped like a barrel. When both the top and bottom are narrowed.
As a rule, the stove is installed on a wide pedestal, and the structure itself has a blower at the bottom, which provides draft for burning the fuel. The latter can be charcoal, firewood or large brushwood. Its insertion is carried out through the neck. And in many models it is also necessary to remove ash through it.
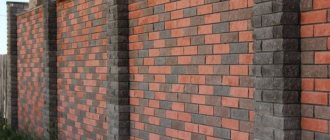
In the classic design, a clay grill is surrounded in a circle with a brick frame. It can be round or square in shape. Thermal insulation material is distributed between the masonry and the outer walls of the furnace. In the old days, sand, salt or powdered clay were poured there. This helped keep the fireplace warm literally until the very end of the day. And they melted it in the morning.
Brick lining Source ideas.homechart.ru
Modern technologies make it possible to produce refractory materials of almost any shape. Yes, and such structures are used more for exotic things, instead of a regular barbecue. Just to pamper guests with original vertically cooked kebab and famous, delicious Uzbek flatbreads. And to do this, light the stove for a maximum of three hours.
Therefore, current tandoors are most often made only of brick, and structures in the form of a clay jug perform only mobile functions. But even a modern stove has thick enough walls to accumulate heat for a long time. And if the kindling is carried out correctly, the inner surface heats up to 400°C. Therefore, the tandoor device allows you to bake bread directly on the walls.
For convenience, the tandoor is equipped with various accessories. For example, a special holder for skewers. In this stove they are not stacked horizontally, but hang vertically inside the fireplace. There are also different grates on which you can bake vegetables or fish. True, it requires considerable experience and caution to handle them without getting burned. The fireplace with hot coals is covered with a lid on top.
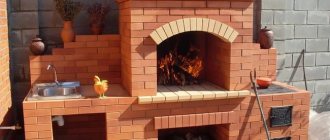
Stationary tandoor Source postroika.biz
A distinctive feature of a tandoor from a regular barbecue is that food in it retains literally all its juices throughout the entire cooking process. Thanks to the tightness of the structure, a constant temperature is maintained and this does not allow the products to dry out. You can also cook and fry in a tandoor.
For this, special dishes are used. For example, a large cauldron with a rounded bottom and larger than the neck. It is installed on top, and it closes the oven like a lid. It makes delicious soups and roasts. Also a huge frying pan with the same bottom as a cauldron. Pilaf cooked on such a brazier is considered the most delicious in the world.
How to cook in tandoor?
First, put coal in the tandoor and wait until it burns out completely. For the convenience of loading products, special skewers, hooks, grates and other useful accessories are sold. In a properly made tandoor, one load of fuel is enough for 5-6 hours of cooking.
Traditional oriental cakes are glued directly to the clay walls. To do this, you need to wash them well in advance from the old soot and wait until the new ash burns out completely. In order for the dough to stick to the surface better, it must first be well moistened with water.
Photo: doorsindom86.rf
Manufacturing technology
A competent approach to the construction of an oriental stove requires a project. The location is also pre-selected. It must meet the following conditions:
- Not located on a hill.
- Be away from any buildings.
- Do not be located in an area of high humidity.
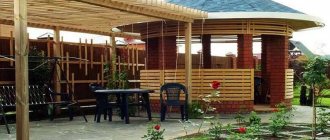
If necessary, the area is leveled. It can also be refined if desired. For example, leave the tandoor itself in the open air, and next to it set up a table for food under a canopy.
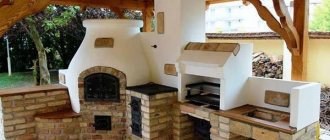
Outdoor kitchen Source remontnik.ru
Preparation
Having a ready-made drawing, you can calculate the amount of materials needed. And in general, this way it will be clear what exactly is needed for construction. And since it is recommended to make a tandoor from fireclay bricks, you first need to prepare it. You will also need a special fireproof mixture for masonry.
Since there is no way to build a foundation, a sand-gravel mixture and cement are needed. A metal rod for reinforcement and a piece of asbestos pipe for the blower. You will also need steel wire to tie up the rows of masonry and a metal mesh with 5 cm cells if you decide to simply plaster the surface of the stove.
As for the tools, you need to take a standard set for a builder. You will also have to make a couple of devices yourself. And you will need a grinder with a diamond wheel for cutting bricks.
See also: Catalog of companies that specialize in the design and installation of fireplaces and stoves of any complexity
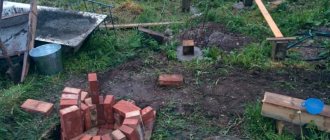
Foundation
Before building a furnace, the soil is carefully studied. If it is clayey, then a reinforced columnar foundation will be needed. In other cases, arranging a monolithic slab will be sufficient.
Foundation for tandoor Source ad-cd.net
Let's take a step-by-step look at how to do the latter:
- A hole is dug. For example, round. Its diameter should be half a meter larger than the size of the tandoor. Extra space will be needed for decorative finishing.
- The entire fertile layer is removed from the hole. The bottom is leveled and a simple formwork is installed, so that its top rises 10-15 cm above ground level. It is better to raise the base of the tandoor so that it is not washed away by precipitation.
- Waterproofing is laid on the bottom. A piece of ordinary roofing felt will do.
- Sand is poured into the pit to a thickness of at least 10 cm. A thin layer of crushed stone is laid on the sand cushion. The backfill is individually carefully compacted.
- A grid of reinforcement is placed on the crushed stone. And the formwork is filled to the brim with concrete mortar made in a ratio of 3:1:1. The first number refers to sand. The rest are for cement and gravel. The mixture is mixed with water until the consistency of thick sour cream.
- The surface is leveled, and its exact horizontalness is controlled using a building level.
Ready foundation Source yaplakal.com
The solution hardens within 72 hours. But before continuing work, it is necessary to let the structure stand for a total of 10 days. And so that the surface does not crack during summer construction, it is moistened with water every day.
Making fixtures
To work you will need a circle-shaped pattern. The easiest way to make it is from a piece of plywood. The circle should be the same diameter as the outer walls of the tandoor.
And you can’t do without a special rule. It is called a compass or a ballerina. It is impossible to line the neck of the oven without it. Therefore, a structure is assembled from wooden planks, which is shown in the figure below.
Template for building tandoor walls Source trizio.ru
When making it, you must be guided by the fact that the ratio of the neck to the base will be 1 to 3. That is, the uppermost spacer die should be exactly one third shorter than the lower part. For a flexible strap, you can take a strip of kragis.
Base
Although concrete is fire-resistant, it cannot withstand regular high heat. Therefore, it is necessary to lay the base of the furnace on the surface of the foundation. That is, its bottom.
Since fireclay bricks have already been selected for the tandoor, then they should also be used for the base. Moreover, you won’t find anything better than this variety. In addition to being fireproof, fireclay also easily withstands large temperature changes. And this allows you to operate the fireplace in winter, in frosty conditions.
Since the design of the stove is round, it is necessary to lay out the same base. There is a simple way to accomplish such a difficult task. On a separate flat surface, you need to lay out a square of brick, without connecting the elements with mortar. Then, using a previously made pattern, a circle is drawn on the plane.
Cutting bricks with a grinder Source legkovmeste.ru
How to make a square tandoor from brick with cladding and insulation
Shot: Big Family VLOG / YouTube
What you will need
- Fireclay brick;
- facing brick;
- fire-resistant masonry mixture;
- ash pan door;
- grate;
- galvanized steel wire 2 mm thick;
- cement;
- sand;
- board;
- crushed stone;
- roofing felt;
- expanded clay;
- boards;
- screwdriver;
- Angle Grinder;
- trowel;
- hammer;
- level.
How to do
Shot: Big Family VLOG / YouTube
Prepare the foundation: dig a layer of soil 20 cm deep, fill it with crushed stone, compact it, and then install formwork from boards along the contour and fill it with concrete, putting several reinforcement bars or mesh inside for reinforcement.
Shot: Big Family VLOG / YouTube
After a week, when the concrete has hardened, you can begin. Lay roofing material or other waterproofing material on the base to protect the tandoor from moisture.
Shot: Big Family VLOG / YouTube
Place the bottom continuous row in the form of a square on the refractory mixture, size 3 × 3 bricks (fireclay). The next three rows are only the side and back walls. Leave the front as is for now. To prevent the mortar from drying out when laying fireclay bricks, dip the latter in water before installing it in place.
Shot: Big Family VLOG / YouTube
Now lift up a couple of rows of exterior siding. It has the size of 4 × 4 bricks. Lay them on a ready-made or home-made cement-sand mortar: 1 part cement to 3 parts sand with the addition of water until sour cream thick.
Shot: Big Family VLOG / YouTube
Twist the wire whiskers using a screwdriver, after inserting them into the holes in each corner of the door.
Shot: Big Family VLOG / YouTube
Next, dry lay two fireclay bricks at the side walls and one at the back to form the letter “P”. A grate will lie on top of it, through which burnt coals will spill out. To make it lie flush with the bricks, cut small grooves in them to the size of the grate.
Shot: Big Family VLOG / YouTube
Finally lay the cut bricks on the refractory mixture.
Shot: Big Family VLOG / YouTube
Install the ash pan door into the facing masonry and secure it by sinking the wire whiskers into the solution. At the same time, make a frame from fireclay bricks the size of the door, which will fill the space between the firebox and the lining.
Shot: Big Family VLOG / YouTube
Lay two more rows of outer masonry to cover the ash pit.
Shot: Big Family VLOG / YouTube
Continue laying, alternately installing a pair of rows of refractory and facing bricks. Control the horizontal alignment using a level and correct protruding blocks with light blows of a hammer.
Shot: Big Family VLOG / YouTube
When 8–9 rows are ready, fill the cavity between the firebox and the outer walls with expanded clay so that the tandoor retains heat longer.
Shot: Big Family VLOG / YouTube
Lay the bricks in the 13th row not flush with the lower level, but moving them 3.5 cm inward. Then place the 14th row as usual, and then there will be a small shelf in the firebox on which the lid will rest.
Shot: Big Family VLOG / YouTube
Raise the facing masonry by 14 rows, add expanded clay to the cavity, and the tandoor will be almost ready.
Shot: Big Family VLOG / YouTube
All that remains is to make the lid. Cut the boards to the size of the firebox and screw them together. For more effective thermal insulation, it is better to make the lid two-layer: the first layer lies on the shelf inside the firebox, and the second covers it from above, protruding slightly outward. Make handles from the same board so that you can easily grasp the lid.
Other masonry options
To save consumables, some craftsmen use masonry - a vertical spoon. At the same time, the height of the stove also has 4 rows, but when building walls, the bricks are joined together not by a bed, but by a long side edge. But all technology remains unchanged. But it should be said that the strength of this design leaves much to be desired. Therefore, in this case, it is imperative to lay out the outer frame.
You can simplify the masonry process and make the stove in the shape of a strict cylinder. That is, do not make a neck at the end. At the same time, heat loss during cooking will increase, but not critically. And in this case, you can go two ways. Use a vertical poke in the masonry or place the brick horizontally.
Masonry from halves Source ad-cd.net
Origin story
The traditional tandoor comes from Central Asia, it was made from refractory clay, dried in the sun and annealed over saxaul firewood .
It is almost impossible to reproduce this technology in mid-latitude conditions: drying clay requires special conditions with low humidity and a certain light spectrum. In a desert climate, such a regime can be created without much difficulty outdoors: the hot sun evaporates moisture, heats the clay to 70 degrees, and the dust constantly contained in the air acts as a kind of filter for UV rays. As a result, the tandoor dries without the formation of internal stresses, and during annealing it remains intact even with large wall thicknesses.
Clay that is dried under normal conditions quickly becomes crusty, remaining moist inside. As a result. when trying to burn. its internal moisture suddenly escapes, forming cracks. Therefore, it is impossible to make a ceramic tandoor with your own hands in our latitudes , even if you have good fireclay clay.
Therefore, craftsmen , having decided to build a tandoor on the site with their own hands, pay attention to its closest relative - the Armenian tonir . It is made of fireclay bricks and has thicker walls, which allows it to retain heat longer. Of course, the toner takes longer to warm up, but, unlike Central Asia, there is no shortage of firewood in mid-latitudes.
Building a brick tandoor with your own hands is quite simple - the laying technology is simple, and the materials needed for it are available and sold in hardware stores. Detailed instructions and photos are given below.
In this article you will learn what types of wood-burning stoves there are and how to build them yourself. What are the advantages of a brick oven with a water circuit, as well as what design features it has, you can find out here. Here we tell you how to quickly make a smokehouse for cold smoking at home and on the go.
Decorative finishing
Before strengthening, insulating and decorating the tandoor, it is necessary to coat the internal walls with special clay. It is advisable to rub everything thoroughly and make a smooth surface. After the composition has completely dried, firing is carried out. The result is smooth, ceramic walls, on which bread is baked, sticking dough to them.
The remaining work will lead to an increase in the tandoor’s ability to accumulate heat. And the simplest is regular plastering. To do this, a metal mesh is fixed to the external walls. After this, the entire oven is coated with a thick layer of a special oven mixture. When the surface is completely dry, it is either covered with whitewash or painted with fireproof acrylic paint.
In the second way, a round oven turns into a square tandoor. To do this, a brick frame with right angles is laid around the cylinder. All voids between the walls of the fireplace and the external structure are filled with any heat insulator. Typically, all construction waste is used and supplemented with sand or slag. In this case, plaster is not done, but beautiful jointing is done on the masonry.
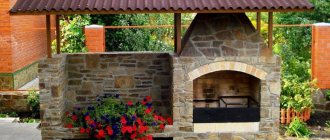
Decorative cladding of tandoor Source tildacdn.com
Burning
After the initial heating, the furnace must be fired from the inside. For firing, you need hardwood firewood, which when burned produces a lot of coals.
We recommend reading:
- Living fence at the dacha - 150 photos and videos of step-by-step instructions on how to create a tall and beautiful fence
The best flowers for the garden: 155 photos of simple and stylish solutions for creating flowers
Do-it-yourself landscaping - the best ideas for beautiful and functional site planning. Instructions, diagrams, photos, videos
The first batch of firewood is placed on about a quarter of the stove, set on fire and wait for coals to form. Then they add the next portion of firewood, gradually filling the stove 2/3 full.
After the flame disappears and the resulting embers begin to smolder. The oven is closed until it cools completely. Then they take out the coals and ash and sweep the walls of the tandoor. After this, you can cook food in the oven.
Earth tandoor
The first ovens were made in the ground. They can still often be found in the east. And the characteristics of an underground structure are even better than those of a furnace that is built on the surface.
When arranging a tandoor in the ground, it has some nuances:
- The diameter of the pit should exceed the external dimensions of the fireplace by 80 cm. This will be needed to fill the space with a heat insulator.
- The furnace walls are erected using any of the technologies described above. And you need to use the same fireclay brick.
- In the first row of masonry, above the laid base, an asbestos pipe must be installed, which reaches the surface at an angle of 45 degrees. It should have an adjustable damper.
- After coating the inner walls with clay mortar, they need to be allowed to stand for half a month.
- The firing process must last at least 180 minutes. In some cases it reaches up to 8 hours. When completed, the ideal surface produces a ringing sound when tapped.
When filling the void between the hearth and the ground, it is better to use crushed stone. All other materials do not resist frost swelling well. After careful compaction, the surface is either concreted or paving slabs are laid on it level with the neck.
Optimal sizes
The standard dimensions of a tandoor oven for installation in a country house are:
- height - from 1 to 1.5 m;
- center diameter - 1 m;
- upper part under the lid, reinforced with a metal ring, ‒ 40‒60 cm.\
To increase the heat capacity of the product and efficiency, a square brick frame or well is built around it, where there are four walls. The opening between the walls of the frame and the furnace is filled with expanded clay or slag.
Briefly about the main thing
If you want to build a magnificent oriental stove in your yard, you first need to decide on the design. Setting up a tandoor in the ground will be much easier. But it is more difficult to maintain. After all, after each use it is necessary to remove the ash, and this will have to be done lying down.
But with any choice, you need to purchase only fireclay bricks. Although there are other fireproof varieties that are half the price. Saving on the quality of the material will lead to the walls of the fireplace gradually beginning to collapse. Repairing a tandoor will not be cheap, and in the case of an earthen structure, it will be very difficult to carry out.
Ratings 0
Decorating the hearth
Decorating the outer surface will allow you to make your own tandoor attractive when entertaining guests or to satisfy the aesthetic needs of family members. There is no need to decorate facing bricks, however, to reduce the construction budget, ordinary ceramic stone is often used.
Its surface can be coated in several ways:
- coat with fireproof mortar and sink decorative natural stone of any size into it;
- putty and cover with acrylic paint that is not afraid of moisture and ultraviolet radiation;
- faced with tiles or porcelain stoneware.
There is no point in decorating a pit tandoor, since the structure is recessed into the ground by default.
To improve operating comfort, additional functions are used:
- canopy – protection from precipitation;
- countertop - cutting food;
- washing – ensuring hygiene;
- woodpile - storing fuel in close proximity to the fireplace;
- ring with slots for placing skewers.
Thus, the construction of a tandoor is much more complicated than a barbecue grill and a barbecue oven. However, the temperature regime of the hearth ensures a high speed of cooking and a wide range of dishes, not inferior to a full-fledged summer kitchen.
Why do you need a mop stick?
The work was nearing completion, it was time to correct the flaws of the previous row of bricks and think through the top hole.
Lulka
“I decided to make some kind of pattern so that the top hole would not suddenly be shifted somewhere to the side. I bought a sheet of EPPS, 2 cm thick. It could have been thicker, but I thought that it would be more difficult for me to cut it and tug it in and out. I cut out a circle of dia. 54.5 cm, so that it would go into confusion, and a “sail” was made from 3 parts. The mast is a mop stick. Please don’t make fun of me or laugh loudly, I did it as best I could, using the blonde’s improvised means... Chinese chopsticks also came into play.
Ultimately, the sail underwent some changes, which were sculpted after fitting. And after all, I seemed to have calculated everything, measured it out, but still had to trim and glue it, fortunately the material is suitable for transformation, I can’t imagine how much fuss I would have had with plywood!”
The bricks were signed again, the seams and the help of the basin were outlined. All this was necessary - after all, the FORUMHOUSE user was working with brick for the first time and did not want to redo it at all.
The row was placed on the solution, the hose was carefully pulled out. The third row (half a brick) was also laid, but the work did not pass the level test.
Therefore, Lulka dismantled the third circle and folded it again - the cauldron fit perfectly. It remains to wait 14 days for the first heating.
When the husband is tired of construction
FORUMHOUSE user Lulka opened a new topic on the forum and honestly said that when she started talking about the tandoor, her husband did not express enthusiasm, and made it clear that he was resting after the worries associated with building a house.
Lulka
“He began to fidget restlessly on the sofa, making it clear that I was again trying to invade his zen, which he stubbornly refused to leave after our construction project. In response I heard something vaguely cartoonish: “Sho? Again?" and “I understand everything, there is no money!” That’s why I’m doing this business all at once.”
The forum member had no experience as a builder at all (except that as a child she watched her father build a dacha) - nor did she have any experience as a stove-maker. She immediately admitted this and asked not to sharply criticize her work (it hurts not to throw slippers). To begin with, Lulka actively searched for information on the Internet. Especially on our forum, where there are many people who have built a tandoor on their own site and are ready to share tips to help beginners “pump up” in this matter.
As a result, it was decided to install a tandoor on the veranda in order to use the stove in any weather and not have to worry about the canopy.
Preparatory stage
Before making a brick tandoor, you need to perform a number of preliminary works. They depend on the design of the fireplace, but in general they come down to preparing the base and selecting materials. An important point in making a cylindrical mini-stove is making a template. It is needed to ensure that the round arch is smooth.
You can take an ordinary brick for a tandoor: red solid or even facing. But the best choice would be fireproof fireclay stone, which is designed to withstand high temperatures. The heating and cooling times for all brands of brick are approximately the same.
In addition to building stone, a number of additional materials will be required:
- cement, sand and crushed stone - for the foundation of the above-ground variation;
- masonry mortar for stoves and fireplaces (dry mixture);
- pipe with a diameter of 10 cm (asbestos cement, sandwich, tin) - for some tandoor models;
- grate;
- clay;
- reinforcing mesh, wire;
- cutting boards and plywood;
- grinder and disc for ceramics;
- measuring instruments.
If you add decorative elements to the structure, you can even decorate the site with a tandoor. In this case, it is best to sketch the building in color, and then make drawings according to the desired dimensions of the hearth.
The location for the mini-oven should be chosen so that the building is flooded with water as little as possible during the spring melting of snow. If necessary, you can build a raised platform for its installation. For a ground model, you will have to pour a foundation, and for an in-depth model, you will have to dig a hole.
Fire safety
They also criticized the short distance from the tandoor to the wall - 5 cm. Suddenly, the wall surface will smoke. However, the hostess assured that there was an industrial hood on the veranda (for barbecue), so there should be no problems. But when the second row of bricks was laid, it turned out that it would be better to make the gap larger - already at this stage the wind was sweeping leaves into the gap.
Lulka
“Tomorrow, if the weather and time permit, I will sculpt the 3rd row. With another pattern., And the leaves over there are already sweeping into the crack, here are those and why right next to each other... I feel like I’ll have to cover it with a square later... at least at the back wall...”
And the decision to install a tandoor on the veranda did not seem successful to everyone, although the ceiling height of Lulka is about 4 meters - everything should be fine.
Densider
“I don’t want to upset you too much, but when you light a tandoor, the flame rises up to a meter high. And this meter is not from the floor of the veranda, but from the top cut. If you heat it barely, so that the flame is not high, you won’t heat your tandoor with a half-brick wall. It won't even get rid of soot. So think about fire safety in advance.”
Operating rules
Do not use flammable liquids to ignite the tandoor.
Safety precautions are very simple:
- Children and pets are not allowed on the site during cooking;
- You cannot place a portable tandoor next to wooden objects;
- during cooking, you cannot touch the walls of the brick model - they are hot;
- You can only remove finished products using canvas gloves and special hooks;
- When igniting, do not bend low.
It is strictly forbidden to use flammable liquids such as alcohol, gasoline, kerosene for ignition.