At first glance, it seems that building a shed is simple. Choose a picture you like on the Internet or drawings of a utility unit you like - and build it for your health. Moreover, you can make a barn from timber, using frame technology, or even a stone one - from brick or aerated concrete. But behind the apparent ease lies the main pitfall. The barn in the picture is not yours, but “that guy’s.” Will it be right for you, will it be convenient to use this outbuilding, will everything that is planned fit into it? You will learn the answers to these questions, and more, from our article. Namely:
- What is a shed for?
- How to determine the optimal size of an outbuilding.
- How to turn a barn into a multi-functional building.
- What are utility blocks built from and on what foundation?
Site selection and site planning
The building can be connected to an existing bathhouse or garage, or installed separately. Basic requirements when choosing a site on the site:
- the structure should be conveniently located in relation to the house and other outbuildings;
- do not occupy the area for designated gardening plantings;
- fit harmoniously into the complex of surrounding outbuildings;
- comply with fire and sanitary safety standards.
The owner can resolve the first 3 points independently. But according to the requirements of urban planning and sanitary standards, there are certain restrictions. If you plan to keep poultry or small pets in the barn, you need to retreat:
- from the neighboring property at least 4 m;
- from a residential building at a distance of 15 m;
- from the drinking water well 30-50 m.
The place should be elevated enough so as not to be flooded by melt or rainwater. To protect the area from winds, you can place the shed on the windward side.
The structure should not interfere with neighbors and block access to sunlight to their site. Otherwise, they can file a complaint, and the court will force the building to be demolished or moved to another location.
Arrangement
When the utility block is ready, all that remains is to equip it. The minimum set of thematic space includes:
- Table;
- Chairs;
- Lamps;
- Rack;
- Boxes.
If desired, the design is supplemented with a stove, workbench, machine tools, plumbing fixtures, stepladder or ladder. If plumbing is relevant for a workshop, then a stepladder may be useful for a storage room.
The heating system is suitable for both a workshop and a food pantry. But for a warehouse with tools it is not necessary to install an expensive and heavy oven. Although a modern heat source can be light and safe if an electric main is connected to the utility unit.
Basic construction requirements
Since various things (equipment, tools, supplies) can be stored in sheds, the operating mode may also differ:
- “cold” construction without waterproofing. This is the simplest structure, for which insulation and protection from moisture are not provided. Usually built from scrap materials, sometimes directly on the ground;
- “cold” shed with protection from atmospheric moisture. It is impossible to completely eliminate dampness in such rooms, since condensation inside is inevitable during the cold season. However, they try to make the walls without cracks and gaps, the roof without leaks;
- a “warm” barn that can also be used as a workshop or storage room. In such cases, insulation of structures, high-quality waterproofing, and sometimes heating (usually temporary, while people are inside) are provided.
As a rule, agricultural implements that are not prone to corrosion and mold are stored in “cold” buildings, poorly protected from dampness. But it is better to store power tools and expensive equipment in not only a waterproofed, but also a relatively warm room.
Toilets
Construction always begins with the installation of a toilet. It is advisable to immediately make its body durable. So that the structure can stand for more than 10 years without requiring repairs, etc. Repairing or changing this building is not the most pleasant thing. Therefore, we have created a traditional structure for you, providing important details:
- Small gaps between the eurolining - they provide good ventilation inside the block, eliminating the possibility of visual contact from the outside;
- A compact, narrow door not only reduces overall cost, but also increases durability. It is the sash that breaks in toilets most often, because people are used to slamming it harder than in residential premises. By making it narrower, we reduced the scope, and therefore the load;
- Insulated roof - if you immediately put a profiled sheet on it, it will get very hot. A layer of wood will make the temperature inside lower in summer. Corrugated sheeting is not included.
Available add-ons: By default, the housing is sold separately from the internals. However, you can order the following:
- Wooden toilet seat;
- Roofing made of steel (galvanized or colored);
- Impregnation for protection from sunlight and weather conditions.
Material selection
Capital buildings, built, as they say, to last, are built of stone or brick. Cinder blocks or foam concrete blocks are also often used. It is reliable, durable, but expensive, and when creating such a structure you cannot do without the skills of a builder, otherwise it will simply fall apart. In most cases, wood or a material based on it is chosen for a shed in a country house.
Sleepers
A shed made of sleepers is an excellent budget solution, especially for villages located near the railway. Wooden sleepers are gradually being phased out, but they are a very reliable and durable material. A sleeper, even if it has served for decades, can be an excellent choice for the walls of a small shed.
Note! You can build a shed from old sleepers only away from residential buildings.
The advantages of this material are obvious: the sleeper is cheap, due to its shape, even a beginner can build a wall from it, and thanks to its impregnation, the sleeper will last for many more decades. True, it is in the impregnation that the main drawback of this material lies - a characteristic odor plus an unsightly appearance.
Log
Since ancient times, logs have been used as a building material. This is an excellent choice for building a wooden shed, especially in wooded areas where this material is not in short supply. A log barn has an excellent appearance; it can be built in an ensemble, for example, with a bathhouse; it will be a good addition to a wooden house. The only significant drawback is that the work will require specific skills.
timber
An excellent building material for the construction of any building. The characteristics of the timber are comparable to those of a log, but thanks to its rectangular profile it is much easier to work with. A barn made of timber will fit perfectly into a wooden courtyard; few people would dare to disparagingly call a masterfully built structure a barn.
Versatility
In old summer cottages, outbuildings are rarely found. But the thematic design, despite its small size, has universal benefits:
- Firstly, inside a space of up to 10 square meters you can store up to two tons of food and other supplies (the main thing is to maintain free passage, a stable foundation, an optimal microclimate and a rodent-proof façade);
- Secondly, a small “closet” can be equipped with machines to create a workshop (the corresponding project welcomes lighting and insulation);
- Thirdly, the utility block is perfect for storing seasonal and other tools.
If you take a good look at the different photos of the utility block for the dacha, you will notice that it completes the landscape design and sometimes serves as a barrier from the north wind. It’s a pity that not every summer resident tries to pay attention to the commonality of the exterior and the interaction of all buildings.
Barn foundation
For light frame sheds, it is advisable to use pile or columnar foundations, for heavier walls made of blocks - shallow-depth strip ones. The design also depends on the type of soil. It is not recommended to build columnar foundations on clayey, heaving soils. Seasonal movements lead to extrusion and distortion of the supports. On peat bogs or very weak soils, piles are preferred.
Marking
The foundation is first marked on the ground. You need to prepare stakes, a long cord, and a tape measure.
A quick and correct breakdown of the structure can be done in the following ways:
- Using a theodolite. Fix the position of the longest wall of the barn and two corner points with a cord and pegs. Then, using a tape measure and a measuring device, determine the corners of the foundation, drive in stakes, and tighten the cord.
- Using the "Egyptian triangle" method. Mark a point on the already stretched cord at a distance of 4 m from the base angle and set aside 3 m in the perpendicular direction (approximately). There should be exactly 5 m between the points. Correct the position of the second point and fix it with a peg. Further constructions lead from this right angle.
You can check the correctness of the markings along the diagonal of the resulting rectangle or square. Its length is calculated using the Pythagorean theorem.
To more accurately fix the axes of the barn, it is recommended to make cast-offs - temporary devices made of racks and transverse slats, placed outside the pit. A cord is attached to the nails hammered on them, which can be removed before excavation work, and after completion, the contour of the building can be restored again.
Strip foundation
The construction of a monolithic strip foundation includes the following steps:
- digging a trench 50 cm deep and 40 cm wide;
- backfilling of crushed stone-sand cushion to a height of 10-20 cm with layer-by-layer compaction;
- installation of formwork;
- laying waterproofing materials;
- installation of reinforcement frame;
- pouring concrete.
The surface of the foundation is covered with a film to protect it from premature drying. This is especially important in hot weather. You can periodically water the set solution from a watering can or hose. Further work begins after 7-10 days, when the concrete gains initial strength.
You can lay not a monolithic, but a prefabricated strip foundation made of concrete blocks. The material should not contain porous aggregates - expanded clay, slag. They increase water absorption and, as a result, contribute to the rapid destruction of the base.
Columnar
The foundation of free-standing supports is made of clay bricks, concrete blocks, asbestos-cement or PVC pipes with a diameter of 150 mm, railway sleepers or even car tires. The posts are installed in the corners of the building, every 1.2-1.5 m around the perimeter and under the partitions.
Supports made of blocks or bricks are constructed in the following order:
- Dig holes 35-40 cm deep.
- Cover the bottom with a 20 cm layer of sand and compact it.
- Lay out columns with a section of 40x40 cm and a height of 50-60 cm.
- After the solution has hardened, it is treated on all sides with coating waterproofing.
To install columnar foundations from pipes:
- They do it with a hand drill or dig holes to a depth of 70-90 cm.
- Cover the bottom with sand 10 cm thick.
- Waterproofing, for example roofing felt, is placed in the well.
- Install asbestos cement pipes and fix the position.
- Place 3-4 bars of reinforcement inside.
- Filled with concrete.
- After the mixture has hardened, the pit bosoms are backfilled with compaction.
Asbestos-cement or plastic pipes act as formwork. If the soil is not loose, you can pour concrete directly into the prepared well, having previously lined the walls with waterproofing.
Pile
Installation of piles is usually carried out by a specialized organization. Most often, screw metal structures are used, which are screwed in using mechanized equipment or a manual lever device.
After installation, you need to cut off the top of the supports horizontally and pour concrete into the pile cavity with layer-by-layer compaction with a vibrator. Cover the fresh solution with film and let it harden for 5-7 days.
Selection of technology and materials
When building a barn with your own hands, budget options are considered first of all:
- frame technology;
Frame barn
This technology allows you to build a structure in just a few days. The wooden frame is installed on a prepared base, filled with insulation, and sheathed with finishing materials.
Advantages:
- the lightweight structure does not require a powerful foundation; it is enough to build a pile or columnar foundation;
- walls are erected quickly, there is no need to wait for the mortar to gain strength;
- you can decorate the building with any decorative materials to your liking, for example, timber, brick or stone siding;
- When the joints are properly made, heat is well retained inside the room.
A frame shed is an economical and quickly erected structure. The disadvantage is low fire safety, since the structures contain wood.
Important. To avoid rapid fire, it is recommended to treat the wood with fire retardants and use non-flammable insulation materials such as mineral wool. In the case of thermal insulation made of moderately flammable polystyrene foam, decorate the walls with materials that do not support combustion.
The frame is often sheathed with oriented strand board, a practical and affordable material made from wood chips and polymer resins. An OSB shed without insulation can be used for storing tools or temporarily housing animals during the warm season. If you add additional thermal insulation, the room is quite suitable for winter use.
OSB is positioned as a moisture-resistant material, but it is not intended for direct exposure to water. The sun's rays, which destroy the polymer glue, are also unfavorable for it. Therefore, there is no need to neglect exterior finishing, for example, painting with waterproof compounds.
Do-it-yourself roof for a lean-to shed
For such simple structures, a pitched roof is most often used. It has a number of advantages:
- easy to use, but reliable and durable design;
- low costs for materials;
- ease of installation and waterproofing, including due to the absence of a ridge.
You can read more about shed roofs here, but let us only remind you of the importance of choosing the angle of the slope: if you don’t want to constantly remove snow from it in winter and at the same time worry about the fact that the flooring will fail, unable to withstand the snow load, it is better to take an angle of at least 25...30 degrees to the horizontal (for middle and northern latitudes).
Depending on the size of the span, you can use either simple rafters (rafter legs) or a combination of them with additional supports.
Considering that the width of the barn is rarely more than 5 m, they usually use simple rafters supported by two beams of the upper frame (mauerlat), in extreme cases with a bench.
The most practical roofing material is metal tiles or corrugated sheets. You can read more about how to lay a roof with corrugated sheeting here.
About quality and cost
The price of production and sale of change houses in Moscow is influenced by the size of the product and the presence of additional elements. The remoteness of the site on which the structure will be erected also plays a role in its formation. We have several price lists for delivery within the Moscow Ring Road, beyond it and in an area further than 50 km, where the price for every 10 km is 500 rubles.
has achieved good quality through cooperation with a couple of trusted suppliers. Their wood is always properly dried and stored in proper conditions. When ordering here, you are sure that the materials will be good.
Barn with gable roof
Installation of a rafter system of 2 slopes involves the installation of a ridge unit. It is performed in various ways:
- with an overlay at the apex of the corner;
- with escutcheon and spacer bolt;
- with the rafters resting on the ridge girder;
- adjacent to the ridge beam.
The roofing materials in the ridge are not joined tightly. The gap is necessary for air circulation in the under-roof space. To prevent precipitation from penetrating into the gap, metal ridge elements are installed.
A gable roof is more difficult to install, but it resists wind loads better. Another plus is the ability to use the space under the roof for various needs.
Angle of inclination of a pitched roof
Shed roofs have less windage than gable roofs. They are more resistant to wind loads, but provided that the slope is minimal. However, as the angle of inclination decreases, vertical loads increase, so you need to stick to the golden mean.
The optimal roof slope is ensured at an angle of 30-35°. Then it won’t be crushed by snow or torn off by a hurricane. Hemming the gables and overhangs significantly reduces the risk of the roof coming off - air masses, going around the edges, lose some of their destructive energy.
Floor and wall covering
As a material for the floor, as well as walls, you can use boards or all kinds of wood-based slabs. The boards are pre-treated to protect them from moisture; only water-resistant slabs are chosen, otherwise the durability of the structure is not guaranteed.
Sometimes you need to create a shed that retains heat; it needs to be additionally insulated. It is not difficult to reduce the heat loss of a wooden structure; to do this, you need to use two layers of wood, between which mineral wool or other insulation is placed. The result is a kind of sandwich that will help conserve heat without having to spend money on expensive materials.
Country cabins
This is the main product produced by the company. They are residential structures in the form of a parallelepiped.
Dimensions: in the catalog you have options with an area of up to 5-12 m². Their length reaches 8-9 m. The height and width are standard - up to 2.55 m.
Capacity: the interior space can include up to 2 partitions. As a result, you will have up to 3 rooms. Use them to create kitchen, sleeping and other areas.
Application:
- Storage of tools and other things - shovels, wheelbarrows, spotlights and other equipment cannot be left on the street. They will spoil or simply be stolen;
- Housing during construction - you can live in a cabin while you are building a dacha. If necessary, workers can be accommodated there;
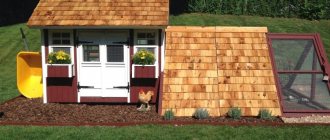
- Barn or shed - often after building a cottage, people use a wooden structure as a warehouse for various things. Some repurpose it for keeping chickens or other livestock.
The structures are used to create play areas for children; they perfectly replace dining rooms. The buildings are widely used as guest accommodation. However, there are better options for these purposes.
Information: in additional. This service will help you renew the ordered product.
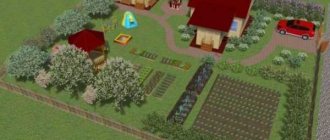
Choosing a barn project
As a rule, sheds are purely above-ground premises, which is why compacted platforms, a screw or columnar foundation can be used as a foundation for them. Examples of such projects are presented below.
Shed made of profiled pipe (assembled on gussets and corners) with cladding and roofing made of corrugated sheets, without insulation, on a concrete site
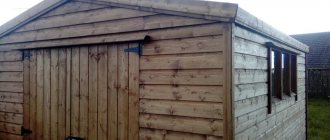
Wooden barn with a gable roof (on one side the overhang is increased) and a vestibule-porch
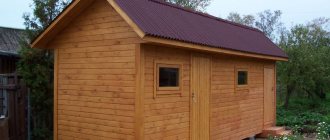
Shed on a wooden frame with a pitched roof, windows on a columnar foundation
However, often in addition to a room for storing various things above ground level, an underground room is also required. In this case, the construction of a shed becomes more complicated, since it is necessary to dig a foundation pit for the basement (cellar) and thoroughly protect the walls located below ground level from ground moisture.
Barn with basement
The building itself can be either wooden or frame, or capital - made of foam or gas blocks. The walls of above-ground sheds are also made of blocks; in this case, a strip foundation is required.
The choice of a specific project depends on the needs and capabilities of the future owners.
Drawings and diagrams of sheds
A barn is a capital structure, so the drawing is the basic basis for both the calculation of materials and for further construction. When compiling, it is important to take into account, in addition to your wishes, the sizes of blocks, sheets, and measured products, so that during construction there will be as little scraps and waste as possible.
The drawing must be drawn up in several projections, preferably all 4 facades, if there are any differences. Indicate the dimensions of the building along the axes, height, opening dimensions, and wall thickness. Indicate the layout of the main structural elements and other technical details. You can use a diagram from the Internet and then work it out in detail.
The layout can be quite simple. If there are rooms for different purposes under one roof, they need to be separated by partitions. It is advisable to arrange at least one window. This is especially important for raising animals, since sunlight has a beneficial effect on their behavior.
Examples of drawings:
A simple do-it-yourself shed: construction in stages
As an example, we propose to build a frame building with dimensions of 2.5x5 m, on a columnar foundation made of cinder blocks. Covering the walls with tongue and groove boards, grade B, 24x96 mm, six meters long. Frame posts – 100x100 mm, strapping 75x100 mm, assembly on corners and plates.
Sequencing:
- foundation marking. For a structure of this size we will need eight supports around the perimeter and two in the middle;
- in places for supports, we tear out holes for supports, depth of at least 20...30 cm, size to match the size of the support (approximately 400x400 mm);
- We install the supports by laying a solid cinder block (390x188x190 mm) or a foundation block on a sand cushion. The blocks are fastened with cement mortar of grade M200...M400;
- We lay waterproofing on top of the supports (roofing felt in two layers). It is also advisable to make lateral waterproofing of the supports using the coating method (bitumen mastic);
- we assemble a grillage - a beam with a cut at the corners “in half a tree” or “in a paw”;
- we fasten the harness to the supports using pins or dowel anchors;
- we mount the frame posts, fastening them to the bottom trim with corners and/or cutting;
- we arrange the upper harness (the fastening is similar);
- we mount the rafters (read more about how to attach the rafters to the mauerlat, which is the top frame frame);
- we install the braces and struts in place;
- We cover the walls with tongue and groove boards (with the exception of the doorway), the covering is carried out from below with mandatory fastening to the frame;
- we install the flooring and roof sheathing (the floor can be laid before assembling the racks and top trim);
Sheathing of a pitched roof: 1 – rafters (purlins), 2 – waterproofing film or membrane, 3 – counter battens (lay directly on the rafters, the cross-section is half the size), 4 – sheathing, the pitch of which depends on the selected roofing material - We install the roofing material – metal tiles. It is highly advisable not to neglect the additional elements and drainage system - in this case, you will not have to worry about rotting and dampening of the walls of the barn;
- We attach the door and decorative protective corners to the corners of the building.
You should immediately take care of the interior arrangement of the shed - for example, make convenient holders for garden tools, organize shelves, etc.
Construction of a barn frame step by step: detailed instructions
The frame is a structure made up of racks, upper and lower beams, lintels, and inclined jibs. Installation can be done in 2 ways:
- connecting all elements in series;
- using the “platform” method, fastening parts into large sections on the horizontal surface of the subfloor.
For the frame, timber 150x100 mm and dry planed board 150x50 m are prepared. All lumber must be treated with antiseptics and fire retardants.
Fasteners - galvanized screws, nails, bolts, plates, staples. Additionally, you can use wood glue.
Do-it-yourself frame shed, according to step-by-step instructions, is installed in the following order:
- The bottom trim beam is laid on the waterproofing layer along the foundation. Secure with anchors, studs or bolts.
- Install floor joists.
- Starting from the corner, racks are installed in increments of 60 cm, and fastened along the top with a strapping beam.
- The openings are reinforced with boards laid on edge.
- The frame is reinforced with jibs made of boards or perforated steel strips with inserts into the lower and upper horizontal beams.
- The structure is sheathed with finishing materials, windows and doors are installed.
- If necessary, install wooden floors or a concrete screed on the ground, install communications, and carry out interior finishing.
If you use OSB or multi-layer plywood to cover a frame shed with your own hands, jib bars are not required, since rigid sheets give the frame stability. The facing slabs must be staggered with the long side parallel to the foundation.
Additional features
The shed itself is a convenient and useful building, but it can be used not only for storing equipment and garden supplies.
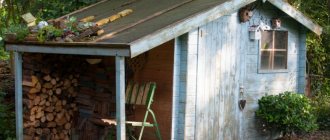
You can combine this building with a woodshed. To do this, part of the building is sheathed not with continuous cladding, but with gaps - for better ventilation of firewood. The roof and foundation remain the same.
You can place pumping equipment for a well in a common or separately built shed.
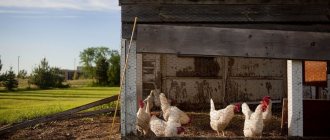
Allocate part of the room or use it entirely as a poultry house.
Advantages and disadvantages of plank construction without a foundation
Experienced farmers advise creating sheds from wooden planks and installing them directly on the ground, without building a foundation. The advantages of such structures are as follows:
- saving time - they can be erected quickly (in just a few days);
- saving money - without a foundation, the structure will cost 2 times less;
- saving effort - it is obvious that erecting a structure without a foundation requires less effort on the part of the builder.
In addition, the barn itself turns out to be quite light and stable.
To build a shed without a foundation, choose wooden boards - they are quite light, but durable
However, such buildings also have disadvantages:
- the need for mandatory additional insulation of the floor so that the animals inside do not freeze;
- the need for external and internal waterproofing of walls and floors so that water from the soil does not destroy wooden boards;
- fragility of the structure (a barn will last about 20 years, whereas with a foundation it will last about 50);
- the need for careful preparation of the area where the shed will be installed.
If such problems do not scare you, then you can safely start building a shed from wooden planks without a foundation.
Wooden boards are a durable and reliable material and are relatively inexpensive. That is why they do not lose their popularity and relevance, despite the abundance of modern innovative materials.
A wooden shed without a foundation will last a maximum of 20 years, then it will begin to quickly collapse
In what cases is it rational to use
When a barn is built to last, it must be installed on a foundation. If there is no need for long-term operation of the building or the structure is to be moved from one place to another, then the foundation is not poured.
There is no need for a foundation if you live in warm regions where there are no harsh winters and little rainfall throughout the year.
Residents of warm regions with low average annual precipitation can afford to build a shed without a foundation.
Cheapness is another important feature of a shed without a foundation. If funds are limited, you can build a structure without a foundation and install it directly on the ground.
Range of services
We go to the site: some clients need options with individual sizes. In this case, order a manager for your site. He will take measurements.
We assemble them in a workshop: the cabins, due to their small dimensions, are delivered ready-made. If there is no access to the installation site, the procedure is carried out directly on site. This does not affect the quality in any way, because even at the factory, all work is performed using hand tools.
We transport and unload: for this we have a crane, thanks to which the object will be immediately placed in the right place. And for residents of hard-to-reach areas, the company has prepared an all-terrain vehicle delivery service.
We install: if the structure is sent ready-made, our specialists will make sure that it is installed on your site in compliance with the standards.
Preparation for construction
Before you begin the process of constructing a shed from wooden planks, you need to decide on the design of the room, prepare all the necessary tools and materials, choose insulation and waterproofing.
A barn made of wooden planks without a foundation can only be one-story. Otherwise, the earth will not stand it and will begin to sag, the structure will gradually sink into the soil, the walls and floor will begin to collapse. This is dangerous for animals and humans.
A barn without a foundation can only be one-story: the more floors, the heavier the structure; it will quickly sink into the ground
The height of the building walls should not exceed three meters, and the total area should not be more than 20 m2. Otherwise, the structure will turn out to be very large, the earth simply will not support such weight.
In any case, the barn made of wooden boards will be frame. This means that initially they build a “skeleton” - a base, then it is lined with boards, insulation, waterproofing and finishing.
Drawings of plank sheds
To build a shed, you need a drawing. It is better to choose the simplest design. It will be easier to build such a structure alone.
By strictly following the drawing, a barn can be built in a couple of days alone
The barn can be made square or rectangular depending on the personal preferences of the owner. But an elongated structure that is too narrow is inconvenient to use; the animals inside will be too cramped.
Using a simple drawing you can create a comfortable and cozy barn for livestock
Selection of material and calculation of boards
The main material for building a shed without a foundation is wooden planks. Oak, spruce and pine trees are suitable for agricultural purposes. It is worth choosing such tree species because they:
- smell nice;
- do not absorb unpleasant odors;
- are durable;
- resistant to mold formation.
To build a frame base, choose oak wooden blocks with a square or rectangular cross-section (100×100 or 60×100 millimeters).
For construction, choose only bars with a cross-section of 100X100 mm or 60X100 mm, others will not work
To calculate how many boards and bars will be needed, you will have to take into account the following nuances:
- To create a frame, place 4 identical bars at the corners of the future structure. The length of each “stick” is 3 meters 20 centimeters (provided that the height of the barn is 3 meters, 20 centimeters will be buried in the ground to ensure the stability of the entire structure).
- Vertical bars are connected to each other by horizontal ones. And not only on the walls, but also on the floor and ceiling. The distance between parallel bars is 50 centimeters.
- The frame is sheathed with wooden boards on the outside and inside (entirely, including the floor and ceiling). The planks should fit snugly against each other without forming gaps.
Based on such features, calculations are made. To erect a building with an area of 20 square meters with three-meter walls, you will need the following number of boards and bars:
- 210 meters of timber (70 timber, 3 meters each);
- 188 square meters of wooden plank.
An example of calculating the required number of wooden boards
To calculate how much material will be required for the construction of a building, you need to know the exact dimensions of the future room. If the structure is three meters high, 5 meters long, and 4 meters wide, then counting the number of boards is easy. You need to find out the total area of all surfaces of the building (including the floor and ceiling). To do this, first multiply the length of the building by the height (5 * 3). We get the area of one wall, the same area of the parallel wall. The area of the other two walls is equal to the product of the height and the width of the barn, multiplied by two (4 * 3 * 2). The floor and ceiling have equal area. We calculate them by multiplying the length by the width (5 * 4). Now we sum up all the received numbers (5*3*2+4*3*2+5*4*2). We carry out the cladding outside and inside. This means that we multiply the resulting value (94) by 2.
Using the same formula, you can calculate the required amount of insulation and waterproofing for a shed.
Do-it-yourself wooden frame shed: step by step with photos
A frame barn measuring 6*3 meters was built. The roof is pitched, covered with ondulin. The height of the front wall is 3 meters, the back one is 2.4 m. Operation has shown that with such a difference in height, snow does not accumulate much (Len. region).
Standard FBS 600*300*200 blocks were used as the foundation for the barn. They are laid on a sand and gravel bedding 25 cm thick. A cut-off waterproofing is laid on top of the blocks - a layer of roofing felt, on bitumen mastic. A layer of “hydrotex” is also glued on top of the same mastic. This cake was made because the groundwater level was high, and it was necessary to ensure that the building was protected from dampness.
Start of construction of the barn. Waterproofing is laid on the foundation, a frame is placed on it, and a beam is attached to the frame
A beam with a cross section of 150*150 mm was laid on the waterproofing (all lumber was processed). Connected into half a tree, nailed - 100 * 4 mm. For those who are unfamiliar with carpentry, you can join the beams end-to-end, nail reinforced corners to the joints from the inside, and a mounting plate from the outside.
In this version, the frame was not attached to the blocks in any way. In regions with high wind loads this is unjustified. You can fasten it using studs: a hole of the same diameter (12-14 mm) is drilled under them, through the beam, into the block. A pin is driven into it, the bolt is then tightened with a wrench. To hide the cap, you can drill a hole for it.
The next step is to attach the floor joists. Installed on the edge of a 150*60 mm board. They are attached to the harness with special brackets of the appropriate size. Attached to 100*4 mm nails.
The floor joists are attached to the frame with such brackets
The logs were aligned along the upper edge of the strapping beam. Everything must be level, otherwise the floor will be difficult to lay. You may have to level it with a plane or redo it.
The frame was assembled using the “platform” technology: first the floor was laid, and the walls were mounted on it. The wall frame or part of it is assembled on the floor. In some cases, they are immediately sheathed from the outside if slab material is chosen for the sheathing. And already in this form (with or without casing) they are lifted, placed vertically and secured.
There is a second technology called “balloon”. The frame is mounted along it gradually: the corner posts of the frame are mounted on the frame or even directly on the blocks. They are leveled in all planes. A rope is pulled between them, along which the remaining racks are then placed. They are also nailed one at a time, fastening them together with slopes and temporary cross members.
You may be interested in the article “We make firewood sheds and woodpiles with our own hands”
In this case, the “platform” technology was chosen and 18 mm thick OSB was laid on the logs. In general, the floor can be made of boards, plywood (moisture resistant), OSB, etc. You will need 20 boards, 13-15 mm plywood, but you need moisture resistant (OSB is moisture resistant by default).
Laying the floor in the barn
Next, the assembly of the walls began. The frame is completely knocked down: the lower frame, the racks, the top frame. In this form, it is installed exactly along the edge of the strapping beam, aligned, reinforced with safety struts, stops, and slopes. It is nailed through the flooring to the trim beam. The nails were 200*4 mm.
The walls have been assembled. The top trim will immediately serve as a support for the rafters
To assemble the frame, 100*50 mm boards were used, the distance between the posts was 600 mm, the rafters were installed with the same spacing. The rafter system was assembled from 150*40 mm.
Window and door openings are reinforced - two boards are nailed, which are nailed together in a checkerboard pattern every 20 cm. The load here is greater, so reinforcement is required. There is a gate at one end for loading/unloading large items. Therefore, in this wall (you can see in the photo) there are only corner posts and reinforced ones - for fastening the sashes.
View of the end, which will have wide double doors
Since the roof is single-pitched, the rafter system is simple: boards that are selected for the rafters are laid on the edge. Their length is longer, since the roof overhang is necessary. It is usually 30-50 cm on each side. In this option, with a barn width of 3 meters, the length of the rafter legs (taking into account the slope) was 3840 mm.
They were nailed obliquely with nails - two on each side. It can be strengthened by installing corners: this will withstand even significant wind and snow loads.
Lathing for ondulin
Next, a sheathing (100*25 mm) is mounted on the roof. The installation step is 40 cm, according to the recommendations. And the roofing material is laid (nails were purchased along with the covering).
The external walls were covered with OSB 9.5 mm thick.
Shed cladding process
The doors were installed and small steps were made.
Doors installed old, tidied up
The finishing touches were to install the wind board. The barn was then clapboarded and painted to match the rest of the buildings on the site. The barn was built with your own hands on a ready-made foundation in two weekends. Cladding and painting were done much later - almost a month later.
The final barn...beautiful
The unattractive foundation is covered with asbestos sheets cut to size. It turned out to be a beautiful barn.
Read more about the principles of timber frame construction here.
Video about building wooden sheds
The barn turned out to be beautiful, but not cheap. But it is decent in size, strong and in appearance no different from a house - it fits into the composition. Everything is shown/described in detail, there is one violation: the waterproofing under the metal tiles is laid vertically. Even with good gluing of the strips, sooner or later the water will make a path for itself. Otherwise, everything is correct.
In this case, the barn is built with your own hands on what is probably the cheapest foundation: concrete is poured into old tires. The frame stands on these “pillars”. Naturally, they need to be placed on a flat, reliable surface and they themselves must be at the same level. In terms of strength, the base will not be inferior to the best concrete blocks, and may even surpass them. Tires protruding from under the structure can be closed by making a step and subsequently placing flowers on it or using it for other needs. It will be even more practical.
Another video with a step-by-step illustration of the construction of a frame barn made of timber.
Sources
- https://stroim-dom.net/saraj-svoimi-rukami-pojetapnoe-stroitelstvo/
- https://stroy-okey.ru/house/pristroyka/odnoskatnyj-saraj-dlya-dachi-svoimi-rukami-chertezhi-i-poshagovaya-instrukciya/
- https://DrevoGid.com/stroitelstvo/pristrojki/saraj.html
- https://legkovmeste.ru/stroitelstvo-i-remont/kak-sdelat-saray-svoimi-rukami-iz-dosok-bez-fundamenta.html
- https://stroychik.ru/hozpostrojki/saraj-svoimi-rukami
[collapse]