A metal brazier made by yourself is much more reliable than one bought in a store. In this article we will tell you how to make a barbecue with your own hands using the example of three models: from small kebab makers to a convenient brazier on a transportable stand. And the recommendations of the masters, step-by-step instructions, diagrams, drawings and photos will help in the upcoming work.
A short excursion into history
This word comes from the Azerbaijani or Turkish manqal - brazier. There are similar words in Arabic, Persian, Georgian, and Armenian. It was a bowl made of copper with wide horizontal brims. For ease of carrying, it was equipped with two handles and was covered with a lid in the shape of a hemisphere. For stability, supports were placed from below. Somewhat later, skewers from the Syrian peak appeared, and the self-name shashlik came from the Tatar shishlyk - fried on a spit. Now it has firmly taken its place in the national cuisine of many peoples of the world.
Device Features
A modern barbecue is most often presented in the form of a low rectangular box, and the hemisphere is “attached” to another type of portable brazier - a barbecue.
An explanation for this division can be found in the particular preparation of products, or more precisely, in the accessories with which they are prepared.
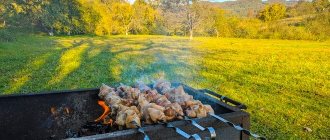
In a barbecue, meat and vegetables are threaded onto skewers, and they are best placed on the sides of a rectangular broiler. In this case, several identical portions are fried on the fire at the same time, so it is important that the heat is distributed as evenly as possible along the entire length of the skewer and throughout the entire cooking zone, which is impossible to achieve in a spherical fryer.
In a barbecue, food is placed on the grill. The maximum heat from the coals is concentrated in the center, but this disadvantage, from the point of view of the barbecue, turns into an advantage for the barbecue - by changing the position of the products on the grill, you can adjust the cooking temperature, or the degree of roasting. This is especially important for steaks - one of the “signature” barbecue dishes.
There are other differences between the two most popular types of fryers:
- The grill, as a rule, does not have a lid, but the barbecue usually has one.
- In a barbecue, firewood is often used, which is burned to the state of coal, and to speed up the combustion process, holes are made in the walls. In addition, using wood of different species, you can achieve different aromas and flavors in each case.
- The barbecue is filled with charcoal, which does not require a lot of air to burn. Therefore, there are no holes in the walls of the fryer. In addition, birch firewood is used to produce charcoal, and this “standard” of fuel does not affect the taste.
But there is also a “compromise” type that combines the characteristics of a barbecue and a barbecue - its fryer is made in the shape of a hollow cylinder with an opening lid. This is the shape of a homemade grill made from an old gas cylinder or a container from a water heating boiler.
The fastest way
Suddenly guests arrived and offered to cook barbecue. There is nothing suitable for using your hand, but you can quickly make a simple barbecue from scrap materials. To do this, place two parallel rows of bricks on an edge on a sheet of iron.
We light a fire between them; when it burns out, we place skewers with meat on the hot coals. A way out of the situation has been found. But over time, it is better to get a specially made barbecue.
Types of designs
The types of barbecues can be different; there are portable and stationary structures. The materials most often used are metal and brick.
A portable barbecue is very convenient for travel, which easily fits in the trunk of a car and can always be taken with you on a picnic. Its disadvantages include the fragility of this design.
Stationary barbecues are more massive, they have a durable design and a long service life. In addition to metal barbecues, they are also made from gas cylinders, rims and barrels.
We use old containers
If you find a 50-liter container for household gas, you can make a barbecue from a cylinder with your own hands.
For this:
- open the valve and completely bleed off the gas;
- fill with water and let sit for 24 hours to neutralize any remaining contents;
- We make a rectangular cutout on the side;
- we clean the edges and install hinges on the rivets;
- We cut off the valve, and in its place we weld a chimney pipe with a damper to adjust the draft.
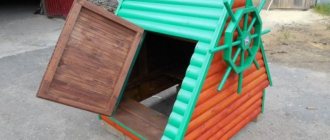
In the same way, you can use steel barrels, but you also need to take “Soviet” ones with thick walls; they won’t burn out longer. With the help of decor, they can be transformed into a steam locomotive, airplane or rocket.
Many motorists have unnecessary rims, put them on a stand and you're done.
Dimensions and typical diagrams
When making a barbecue yourself, you can focus on the following parameters and features of their calculation.
Width
Determined by the size of the skewers. The length of typical products is 45-50 cm, of which the useful or working length is only 30-35 cm.
Consequently, the maximum permissible width of a typical barbecue is 40 cm. Then the meat will occupy maximum space above the coals, and the heat will not be wasted.
Length
It must be calculated based on the average number of kebabs. The recommended distance between two skewers is 5-10 cm. For 6 skewers, it is better to make a grill 60 cm long.
For a large company, when meat is fried on 10 skewers at the same time, a meter-long grill is suitable. And for barbecue grills, a 40 cm long roasting pan is optimal.
Dutch oven depth
The ideal value is from 15 to 20 cm. For frying meat, a layer of coals 5-10 cm high is enough, and the recommended distance between the skewers and the fuel is 8 cm.
For wood-burning grills, the depth is increased, but then more coals will be required for good roasting.
Grill height
This parameter is selected individually for the chef. It is believed that the brazier should be at the level of a person’s waist, then it will be convenient to work with the barbecue.
Depending on the height of the cook, the height of the grill can vary from 80 to 120 cm.
Frypan wall thickness
For stationary barbecues, the rule works: the thicker the walls of the firebox (broiler) of the barbecue, the better. It is advisable to use metal sheets with a thickness of 5-10 mm. Such a grill will retain heat better and last longer.
If you want to weld a portable structure, sheets 3-4 mm thick are suitable. Then the structure will weigh less.
Metal sheets
The traditional manufacturing option is to make a box in accordance with the drawing of the barbecue. The dimensions must be such as to accommodate the required number of skewers. To fix them along the length of the side, slots are made at the top.
There are holes at the bottom for ventilation. The height should be sufficient so that the food does not burn. To make cooking convenient, legs are made. For protection against corrosion and durability, it is advisable to paint it with black heat-resistant paint. It will not stand out against the background of soot.
Instructions for self-production
Let's consider the process of assembling a barbecue made of metal. To make a simple model you need a minimum of materials and tools.
Tools and materials
Metal sheets 5 mm thick for the bottom and 3 mm for the walls
Steel pipes for making supports
Metal corner 20 mm for decorating the sides (you can also strengthen the connection between the bottom and the sides)
Grinder with cutting wheel
Welding inverter with a set of electrodes
Shovel or drill for making sockets for supports
Ruberoid, bitumen mastic for lining nests and applying a protective coating to supports
Protective paint for application on the grill
Expert opinion
Valery Garmash
Chef of the Grill House restaurant, griller
As a rule, heat-resistant black paint is used for painting so that the burnt edges do not stand out and create a contrast with the main coating.
Step-by-step instruction
We will show you how to assemble a simple grill yourself. Its design is so simple that any novice craftsman can make it.
For this purpose, a sheet of metal 2 mm thick was purchased from a metal warehouse. We recommend using metal with a thickness of at least 3 mm for the barbecue.
Since this grill (in our example) will not be used very often, 2 mm thick metal will be enough for us. Before starting work, for convenience, we made a small cutting diagram.
To obtain an even cut, you can use a regular iron strip as a guide bar.
When working, remember to use appropriate protective equipment.
Due to their design, homemade clamps are very helpful in work.
Once all the panels are cut, it's time to start drilling the holes. We decided to order a set of step drills for testing.
The optimal height of the grill sides is 150 mm. A row of holes is located at a height of 50 mm from the base. Hole pitch 60 mm. Diameter 12.4 mm.
The first impression of these drills is so far positive. The chips, as expected, come out of the hole in whole ribbons. I use a countersink to remove burrs.
We also place the recess for the skewers in increments of 60 mm.
It is best to process the sidewalls with a bag, pre-compressed with clamps.
When all the parts are ready, you can proceed to welding.
It is very convenient to use magnetic corners to secure parts.
We assemble the box using tacks.
Now you can scald.
It is not necessary to completely weld all the seams. We just wanted to practice welding one more time. We knock down the slag and clean the welds.
From 10 squares we make handles for easy carrying.
We will make the legs of the barbecue from 15 profile pipes, their length will be 80 cm. We trim the blanks using a cordless circular saw.
It will not be easy to get such an even cut with a regular grinder.
The legs will be attached using M6 bolts.
If necessary, this will allow you to store and transport the grill when folded.
To attach the legs, it is most convenient to use a wing nut.
When preparing barbecue, an additional work surface is never superfluous. A small shelf was quickly welded from 10 squares of reinforcement. It is installed in one movement in two sections of 15 professional pipes.
When all the work is completed, we clean all the parts and cover them with heat-resistant enamel. We wait for the paint to dry completely and you can assemble the grill.
The grill turned out to be very durable and quite stable. Its dimensions are as follows: height 80 cm, length 50 cm, width 30 cm, depth 15 cm.
When first ignited, the paint is fired within 15 minutes and it gains full mechanical strength.
The grill turned out to be very successful. Its design is so simple that even a novice welder can make such a grill.
Sometimes an awning or canopy is installed over the barbecue to protect the brazier from rain. The grill can also be painted with heat-resistant paint to protect against corrosion.
We build a barbecue from bricks
Do-it-yourself brick grill - for this we need:
- the site is leveled at the selected location and the foundation is poured;
- the first layer of bricks is laid out strictly according to the level and checking the diagonals;
- subsequent laying must be carried out with bandaging between the rows at least a quarter;
- We take fire-resistant bricks and lay reinforcement for strength.
How to choose a good and beautiful grill for your home
First you need to decide what kind of grill you need. You can choose mobile or landline option. Having made your choice, you need to decide which material is right for you. The most common variations are:
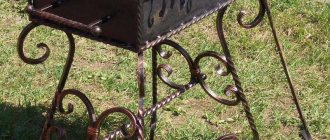
- A cast iron grill has a number of undeniable advantages: fast heating, heat retention, corrosion resistance, attractive appearance. However, they have an impressive price and size. At the same time, you get a beautiful grill, often decorated with forged inserts, which will serve you for a long time.
- Brick has a number of positive aspects. It is especially worth noting the decent appearance, high quality and resistance to external adverse factors.
- Made from stainless steel. The only advantage is the low price. Unfortunately, there are many more disadvantages.
Some craftsmen resort to forging the base of the barbecue.
When to combine with cooking
Instructions on how to make a grill oven:
- We select a suitable project taking into account your wishes;
- we make an additional compartment for the kitchen stove;
- we put a grate in the firebox, be sure to make a ash pan for better draft;
- cover the top with a cap with a chimney;
- We install a hob with burners; when cooking food, the mugs are removed; for better heating of the vessel, you can place a cauldron for pilaf.
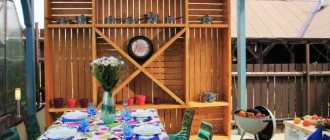
When it's bad weather outside
Snow, rain, and drizzle prevent you from enjoying the holiday, and they also prevent you from lighting a fire. In this case, a barbecue with a roof is required.
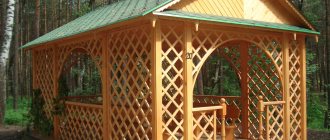
You can build a gazebo with a barbecue with your own hands. To do this, we choose a spacious area,
so that the wooden parts do not get hot from the heat source. We drive in the metal support posts and fasten the veins between them. We cover it with light and durable profiled sheets. They can also be secured on the sides for protection from the wind. We put a grill in the center and no vagaries of the weather are scary.
Note!
How to make a garden (construction) wheelbarrow with your own hands: detailed instructions with description + 85 photos of fresh ideas
How to make a bench with your own hands - 90 photos of the best ideas from the master. Review of finished drawings, diagrams and dimensions of the bench
How to make a hot smoked smokehouse with your own hands: drawings, dimensions, choice of material, photos of finished options
What about in a city apartment?
If you want to treat yourself to a barbecue at home. There is no need to cook it on the balcony like the hero of one famous film. Just make a sealed box with an infrared heater from an electric oven grill. Place the handles of the skewers outside and make sure that the food does not burn; turn it over in a timely manner. The most delicious kebab is guaranteed without leaving the kitchen.
These are not all ideas about devices for preparing shish kebabs and barbecues. Based on this article and examples from the Internet, you can always come up with something more original.