Wells as sources of tasty and clean underground water have long been dug in the streets and courtyards. To make it convenient to get water, and to prevent garbage from getting into the mine, beautiful sheds and houses, often made of wood, were built on top.
Now many private houses have a central water supply, but the tradition of installing such structures in the yard has been preserved. Nowadays it is more often an element of landscape design.
The desire and ability to work with carpentry tools and a ready-made drawing of a decorative wooden well will help you create such a miracle for your site yourself.
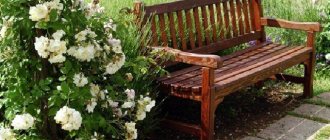
A wonderful addition to a blooming landscape
Design options
Construction companies offer to purchase ready-made designs for decorative wells, but such products are quite expensive and are not original. A landscape designer will be able to advise on how to choose the right decorative wells and design them in accordance with the appearance of the garden, but you can also cope on your own, not only with the choice, but also with the creation of the structure.
Ready-made decorative wells are expensive and not original
Ready-made designs of decorative wells
There are several designs of wells, in the likeness of which decorative structures are also built. This could be a mansion with a gable roof, a crane well without a canopy, or a column protruding above the surface of the earth (Abyssinian well). A well, similar to a house, usually acts as a decorative object.
Small decorative well
Beautiful crane well without canopy
The design of a well in a dacha must correspond to the chosen design style of the site and the house:
A decorative well can become an interesting object in the landscape when illuminated at night
Magnificent view of the estate with a decorative well
for country style (an ordinary village hut with a cozy garden around), a well in the form of a mansion with interesting carved details is suitable,
Country style well
Beautiful landscape with decorative wells
in oriental styles, a small building with a tiled roof with corners curved up would be appropriate,
Spectacular well in oriental style
Decorative well with a roof with curved corners
modern styles (minimalism, modernism, etc.) involve creating a well structure by analogy with other objects on the site (house, bathhouse, barn, chicken coop, well and other structures must be made of the same materials and using the same technique).
A beautiful decorative well will never cease to delight your eye
Decorative well in a modern style
How to assemble a log house correctly
When assembling a log house, it is necessary to ensure a tight connection of the elements within each crown. Rows of logs are installed perpendicular to the ground surface. To adjust the position, trimming the surface of the parts is allowed. The strength of the structure and the quality of the water that will collect in the lower part of the well depend on the correct assembly of the log house.
Corner connection of crowns
To connect the crowns, 2 methods are used:
- joint “in the paw”;
- half-tree pairing.
When joining “in the paw”, rectangular recesses are cut out in the logs, in which there are protrusions and response cavities. The connection design is characterized by increased rigidity, but is rarely used due to labor intensity.
The dovetail joining technique requires careful marking of surfaces, but provides high tensile and torsional strength. There is a combined connection scheme in which a spacer wedge is inserted into the contact zone, further strengthening the structure.
Assembling a well frame.
The technology for joining half-timber elements involves making rectangular cutouts on mating logs. Grooves are made at the ends of the parts at 50% of the cross-section; the planes undergo additional mechanical processing to reduce gaps.
The crowns are connected to each other by round pins, which are driven into pre-prepared holes. The design is not complicated, but the rigidity of the frame is insufficient for use in a well shaft. To build a log house, it is recommended to use the dovetail connection technology.
To cut dovetail joints, a special template is used, which allows you to obtain slots of the same configuration. To ensure the tightness of the joint between the crowns, a semicircular niche is cut out in the body of the lower logs, into which the upper row of elements is placed. When using timber, a square groove is cut out on the parts, into which a counter tenon, formed on the upper crown, fits.
Decorative well design ideas
The construction of decorative structures does not involve their use as a source of water. They represent an element of landscape design. Its main purpose is to create an impression. Proper design of the structure, the area around it, and the approaches will allow you to create a magnificent garden that can delight others.
For decoration you can use any raw material. The most economical option is to use leftovers after construction, for example, logs or bricks. Any available materials are also suitable, for example: birch logs that have not been cleared of bark, laid out in a circle, stones of various sizes; you can cast a concrete head and paint it; lay brickwork.
Flowers and hanging plants look good as decoration. Instead of a bucket, you can install an old watering can, a barrel, or do without it altogether, placing an original composition in the form of birds in a nest. A standard gate easily replaces a wheel, steering wheel, or steering wheel from an old car.
Features of making wooden wells
An ordinary well consists of an underground part - the shaft and an above-ground structure - the head. In the case of the decorative option, there is no need for a shaft. They construct only the head from wood with their own hands. The optimal height of the structure is 70-80 cm.
Since the well is decorative, the head can be designed classically or use imagination and create exclusive masterpieces. The log house is considered a classic. The building material used is logs peeled from bark. The design looks beautiful, but it is difficult to assemble it with your own hands without experience. The logs need to be cut perfectly, the connecting grooves must be cut out so that each crown fits snugly against each other. It is easier for an inexperienced person to assemble a log house from timber with his own hands. Workpieces with smooth walls fit tightly when joined. You just need to precisely adjust the connecting grooves to size.
If you want to move away from the classics, you can make a decorative well with your own hands from boards, wooden lining, slats, and thin bars. In other words, they use any lumber left over after construction work.
Before you create a well or even begin to think through its design, you need to decide for what purpose it is needed. Decorative structures are in demand to achieve the following goals:
- mask a damaged area of the hard surface of the yard, an unsightly corner of the garden;
- act as an integral element of landscape design;
- help decorate a well located in the yard;
- serve as a niche for storing garden tools, a hose;
- mask the sewer hatch in a visible area;
- act as the body of the original flower bed.
When the purpose of the well is clearly defined, sketches can be developed, since its design will depend on this nuance.
Important! The design of the well is thought through to the smallest detail. A decorative structure made of wood should not seem out of place on the site, be striking, and be harmoniously combined with the architectural ensemble.
Recommended materials
First of all, you should proceed from the dimensions of the structure. If the well is to be built on a small scale, the remains of materials that were preserved after the construction of the house (boards, roofing) will be sufficient. All materials must be combined in color and texture with the materials of the house.
Tree
Wooden structures create comfort and warmth. Carved and artificially aged wells for decoration look especially beautiful:
- Wood is a natural material, so the structure will fit perfectly into the interior of the garden.
- It is easy to make a structure with straight edges from wood.
- For work without the help of professionals, it is better to take wood. The material is easy to process, install and maintain.
- The service life of wooden structures is long.
- All wooden parts must be treated with an antiseptic and water-repellent agent.
Stone
The stone structure is solid and durable. It will take longer to make a well from stone than from wood. Such a structure should be surrounded by vegetation so that the element fits harmoniously into the interior. Such a well looks especially beautiful in combination with a path paved with stones.
Brick
It will be possible to lay out a round or square base from brick. The surface is left unchanged or plastered. The construction is strong and durable.
Modern solutions
Lining
Lining is the name given to thin planed boards that are used for surface cladding. The panels are placed vertically or horizontally.
Siding
Siding is often chosen to cover a structure. The material is characterized by durability and for many years gives the well a neat and aesthetic appearance.
Corrugated sheet
Profiled steel sheets are considered a popular finishing material. Corrugated sheeting can be used as a roofing material, or it can be used to cover the walls of a well.
Available materials
The most popular option for making a well yourself is from old tires or tires. Craftsmen manage to make a structure out of buckets and a roof out of straw.
From timber or logs
The durability of a log structure depends on the type of wood that was used to make its elements. The owner of the land plot can use cylindrical or square-shaped elements that have been treated with antiseptic solutions and then dried in air. To construct a frame for a well, it is recommended to choose oak or pine that can withstand use for 25 years. Structures made of birch or linden, which have a low price, are destroyed after 5-10 years.
When selecting material, you need to pay attention to the density of the structure and the absence of cracks or knots. The outer surface of the parts should not have any traces of bark. It is forbidden to use elements damaged by insects, as the strength of the material and resistance to rotting are reduced. The logs or beams used in construction must have the same dimensions, without changing the cross-sectional area along the length (camber).
The purchased logs must have a moisture content no higher than 16% and not have a negative impact on the quality and taste of water. Coniferous wood has increased antibacterial characteristics due to the presence of organic resin. If you plan to use larch for construction, then you need to know that this material is characterized by increased resistance to moisture penetration into the deep layers, which increases resistance to rotting.
Well design and functions
- Before starting construction of a structure, it is necessary to draw up a project. You can do it yourself, download it from the Internet. It consists of several stages: General provisions. Includes engineering-geological data, technical indicators, and pursued goals. At this stage it is decided what function the structure will perform:
- If it acts only as decoration, then all that remains is to choose a suitable place for installation, decide on construction materials and cladding.
- For the well, which will be used for drainage, hydrogeological studies of the soil are carried out. If it is water-absorbing, filter models are installed; where moisture is poorly absorbed, storage models are installed.
- Wells that serve as a source of water (plumbing option) also require preliminary research related to determining the depth of the aquifer. 2. Graphic part. It consists of drawings of the main components, the appearance of the building, the roof plan, if any, recommendations for finishing, the technologies used, the location of lighting fixtures, electrical points (socket, light bulb). 3. Specification. It includes materials and equipment used for construction.
Design selection
Before you make a house for a well, you need to decide on its design compliance. There are several options:
- in appearance and finishing material used, it can copy the main building;
- may have a separate, eye-catching exterior;
- There are a huge number of varieties of such solutions, each of them has its own advantages and disadvantages.
All that remains is to choose the right decor for the well, which will become a real decoration of the entire yard. This will rationalize the area of the yard and give it an improved aesthetic appearance.Each person makes a decision independently, everything depends on his imagination and achievement of his goal.
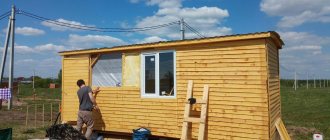
Do-it-yourself decorative well at the dacha: choice of material
If you think that building such a thing as a well is a complicated matter, and there is no way to do it without the participation of specialists, then I hasten to assure you of the opposite. Building a decorative well yourself is simple, if not elementary - all you need is to decide on the material and study a little about the construction technology itself.
Let's start with the materials, since the complexity of building a well and its service life fully depend on them. So, to make a decorative well at your dacha with your own hands, you will need the following materials.
- Cement with sand. This material will be needed to prepare a solution, which will be used to make the base for the well (foundation) and, possibly, will be used for laying block materials if you decide to make the well from brick or natural stone.
- Stone, brick, natural stone, rounded timber or just logs. The purpose of these materials is simple, one might even say trivial - these materials can be used to make the main part of a decorative well. In addition to them, as an alternative, you can consider the same concrete or, if you do not want to bother with the monolithic production of the well body, then a ready-made well ring made of the same concrete. In any case, when choosing this approach to business, you should understand that decorative wells will have to be lined with a decorative coating. In most cases, small natural stone is chosen for this purpose. For example, flagstone or sandstone cut into strips, you can also use pebbles and even crushed stone. Everything, as they say, is in your hands.
- Board or profile pipe. As a rule, a canopy over a well and a lid are made from this material. You will also need wood and metal to make a knob or, in our case, an imitation of it.
- Roofing material. In principle, you can choose any one, but the easiest to work with is flexible tiles. In this regard, there are no restrictions on the types of roofing material.
You should also think about the so-called decorations - after all, at least visually, a decorative well should resemble a real source of water! You need to take care of a beautiful bucket and equip it with a real chain. You should also create a beautiful area around the well. In general, all these little things that make a decorative well look like a real one.
And don’t forget about the sealed container; by installing it inside the well, you can fill it with real water - in general, make a complete imitation of a real source of precious liquid. You can see about such beautiful decorative wells in this short video.
https://youtube.com/watch?v=KJJflehg_WU
Wood selection
You should take care in advance of the wood from which the log house will be made. Its composition fundamentally affects the durability of the structure in a humid environment.
It is interesting to note that some of the logs located above water last much less than wood located under water, the common species of which survive for the following number of years:
- stained oak – 50;
- ordinary oak – 35;
- alder and pine – 20;
- birch and willow – 10;
- elm – 8.
Above the surface of the water, a well made of timber comes into contact with open air and collapses much faster:
- bog oak for 35 years;
- ordinary oak – 25;
- alder – 10;
- pine, birch, willow, elm – 5.
Bog oak is particularly resistant due to two years of aging in running river water. Staining serves two purposes: removing bitterness from wood, which can pass into water, spoiling its taste, and increasing durability.
Birch, willow, and alder are undesirable species for making wooden wells. They are not durable and when water is rarely used they give it a rotten smell. In the absence of alternative raw materials, with regular use of the well, the owners are quite satisfied with the quality of the water.
Historically, there have been good reviews about wooden wells made of pine, cedar, larch, the log houses of which are characterized by durability.
From the available raw materials, taking into account financial capabilities, you need to choose the most durable one, because repairing a well is not an easy and expensive task. Logs must be carefully inspected, under no circumstances should they be treated with antiseptics; they should not contain rot, insects, or large knots.
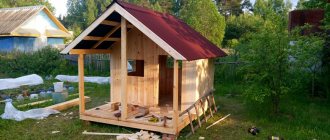
How to build a house for a well
Construction of the house begins after taking measurements of the well. These will be the dimensions of the frame. Its base frames are made of beams measuring 8x10 cm.
To make the structure stronger and stronger, you need to drive in nails measuring 10 cm. From the highest part of the base, 2 racks are brought out to a height equal to the height of the future house.
After this, rafters are made from the beams, cutting their edges at an angle of 45 degrees, and making grooves in them for connection with the higher frame. Installing crossbars and jibs will give the roof strength.
If your structure has a base in addition to the roof, then it must be covered with boards; the same can be done with the triangular sides of the roof.
Gate for lifting the bucket. It is made from logs by removing the bark and sanding it. The length is needed 3-4 cm less than the distance of the posts, otherwise, when scrolling, it will cling to them.
Grooves are drilled in the middle of the log frames, as well as in the racks or base walls. After this, metal rods are fixed into these grooves; first, in order to save the structure from premature wear due to friction of the elements in the grooves, metal bushings are installed. After this, you can attach a chain with a bucket to the gate.
Roof. A sheathing is made on the frame, after which it is covered with roofing felt or roofing felt to insulate it from moisture. Then the roofing work begins. The roofing material can be slate, tiles, etc.
The final part of the work is the decorative design of the well. Wooden products can be decorated with carved elements. The decor depends only on the imagination and wishes of the owners of the plot.
A well is not only a place to store water resources, but also an original decoration for a yard or garden. It’s easy to build and decorate a house for a well yourself, and to pick up ideas and find inspiration, you can look at photos of houses for a well.
Drawing, material, equipment
The diameter of the well part corresponds to the dimensions present in the well house. When all the measurements have been made, a drawing for the well house is drawn up. It indicates what dimensions should be:
- frame;
- rack;
- gables;
- skate;
- cladding of the gable part;
- door;
- pitched part.
Making a decorative well at your dacha with your own hands
Ask any person today what associations the Russian village evokes in him, and everyone will name a hut, a stove and a well. In many cases, the only source of water in the village, the well, was the subject of special attention and care. Hence the proverbs: “If you dig a well deep, the water will stand high” or “One person digs a well, a thousand people drink the water.” And the well-known advice not to spit on him was taken out of context, as diplomats say - in its original form the word “filthy” was there. In the villages around them they gathered, discussed news or simply gossiped.
Now the old wells do not look very presentable, and they have long ceased to be the center of social life in the village.
We have long been accustomed to running water, and not many people are happy with the prospect of carrying water in buckets from somewhere. But the memory remains, and summer residents happily decorate their plots with symbols of the life of a bygone era: carts, small mills, humpbacked bridges and decorative wells. A decorative well is the most popular element of decorating a site, and it does not matter whether you dug a real drainage well, drilled a water well in this place, or decided to simply decorate your property with a beautiful “house”. The only difference is that an active well stands in the place where it was dug or drilled, and the source of water must be reliably protected (we say “well,” but in fact this part of it is called the head). The decorative one can be placed anywhere on the site.
Let's talk about what kind of decorative wells you can build with your own hands and what is required for this.
What it is
A decorative well is a good option for your summer cottage. They blend perfectly with the surrounding environment, thanks to the main component - wooden structures. Recently, people have increasingly begun to create them in their country houses. The direct meaning of a well is the work of water supply
It is important not to forget that the purpose of a decorative well is an aesthetic location on the site
Types of decorative wells:
- Log house A design designed to complement the landscape design of a country house or garden. The option for creating such a well is quite simple. It can be used as a real well. The following materials are selected for its creation: branches, large stones. Auxiliary raw materials are cement and twine.
- Flower pot - that's what it was called for its decorative value. The material used in this case is wood. The originality of such a well goes well with similar pots. Due to its small size, the well is usually installed on window sills.
- A well is a house. This option is becoming increasingly popular. With its small size, it is great for hiding hatches. It can also perform its main function.
- Toy well. This type of product is similar to a real well made of concrete and a wooden roof. It contains all the elements that only imagination is capable of.
- Snow White. The main mystery of this species is its snow-white color. By the way, a variety of shades gives the landscape freshness and beauty.
- Extensive flower bed. Summer residents and gardeners with deep imagination will turn this well option into perfection. Made of several tiers decorated with flowers.
- A version of a light wood well is considered a classic of its kind.
- Decorative wells made of birch can be used for main purposes.
Operating rules
During the operation of a log house, a layer of moss and mold forms on the inner surface, which contributes to the destruction of the wood. It is recommended to periodically inspect the well shaft. Before starting work, the water level is reduced to a minimum (for example, using an electric pump). A special platform made of boards is lowered into the trunk, which is raised and lowered using a standard gate or winch. The specialist examines the surfaces, identifying damaged joints between logs through which liquid leaks into the ground.
A metal scraper is used to remove accumulated dirt. Since the crushed stone laid at the bottom of the well is also subject to contamination, it is removed to the surface for cleaning and washing. The gravel is then placed on the bottom. Detected cracks are repaired using wooden elements, which are driven in with a mallet. When the well is filled with water, the inserts will swell, ensuring the tightness of the log house.
Completely destroyed beams must be replaced with new ones. To perform the work, you need to install a tripod with a lifting device over the well.
Then water is pumped out of the trunk and rotten elements are removed. New ones are inserted in place of the removed beams, then the upper part of the frame is lowered onto the replaced crowns. Using this technology, it is possible to completely or partially replace a log house assembled from rectangular elements.
Why do you need a well house?
Convenience and cleanliness of water
A well house is necessary because it performs several functions at once:
- Its design eliminates the possibility of leaves, insects, dust, debris, as well as chemicals used when spraying plants near it, getting into the water.
- Protects against penetration of sunlight, which negatively affects water.
- Prevents water from freezing in winter.
- Will not allow access to children and pets.
- It will serve as a decoration for the yard, which will emphasize the uniqueness and complete the composition of the site.
Design Features
Various forms of structures for wells are allowed. They can be in the form of a simple shield covering the top of the well shaft or look like a log house. The roof is usually gable, shed or umbrella-shaped. The angle of the roof can be flat or sharp. Doors are usually placed on one or both sides. They can be single-leaf, double-leaf, solid or sliding panels.
For the roof, a material is selected that is harmonious in color and texture with the buildings on the site. It can be painted or covered with soft tiles. Finishing with stone and other textured materials looks beautiful. In this case, a layer of cement mortar is applied to the well ring, and stones are placed on it. The same principle applies to tiling with mosaic tiles.
To create all these design details, it is not necessary to purchase them from a hardware store. The materials remaining after building the house will do just fine:
- Cement applied to a well ring can easily be turned into a relief pattern in the form of brickwork. While the solution has not hardened, you can draw lines imitating bricks. When it hardens, paint it in the appropriate color.
- Ceramic tile fragments can be split into fragments and laid out like puzzles, in the form of a composition around the base of the well.
- Enclose the base with round logs, giving it any geometric shape. The stands can be decorated with dry tree bark. Plant flowers nearby and decorate the roof slopes with curly carvings.
Staining technology for wood blanks
The staining procedure makes it possible to increase the resistance to rotting of workpieces made from oak or pine logs. The technology involves placing the material in running water. With gradual impregnation with liquid, the density of wood increases. After the blanks fall to the bottom, they are aged for another 6 months.
The stream washes tannins from the oak board, which spoil the taste of the water. The resulting material is characterized by 2-3 times increased resistance to decay in an aquatic environment.
A brief description of the sequence of actions when staining and processing workpieces:
- Mark the logs or beams. The length of the elements is selected depending on the size of the future well frame.
- Remove any remaining bark from the surface and then inspect the parts. Elements with cracks or knots are rejected.
- Dip the workpieces into water for impregnation.
- After completion of the staining procedure, mechanical processing of the parts is carried out. It is not recommended to dry the wood before cutting, as the strength of the material increases.
- Dry the finished parts to a moisture content no higher than 18%, and then begin building the log house. The elements are stacked in a cage and dried in a ventilated place. To prevent rainwater from entering and heating by sunlight, the parts are covered with a shield.
Bog oak boards.
Purpose
If communications are connected to a country house that provide water supply, then a well is not needed. If desired, it can be installed for decorative purposes. In addition to decorating the site, the structure can perform a number of other functions.
Well with water
The well in this case serves the function of protecting the source from adverse environmental influences.
Barrels of water
The design is perfect for storing a container of water. You don’t have to worry about foreign bodies and debris getting into the water.
Storage
Inside the structure there is a place to store, for example, garden tools or other accessories. At the dacha, such a well will become an additional place for storing necessary things.
Original flower bed
It is common to use the structure as a flower bed. Boxes with flowers are placed on the base and climbing plants are planted nearby. In the garden, next to the structure, a flower bed is also laid out so that the composition looks harmonious.
Sun canopy with bench
If you try and spend a little more effort and time, you will be able to create not only a decoration for the garden, but also a place to relax. It is recommended to make the bench from the same material as the base of the well. It is recommended to plant bindweed nearby, which will additionally create shade for a comfortable rest.
Masking landscape imperfections
If there are depressions, mounds or other landscape imperfections on the site, it is recommended to disguise them with a decorative structure. The area will immediately be transformed, and unevenness will not be noticeable.
What is it for?
Such buildings can be used to hide a container with rainwater, hide utility lines or disguise hatches. If desired, an artificial tower can be installed above the well. Thanks to this, a garden house at the dacha will not only serve as decoration, but also prevent contamination of the source, hide various imperfections in the landscape, etc.
Plus, such a structure is used in combination with a flower bed. For example, beautifully flowering plants and flowers are planted on the roof or in the middle of the tower. Often these are climbing species.
The most read on the LandshaftBlog.Ru website:
Brick barbecue Gazebo with barbecue Concrete paths Landscaping Choosing a brush cutter Geogrid Guzmania Ornamental grass Decorative flower beds Decorative fence Children's slide Garden design Firewood for the dacha Mesh fence Winter garden Ideas for the dacha Flower bed made of stones Flower beds of perennials Lianas for the garden Polycarbonate awnings Site lighting Greenhouse do-it-yourself sandbox Do-it-yourself area for a car Retaining wall Facade lighting Swing gates Garden arch Garden fountains Snow shovel Brick tandoor Topiary in the garden Thuja occidentalis Plot 15 acres Figures for the garden Coniferous plants
Where and how best to install
There are no special restrictions here. You can install a well structure in any part of your summer cottage. The main thing is that the surrounding area matches the design style. It can be installed in a place where it is necessary to disguise various landscape elements or utility lines.
Particular attention is paid to the surrounding area:
- Install jugs, pots, etc.
- Lay out beautiful stone paths.
- Set up a bench.
- Buy beautiful decorative figurines.
- A well near a pond, bridge, etc. will look beautiful.
- Flowering plants are planted nearby.
Mine digging work
Almost every well hole, without exception, is dug vertically to the bottom with a cross-section of about two meters no more. The overall dimensions of the pit are set along the circumference of the concrete rings with a small margin.
The process of creating a well can be carried out by a team of no more than 4 people, where they can take turns changing during the work process.
Of no small importance is the pit for installing the very first concrete ring, while the walls in the pit should be smooth and slightly rounded, and the bottom itself should have a flat surface.
After installing the first ring, they dig further under it, after which a second ring is placed on it and they will sag under their weight. And so do this until the first water appears, and then the dirty water itself must be removed from the pit.
The connection of concrete rings occurs as follows. Each ring contains special steel rods, as well as loops that are connected to each other with connecting bolts.
As the water rises at the bottom of the pit, it is recommended to densely lay small, medium-sized stones, after which it is covered with fine gravel or crushed stone to level the floor of the shaft. At the same time, they can serve as a kind of purification filter, so that when lifting a bucket of water to the surface, soil particles do not come across.
Next, the well must collect water that still cannot be consumed, it must be removed or pumped out, this process must be repeated until the water takes on a clean and transparent appearance.
Not the least importance must be given to the removal or removal of soil raised to the surface. After which you can begin making the head, which can be made in any form.
At the same time, recently it has been considered very popular to have a beautiful and unique head that can decorate your yard as a decorative element.
Therefore, if you are planning to make a well in your dacha with your own hands, you will have to put in a lot of time and effort, but the end result is worth it.
If for some reason you encounter any difficulties, then in this case you can seek the help of professionals. Also in this article there are many illustrated bright photos of the well, perhaps something will suit your taste.
Choosing a place
Some summer residents believe that water deposits are everywhere. To do this, it is enough to make a deep hole, which after time will fill with water. Actually this is not true. To construct a concrete well, it is necessary to accurately determine the location of ground sources.
To detect a water layer, it is necessary to use the dowsing method. To do this you will need aluminum rods with curved ends. They are inserted into a special hollow tube. With such a design, it is necessary to explore every meter of the territory.
In places where groundwater occurs, the rods begin to connect with each other. To confirm the information received, it is recommended to re-examine this area.
During the search process, you need to pay attention to vegetation. If it is distinguished by lush greenery, then its roots are located near groundwater.
- How to make drainage on a site - the secrets of a master on how to make drainage to drain water yourself!
- How to clean a pond: a detailed description of how to clean a pond quickly and easily with your own hands (130 photos + video)
Decorate the site according to Feng Shui: location features, design elements, Feng Shui zones. How to work with a ba gua diagram? Secrets of garden decoration
Before drilling, a test study is carried out. A garden drill is used for this. A depression of 10 m is made in the thickness of the earth. If the presence of liquid is not observed, the drill is further deepened.
Experienced specialists recommend carrying out geological exploration. It will allow you to accurately determine the location of groundwater in the garden area. The only drawback of this procedure is its high cost.
Ways to decorate a decorative well ↑
We looked at how to make a decorative well. The next important task is its decoration.
This is a simple and cute decor option. If you have a wattle fence, a wooden fence, or a cart on your property, it’s easy to design a well to match this style. You can place boxes with flowers on a wooden well circle and hang a wooden wheel on a stand. If you use climbing plants, over time they will beautifully entwine the wheel and racks.
If there is a pond in the recreation area, throw a wooden bridge over it. The picture will be complemented by a path made from tree cuts or lined with stone.
It is not difficult to build such a well, but it looks original and attractive. Plus, you can decorate it however you like. You will need a ring of concrete, which is used when building a conventional well. The simplest decor option is to paint the ring in the color you like or several different colors; you can draw an ornament on the concrete ring or apply drawings.
Stone lining will give the well a medieval flavor. Brick and sandstone are suitable, but one of the best options is pebbles - an excellent decorative material. You can choose large pebbles, a combination of small and large ones, lay out a pattern, paint the stones - at your discretion. If such a building also has a roof, we can consider it to be a medieval version. But it is not necessary to make a roof; a crane can complement the ensemble.
A wonderful crane well, where the highlight of the decor are drawings in ethnic style
A well without a roof with an unusual crane
The marine style is popular everywhere, and the summer cottage is no exception. Use ropes, make anchors from plywood or wood. If you can find a beer barrel, it will be an excellent replacement for a bucket. Pebbles can be used to lay out the area in front of the well if it is wooden, or use it to line a well container.
Video: Making a house for a well
The finished well house can be decorated at your discretion. You can lay out flower beds and flower beds around it, paint it in the color you like or decorate it with carvings. There are no rules in the design. The building should fit harmoniously into the environment of the site and delight you for many years.
- Author: Andrey Sokolov
Rate this article:
- 5
- 4
- 3
- 2
- 1
(17 votes, average: 3.8 out of 5)
Share with your friends!
What to make a decorative well from
If your summer cottage is equipped with a concrete well, then the most correct option would be stone or brick. They are quite unpretentious to dampness, as well as to weather conditions - showers, snowfalls. The main quality is strength and durability. You can even make a decorative well from tires or wood.
It is important to know! The design of your future well should take into account the material from which the house is made. There must be clear harmony.
Required materials and tools
The main raw materials for creating a well are planks of wood or timber. Protective products are specially purchased to ensure high-quality preservation of your main raw materials from rot and mold. Necessary tools for manufacturing: saws, electric jigsaw, milling cutter, chisels, screwdriver or drill, fasteners, and measuring instruments.
How to make a decorative well from wood with your own hands
To create a decorative well, you will need the following materials: wooden boards, an electric or regular jigsaw, a grinding machine, a saw, nails, a hammer.
Let's start creating:
- We cut two triangles from the boards to create the roof. The dimensions for this are determined as follows. The length should be 80 centimeters and the height 65 centimeters.
- Now let's start creating the main part of the well. To do this, you need to cut the boards with a saw. Length 1 meter 80 centimeters. Width – 15 centimeters, height 6. We prepare 12 parts 15 centimeters by 100 centimeters, size 15 by 80 centimeters.
- We begin assembling the well. Here you will need a hammer and nails. Fold the base into squares. Once you have folded the first row, secure everything with nails. And we also continue for 6 more rows.
- Then we prepare boards 1.5 meters high. We take a board 15 centimeters wide and nail it to the bottom of the well. We also install the 2nd board opposite the first one.
- Then we nail the board on top and thereby connect the two supports.
- We fasten our triangles on the sides of the well.
- Then we smooth out all the corners on the sides of the product.
- Then we create a bar for the roof.
- We are engaged in the manufacture of roofs. We cut 4 boards measuring 20 by 80 centimeters. Once the planks are made, we attach them to the roof and nail them down.
- The last point remains - this is the wheel with the shaft. We take a log and reduce the diameter and shape for the future wheel. And again we nail everything down.
It will also be possible to paint the well so that it fits perfectly with the decor of the country site.
How to make a decorative well from stone with your own hands
To create such a structure, you must first pour the foundation. To create a well, you can use a brick or a concrete ring. And then just cover it with bricks. We dig pillars for support into the ground and sprinkle them with sand or stone, and install the roof. It is better to create it from the same material as the roof of your house.
You choose the dimensions for the future well yourself. Wells made from natural or decorative stones are constructed exactly according to these instructions. A simpler and more convenient way would be to cover the concrete rings with artificial stone. To do this, use only high-quality and special glue. After creating the well, simply coat with varnish.
What kind of wood are wells made of?
How long the structure will last depends on the correctly chosen building material. Each type of wood has a certain resistance to destructive factors. For construction, only dry lumber is used that is not damaged by mold, insects, or rot. It is easier to make a log house with your own hands from logs with straight-layered wood, since they are easier to process. The main destructive factor of wood is moisture. For the construction, a variety with the maximum water resistance is selected.
There is a rule for creating wells that has been tested by masters. The underwater part of the mine is made of lumber 18 cm thick, and the above-water part is 22 cm thick. This difference is due to the fact that the wood that is constantly in the water disappears more slowly. The wood of the above-water part of the shaft and the head is subject to temporary exposure to moisture and constant exposure to oxygen. Under such conditions, destruction occurs faster. From the rule we can conclude that for a decorative structure it is better to take a beam or log with a thickness of at least 22 cm.
Another secret lies in the way the wood is processed. If a log house is made from logs, then it is advisable not to cut them, but to plan them. The first type of processing is performed with an ax. During cutting, many nicks and chips remain. Through these defects, moisture penetrates deeper into the wood faster. A fungus forms in the nicks and spreads throughout the tree.
When creating a decorative well from logs or other lumber with your own hands, it is optimal to give preference to the following types of wood:
- Oak is considered the best hardwood for making heads. The above-ground part will last from 20 to 25 years. The downside is the difficulty of processing wood with your own hands.
- Larch is a worthy competitor to oak. The wood is resistant to moisture due to the large amount of resin. A larch head will last at least 20 years.
- Pine is the most common building material. Soft wood is easy to process and has a wonderful pine aroma. The disadvantage is the short service life. The tree quickly changes its color, acquiring a gray-black hue. A pine head will last from 10 to 20 years, subject to annual treatment with an antiseptic and varnishing.
- Elm and alder are more suitable for making the underwater part of the mine. Wood will last 20 years in water. This is not the best material for a decorative head. The structure will last about 5 years. In rainy summers, rotten spots will begin to appear on the wood.
- Willow and willow are considered a popular building material for rural residents. Trees grow along the banks of rivers and reservoirs and love moist soil. However, the wood itself quickly disappears in damp conditions. Willow head
- Linden is a soft tree. The building material is used for lining bathhouses and making dishes. A linden well will not last long, about 5 years.
Each wood has its own unique texture. Here the owner needs to decide what he wants: the wooden lining of the well needs to look more beautiful or last longer.
DIY decorative well.
Let's start making a decorative well.
We will make a bottom box for the well from boards, fastening the boards with screws.
Now let’s make supports for the roof of the well; to do this, we attach two boards to the inner sides of the box with screws; for a more durable connection, you can also use wood glue to allow the glue to set; we fix the joint with clamps.
We will make a roof for the well, we will make the roof frame from bars, and we will cover the roof itself with boards. We smooth out all the unevenness on the wood with sandpaper.
Let's make sides for the box.
To make it more similar to a real village well, we will make a mechanism consisting of a handle and a drum for winding a rope and lifting a bucket.
We attach the mechanism to the side supports of our well; holes in the supports can be made with a wood drill.
To prevent the wood from quickly rotting, we will cover it with antifungal impregnation, and then with stain and varnish. The stain will highlight the structure of the wood, and the varnish will protect it from moisture.
For more ambience, wrap a rope around the drum and attach a decorative bucket.
The decorative well is ready, it can be installed directly on the grass in the garden or you can arrange flower beds around the well, there are a lot of options, it all depends on the author’s imagination.
I also recommend watching a very interesting video: step-by-step production of a decorative well at the dacha with your own hands.
Sanitary aspects
The area around the well must always be kept clean and surrounded by a drainage area. Ideally, for this, soil is removed around the perimeter to a depth of two meters and a width of up to a meter. Oily clay is placed in the ditch, compacted, and a concrete pad is made on top.
If the well is not used very often, then preventive pumping of water should be carried out regularly. At least once a month, the inside should be carefully inspected by illuminating it with an electric lamp. Water can be obtained using a rotating block, which is most often done. Cranes over wells are now very rare, mainly in illustrations of folk tales.
What you will need when constructing a decorative wooden well
Alternatively, use wooden planks or timber to make the well if the structure is expected to be massive. Immediately purchase a special protective composition for wood, with which the well is not afraid of either rot or mold. It will not do without a decorative coating - varnish or stain. The choice depends only on your preferences.
To design you will need to prepare:
- saw;
- jigsaw;
- cutter;
- chisel;
- screwdriver;
- drill;
- fasteners;
- roulette;
- square
Important! Remember that the list of tools will depend on what material you choose to make the well. In addition to materials and tools, it is important to prepare a drawing
Don't forget about this. Visualize any structure you are trying to make. Design it in a program or make drawings on paper. This will help save not only money when purchasing materials, but will also reduce work time, because the process goes faster than it could be when you have pre-calibrated dimensions for each part. See what a partial drawing (below in the photo) of a decorative well, made with your own hands, looks like
In addition to materials and tools, it is important to prepare a drawing. Don't forget about this
Visualize any structure you are trying to make. Design it in a program or make drawings on paper. This will help save not only money when purchasing materials, but will also reduce work time, because the process goes faster than it could be when you have pre-calibrated dimensions for each part. See what a partial drawing (below in the photo) of a decorative well, made with your own hands, looks like.
Materials for decorative wells - we make purchases
The easiest option to make a decorative well with your own hands is wood. It is not only durable, but also environmentally friendly. The versatility of wood is that it fits perfectly into absolutely any environment. You can use logs, branches, beams and ready-made boards. The flowerpots located inside will also look very organic.
In addition to wood, gardeners often use stone as a base. A concrete ring is also suitable - by the way, it is the basic element in real wells. And if you paint it with some bright paint, you’ll get a catchy, attractive option. Use decorative stone or brick as the cladding material. The design in the spirit of the Middle Ages is ready!
Various materials can be used for wells
An excellent solution for decorating a gray concrete head is ceramic tiles. It is resistant to water and can last for a long time without repair. If your budget is very limited, buy a tile fight and use it. It costs several times less and allows you to lay out a beautiful mosaic.
We are accustomed to the fact that wooden covers are often used to decorate the top of wells. This is a good, but far from the only option. Pay attention to bamboo, thatch, tiles that are common in many homes, and even metal.
The most inventive craftsmen use old, long-needed things. Place several tires next to each other or take a barrel - and you can get to work. Attached to the base is a wooden lid for a homemade well and small parts in the form of a bucket, handle, chain, and so on. After this, the structure is decorated.
Metal is also considered a good finishing material. And even though finishing wells with forged elements is not so popular, it also has a right to exist. Luxurious frames for water intake shafts are forged and welded from metal rods. In the end, the roof frame can also be made of metal, and then finished with polycarbonate.
Decorating a well with flowers
Thus, the quality of well decoration depends entirely on your imagination. For some, traditional wooden elements are enough, others will definitely dilute the building with greenery and flowers, others will put up garden sculptures and use stencils. But the fact remains that with skillful design, the country well becomes the main decoration of the site.
How to make it yourself, step-by-step instructions
If you have all the necessary tools and materials at hand, then making a homemade well will not be difficult in a couple of hours.
Tools
Such instruments are being prepared.
Jigsaw
With this tool you can easily cut wood, plastic or metal. The cut can be made at different angles.
Chisels
The chisel is used for rough and fine processing of wood. The tool allows you to clean out recesses, remove sharp corners, apply an outline and make a relief pattern.
Drill or screwdriver
Using a drill, you can easily make holes in any type of material.
The screwdriver is designed for tightening and unscrewing fasteners.
Milling cutter
A cutter is a cutting tool with rotating blades. It is used to process the surface of various materials, cut grooves and keyways, and cut metal.
Drawings with dimensions
After the type of construction has been chosen, you need to prepare a diagram with the exact dimensions of all the main elements of the well.
Bottom assembly
A cube-shaped structure is assembled from available wooden blocks. The length of the parts will depend on the size of the well itself.
The frame walls are connected to each other by sawing, with self-tapping screws or corners.
Posts and roofing
The racks for the roof of the structure are attached to the base. Two blanks are cut out and cut at an angle at the top edge. The posts are placed inside the base and secured with a screwdriver.
How to make a bucket and decks
An integral part of the structure is the well gate:
- The drum is made from a cutting or a stick.
- Holes are drilled in the racks, a stick is inserted, and a handle is made on the protruding outer part on one side.
- Then a rope is wound around the drum and the bucket is hung.
If you try, you can make a bucket yourself:
- Prepare wooden slats of the same size.
- The edges are coated with glue and connected together in an even row.
- Roll the workpiece into a cylinder shape and leave to dry.
- Then cut out the bottom.
- The bottom and racks are connected with a screwdriver.
- A decorative cord can serve as a handle.
Decoration
The appearance of the structure depends on the chosen decoration method.
Sea style
A well made in a marine style looks interesting:
- the base and racks are wrapped with thick rope;
- instead of a bucket, a wooden barrel is suspended;
- instead of a handle, a steering wheel is fixed;
- the surface of the structure is decorated with shells, sea pebbles, and anchors.
Chinese
If there are a lot of stones in the garden, then an oriental style well is suitable. An unusual detail characteristic of Japanese houses is the roof with raised edges. The base is made of both stone and wood.
Minimalism
The main feature of the design in the minimalist style is the high functionality of each element. The main material is concrete. Stucco or painting excluded. The roof is made flat.
Columns are a hallmark of antiquity.
Middle Ages
If this style is chosen, then natural stone, granite or cobblestones are used for decoration. The roof of the structure is usually made in the form of a metal dome. It is better to make supports from forged parts.
Village
The main material in the manufacture of a well in the Russian style is wood. The base is made in the form of a 4 or 6-corner log house. The roof is covered with the same material as the roof of the house, or it is made of straw or tiles. Additional decorative elements will be painting and carving.
Kinds
- In Japanese style.
- In a rural style.
- Antique.
- Flowerbed.
- Small/childish.
- Mill.
- Hexagonal.
- With a crane.
Let's look at the manufacturing features of each type.
With a crane
Wood is used as the basis of the structure. The above-ground part is made of stone, brick, reinforced concrete rings, square/round timber as follows:
- Timber and boards of a given size are prepared.
- A frame is formed.
- The wooden elements are connected to each other with fasteners.
- Additionally, a folding or removable decorative cover is equipped.
- Afterwards, a frame and support for the crane are formed from a pipe, thick timber, channel, etc.
- If wood is used, all material is treated with an antiseptic, which will prevent the formation of corrosion and rot. This also applies to the processing of metal parts.
- Part of the support under the crane should be immersed in the ground. This part must be treated with bitumen or protected from direct contact with the soil using rolled roofing felt.
- If metal is used, then a crane is formed according to a given pattern using welding, and then the entire structure is immersed in the ground.
- When installing, it is important to maintain verticality.
- If this is an imitation of a crane, then the arrow will be motionless. To create an additional effect, it is better to install a mechanism by which the arrow is driven.
You can use available material to give the structure individuality.
Hexagonal
Only wood is used to create the hexagonal shape. The simplest solution is boards. The size of the structure is preliminarily determined. Below are step-by-step instructions:
- The boards can be installed both vertically and horizontally.
- Prepare several preparations. Take 2-3 boards and connect them together with a block and self-tapping screws. The fastening bars will eventually end up inside the decorative well.
- A total of 6 such blanks are needed: 2–3 boards knocked down.
- Next, they should be combined into a single structure. A beam is used from below and above for strapping. It can also be fixed on the outside to give the shape a special appearance.
- Additionally, the header is formed according to the general style.
- You can simulate a drum and a rotary handle to create a special effect.
Mill
Imitating a large mill is not an easy task. The main difficulties will be in the manufacture of the structure itself. The head can be based on different materials: brick, wood, stone, etc. First of all, a drawing of the future structure is prepared.
Advice! Decide in advance whether the mill will be rotary or not. To set it in motion, you need to demonstrate construction skills.
The blades and the entire structure can be easily made from plywood or wicker material, as in the photo. The given shape is cut out with a jigsaw. So, there should be four blades in total. Prepare a template and cut out identical parts using it. Next, the blades are combined with each other. At the same time, they should have an angle of 90° in the center. To set the blades in motion, a rotating mechanism made of a pipe or round block is fixed.
Suitable materials
A decorative well can be made from completely different materials. It all depends on the imagination of the master himself. Here are some generally accepted options:
- Stone. The base of the well is built as in an ordinary well. A concrete ring or stone masonry looks ancient. You can dilute the same type of stone using wooden parts, for example, a crane or a rotating structure. For finishing, paints, mixtures and decorative colored stones are used.
- Tree. Every person can make a wooden well. It can be made from logs, logs or timber. These materials are readily available, inexpensive and environmentally friendly. They add color to the area and look organically in the garden. Despite the fact that a well made of wood requires constant maintenance, it is very easy to make this option a business card at your summer cottage, you just have to give the wooden parts into the hands of a wood carving master.
- Brick. Making a well out of brick is a little heavier and more expensive than previous options. To create such a decoration, you will have to lay a foundation, otherwise the building will warp over time or go underground. Externally, the brick well is beautiful and mysterious.
- Available materials. If for some reason the above materials could not be obtained in the required quantity, then you can resort to everything that is at hand. Instead of a concrete ring, a rubber tire will do. The base can be built from wire, stumps and vines. Tiles, old plastic containers or any junk items are suitable as finishing materials.
The well can be made from several types of material
Required tools and materials
The minimum set of tools required when constructing a well is as follows:
- devices for digging a well channel (bayonet and shovel shovels, pickaxe);
- steel scrap for breaking large stones or layers of rock;
- containers for excavating soil and pumping out liquid mud;
- a winch with a rigid base for lifting and lowering loads into the trunk;
- electric submersible pump that allows you to pump out water;
- circular saw for cutting workpieces (use of a chainsaw is allowed);
- a set of tools for marking workpieces;
- construction level (hydraulic or laser);
- axe;
- hacksaws for wood.
Tools for creating a wooden well.
In addition to a set of blanks for the frame and the head, it is necessary to prepare a set of fasteners (depending on the method of connecting the parts) and gravel for arranging the filter. Since the work is carried out in water or mud, it is necessary to use rubber boots or a wetsuit. Additionally, you will need to purchase insulated clothing.