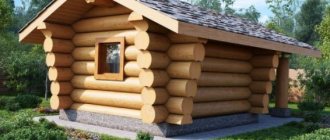
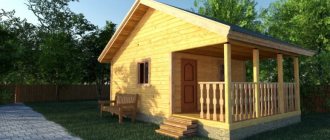
In terms of quality, practicality, and aesthetic characteristics, a bathhouse made from wood beams is practically no different from one built from rounded logs, but the construction process is much simpler and does not require special skill.
A wooden bathhouse is considered truly Russian, since once upon a time in Rus' every building was erected without the use of nails, but as efficiently as possible.
So, let's talk about building a bathhouse from natural timber.
Advantages of a timber bath
It is worth knowing what qualities distinguish this model from other known options:
- Natural materials.
- Good environmental performance.
- Ease of operation.
- With high-quality pre-treatment, the construction is safe.
- Relatively low cost.
- Save time. The construction of this model will take much less time, thanks to the use of shaped blanks and the absence of frame structures.
- Sufficient thermal insulation. The timber has a good thickness, which allows you to retain heat indoors.
Due to the presence of so many advantages of practical application, bathhouses made of timber have gained particular popularity among owners of summer cottages.
Features of material selection
When purchasing material, you should consider the following characteristics:
- Timber harvesting season. Ideally, the material should be prepared in winter. This indicator may affect the quality of construction.
- Storage period before use. This characteristic has the same basis as the harvesting season. You can check this information with the seller of the materials.
- Appearance. You should definitely evaluate the condition of the workpieces: stains, dampness, and traces of pests may alert you. The quality of trimming and the degree of alignment of the cuts are also assessed.
- Type of raw material.
- Wood species. The best options for building a bathhouse are hardwoods. It is better not to use raw materials from pine needles due to the presence of various resins in the structure.
Assessing these parameters is mandatory, as it will help avoid possible problems during the construction process.
Bathroom and washroom
These rooms do not have very high temperatures, although the humidity is as high as in a steam room. The choice of finishes in the bathroom and washroom is more extensive. Fans of bath procedures recommend using natural raw materials for such rooms - wood or stone. Among wood, pine is the leader - it is an affordable material, however, it darkens with prolonged use.
An example of a washing station design Source profstroiplotnik.ru
Plastic is acceptable since there is no high temperature, and it tolerates humid air well. You can use regular tiles for the shower.
Choosing a timber model
The material for the construction of baths differs not only in its species and quality characteristics, but also in its manufacturing technology. Today, manufacturers offer their customers the following types of timber:
- Profiled option.
- One-piece models.
Each of the presented models differs in the method of formation, finishing features, and methods of practical work with the material.
Making the floor in the steam room
Not only comfort, but also safety depends on the choice of raw materials for the floor. Moisture on smooth tiles or linoleum leads to falls and injuries. Installation of such materials will turn the floor into a skating rink. In addition, when heated, linoleum emits an unpleasant odor containing substances harmful to health.
The optimal choice of floor for a steam room is wood. It does not require a special coating, and with this design the room will be designed in the same style. It is worth noting that the wooden floor in the bathhouse is not made of oak. This wood becomes stronger when wet, but at the same time its surface begins to slip.
Concrete works well. A floor made of such material will be strong and durable. Tiles are laid on top of it, but the structure of the surface of such a coating is important. It should not be glossy; a pronounced relief is necessary. The floor is laid at a slight slope towards the water drainage.
Laying tiles on the floor in a bath Source seattlehelpers.org
The tiles are laid from the corner, placing crosses between the blocks, tapping with a mounting hammer. After 2-3 days, the seams between the tiles are rubbed down. Wooden grates are placed on top to prevent you from stepping on the cold floor and provide additional safety in case of possible slipping.
Profiled version
Structures made from profiled timber are durable and resistant to moisture.
During manufacturing, additional surface grinding is used due to the presence of tenons and grooves. But in terms of safety, the material is inferior to the second model, so before construction, the workpieces are treated with an antipyretic.
Restroom
The decoration of the rest room in the bathhouse is usually done with pine lining. This type of wood is not used for steam rooms and washing rooms. When exposed to high temperatures, resin is released from pine boards. Its fumes can be harmful, and if it comes into contact with the skin, the molten resin causes burns.
Pine wood is relatively inexpensive and durable. Its advantages:
- resistance to external influences, despite the softness of the wood, the covering made of pine lining lasts a long time and retains its attractive appearance;
- ease of use - pine is easy to process and can be coated with a variety of paints and varnishes;
- low cost - the use of pine lumber for the rest room in the bathhouse will save money.
Along with pine lining, lumber from other coniferous species - for example, spruce, larch or cedar - is also used to perform finishing work in a rest room or small dressing room. The last two options are more expensive.
Additional materials for construction
Any construction process requires auxiliary materials and a certain set of tools. Before starting work you should prepare:
- Foundation materials: cement, sand, gravel.
- Brick for the stove.
- Lining for interior decoration.
- Roofing material.
- Tool sets: nails, hammers, screws.
- Insulation materials.
- Lighting fixtures and cable.
Construction of a bathhouse
For a novice master, the main question is: how to make a sauna with your own hands correctly and for a long time. The construction process itself consists of several stages:
- Drawing up a bathhouse project.
- Foundation construction.
- Laying a waterproofing layer.
- Walling.
- Hiding cracks.
- Formation of the roof.
- Finishing.
Each stage requires certain efforts and skills from the master. If you wish, you can familiarize yourself with photos and video tutorials on building a bathhouse from timber.
Where is the best place to place the sink?
In a one-story 3 by 3 bathhouse with an area of 9 square meters, everything must be placed as conveniently and compactly as possible so that everyone is comfortable and the premises function according to all the rules. It is better to combine a room with a sink with a steam compartment. To make washing more convenient, it is better to attach an additional insulated dressing room to the bathhouse.
The bathhouse can be equipped to the highest standard without going beyond the planned budget.
Drawing up a bathhouse project
Any construction process requires a clear drawing or diagram. Preparation of the project includes sketching the following details on paper:
- Bath box dimensions.
- Indication of the location of doors, windows, stove, rooms (steam room, dressing room, shower).
- Electrical wiring indicating the location of sockets and lamps.
After drawing up the diagram, you should definitely calculate the required amount of material in order to avoid unnecessary financial costs.
Building styles
If the owner of a country house does not have a vast territory, he will have to limit himself to choosing either a Finnish bathhouse or a Russian one. Other types of buildings are unlikely to fit in a small space.
The Finnish sauna has a temperature of up to 100 degrees and a low humidity of 7%. In Russian baths the temperature reaches 80 degrees and high humidity 70%. For a Russian bath there is no need to install ventilation.
- The atmosphere in a Russian bath is more natural, in contrast to a Finnish sauna. Finnish structures can be moved from one place to another; their construction does not require a foundation or much time.
- Unlike Russian-built ones, the Finnish sauna heats up faster, is smaller in size (usually it is designed for 2-3 people), and can withstand any climate.
- The construction is carried out using logs fastened together with tongues and reinforced with steel. The benches are made of linden, and the sauna itself is usually made of cedar, thereby enhancing its natural qualities.
The Russian bathhouse has advantages over the Finnish one, since an excess of dry air is harmful to health. It is easier to be in a Russian steam room, due to high humidity, the body removes toxins, thanks to excellent heating, there is no harm to the lungs and skin.
It is not advisable to install a Russian stove yourself; it is better to find a specialist who understands the intricacies of its work. It will be difficult for a beginner to design a Russian stove; as a result, you may end up with a malfunctioning sauna.
The Russian bath includes dry and wet rooms. Dry rooms include a small room (dressing room), locker room, shower, and steam room.
Foundation structure
The choice of foundation models is quite extensive and depends on the weight of the structure and soil characteristics. The most famous options for filling the base:
- Tape type.
- Pile type.
- Slab option.
- Columnar model.
For a structure such as a timber bathhouse, a columnar foundation is perfect. To lay the support, you should use the instructions:
- First of all, you need to mark the site. To do this, install pegs and pull the string.
- Additional marks are placed in the places of future support pillars.
- Niches are dug in the ground for filling.
- At the bottom of the pits, make a sand cushion of at least 20 cm, then fill it with water.
- The next layer is crushed stone and formwork is formed.
- A bunch of metal reinforcement acts as supporting structures.
- After installing the support column, the empty spaces in the pits are filled with cement mortar.
Experts advise making additional concrete inserts to increase the strength of the supporting structure.
How to properly solder polypropylene pipes
Everything seems simple if you have experience, but soldering for the first time is scary.
It is necessary to mark the pipes before welding (see information below)
Step 1. Screw couplers to the front of the soldering iron to heat the internal or external surfaces of pipes and fittings. For showers, we recommend using Ø ¾″ pipes. The pipe is heated on the outer surfaces, the connecting elements (couplings, triangles, elbows, etc.) on the inner ones.
Preparing the soldering iron for work
Step 2. Connect the soldering iron to a 220 V network. On the body of the device there is a heating temperature regulator and two indicator lights. Green indicates that the soldering iron is ready for use, red indicates that the heating temperature is insufficient.
Turn on the soldering iron and wait until the green light comes on
Step 3. Set the temperature regulator to +250°C. Specific values do not play a big role; the degree of heating of the pipe is regulated by the holding time.
Step 4. Take the two elements to be connected and insert them each into their place in the soldering iron. Heat for approximately 5-9 seconds. The ends must fit into the heaters until they stop.
Inserting heated elements
We heat the couplings along the inner surface
This also explains why you should not use a soldering iron heating temperature table. We advise you to always set it to maximum - the pipe will warm up much faster.
Pipe heating table
Step 5. The surface of the heated plastic pipe should resemble thick sour cream. Once such softening is achieved, remove the elements simultaneously from both sides of the soldering iron.
Step 6. Connect the two heated planes together as quickly as possible, keeping them as level as possible. You need to hold it in the clamped state for 10÷15 seconds, the exact time depends on the heating temperature of the plastic. As you can see, almost all parameters and modes of pipe welding are determined not by instructions, but by the experience of the master. Experience will appear already on the second or third gluing, gain skills on unnecessary segments.
Sectional connection of PP pipes
Connecting heated elements
Laying a layer of waterproofing
This stage should not be ignored, since laying an additional protective layer will significantly increase the service life of the structure. The step-by-step scheme looks like this:
- After the concrete has hardened, a layer of bitumen is laid on top of the foundation.
- Next comes a layer in the form of roofing material.
This procedure is repeated several times.
Walling
The first step in construction is laying the strapping crown. The closest attention is paid to this layer, since the even laying of subsequent rows depends specifically on the first row. You can check the laying direction using a building level.
A layer of insulation can be laid on top of the first row. Next, proceed to assembly, depending on the type of fastening structures:
- Metal pins. The advantage is the strength of the connection.
- Wooden dowels.
There are features regarding the frequency of screeding: when building a bathhouse from laminated timber, the screeding is done after every 5th row.
Useful tips
- A bathhouse with an area of 9 square meters is preferable for small areas. It is easy to place it on an already inhabited area. The main rule is distance from flammable objects and wooden buildings. Bushes and trees, on the contrary, will not suffer from such a neighborhood. The adjacent area can be used for planting non-capricious crops that love shading, high humidity and are not afraid of slight temperature changes.
- Often they try to increase the usable area of the steam room by abandoning the classic benches. However, you can sit comfortably indoors only if the length of the tier is at least 2.2 meters. A person must fit here at full height. It is quite possible to reduce the width of the bench or its height. The more ledges, the greater the opportunities for bathhouse visitors. Even without a temperature controller, you can find a suitable zone for everyone.
- Wooden baths are often imagined as a building made of rounded timber, inside of which the circles of huge logs are clearly visible. However, this option is not very practical in the case of a small area. Such reliefs hide useful space, and visually create a not very pleasant oppressive effect. Therefore, it is better to choose straight lines and finishing materials with a small cross-section.
- Building a 3x3 bathhouse is not an easy task. It’s easy to find a place for a building on any site; you don’t have to think about investing in a capital foundation. However, the layout of the interior space and the choice of materials can cause difficulties. A successful bathhouse with a hot steam room, a comfortable relaxation area and a convenient washroom can be built from wood, brick and even expanded clay.
Roof assembly
The assembly process depends on the covering model, material and shape (single or gable roof). Regardless of the type chosen, the entire process will consist of a number of steps:
- Preparation and fastening of rafters.
- Laying the covering.
Very often, tiles are used as a material, but the final choice is made by the owner of the bathhouse, based on personal wishes and financial capabilities.
Setting up a dressing room
The main function of the dressing room is to preserve heat. The temperature in the room is not high, so it is good to use coniferous trees to decorate walls in a traditional style.
Design of the waiting room and rest room “under the tree” Source koon.ru
The interior decoration of the bathhouse made of logs creates an atmosphere of antiquity and ancient fairy tales. A light aroma created by pine, fir, and spruce is appropriate here. The wood of these species resists fungus and mold well. It does not crack after drying and is durable. When heated, fir releases almost no resin.
If hardwood is preferred, experts advise finishing the room with birch. The lining can be laid out not only in even rows, but also in a pattern. It is important that the walls in the room are covered with the same type of wood.
Bath decoration
The whole process is divided into two options: interior and exterior finishing. The external design of the building plays only an aesthetic role, and therefore is not a mandatory stage. But the same cannot be said about the interior design, which includes:
- Wall covering with decorative materials.
- Conducting electricity, installing sockets and lamps.
- Construction of the stove and installation of a shower cabin or washing room.
There are a lot of options and ideas for interior decoration, and the choice is individual for each style.
And now the shelves
A very important point is the shelves in the bathhouse. Since constant tactile contact is assumed with them, increased requirements are put forward for these elements:
- they should not get very hot ;
- it is better if they cool slowly ;
- must be environmentally friendly ;
- do not slip or be very rough;
- have no external damage ;
- easy to wash.
Again, wood is most suitable for this purpose. Carefully cleaned, without knots or nicks, it has served people in bathhouses and steam rooms for centuries. Shelves should not have sharp corners that could cause injury. They are not made solid, leaving a small distance between the wooden boards.
Original author's ideas
For those who have not yet decided on a timber bathhouse model, here is a selection of the most original options:
- Bathhouse with terrace.
- Unusual shaped baths. One of the most famous and original models is a steam room in the shape of a horizontal barrel.
Non-standard sizes and shapes, as well as interesting approaches to design, are great for construction when there is a shortage of free space.
Photos of finished baths can be found on landscape design websites, where it is easy to choose a unique option for every taste.
Ceiling protection
Before finishing, you should protect the ceiling from hot steam. To do this, use aluminum foil or a construction membrane.
Important ! Do not use foil with mineral wool or polypropylene foam glued on it. When heated, these materials release toxic substances.
Protecting the ceiling in a bathhouse using aluminum foil Source ko.aviarydecor.com
Photo of a bathhouse made of timber
Total
Category: Gazebos and baths

