Review author: Terrari School of Design
How nice it is to spend your free time at the dacha with your family. Messing around in the garden, cooking, watching the kids play with the dog or cat. And at the end of the day, after pleasant and useful work, go to the bathhouse and just relax.
After all, if you don’t have this magical remedy on your site, then you need to build it as quickly as possible. Having looked through specialized magazines, you can find a variety of colorful photos of a bathhouse in a country house that will not leave anyone indifferent, and certainly one of them will definitely appeal to you. All that remains is to make up your mind and start construction, fulfilling a number of conditions.
Selecting a location
Typically, summer cottages are quite small in size. There are some tips about the location where the building will be located:
- Elevation. This will make it much easier to drain excess water.
- Near any body of water.
- It is convenient when the entrance to the bathhouse is visible from the window of the house itself.
But it is also important to remember fire safety and think through everything, taking into account existing measures. For example, there should be no less than eight meters between the mini sauna and the house.
If this norm is violated, the situation can lead to conflict with neighbors, even leading to court proceedings.
Bathhouse: layout and division of the total area into zones
If previously baths consisted of only one room, modern versions of these structures include several. This may include a laundry room, locker room, recreation area, swimming pool, billiard room, etc. To ensure that in the future the owner does not have to resort to reconstruction and adaptation of the building, it is necessary to make all the important notes in the drawings at the design stage. The following points deserve special attention:
For convenience, modern saunas include several functional areas
- interior layout;
- water supply system;
- electrical cables;
- sewerage and drainage.
Note! Having a detailed diagram in front of you will greatly simplify and speed up the process of selecting and arranging furniture.
Development of a bathhouse plan taking into account the conditions of the summer cottage
To create ideal conditions for relaxing in the bathhouse, it is necessary to take into account some nuances that will allow you to avoid problems during the operation of the premises. It is desirable that the construction area be located on land with a low level of groundwater availability. Before starting to develop a project, it is necessary to immediately exclude all areas that do not meet this condition.
Sauna project 5 x 7 meters with an open terrace
If there is a well on the territory, then the distance between it and the bathhouse should be at least 5 m. The minimum distance between the steam room and a residential building is 8 m. The farther from the bathhouse the compost pit and toilet are located, the better. Experts recommend entering from the south. In winter, fewer snowdrifts form here, so the possibility of blocking access to the door is eliminated. It is better if the windows face west, which will facilitate the penetration of sufficient sunlight into the room.
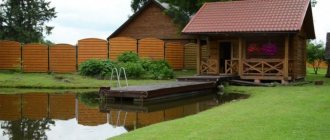
If there is a pond at your summer cottage, then after building a bathhouse 15-20 m from it you can use it instead of a swimming pool. In addition, the presence of a river or lake in close proximity to the property will provide a water supply system.
Dimensions of the sauna project: 7.74 x 6.24 meters
For small areas (3-6 acres), 3 by 3 bathroom designs are suitable; photos of such buildings are abundant on the websites of construction companies. Even in such compact buildings, the steam room remains the main room. To organize this room, you should allocate the maximum possible amount of space - approximately 8 m². This is enough to install 2-3 beds (shelves) and install a stove.
The remaining rooms can be included in the bathroom layout of 3x4m or more (optional). The structure can be used for its intended purpose even in the absence of a billiard room or bathroom. A bathhouse cannot exist without a Turkish bath. For this reason, the division of internal space into functional zones largely depends on the scale of the project.
It is recommended to build saunas at a distance of at least 8 m from a residential building
If you want extra amenities, you can include a small shower or bathtub in your 10-by-4-foot bathtub design. After the Turkish bath, you can wash off the dirt and cool down here. Typical projects are characterized by the presence of a relaxation room that will be serviced between couples' sessions. To organize it you will need 4.5 m².
Other rooms, for example, a dressing room or vestibule, will also come in handy. They are compact enough to fit a 5 x 5 log sauna along with the main rooms.
Please note: the size of the bathing area per person is 2 m².
Sauna project 6x6 m with a second attic floor
Bathhouse design: main premises and successful examples of layouts
Even the smallest project cannot consist only of a Turkish bath. In order for the bathroom to function normally and the conditions of its operation to ensure human comfort, other rooms should be included in the layout. To achieve this, the interior space of the building is divided into small rooms, each of which plays its own role.
In the design of a 5 by 6 m bathhouse (taking into account the small size of such a building), there is no need to use load-bearing walls to divide the space into zones. Light wooden partitions will be sufficient. They do not require laying a foundation and do not bear additional loads.
When dividing space, glass partitions can be used instead of walls to save space
By dividing the main space into several sections, it will be possible to heat the steam room efficiently and quickly. In this case, the remaining rooms will not be heated. This benefit is especially useful for the break room.
The dressing room belongs to the category of necessary premises. This room is used as the entrance door to the bathroom, preventing cold outside air from entering the steam room. You can store firewood or other fuel here. The dressing room is suitable for arranging a small dressing room (dressing room). With the right layout, you can easily move from this room to a steam room, shower room and relaxation room.
The layout of a 3 x 5 m bathhouse can include a fairly spacious dressing room. Using partitions, you can create additional storage spaces for items and fuel. By the way, there will be a large window in the dressing room, but only on the condition that it is not in the steam room. The steam room should have only one door leading to the locker room. The dressing room itself can be connected by passages to other rooms.
Project of a sauna 8 by 8 meters with a relaxation room, laundry room and terrace
Materials
Various types of modern baths can be built using a variety of materials. There are several types of buildings:
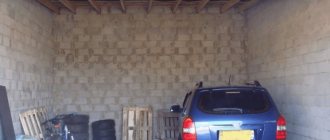
- Frame. Usually they choose it because of its low price and good quality. And thanks to the lightness of the material, you won’t need a lot of money for the foundation.
- Wooden. This design will be somewhat more expensive than the previous one, but will be stronger and of better quality. In addition, you won’t have to insulate it.
- Brick or stone. Such a bathhouse is built quite rarely, since such a structure requires a stronger foundation, and the walls are frozen, and it takes a long time to warm them up. But there is an exception - gas and foam blocks. The walls are warm and do not require a strong foundation. The only downside is poor moisture tolerance.
- Arbolite. A very good material that makes the bathhouse warm, durable and does not require much expense.
Main rooms in the bathhouse
Each type of bath includes the following functional premises:
- dressing room (dressing room);
- steam room;
- washing room;
- restroom.
Dressing room (locker room)
The dressing room is also called a vestibule. Here visitors leave their clothes, brooms and firewood are stored here. The dressing room performs a number of functions :
- is a zone with a buffer function that equalizes the temperature transition from the climate outside to the temperature inside the bathhouse;
- serves as a place for drying firewood;
- often also serves as a room in which to rest.
The dressing room door should open outward.
Steam room
This room is the main, base room of the building. This is where the highest temperature is maintained and where the furnace is located. In the corner of the steam room there are stones that create steam. There should be a heat-resistant coating underneath.
There are also benches arranged on steps. Two, as a rule, are intended for sitting, one for lying. When arranging a steam room, you need to think through the nuances:
- the material with which the ceiling and walls are sheathed is characterized by certain thermal insulation properties, taking them into account, the depth of thermal insulation of the rooms is calculated, and constructive techniques are used;
- The effective operation of the ventilation system is ensured by a special box or swinging window with double glazing. The location of the window is opposite the stove;
- the doorway is designed with a higher threshold: this way, cool air does not pass under the door and thermal efficiency is not reduced. The door itself swings outward;
- The steam room and washing room must be separated, otherwise the quality of steam and temperature decreases and fuel consumption increases.
Wash room
The washing room, often a shower stall, is located near the steam room . If the size of the building allows, these zones are separate from each other; in small buildings they are combined. In large buildings, a swimming pool or plunge pool is also equipped here.
The average area of the washing room is 2000x2000mm, then there is a place to take water procedures and place containers with water, hot and cold.
The window is built one and a half times larger than the window in the steam room. The doorway has also been enlarged – 1800x800mm to provide greater comfort. The requirements for heat conservation are lower than in a steam room. The threshold is made high, and the floor is laid with special tiles to prevent slipping and related injuries.
Restroom
Designs of bathhouses with a relaxation room give room for imagination. When there is only one recreation room, it can be made multifunctional through zoning . Eating, drinking tea, watching TV, billiards - all this happens in one room. Zoning is done using partitions, windows, furniture, and finishing materials. Additional comfort will be created by a fireplace in the corner and a couple of armchairs in front of it.
Frame bath
For such a structure, it is important to take reliable resources. The beams of the frame bath must first be dried and leveled if necessary. A lattice frame is produced for the walls. To make it you need:
- The bars differ in their cross-section and are suitable in size.
- Insulation with excellent thermal insulation qualities. It will be used when filling the structure.
- Something to sheath the structure on both sides. Typically, OSB, edged boards, siding or lining are used for this.
Save your budget
If you have a small budget, you can save on several points. Such savings will not affect the quality of construction, ensuring the construction of a reliable structure.
You should not buy a stove with a remote firebox. Such a purchase will not only be cheaper, but will also allow you to heat up the steam room much faster, and this will save firewood.
If the soil allows, give preference to a removable foundation. It is very inexpensive, allows you to quickly carry out the necessary repairs if necessary, and is easily dismantled and replaced with another.
If you plan to have a window in the bathhouse, be sure to insulate it in the winter; regular film with bubbles, which is used for packaging, is suitable for these purposes. It is used to trim the frame from the outside.
There is no need to install a shower stall or install a shower in the washroom. Just put basins or tubs for water. It is not so convenient, but very economical.
To reduce the cost of the roof, you should not make it very high. This will not only reduce the cost of cladding, but will also make the chimney not so high.
Attention! In a budget bathhouse, you will also need to abandon full sewerage and water supply. For cold water, you can put barrels or equip a hose. Water in such baths is usually simply poured onto the floor, from where it is immediately absorbed into the ground.
Brick, stone or block bathhouse
The walls can be made of ceramic or silicate bricks, rubble, limestone, shell rock, foam blocks, cinder blocks, and gas blocks.
What other buildings should be placed and the principles of zone design
A plot of 10 acres is more suitable for suburban settlements equipped with central water supply, sewerage, gas and electricity.
In terms of its size, it is considered small for rural areas, so it is difficult to accommodate all the premises that owners typically need for large-scale agriculture with processing and storage of crops. They are mainly used for organizing recreation areas and small personal farming.
Outbuildings
Based on the goals that the owner of a land plot of 10 acres sets for himself, as well as its shape and location in relation to the transport interchange, the following outbuildings can be located :
- fuel shed for storing coal and firewood;
- poultry and livestock barn;
- dog enclosure;
- repair shops;
- greenhouse;
- barn for storing agricultural products;
- cellar;
- latrine and compost pit.
Arbolite bathhouse
This material is durable and lightweight, often found in the construction of prefabricated baths. Arbolite blocks, in fact, can be easily made with your own hands.
For this you will need ordinary sawdust, but if they are not available and cannot be purchased, then ready-made blocks are sold quite inexpensively.
Erecting walls made of wood concrete does not take much time, which is also a definite plus.
Drawing up a diagram
In order to correctly draw up a planning diagram, boundaries and red lines are drawn on a site diagram drawn to scale. Next, all the necessary objects are cut out from colored paper, also to scale, and placed on the diagram.
To correctly place objects on the diagram of a plot of 10 acres,
you will need to take into account the following characteristics :
- relief, the presence of ditches, hills and the general slope of the building; the house is always located on a hill;
- degree of soil moisture and its composition: sandy or clay, if the soil is poor for flower beds and vegetable gardens, black soil will have to be brought in;
- the level of groundwater, if it is below 2 m, then it will be necessary to install a drainage system to drain water from the landfill and protect the foundation;
- the wind rose is important for the location of the house, it should be a blank wall and non-residential premises should be directed to the leeward and north side; objects should also be placed taking into account the wind: boiler room, bathhouse and barbecue, so that smoke does not enter the residential premises;
- The shading scheme of the building is taken into account when choosing the location of recreation areas, playgrounds, gardens and vegetable gardens.
After the main objects of the memory have been placed on the plan, you need to check that the maximum distances between them and other objects are observed, and only after that you can begin the final drawing of the objects on the diagram.
The detailed zoning scheme for plots of 10 acres will depend on its geometric shape: rectangular, square, triangular, round and polygonal, since the size of the free area will be significantly influenced by the limit gaps from the boundaries of neighbors to buildings.
For a rectangular area
There are three types of such memory :
- narrow with an aspect ratio of 0.45/1;
- average - 0.6/1;
- wide - 0.8/1.
The most preferred ones are rectangular with an average width; in plan this corresponds to approximately a size of 25x40m. Wide rectangles are close to square ones according to the zoning principle.
Initially, the location of the residential building is determined; it should be turned with blank walls to the north . This is done in order to protect living rooms from cold air currents. The location of the house according to the depth of the storage area also matters. There are three layout schemes: urban, when the house is installed on the border facing a city street, central, when the house is located in the center of the building, and in-depth, at the border opposite the street.
The most preferable for a rectangular plot of 10 acres is the central location of the house along the southern wall with a symmetrical arrangement of all auxiliary objects: the garage on the southern side is located symmetrically with outbuildings and a bathhouse, which is placed on the northern side and a vegetable garden located along the southern long side of the rectangle
A house for a given plot of 10 acres can have a plan of 10x15 m. The central entrance is located on the west side or any other side except the north. In front of it there is a seating area with two symmetrical flower beds. On the eastern side of the house there is a garden and an artificial pond, in front of which there is a bathhouse and a barbecue near the eastern fence.
Square
The square plot has boundaries of 31.6x31.6 m. On such a plot you can build a cottage of 1000 x 15 = 150 m2, in plan 12x12, it can be up to 3 floors. Zoning is carried out similarly to rectangular - symmetrical . But since the length of the square plot is shorter, the house is located relative to the central axis closer to the fence in the western part of the building, with the kitchen, central entrance and garage located to the north
The front entrance of the house is located on the east side, with a swimming pool in front of it. A recreation area with a gazebo is located on the south side of the building, and a garden is also located here. The utility area and bathhouse are located symmetrically to the garage in the southwestern part of the building, not reaching 1 m from the fence.
Triangular
This form of site is especially difficult for high-quality planning, so inexperienced developers are better off turning to specialists. Difficulties in planning here are caused by the fact that the landfill has long boundaries and a narrow internal area , taking into account fire and sanitary gaps. Therefore, there is very little useful space left for building a house, bathhouse and garage.
If the triangle is rectangular, then the larger side of the right angle should become the main one. The location of objects in this case can only be asymmetrical.
The central entrance to the house is located on the middle line of the triangle, turned to the south, the northern part of the house is adjacent to the fence. The central entrance is from the base of the triangle on the eastern side of the building. To save space, a garage is built into the house.
On the western narrow side of the building there are outbuildings and a bathhouse; at the top of the triangle there is a parking lot if there is a reserve entrance or a garden for a dead-end plot. The western part of the house is adjacent to the recreation area and swimming pool. The gardening area is located on the south side of the land plot at the base of the triangle and along the longest side of the triangle.
Round
This shape of the site is quite rare; zoning here should be carried out according to the radial principle . The house is located closer to the fence, with the blind side to the north.
The garage is adjacent to the house and is located on the east side of the building. On the western side of the building, a utility block and a bathhouse are symmetrically located. The garden is placed radially along the fence. Flowerbeds and a recreation area are located on the south in front of the central entrance to the house. The zones are separated by paths arranged in a circle.
Polygonal
This is also a rather difficult area for zoning; the principle here can only be applied asymmetrically. For the location of the house, whenever possible, choose the side adjacent to the right angle. The cottage is set with the main entrance to the south, approximately in the center of the building . To the north are non-residential rooms. On the east side there is a central entrance to the property, a garage and a parking lot.
On the western part of the site, along the long side of the polygon, a utility block is located in the center. In the lower corner there is a garden, an artificial pond and not far from them, at the southern part of the fence, a bathhouse. The vegetable garden is located in the upper corner of the polygon, opposite the western side of the house. It is better to place the recreation area opposite the front entrance to the house.
Construction stages
Many people wonder how they can build a bathhouse themselves. It is best not to build it alone, so it would be nice to call one of your relatives for help.
Otherwise, the process will drag on for a long time, and besides, there are jobs that cannot be done alone.
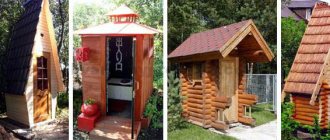
Atypical summer shower options
A person with a vivid imagination and a certain amount of money can afford to make not just an outdoor shower, but also build a masterpiece of construction art or bring to life a small piece from a fairy tale.
When building an indoor summer shower, one of the walls can be made of colored bottles, and a wooden beer barrel will serve as a water tank. A person’s imagination has no limits: every summer resident makes a summer shower to his own taste and following his preferences. For example, some people like to decorate their shower stall walls with bamboo, straw or sunflowers.
Marking
After choosing a place to place the building, you need to mark the territory. To do this, you need to transfer the size of the building to the terrain.
Pegs that are driven into the future corners of the bathhouse will help with this. It is important to ensure that the angles are exactly right. Further actions depend on the foundation:
- Slab. Expensive, chosen only when absolutely necessary. They are marked either exactly in size, or a little wider so that the foundation extends beyond the building;
- Tape. The most used, relatively cheap, high quality. The marking is carried out so that the concrete tape runs along the perimeter and under the partitions;
- Columnar. Also popular, most often refers to buildings made of wood. They are marked based on the size of the bathhouse and the number of supports made;
- Screw. Some people think that this method is a recent development, but it is not. It has been serving in various buildings for many years and performs well. Its advantages are the ease and speed of installation, as well as the unnecessary need for earthworks. And such a foundation is not afraid of uneven terrain. The marking is carried out precisely, based on the number of piles.
Typical mistakes during construction
To avoid problems with the performance of the bathhouse, it is worth considering the most common errors:
- Carefully calculate the size of the premises based on the number of people.
- Correct ceiling height. You should not make ceilings lower than 2 meters, since it is not comfortable to be in such a room. In a room with ceilings higher than 2.4 m, there is an overconsumption of coolants.
- The southern and western walls are allocated for windows, and the southern one for the door.
- The windows are not too large - this will help avoid excessive heat loss.
- Use energy-saving materials.
- Choose quality equipment.
Fill
A shallow strip foundation is suitable when the soil is dry, there is no moisture, there is little frost in winter, and the construction is not heavy.
To do it, you need:
- Conduct internal markings.
- It’s good to think in advance where the stove is located so that you can immediately lay the foundation for it too.
- To simplify the work, you can place wooden structures resembling benches in the corners. They are needed to attach the measuring cord.
- Get rid of the fertile layer of soil and make a trench. The clay obtained from it can be used as bedding later. The depth of the trench should reach a durable layer of clay. Most often, 50-60 centimeters are required.
- Level the bottom and cover the trench with a layer of sand, and then wet it with water and compact it. The thickness should be more than 15 centimeters.
- Fill in a new layer of crushed stone and compact it.
- Make formwork and cover it with polyethylene from the inside.
- Build a structure made of metal or plastic and lower it into the trench. To raise it above the topping, you can put granite pieces underneath.
- Fill the foundation with concrete and level the resulting area. The formwork can only be removed after at least a week.
Concrete becomes very strong after about a month, so it must be handled carefully at first. It’s better to wait a month before moving on to building a bathhouse.
The easiest way to build
The design of the simplest summer shower consists of a tank, a tap, a shower head, a rubber mat, 4 racks and a moisture-proof material. In order to build the simplest version of a summer shower in the country, you need to follow some tips :
- First of all, you need to choose a place or site to build a shower. It must be under constant exposure to sunlight , since the water tank of the future shower must heat up naturally. If you build a shower structure in the shade of trees or another building, then the problem of heating the water will arise.
- It is necessary to dig 4 pillars into the ground to make the structure stable. A metal or plastic water tank is attached to the top, preferably black: for better heating.
- A hose for water supply is connected to the tank and a watering can is attached.
- You can put a rubber mat on the ground and cover the shower frame with polyethylene or other material.
After about 2 hours of operation, the outdoor shower is ready for use. Such a shower is mobile, it can be easily moved to another place, and can be easily removed for the winter.
Walls
When building a brick, stone or block bathhouse, masonry always starts from the corners. A solution of cement and sand is created and blocks are laid on it.
You should also use stretched string to lay the material evenly.
Having made lintels on top of the doors and windows, you need to make formwork at the top and build an armored belt. It is needed to secure the bolts on which the Mauerlat board will be attached. When the mixture is completely dry, you can begin to make the roof.
From aerated concrete
In its characteristics, this material is similar to foam blocks. Aerated concrete blocks are made from a mixture of cement, sand, aluminum mixture and special gas-forming substances. During a chemical reaction, the mixture hardens, and pouring into special molds allows the block to be given the correct shape.
Aerated concrete baths are prefabricated, lightweight, and do not require the construction of a solid foundation. In terms of ease of processing, the material is comparable to wood; it is easy to cut and assemble.
In terms of thermal insulation properties, aerated concrete blocks are not inferior to timber, which allows you to build a very warm and strong bathhouse. The special composition of the material allows you to avoid the appearance of mold and mildew, but you should understand that this requires proper ventilation.
The blocks do not burn, and when exposed to high temperatures they do not emit any harmful substances or toxins.
The only drawback of aerated concrete is its high ability to absorb water. This is due to the porous structure of the material. To prevent a reduction in the service life of the bathhouse and destruction of the concrete structure, good waterproofing is required. Particular attention should be paid to this work in the steam room and washing room. The floor in such baths should always be left wet and not insulated with anything.
Attention! Aerated concrete does not shrink significantly; it does not exceed 1-2%. This moment allows you to immediately begin decorating the steam room and dressing room.
Frame installation
The frame is made of wood, insulated and sheathed with various types of finishes. To carry out a vapor barrier, take a film specially created for this purpose.
This will prevent moisture from accumulating inside. As insulation, you can use mineral wool or fiberglass. They seal perfectly and do not spoil natural air exchange.
The walls should be insulated and sheathed after the work on the roof is completed. This way the materials will not suffer from possible getting wet.
Questions and answers
In the case of using boards to build a bathhouse, is it possible to use unedged material or will the quality of the structure suffer from this?
No. You can safely use unedged boards if you have no complaints about their appearance. The main thing is that the wood itself is strong and dry.
Why do you need a vapor barrier if insulation is already used to lose heat?
Insulation and vapor barrier perform different tasks. Vapor barrier prevents the destruction of wood due to constant ingress of water and exposure to high temperature.
Does the wood need to be treated again after some time has passed since it was put into use?
Necessarily. To prevent the wood from drying out, use antiseptics and fire retardants from time to time. To be on the safe side, all wood can be varnished again once a year.
What is better: an individual project or a standard building?
An individual project is much more expensive, so if you are building a budget bathhouse, you should focus on standard small-sized projects.
Where is the best place to install the door?
It makes no difference what kind of bathhouse you are building. Always install the door on the south side if you plan to use the steam room in winter. This way the snowdrifts will melt quickly and will not block the entrance.
A budget sauna is a reality that everyone can implement on their own site. Careful familiarization with the characteristics of materials for construction, as well as knowledge of where costs can be reduced, allows you to build a durable structure for relatively little money.
Floors
A frame bathhouse requires only insulation of the floor and covering it with boards, but other buildings, on the contrary, require more difficult work:
- Installation of logs;
- Tricks of the subfloor;
- Securing the vapor barrier;
- Laying insulation;
- Performing waterproofing;
- Laying floor boards.
Buildings built with a columnar or pile foundation can only afford an insulated wooden floor.
General principles of project planning
The plan of a plot of land of 10 acres is a diagram drawn to scale, on which the boundaries of the land plot and its red lines, as well as all the main zones, are plotted . Zoning of the territory is carried out by the developer independently or under an agreement with a design organization using all building codes.
To carry out competent zoning, you will need to take into account the terrain, shading patterns of the site, wind roses, cardinal directions and groundwater levels. At the same time, it is very important when zoning to take into account the minimum fire, sanitary and construction gaps between buildings, trees, site boundaries and red lines
For a plot of 10 acres, the maximum zone sizes for its total area are also established :
- entrance and garage - 6%;
- residential building 15%;
- household facilities and bathhouse - 15%;
- sports ground and recreation area - 15%;
- garden and vegetable garden up to 49%.
Ceiling
Aspen, alder and linden will serve wonderfully as ceiling materials. They are not particularly thermally conductive, which means they will not heat up from the warmth of the dressing room or rest room.
It is recommended to sheath it with wooden clapboard, which can easily withstand elevated temperatures. You cannot take pine or spruce, as they release resin when heated.
In addition, fiberboard and chipboard sheets are also dangerous to use as ceilings - they can emit fumes that are dangerous to humans.
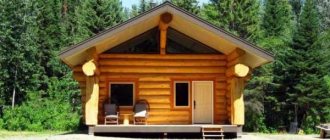
Project of a two-story wooden bathhouse with an attic, balcony and terrace
The overall dimensions of the building are 7 by 5 meters. The walls of the log house are wooden, the ceiling is also made of wood over logs. A monolithic reinforced concrete slab is used as the foundation. The roof is mansard type with a sheet metal cape.
The total area of the bathroom is 47.78 sq.m., the area of the terrace and balcony is 11.16 sq.m.
Despite the fact that the total area of the building is small, thanks to a competent layout, not only a classic steam room, a shower room and a relaxation room will fit on the ground floor. In addition to them, a storage room and a fairly large bathroom fit into the overall dimensions of the building. Consequently, the attic floor is completely occupied by a spacious bedroom with an area of 22.9 sq. m. Thus, the bathhouse effectively turns from a place of relaxation into a fairly comfortable home.
Two-story bathhouse
A two-story bathhouse is built only if it will be used as a living space by the owners themselves or as a guest house. Less often, a two-story bathhouse is built exclusively for relaxation. In order to save money, a full second floor is often replaced with an attic. This type of building fully meets all the requirements for the second floor.
Most attic bathroom designs involve bedrooms or guest rooms. In small houses this can be a common room; in large buildings, two bedrooms can also fit on the second floor. Depending on the option chosen, there is a small hallway on the floor, accessed by a staircase, or there may be no hallway if there is only one bedroom on the top floor.
Arrangement of all floors of a two-story bathhouse 7x8
If a bathhouse with an attic is built exclusively for recreation, entertainment for a small circle of people is transferred to the second floor: here you can place a recreation room, a recreation room, a billiard table and a cinema.
The ground floor area is divided into a large Turkish bath, a bathroom, possibly a swimming pool and a relaxation room. The common room on the ground floor is an area with a table, benches or sun loungers, and a small kitchen with a kettle, microwave and refrigerator. All this allows you to comfortably relax after a Turkish bath and chat with friends.
Bathhouse 8 x 8
- enough space to integrate utility rooms;
- the need for zoning of localized objects;
- possibility of arranging a large terrace;
- separate placement of steam room and sink;
- 3-4 sleeping places in the attic;
- If desired, you can also arrange a compact pool.
this is where you can really shine! An 8 by 8 bathroom design with a loft can accommodate literally anything your heart desires - from a convenient walk-in closet and large hall to a spacious billiard room upstairs next to the bedroom. The square base of the building allows literally every centimeter of free space to be used for business. You can even arrange access to the balcony. Isn't it nice to go outside and get some fresh air while enjoying a wonderful vacation?
Of course, to ensure comfort not only on paper, but also in practice, it makes sense to take care of reliable waterproofing of the base of the floor. In this case, you will significantly extend the service life of the materials used and achieve almost ideal safety in the operation of the building.
The arrangement of bathrooms with an attic when using the 8x8 format becomes more complicated due to the greater variability in the location of entrances and the integration of additional modules, such as the balcony itself, but the end result is surprising. And this is the best option for planning a plot of 10 acres with a house, a bathhouse and a garage. Essentially, this is a guest house with a sauna function. All that remains is to visit it more often and enjoy a perfect vacation.
Roof
The first step is to install hydro and thermal insulation. Basically, the roof greatly depends on the area in which the bathhouse is built. So, for example, if the wind in these places is strong, then the slope must be small, and vice versa.
After installing the roof, you need to finish it, and then think about ventilation.
Tips and tricks
Regardless of whether you are building an expensive or cheap bathhouse, you can use a number of effective tips:
- Choose the right bathhouse design, taking into account how many people are going to use it. The best option is 10-15 sq.m. Such dimensions allow you to equip all the necessary rooms and not spend a lot of fuel on heating.
- All boards and wooden bases must be treated against pests, mold and fungi. If this is not done, the bathhouse will last only a few seasons and will quickly require repairs.
- The ceiling is not made very high. Measure how much height you need to sit freely on the shelf and add 15-20 cm from above so as not to touch the ceiling with your head while floating.
- Doors should be installed with a high threshold. This speeds up the heating of the room and prevents the heat from quickly leaving the steam room. Be sure to seal the door to minimize heat loss.
- If possible, try to make the outer wall at least 30-35 cm thick. This will keep the heat in the steam room for a long time, which is especially important in winter, when the bathhouse cools down much faster.
- Windows are more than just decoration. They are recommended to be used as an additional fire exit. They should be placed on the western side, where there is the most sun in the afternoon, when the bathhouse is mainly heated.
Attention! Be sure to protect the bathhouse from drafts. To do this, you will need not only to properly insulate the seams, but also to correctly mark the doors. To prevent drafts inside, they should not be placed perpendicular to each other.
Ventilation
Many people think that it is completely unnecessary, but this is not so. Without ventilation, hot air is trapped at the top, and on the contrary, it is cold at the bottom.
It is better to place the first vent hole lower, next to the boiler, and the second one near the ceiling, on the other side. The bathhouse should be ventilated every couple of hours. This will make it possible to keep warm.
Standards for placement of buildings according to SNiP
After a list of objects has been selected and preliminary zoning of a 10-acre plot has been completed, it is important to check that the SNiP requirements for fire and sanitary gaps between objects, as well as in relation to the boundaries and red lines on the site, are met.
Rules for the location of objects on a land plot of 10 acres:
- from house to street - from 5 m;
- from the house to the neighboring building - from 3 m;
- from outbuildings to the neighboring storage unit - from 3 m;
- from the bathhouse to the house - from 8 m;
- from the bathhouse to the boundaries of the landfill - from 5 m;
- from the toilet to the house - from 12 m;
- from the toilet to the well - from 8 m;
- from the well to the house - from 8 m;
- from garage to house - from 3 m;
- from a tall tree to a fence - from 4 m;
- from a medium tree to a fence - from 2 m;
- from bush to fence - from 1 m.
Insulation and vapor barrier
A frame bathhouse is not insulated - when constructing the frame, thermal insulation is immediately installed in it. A wooden structure needs a sheathing where the necessary material will be laid. But other types require more complex work.
You will need mineral wool, the thickness depending on the climate conditions and the type of bath. As a rule, the layer thickness is about fifty millimeters. The insulation itself can be either mats or rolls.
Vapor barrier is very different from waterproofing. The first one will do its job perfectly, even if it’s cheap, while the second one will only ruin everything.
Therefore, you need to be careful not to confuse them and not buy a fake.
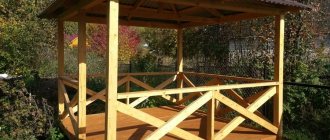
Design and layout of a bathhouse with a terrace
This is a small project, but at the same time a cozy bathroom. Such a structure can be considered as part of an estate or used as a separate element, as a mansion necessary for recreation.
The entrance is preceded by a terrace of 9.8 sq.m. M. Next comes a vestibule of 2.3 square meters.
This is followed by a transition to the rest room (15.9 m2).
From the bathroom, a corridor leads to the laundry room (7.8 m2) and then to the Turkish bath (7.8 m2). All rooms are arranged in such a way that only a minimal amount of heat escapes from the last room.
Much attention is paid to the heating and lighting systems. Windows are located in the billiard room, in the recreation room and in the smaller locker room. Therefore, even during the daytime there will be insufficient lighting. Solve this problem by using lighting in the lower part of the ceiling.
Modern Russian bath
A typical bathroom design involves the presence of several people at the same time. Consists of a vestibule, a dressing room (dressing room) and a steam room of 6-9 sq. m.
The most comfortable options include a shower, plunge pool or plunge pool.
Simple bathroom design with a swimming pool and shower
- In villages, toilets are often built with a laundry compartment to wash clothes and bathe children and the sick.
- The drum is needed to create a thermal barrier so that cold air does not penetrate inside.
Sauna with large relaxation room, shower, bath and small pool
- The dressing room area can be 4-6 square meters, with 1 window. In it you will relax and refresh yourself after a Turkish bath. For this you will need a bench 150 * 50cm.
Advice! The steam room door should not open towards the locker room, as the steam will wet the clothes. A more rational and economical solution in terms of space would be to make the exit from the doors of the Turkish bath and changing rooms towards the vestibule. This way you can heat the entire area from the stove.
- It is best to take a square-shaped steam room. To reduce the amount of heat leaving the Turkish bath, a high threshold and a small low door are made at the entrance. Also, for this, the height of the floor in the steam room is increased by 7-10 cm, and in the washing area, on the contrary, it will have to be lowered so that water does not penetrate into other rooms.
- A wood stove is usually installed in the corner by the door. Opposite are shelves for washing.
In the photo you can see an example of a project for a bathroom with a vestibule, a dressing room, a toilet, a toilet, a shower, a steam room, and a laundry room. The total area of the room is 24 square meters.
Variant of a modern Russian bath
The base is a concrete strip foundation or concrete blocks. The walls and beams are wooden. Slate is used for the roof.
Bathhouse with swimming pool
The classic Russian bathhouse does not offer such luxury, but today a pool in the bathtub is not uncommon. Selected projects boast a full swimming pool, gym and conservatory. But placing a small plunge pool under the same roof as a steam room is a common thing.
A one-story sauna measuring 8 * 10 will comfortably accommodate a spacious relaxation room, a separate steam room, a bathhouse and a room with a swimming pool. In this case, the entrance to the water block is through the rest room. The walk-through room, where three doors lead simultaneously, is the laundry room. You can only get into the pool from the Turkish bath through a shower.
A full pool can be replaced with a small pool. In this case, it is not necessary to allocate a closed room for these needs. It is enough to make the bathroom a little more spacious and install a hydromassage bathtub. This option is also suitable for small bathrooms.
Design and layout of a 7x12 bathhouse with a swimming pool
With a lounge and access to the terrace
A universal project that can be modified to suit the wishes of the potential user. Due to the versatility of all rooms, the sauna can be easily replaced with a steam room. Therefore, from the basic design, two very different designs can actually be obtained.
The first option includes a bathroom with a shower and a studio-style kitchen. The only thing that remains virtually unchanged is the bathroom with access to the terrace, which is present in both versions, even if it is significantly reduced in size.
The second option includes an additional dressing room and a full bathroom, which has both a toilet and a bathtub. This solution does not allow hosting a large company, but is more convenient from an operational point of view, as it clearly separates different functional areas. Therefore, the second option is more convenient for small businesses or families.
Consequently, this planning solution gives 17 sq.m of living space and 24 sq.m of total area. Another advantage of the project is the opportunity to enter the pool on the territory in front of the bathhouse, the presence of which always adds positive emotions from visiting the bathhouse.
Bathhouse with extensions
Another interesting bathroom layout option is to build a master bathroom that includes a steam room, laundry room, and possibly a bathroom. And all other rooms - guest rooms, bedrooms, recreation areas, a swimming pool and a jacuzzi - are built next to each other as needed.
Design and layout of a 5x12 bathhouse with a terrace
This option is ideal for those who use the sauna seasonally, during the summer gardening period. Or for those homeowners who do not have a large amount of money to immediately build a large complex.
Finishing
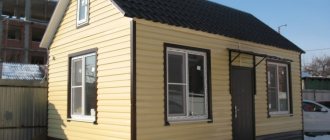
The simplest and most convenient materials for finishing a finished bathhouse at the dacha will be lining or something similar. And if we talk about finishing the exterior, then absolutely anything that is suitable for cladding a house will be suitable.
But if the bathhouse is built from rounded logs, then it already looks attractive and there is no need to sheath it.
Video description
To ensure that wooden furniture lasts a long time, it is treated with varnish or fired.
The latter method not only closes the pores of the wood from moisture penetration, but also gives the furniture a unique “author’s” style. You can learn about this from the video below: The simplest option is wooden benches and a table. But even in this case, there are enough opportunities to make the interior beautiful and memorable.
The style of a hunting lodge is quite appropriate for a bathhouse where a group of men gathers Source sl.aviarydecor.com
Leather sofas and armchairs are even more comfortable. They are not afraid of dampness and dry quickly.
And when there is a spacious buffet nearby, it’s even better to relax Source roomester.ru
Rustic or hunting style is not the only choice for the interior of a recreation room. There are other beautiful bathhouse designs that use modern style trends.
The rest room can also have an unconventional look Source yandex.ru
And as you can see above, it is absolutely not necessary to adhere to any canons. In a modern bathhouse, stone, tiles and mosaics are no less appropriate than wood. Especially when in the “dressing room” there is a font like the one in the photo below.
Luxurious interior for a lover of not only steam, but also water “procedures” under the roof of the house Source astroyresurs.ru
You can even place a small pool here - what could be better than taking a deep dive after a hot steam.
In the interior of this bathhouse, the “mirror” of the pool seems to serve as a continuation of the southern sea Source eventology-theory.ru
Furniture
You can do all the arrangement yourself, or purchase it in stores before studying a huge number of photos of the bathhouse inside and decide what you like.
There are no restrictions in the choice of material, but there is no need to use chipboard - such furniture will soon become unusable because it cannot withstand strong humidity.
Here are the main points, after which you will get a pretty good bathhouse, where you can invite not only relatives, but also friends to take a steam bath. After all, colorful photos of a bathhouse in a country house will not leave anyone indifferent.
Layout of flower beds and flower beds
Flower beds and flower beds will bring visual pleasure while staying in a suburban area. Having studied the possible design options for color compositions, it will be easier to choose an interesting option for the landscape design of your own site with a bathhouse. The materials used in the arrangement and the location of the flower beds can transform the most inconspicuous area into a fragrant Eden. The following types of flower beds are popular:
- The border will decorate any path. In the design it is important to use low flowers up to 45 cm; the width of the plantings can reach a meter.
- The mixborder is incredibly attractive. Different in shape and types of flowers used, they delight the eyes of others throughout the warm period.
Attention! The effect of continuous flowering can be achieved with the correct configuration of the mixborder. Here it is important to select a set of annual and perennial plantings with additional planting of lush greenery, which will gradually replace each other. - Simple stones enclosing a flowerbed or casually placed on it are another trend in the design of a site. The rules for arranging a rock garden and a rock garden are different, but they are united by their priority use in the design of coniferous plants.
- Experienced flower growers can transform the design of a site with an arabesque - a flower bed that imitates the outlines of an animal.
The use of available materials when decorating flower beds on a site is one of the most popular landscape design techniques. Bicycle, barrel, tires, cart - it is not possible to list all the options. The imagination of the site owner can exceed all expectations.
A compact area is not a limitation for planting flower beds. In this case, the design moves from the horizontal to the vertical plane. Various hanging pots and boxes, multi-tiered flower beds and wall panels - there are many ways to beautifully decorate a space without taking up free space.
Photo of a bathhouse at a summer cottage
Design option for storage unit 25x40
This is a classic rectangular plot with a southern central entrance. The house can be built two or three storeys, with dimensions of 10x15 m . It is better to choose a central location for the house in the depths of the building, closer to the main entrance. The garage is built into the house. The central entrance to the house is located in the north-west direction, there is a terrace in front of the house, and clubs are located along the perimeter.
The bathhouse is located in the northern part of the building, with fire gaps between objects of 8 m. The vegetable garden is made in the form of rectangular beds, located on its western part, the garden trees are located in the northern part of the site, additionally protecting the living quarters from the cold wind.
A shed, compost, and a utility yard with garbage cans are located deep in the plot on the southwest side. A barbecue, children's playground and recreation area are located in its eastern part in compliance with fire and sanitary gaps.
Roof
Roof vapor barrier
The cost of construction is affected by the design of the roof. The best option in terms of cost is single-slope, gable. Hip roofing is suitable for attic structures. The terrace is covered with the same roof as the bathhouse, with a single rafter system.
The step between the rafters is made according to the project calculations. For the adjacent, protruding terrace, which is built later, separate rafters and sheathing for the roofing are installed. The area for the extension is planned and fenced off in advance.
The following roofing materials are used: roofing felt, soft tiles, ondulin, corrugated sheets. It all depends on the design features of the project.