When collecting this collection, I classified crafts as practical and decorative. Practical ones include a spray nozzle for a watering hose, vertical beds, etc. But decorative crafts are a whole world! There are flowers from bottles, which we have already talked about, and beautiful paths, and animals, birds, and insects. But this selection combines the beautiful and the useful. There will be everything here that will decorate the garden, and at the same time, will serve us well. And yet, from such crafts you can create a real scene or make individual figures.
Let me remind you that we made swings for children and beautiful crafts from concrete. If interested, follow the links.
No. 1. Fencing for flower beds
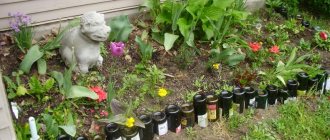
Country garden beds and flower beds definitely need fencing, which protects them from erosion and gives them a neater appearance . An alternative to the usual paving slabs, bricks or concrete curbs can be plastic bottles, however, you will need a lot of them, so you will have to collect them for a whole year. It is advisable that they be the same size - then the palisade will be even.
Each bottle must be filled with sand, closed tightly and started digging into the ground along the marked lines. The finished fence can be painted in the desired color, or it can be left alone if the original color of the bottles suits you. Plastic, even in a humid environment, does not decompose for 500 years, so such a fence will last a very long time.
Making and decorating a gazebo step by step
For construction, you need to collect 400-500 0.5 liter bottles, identical in color and shape. Pour sand into the container to weigh it down and close with stoppers. Bottles will replace bricks.
Instructions:
- dig 4 metal support pipes in the cleared area;
- cement the bases of the supports;
- lay out layers of bottles with the bottoms out or in, coating with cement;
- tie each row with wire to the supports;
- lay out the bottles in a checkerboard pattern;
- Attach metal corners to the supports on top;
- put a roof made of plywood sheets.
A polycarbonate roof will let in more light. Any lightweight material will do. Furniture for a gazebo can also be easily made from bottles by placing them vertically, folding them horizontally and wrapping them with tape. The floor can be decorated with a mosaic of lids.
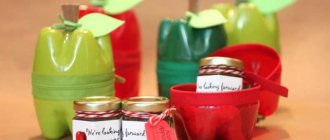
No. 2. Curtains made from plastic bottles
Airy and unusual curtains for decorating the entrance to a house, summer kitchen or gazebo can easily be made from the bottoms of plastic bottles, and there are no requirements for the color, density and size of the latter. It will take a lot of bottles to prepare, and the bottom will need to be cut off from each one - the rest can be used to make other crafts.
The prepared bottoms are connected to each other with thread or fishing line - the curtain is ready. If you use transparent bottles with a bottom that resembles a flower (those in which plain and sparkling water is usually sold), the curtain will turn out to be airy. Bottoms from thick plastic bottles are also suitable , and you can use multi-colored ones or paint them in the colors of your chosen range. As a result, you can get a bright curtain with a pleasant color transition. caps from the same plastic bottles can be used for the same purposes : in different colors and sizes, they will help create an original and cheap decoration for the dacha.
Crafts for the garden using improvised materials
Foam plastic This durable material is useful for making unusual compositions. It cuts well with a regular or stationery knife, so it can be given absolutely any shape. For example, make a goldfish. From a rectangular piece of polystyrene foam, cut out a piece in the shape of a fish. Cover it with shells and paint it with gold spray paint. Place the craft near a pond and let the fish fulfill your every wish.
You can cut out any cartoon characters from foam sheets. The base paints well; you can glue both dried flowers and pieces of fabric or other material onto it.
Natural material
Spikelets of wheat or panicles of field grass, physalis fruits, dried flowers, berries, fruits and moss can easily be used to make a huge composition. If you gather guests at your dacha, then make an unusual stand from various natural ingredients.
At some distance, vertically drive metal rods into the ground and stretch a mesh (metal or nylon thread) over them. Make a background from ears and stems of dry grass, place a bright sun and two charming butterflies made of flowers and herbs on it. Below, place two floor compositions made of vegetables, fruits and green moss.
Artificial flowers
For some reason, some people associate artificial flowers and plants with going to a cemetery. This is far from true; many bouquets look simply life-like and can be used in creativity. For example, make such a composition in the form of two swans. It would be appropriate to celebrate a wedding anniversary as a symbol of love and mutual understanding.
Make a frame from metal rods - two wings and two long necks. Decorate the wings with white translucent fabric. But cover the necks of the swans with white artificial daisies. Make the beaks from red wire. The result is a gentle and romantic composition.
Crafts for the garden made from polyurethane foam
It can be used not only in construction, but also in creativity. For example, for making a bright garden snail. The body and head are formed from two wooden blocks connected with self-tapping screws. Polyurethane foam is applied to them from a spray can. The snail shell is also made of foam, which is blown in a spiral. All details of the craft are painted with bright paints from spray cans.
You can decorate the snail with green self-adhesive film, pine cones, tree leaves and other materials.
Cardboard tubes
If you've ever received linoleum wrapped around a cardboard tube, then you know what we're talking about. It needs to be cut into segments using a fine-toothed saw. Any composition can be formed from these parts. For example, a beautiful bird with a bushy tail.
The spaces between the large rings need to be filled with sections of thin tubes (the kind you wrap paper towels around). And in the middle of the rings it is better to place openwork weaving using the quilling technique. The last stage of work is painting. The result is an openwork composition that attracts the eye.
These are the original ideas that will help you transform a flowerbed or clearing in your summer cottage. You can make such simple but original crafts with your own hands and your garden or summer cottage will take on a simply fabulous look!
No. 3. Bottle garden path
If you have collected an indecent amount of plastic bottles, you can use them to decorate garden paths. For these purposes, the same bottoms are used, which have a noticeable relief, which means that it will be pleasant to walk on them barefoot, but it is inconvenient to transport any loads, therefore, with the help of plastic bottles, it is better to equip secondary paths along which people only walk.
The cut bottoms are laid on loose sand , and efforts must be made to ensure that each element is completely filled with sand, which will prevent future deformation. A more durable option is to lay the bottoms on not yet hardened concrete , which is very often used for pouring garden paths. In this case, we will get a decoration for a boring gray concrete path, and to make the dacha area even more fun and interesting, you can lay out some kind of pattern from the bottoms or bottle caps.
Crafts for home
Bottles are great for creating cute and practical storage systems. To do this, it is enough to cut the bottoms at the required height and lightly sand the cut area, removing all burrs and irregularities.
The resulting jars are suitable for storing nails, spools of thread, bags of spices, cutlery, and will become multi-colored vases for sweets or cookies.
The bottoms can be connected to each other or attached to a wooden crossbar. In this case, the craft will acquire additional stability, ease of use and a nice appearance.
Two bottoms slightly different in diameter will create an unusual translucent jewelry box.
No. 4. Washbasin from a bottle
Making your own washbasin from a plastic bottle is incredibly simple. The selected container is attached (can be tied or carefully nailed) to the base upside down. To wash your hands, it will be enough to slightly unscrew the cap of the bottle, and water can be poured into it through the bottom, which is made removable. It is better to cut it off not completely so that it does not fly away anywhere and get lost, because the water in the container must be protected from dirt getting into it.
A more technologically advanced and very convenient washbasin can be built by installing a piece of hose into the neck of the bottle and connecting it to the tap . If you also choose a large-volume bottle, the result will be very functional and comfortable, and at the same time inexpensive.
Homemade “utilities” made of plastic
From bottles you can make not only beautiful, but also useful things for your home. If you show imagination and ingenuity, bright, beautiful, unusual things will captivate your household and neighbors.
Curtains and drapes
Bottles of different sizes are suitable here, bottoms are useful for flowers, and leaves can be cut from the bottle itself. Sliced flowers and leaves can be painted or left transparent. You need to string them on a thread and hang them in the garden house, in the gazebo, on the veranda, even in the dressing room.
Washbasins and boxes
A bottle washbasin is a very simple and convenient thing. It’s quite simple to make: cut off the bottom (if you don’t cut it all the way, you’ll get a washbasin with a lid that protects the water from leaves and dust), and attach it to a tree trunk or to the wall of a shed. If you need to wash your hands, just open the lid slightly. You can fill the bottle with plastic bags - you get an original box.
Slippers
Step-by-step description of making slippers from a bottle:
- cut the soles to the desired size;
- cut the top to the appropriate size;
- use a hole punch to make holes around the entire perimeter of the sole and upper;
- crochet around the perimeter of the slippers, simultaneously connecting the upper part with the sole;
- the upper part can be decorated with any materials as desired.
The slippers are ready!
Insect traps
After cutting off the neck of the bottle, you need to insert it into the lower part of the bottle with the neck down. Then you need to pour specially prepared syrup into it. Such a trap is left untouched for a week; a huge number of insects flock to it. A week later, a new syrup is prepared.
There are many more useful things that can be made. By making a round hole in the top of the bottle the size of your hand, you can use it as an organizer for fasteners. By making holes in the bottom and digging the bottles into the ground next to the cultivated plants, you can get a device for deep watering. And flower pots, candlesticks and vases, funnels and bird feeders, and children's toys can be easily cut into any shape and any size.
No. 5. Flower pots
Flower pots are most often made from plastic bottles. There are a lot of possible options, the only limitation will be your own imagination. The simplest option is to cut off the neck and get a container for planting plants, and it can be quite large in diameter if you use 5-liter bottles. If you act a little more creatively, then such a flowerpot can be painted , and not just one color, but draw some kind of pattern or animal, and if the cut is not made in a straight line, but given a certain shape, then the resulting flowerpots will not even be give away your origin.
Another good option is to cut a hole in the side wall of the bottle and fill the tightly screwed bottle with soil, planting the selected plant there. Such pots will look spectacular hanging on the wall.
Construction of capital buildings
The burning problem of all summer residents is the construction of a house and auxiliary buildings on a garden plot in conditions of a small land plot and limited funds. In addition, the seasonal purpose of the dacha does not imply the construction of permanent structures “for centuries”.
So, enterprising people decided to use a prosaic plastic bottle as a building material. The walls of houses, gazebos, greenhouses, and other garden structures are laid out traditionally - in a checkerboard pattern using cement mortar, only instead of bricks, unnecessary plastic containers filled with sand are used.
To support this not entirely familiar eco-style, you can make a variety of crafts from bottles for the garden so that the design of the site is decided in a single key. Let's look in detail at how you can make your life simpler and more comfortable with the help of PVC containers.
Country house
Despite the apparent simplicity of building a building from plastic containers, there are some nuances that you need to take into account if you decide to build a country house with your own hands. Here are a couple of useful tips:
- Place a reinforcing mesh between the rows of masonry - the adhesion of the solution to the surface of the bottle will improve.
- Do not forget that plastic does not come into contact with cement like brick, so make small holes in the container - this way the solution will begin to interact with the sand inside the bottle and the wall will become stronger.
- During masonry work, secure the bottles with rope or wire so that the rows do not move apart.
Please note that plastic tends to deteriorate under the influence of frost and heat, especially from temperature changes, so be prepared that after some time - 5-10 years, the walls of the building will begin the “countdown”.
Using PVC bottles as a building material, you can build an economical house in the country
The cylindrical shape of plastic bottles allows you to build houses and gazebos that are round in plan
In addition to the supporting structure of a house made of plastic containers, this universal building material, as it turns out, can be used for roofing work. We offer you two options for roofing from used PVC containers:
- Plastic tiles. To make this simple roofing covering, you need to compress plastic bottles. If this process is carried out without slightly heating the plastic, the container will simply crack, so the easiest way is to lay the raw material out in the sun and then flatten the containers. Installation of PVC modules is carried out using ordinary self-tapping screws to the frame with laying of the material in several layers. From such tiles you can easily form a cone-shaped roof for a gazebo or bathhouse.
- Plastic slate. From the cylindrical part of a plastic bottle it is quite easy to make something like a slate covering for a roof. To do this, you need to cut off the bottom and neck of the container, cut the middle part of the container lengthwise and in half, and connect the resulting PVC elements with glue, forming a wavy surface.
If you decide to build a house from wood, brick, or there is already a residential building on your summer cottage, pick up a plastic bottle and show your imagination - decorate the facade with unusual decor from plastic corks. Complex geometric patterns, floral patterns or slightly naive “cartoon” animals - choose any style that suits your spirit.
An interesting solution to the problem of country housing is the construction of a country house from a container, read about it:
It is quite easy to make a roof for a summer house from plastic bottles - either in the form of tiles or like slate
Bright plastic lids from used containers will give the facade of a country house an expressive color
Decor made from bottle caps for the facade of a country house will give the building individuality
Gazebos, greenhouses, pergolas
The most rational use of plastic bottles for the garden is not only crafts designed to decorate it, but also more significant things, for example, greenhouses or gazebos. Why buy expensive polycarbonate to build a greenhouse if the PVC from which the containers are made is practically the same material?
Why equip a greenhouse with glass that is even more expensive than laminated plastic if there are unnecessary bottles? By refracting the sun's rays, PVC containers perform the same tasks as glass and polycarbonate, moreover, this is the most economical option for building a greenhouse that you can find.
An economical option for arranging a gazebo or greenhouse in the country - building from plastic bottles
If you are bored with the traditional rectangular gazebo, make it in the form of a hemisphere using a metal frame and plastic bottles
Having built a frame of wood or metal, arm yourself with a hot knitting needle, drill or hammer with nails. One way is to make holes in the bottom and cap of a plastic bottle and place the plastic containers on a fishing line or wire, the length of which will be slightly greater than the height of the building. Stretch the resulting elements and secure them to the cross members of the frame - this way you will form the walls of a greenhouse or gazebo. Additionally, you can fix the vertical modules in the transverse direction by tying the bottles within one row with wire. Using containers of different colors, try to create some kind of ornament - this way you will diversify the colorless mass of walls made of transparent plastic.
What else can you build from plastic bottles for your garden? The most easily erected version of a small architectural form made from plastic bottles in the garden is a lightweight gazebo - a pergola, which usually serves as a frame for climbing plants. However, despite the fact that in spring and summer the pergola structure will be hidden by climbing roses or ivy, in winter its frame will be exposed and will not look very good. To avoid this phenomenon, you can decorate the pergola structure with plastic bottles of a natural shade - brown or green. The brownish colors of PVC vaguely resemble wood, while the grassy colors will enliven the appearance of the garden in the cold season.
Fences, railings, gates
You can save a lot of money if you use plastic bottles to fence your garden plot. Using the same principle that was described in the construction of the gazebo, instead of corrugated sheeting, chain-link mesh or polycarbonate, use plastic containers to fill the space between the fence posts.
With a little creativity and diligence, the border of your garden will become not only impassable, but also extravagant and eye-catching. If the fence has already been erected earlier, floral decor made from plastic bottles will give it a new sound - the most natural option for the garden.
To support country houses made of plastic bottles, build a fence using the same containers for the integrity of the landscape design
Multi-colored flowers cut from plastic bottles will refresh and decorate an old fence or country house
Carport
An eternal problem for car owners is allocating space on a plot of land to park a car or several vehicles - bicycles, scooters or ATVs. The design of a compact private or country house does not always include space for a car, so there is a need to build a separate garage or shed. The construction of these structures is expensive and beyond the means of many, so the car sits under the scorching sun, exposed to the winds, rain and snow. Ordinary plastic bottles come to the rescue in this situation - waste, useless containers that allow you to experiment without fear, without fear of spoiling the building material. If something doesn’t work out and the bottle becomes unusable, you can always take another one and not lose a penny.
Material about parking options for a car in the country will also be useful:
A carport made from plastic bottles will not only fulfill its immediate function, but will also add an original accent to the country landscape
So, from plastic bottles you can form a plastic structure, unusual in its configuration and performing several functions at once - it will create a protective plane from precipitation and sun and, at the same time, decorate your garden. There is nothing complicated about forming a canopy from bottles - it can easily be made with your own hands.
First, you need to make through holes in plastic containers, or rather, it is best to burn them with a hot rod, and then put the bottles on fishing line, rope or wire, connecting them in rows. Sequences of bottles are fastened together by perpendicular connections through another pair of holes and the previously selected material for “firmware”. Thus, a movable surface is obtained, reminiscent of “bottle fabric”, which remains to be attached to a metal or wooden frame using hangers of different lengths to create a wave-like effect.
It is important to know! Considering that a plastic bottle is a kind of lens that refracts light in the same way as glass, it is advisable to paint the bottom of the container to block direct sunlight.
No. 6. Bird feeders
You can make a bird feeder from large 5-liter plastic bottles, and even a child can cope with this task . You just need to cut a hole closer to the bottom to provide the birds with access to the grain. By bending the plastic, you can build a small porch and canopy near the entrance so that the birds can sit comfortably and snow does not get inside the feeder. Since large bottles usually have their own handles, you won’t even need to worry about attaching them to wood.
Cute hedgehogs
You can use crafts from scrap materials as decorative elements for the garden, which look not only original, but also funny. A very popular craft is the hedgehog.
To make it, you will need a regular empty bottle and hemp rope for winding. To ensure reliable fixation of the ropes, staples or glue should be used as a connecting element.
In order for the hedgehog to look as natural as possible, you should take care of such little things as the nose and eyes.
Some masters are of the opinion that it is enough to paint these elements with black paint. However, if you want your craft to look as natural as possible, you can sew the eyes and nose separately.
You can attach them to the product using glue. Thus, the fastening itself will be invisible, but at the same time very reliable.
The hedgehog will use ordinary grass as its spines. Therefore, if you have several small accumulations of grass on your site, which you cannot get around to cleaning, you can quite successfully disguise it with the help of this craft.
No. 7. Butterflies from plastic bottles
Since plastic is a fairly flexible material, resourceful summer residents have come up with the idea of making butterflies, flowers, palm trees, various animals and even stuffed animals and cartoon characters out of it. First things first.
Making butterflies from plastic bottles is a simple and creative activity. You will need bottles that are not too dense , from which the middle part is cut out and cut lengthwise to form plates: the necks and bottoms can be useful for other crafts. You need to prepare several butterfly templates in advance, their contours are transferred to plastic using a marker, now you only need to cut out the resulting shape with scissors. The wings of the butterfly are bent so that they look as natural as possible; the butterfly must be symmetrical. Now all that remains is to paint the workpiece, for which acrylic paints or ordinary nail polishes, beads, rhinestones and any other decorations are used, depending on the idea. When the paints have dried, you can glue on a mustache made of wire with stringed beads. You can attach such butterflies anywhere.
Ideas for a garden plot
Decorating a flower garden or flower bed using whole bottles or their parts is quite simple and is the easiest way to usefully get rid of unnecessary things.
The original design will not only be a worthy decoration of the site, but will also attract the attention of the neighbors, so soon you will have to give a master class to everyone.
For beginners, before starting work, a small reminder will be useful, which will be useful for quick and enjoyable work.
No. 8. Palm tree made from plastic bottles
Bringing a little tropical touch to your yard is easy. To make a palm tree you will need plastic bottles of brown and green colors, a little time and effort. There are several options for creating such a plastic palm tree; they differ in the labor intensity of the work and how similar the finished result is to a real palm tree. Let's focus on one of the best ways.
The first step is to make the future foliage of the palm tree . Green bottles are used, the bottom part of which is cut off. The remaining bottle is cut into thin longitudinal strips. In total, you need to make at least 7 branches, which can consist of any required number of blanks - the length is adjusted depending on your own preferences. When the required number of bottles has been prepared, they are strung on a cable with a diameter of 12-14 mm.
The trunk can be made by cutting off the bottom of the bottles and stringing the remaining parts one on top of the other, but it will look very simple. It's better to do the following. Cut off the very bottoms of brown bottles, leaving the convex parts intact. Then make longitudinal cuts to get identical petals, and string the blanks onto a metal trunk. To secure the leaves to the trunk, it is recommended to weld tubes with a diameter corresponding to that used to create the cable branches to the base of the trunk. composition of palm trees on the site will look especially nice .
Fun playground - decorating a place for children to play
Caring parents always strive to provide their children with a place to play in their dacha, where the children can while away the time while the adults are busy in the garden. Of course, it should not only be safe, but also colorful so that the kids will like it. With the help of plastic bottles it is easy to decorate the playground by making a variety of plants and animals. Regular paint will help give them brightness.
In the shade under a palm tree
What is a children's playground without a sandbox? And where there is sand, a palm tree must “grow”. For the tropicana, you will need green and brown bottles for the trunk and leaves, respectively.
Before you begin assembly, you need to make sure you have a solid base. For example, fix a metal pin in a concrete screed, and it should be quite long so that the tree becomes tall and children can walk freely under it.
When the base is fixed, you can start “growing” the palm tree:
- cut off half the bottle (the top and neck are not needed) and form a jagged edge;
- Make a hole in the center of the bottom, string the blanks onto the base pin, bending the teeth to the side for a more natural look;
- cut off the bottom of the green bottle and make straight cuts along the entire contour to the place where the wall meets the neck (if desired, the branches can be made into shapes - cut into 4 parts and make teeth on each one);
- string fragments of the branch onto the base;
- firmly attach the finished branches to the top of the stem (by welding or construction cords).
If after assembling the palm tree there are still a lot of green bottles left, you can use them to make a small (or large) Christmas tree. Remove the bottom of the bottle and cut it into long narrow strips right up to the neck. Trim the edges of the strips to resemble thorns. String the leaves onto the base.
Such a Christmas tree will look great on the site in winter, especially under the snow, and will also help out on New Year's Eve those who, in a hurry, did not have time to buy a living tree.
Guests from a fairy tale - funny animals
And of course, there must be toys on the dacha playground. Children often take their old favorites outside. With the help of plastic bottles, you can easily diversify the “zoo”, creating real masterpieces - from the fairy-tale Frog Princess and Goldfish to modern cartoon characters.
Take, for example, a handsome cat, painted with black and white paint. Or you can use brown beer bottles and you will get a brown cat, also beautiful.
Form a head from two bottle bottoms (connect them), and the curves on the bottoms will indeed look like a real head. On one of them, paint eyes, eyebrows and mustaches with white paint, and a neat tongue with red paint. Insert small cut out ears on top. For the body, string the same short-cut bottoms onto the base, closing the body last. Melt the edges of the bottoms. Apply white paint along the melted contour of the ears and body fragments, and make a white spot on the chest on the front bottom.
Glue the head and legs - the top parts of bottles with elongated necks will be useful for them. Cut them to the place where the bottle expands, cut the edges with sharp teeth and build legs from 4-5 parts, putting them on the base wire. Screw the plugs onto the upper necks and use them to glue the legs to the body. For the tail, take a long wire and string the narrowest parts of the neck onto it, but without the plugs. To make the tail fluffy, cut the edges into thin strips.
Beautiful animals from plastic bottles are also obtained from large 5-liter containers. With the right combination of bottles of different sizes and with the help of bright colors, you can place a zebra, horse, cow, donkey and even a giraffe on the site.
Flowers for my daughter
In the sandbox, children not only make Easter cakes. Little girls love flowers very much and often pick dandelions on the lawn (or roses from their mother’s flowerbed) to plant in their sand garden. But you can make a whole greenhouse of flowers from bottles, and little girls will be happy to take part in making the simplest options. Chamomiles, cornflowers and tulips will decorate the sandbox, especially since young flower growers will be able to repeatedly “transplant” them from bed to bed without harm to the plants or mother’s nerves.
For flowers you will need:
- wire for the stem;
- straight parts of bottles for cutting leaves out of them;
- necks or bottoms for the inflorescences themselves;
- dye.
Adults can make more complex versions. Plastic roses or poppies will decorate not only the playground, but also the flower bed.
No. 9. Animals made from plastic bottles: piglets, peacocks and others
Once the general principles of working with plastic bottles are clear, you can create whatever your heart desires from them, for example, a variety of animals, and the ideas described below will serve as inspiration.
- Bottle piglets are the easiest way to decorate your yard. The basis will be a 5-liter bottle. It will be necessary to cut out the pig's ears from 2-liter bottles, and the necks of small plastic bottles will be used as legs. When all the parts are ready, they are glued together using a glue gun, and the finished “animal” is painted with pink paint. After drying, you can draw or glue eyes from buttons, outline the contours of the ears and penny with paint, and make a tail from wire. If you cut a hole in the back of the pig in advance, the figurine can be used as a flowerpot;
- A plastic peacock will require much more effort and time, but painstaking care and patience will ultimately pay off with an impressive result. A plastic canister or synthetic foam is used as a base, from which it is easy to form the desired body shape. The longest stage is making feathers. They should be of different colors and sizes: from the longest for the tail and body to the shortest for the chest and head. Large feathers can be cut into thin strips. For the beak you will need a red bottle; to create the plumage you need to glue the prepared feathers in stages, alternating sizes and colors. For the wings and tail, you can use an abrasive mesh to which the feathers are screwed. All that remains is to connect all the details, design the eyes and crest;
- Bull . You will need two 5-liter bottles, the bottom of one is cut off to insert one bottle into the other. The neck of a 2-liter bottle (used to create a neck) is cut off at an angle and attached to the neck of a 5-liter bottle. You can use a plastic cup as a nose. The horns and legs are made of thick wire. Now you need to prepare a large amount of cut paper and paste the workpiece in 4-5 layers to form the figure of the future bull. To add volume and naturalness, you need to make a mass of egg trays soaked overnight and well crushed, PVA glue and putty. The resulting elastic mass is applied to the workpiece and the appearance of a bull is formed. When everything dries well, you can paint and decorate the craft. In this way you can create any shapes you like. It is especially easy to form large decorative mushrooms, the basis for which will be 2-liter bottles.
These examples describe the basic techniques that are used to create animals from plastic bottles . Using these principles, you can create an elephant, giraffe, fox, penguins, ostrich, swan and many other animals. In a similar way, you can also make famous cartoon characters or some fantasy creatures.
Homemade figures
Figurines for the garden and vegetable garden are cheapest to make with your own hands. The material you can use is clay or gypsum.
In the first case, you will need a kiln, so for many this can be a problematic solution. Most often, clay products are coated with a special glaze so that they last longer and do not lose their brightness.
Plaster figures are more affordable; they don’t even need to be painted, but can be specially aged. Ideal for creating custom sculptures. Speaking of simpler materials, you can even use construction foam.
The main feature: you can cut out a large number of figures from it, fill them with ordinary solution and paint them.
The cost of several products will barely reach 100 rubles. Usually there are always a few unfinished bottles of this mixture in the utility room.
If you don’t want to spend a lot of time, you can use plastic bottles or tires as a base. Even such decoration can become a source of good mood
No. 10. Flowers from plastic bottles
As diverse as the world of flowers is, there are so many ways to create artificial flowers from plastic bottles. Here are some interesting options for inspiration.
The easiest way to create flowers:
- cut off the bottom part of the bottle;
- make longitudinal cuts to form petals; they can be given a pointed or curved shape;
- heat the petals over a candle and give them a certain shape;
- All that remains is to assemble the finished flower from several such blanks, stamens and stem.
Instead of necks, you can use the main part of the bottle. Initially, you need to prepare templates, trace their outline on the bottle and cut it out. Now, with the help of a candle and tweezers, you can give the flower any shape you want. The flower is assembled from several such blanks, which are glued or stitched. This way you can make roses, carnations, daisies and other flowers. The corollas of the sepals are made from a green bottle using the same technology: creating a stencil, cutting out a part from plastic, melting.
The stem is made from wire and a green bottle cut into a spiral. The wire is wrapped in a plastic spiral while being heated over a flame. The sepals are attached to the end of the wire, and then the corollas of the flowers. Leaves are made in the same way as petals.
A sunflower can be made as follows:
- the bottom must be cut off from three plastic bottles (preferably in the shape of a barrel), and the neck must also be cut off from two of them;
- each workpiece is cut into petals of the same size, the edges of which are given a certain shape;
- all petals are painted yellow with enamel paint, after drying, all three blanks are assembled and glued together;
- the core is made from the bottom of a brown bottle and glued to the workpiece.
These simple rules can be used when making any other flowers.
Original all-season flower beds
The summer season is passing, and living flower beds are being replaced by homemade plastic flowers that are no less beautiful than real ones. Their advantage is the ability to decorate the territory at any time. These flower beds pale in comparison to living plants, but in early spring and late autumn they alone attract admiring glances.
For daisies you will need small plastic containers of white (petals), yellow (centers) and green (leaves). You will also need an awl and a candle (for heating), “liquid nails,” scissors and stiff wire in green insulation.
We cut the base of the white bottle to the center, marking 16 segments - these are the petals. We bend the neat edges over the candle flame, and also make 2-3 chamomile corollas, which we connect in the center with an awl. Here the stem with leaves is fixed on a green wire, closing with the middle. We fill the center of the flower with a yellow basket with small cuts from 2 finely dissected circles with a fringe bent over the candle. We supplement the flower with green sepals from the bottom, collect all the parts and fix them together.
From the remaining pieces of green plastic, cut out leaves with a hole at the base (for stringing) and give them the desired shape, heating them over a candle flame. We attach the leaves to the wire handle; they should bend around it slightly. All that remains is for the chamomile to make several “companions” and find a worthy place for the bouquet.
Using samples and imagination, it’s easy to make plastic lilies of the valley, roses, chrysanthemums or tulips. To do this, you need plastic of a suitable color, from which several layers of petals are made to achieve a resemblance to real flowers.
All-season flower beds include mosaic compositions made from containers filled with earth. The lids are used to make wall panels. “Butterfly” or “ladybug” - in different versions.
No. 11. Lamp made from a plastic bottle
A summer cottage definitely needs lighting, and if you don’t have extra money to buy ready-made garden lamps, and you have more than enough imagination and plastic bottles, you can make a nice lampshade with your own hands. It is important to take into account that plastic melts when heated, so you will either have to maintain a significant distance from the lamp to the lampshade, or use LED bulbs, which hardly heat up.
A couple of interesting options for plastic lamps:
- the top of a 5-liter bottle can become an excellent lampshade. You just have to cut it off, paint it according to your taste, insert the socket, connect the wire and screw in the light bulb;
- You will get an interesting lampshade if you glue numerous small leaves from a green plastic bottle onto a metal frame. The leaves can be given a characteristic pattern using a soldering iron. The finished elements are glued to the base, the shape of branches with foliage is formed, and a light bulb is inserted inside.
Pros and cons of using plastic
Why choose plastic for crafts:
- it is easy to get;
- plastic, easy to cut and melt;
- moisture resistant, suitable for outdoors.
If you do not throw away plastic containers, but recycle them into useful and beautiful devices, you can contribute to protecting the environment.
Negative qualities:
- fusible;
- unpainted fades and gets dirty;
- retains odors.
White plastic will become covered with dust and stains after rain, so it is better to take dark material or paint the product with acrylic paints.
The material cannot withstand high temperatures. It is rarely used in the manufacture of lamp shades. The plastic cap will withstand a low-power light bulb, but will melt from a bright light bulb. An option is to make floral, foliage decor on top of heat-resistant glass.
No. 12. Greenhouse made from plastic bottles
Plastic bottles can be used even for the construction of small outbuildings, and due to its basic properties, plastic is excellent for the construction of greenhouses. It holds temperature well, does not melt and is 20 times stronger than dense polyethylene. True, to build an average greenhouse you will need to collect 500-700 bottles.
There are two main options for using plastic bottles to create greenhouse walls.:
- bottles with the bottom cut off are placed on a thin wooden strip, while the neck of one bottle is tightly inserted into another bottle;
- the second option involves cutting off both the bottom and neck of the bottle. What's left is cut lengthwise to create a rectangular piece of plastic. All elements obtained in this way are ironed through thick paper until a completely flat surface is obtained. After this, small pieces of plastic need to be connected to get larger ones. It is better to do this with an awl, or sew with wire or cord thread (it is not recommended to use fishing line and thread in this case). It is better to connect the elements with an overlap.
When the main building element for the walls is ready, you can proceed to the construction of the frame for the greenhouse. Typically, wooden blocks are used for this, which are connected using nails and a hammer. The shape of the greenhouse can be a triangle or a house. When the frame is ready, the previously prepared elements are attached to it. If strips with bottles are used, they must be placed as closely as possible to each other. The plates are simply nailed to the wooden frame. It is better to make the roof of such a greenhouse from polycarbonate so that it can withstand snow loads.
The use of PET containers in a summer cottage
What is a plastic container? These are, first of all, polymeric material and ready-made containers. From this angle, any summer resident with a creative vision and straight hands will be able to make a lot of useful devices for the household from ordinary PET bottles, create elements of garden decor and turn empty containers into necessary things.
The main advantage of plastic containers is the lack of cost. In addition, PET is light, plastic, resistant to atmospheric influences and UV radiation, and can be easily processed. A plastic bottle filled with water can withstand enormous external pressure and can act as a heat accumulator. And most importantly: in any variation, all plastic containers have a threaded section and a lid. And this is a very important thing for any master to do, which will help fasten products if such a need arises. Let's consider several options for using plastic containers in the garden.
No. 13. Gazebo made from plastic bottles
A gazebo on a summer cottage can be built in the same way as a greenhouse, but the structure can be made more permanent. Glass bottles are usually used for this, but plastic ones will also work. The idea is to use sand-filled plastic bottles as bricks . The sequence of actions is the same as when building a regular brick gazebo: after constructing the foundation, the bottles are laid on the mortar. The gazebo will be stronger if you use reinforcing mesh between the rows. It is advisable to hold the erected walls with something until the mortar is completely dry so that nothing spreads. The shape of the gazebo and its individual architectural elements are thought out in advance. By the way, country fences are built in a similar way.
How to make swan figures
Beautiful white swans will become a real decoration of the site. An unnecessary plastic basin installed upside down is suitable as a frame base. The neck is made of intertwined metal wires, bent in the shape of the letter S. The wire is attached to the basin by drilling a hole in it.
The basin is coated with cement; rags and pieces of foam plastic are used to form the necessary bends. Form wings and tail. The wire for the neck is wrapped with rags soaked in cement, and cement is gradually applied on top, in thin layers, forming a neck of the required thickness and a head.
Decorative adjustments are made on the wings and tail, imitating plumage using scraping. The eyes and beak are outlined on the head. Leave the swan to dry for at least a week. After this, the product is sanded, primed, and painted.
No. 14. Device for deep watering of plants
Some plants do not like surface watering, so they need to deliver water as close to the root system as possible. An ordinary plastic bottle will come in handy in this case too. It is enough to cut the bottom to make a freely opening lid. The soil around the plant is torn up and a stone trench is laid out to prevent water from eroding the soil. All that remains is to put the bottle upside down and dig it in a little with earth. If necessary, just open the lid and pour in water. You can bury the bottle upside down, but in this case it will be necessary to make a lot of punctures in its lower part so that the water can flow out calmly.
Hedgehog
A funny hedgehog placed near a flower bed, under a tree, or on the porch of a garden house will attract attention. It can be made using a three-liter plastic bottle and gray bags
The table shows the stages of making this animal.
| Stage number | Description | Photo |
| 1. | Pour cement into the bottle or fill it with soil, pebbles, sand. The neck is wrapped with tape to give shape. | |
| 2. | Strips 50 mm wide are cut out of gray bags. They are wrapped with them, fixed with glue, and on top with tape, the future face of the hedgehog | |
| 3. | Fold two strips in half and cut the fringe with scissors | |
| 4. | They are attached to the body, starting from the wide end. Part of the abdomen container remains free | |
| 5. | Repeat the operation until the beginning of the muzzle, which remains without “needles” | |
| 6. | For the back part, the strip is rolled into a cylinder and fixed with glue | |
| 7. | On a sheet of black self-adhesive film, draw a circle the size of the hedgehog’s nose. Add allowances of 5 mm | |
| 8. | After cutting along the edge, incisions are made and the nose is fixed. | |
| 9. | Cut out parts for the eyes from white and black oilcloth and glue them on | |
| 10. | For the ears, a 40 x 40 mm square is glued diagonally, having first removed the protective layer. Round the top corner | |
| 11. | After gluing the ears, the hedgehog is ready |
You can engage in exciting creativity with your children, developing their artistic abilities. This craft is available to beginner craftsmen who want to make original decorations for the garden.
No. 16. Tool storage boxes
In this case, it is better to use rectangular bottles , such as those in which machine oil and liquid washing powder are sold. All you have to do is make a hole of the required size on one of the walls, and the box for small garden supplies is ready. If several of these homemade boxes are inserted into a bedside table, the walls and shelves of which are made of chipboard or plywood, you will get a full-fledged storage space.
The number of possible crafts made from plastic bottles is not limited to this list. Depending on the style and design of the summer cottage, the needs and tastes of the owners, you can actually create a lot of different useful or simply decorative things from waste.
The article was written for the site.
Tags: Landscaping
Crafts from household items
Interesting DIY cement crafts can be made from a wide variety of household items, shoes, clothes, for example:
- Old shoes or boots. They are simply dipped in the solution, dried, sanded, primed, and painted if desired. This craft will be an excellent flowerpot for plants.
- Shirts. An item of clothing is placed in the solution. 3-4 sticks are stuck into the ground and the shirt is hung on them until it hardens. The finished product will be an original version of a flower bed.
- Plastic containers. The container is wrapped in a plastic bag. A bag of sand is placed inside to maintain its shape. The outer side is covered with cement. Allow to dry, after which the sand bag is removed and several holes are drilled in the bottom for better drainage. The craft is primed and painted. Cacti can be planted in containers.
When decorating the landscape design of a garden, you must first learn how to make crafts from cement and correctly place them on the site. You shouldn’t place too many crafts in a small area (2-3 original compositions will be enough), the figures are too large. In a large garden, on the contrary, too small items run the risk of getting lost. Compliance with these conditions will turn the site into a beautiful, unique and cozy place.
DIY garden figures
Sleight of hand and no fraud
The photo shows an example of a simple and effective craft.
How pleasant it is to find this miracle among monotonous and boring courtyards with professional and identical landscape design or lack thereof: a plot decorated with fairy-tale characters, flowers, cartoon characters or non-existent good monsters!
Concrete garden figures will decorate and transform your dacha.
You involuntarily stop, admire, absorb positive vibrations and notice how bad thoughts have left your head, and with a barely noticeable smile you continue on your way...
Who are they, the creators of this wonderful fairy-tale world of the master? Maybe some artists live here or just rare talented people? In fact, these are simple summer residents who showed a little love for their garden and began to creatively transform it.
DIY plywood garden figurines are as easy as shelling pears.
Anyone can create similar figures for the garden from plywood with their own hands, you just need to start. In the process, you will see for yourself that anything can be used, unless at the beginning you need a little instruction, guidance, and we will try to provide it to you.
You can easily cut garden figures from wood with your own hands using a jigsaw.
Important! The most difficult thing is to believe in yourself and overcome shyness.
Show the world your love and joy, and it will reciprocate, and the technical side of the issue rivals in complexity the crafts of the children's art club.
Plastic
The price of any work is empty eggplants, a little glue, newspapers, wire and other improvised materials, of which there are a lot at any dacha.
Plastic is the favorite material of amateur decorators of summer cottages. It is easy to process, lends itself to various methods of fixation and installation, and its source is ordinary nylon bottles and plastic containers, of which a whole sea accumulates against your will.
A sea of bottles magically turns into a fairy-tale forest.
Of course, you can only work with bottles and plastic, but more often combinations of materials are used, among which you can find:
- Papier mache. From childhood, we all remember the technique of gluing newspaper scraps, gradually building up the layer and forming the shape or detail we need. Any glue for wood or paper will do here; you can use a homemade paste made from flour or PVA;
- Metal wire. An excellent way to attach parts, fix and connect individual parts together. The material is pliable, easily cut with nippers or scissors, and is available in abundance in any country attic, basement or workshop;
- Concrete. This material is also available in the countryside and plays the role of gypsum, only durable and waterproof gypsum. Do-it-yourself garden figures from concrete are much easier to make than it might seem at first;
- Plywood. From scraps or whole sheets (if you don’t mind, of course), you can cut out any shape or part for a summer cottage, because electric jigsaws allow you to do this without any special skills or experience;
- Various pieces of plastic pipes, hoses, corrugated channels, insulation - these are almost finished paws, fingers, necks and tails of fairy-tale or real animals, it all depends on your imagination and courage.
Here are the space wasps, assembled from different parts of eggplants and pieces of cable as legs.
But let's get back to plastic. Empty eggplants are just Klondike: here you can see both the whole body and the finished pig, and by cutting it into the necessary pieces, you can collect plumage, petals, ears - whatever you want.
Important! The material is easy to cut, glue, fasten with wire or fishing line, screws and other materials.
Thus, plastic can serve both as the basis of the product and as elements of its decor.
Giant mushroom from a bottle and papier mache
DIY garden figures made from papier mache are one of the easiest ways to make them.
So, so that you understand what we’re talking about and believe our stories, let’s look at making a mushroom step by step:
- We take a plastic lid from paint or putty, cut a hole in its center and put it on the neck of a 1.5-liter eggplant;
Place the cap on the bottle as shown in the photo.
- We dilute PVA glue in water, cut the newspaper into strips and paste it onto the bottle and cap in layers using the papier-mâché technique. Form a mushroom shape;
We form a mushroom from papier mache.
- Soak the egg trays in a bowl of water overnight, then grind this mass in a blender and add a little PVA and putty. Stir until smooth;
Mix the crushed and soaked mass with PVA and putty until smooth.
- We apply the resulting mass with our hands to our mushroom, giving it a more natural outline. The mass is applied by hand, it sticks well and sets quickly;
We apply a coating of trays and glue to the mushroom.
- We sculpt the elements of the face from the same egg-tray mass - nose, cheeks, beard, eyes. We add hands and other details of our hero if desired. Let it dry;
We sculpt the details of the character.
- After the mass has completely dried, we cover our giant with waterproof grout for tile joints. The grout is prepared according to the instructions on the package;
We cover the old forest dweller with grout for the joints.
- When the grout has dried, we paint the hero with façade paint. It is better to use acrylic or silicone paint. Voila - our giant mushroom is already asking to go into the garden, where the most prominent place has been prepared for it.
So that grandpa doesn’t get bored, you can add him a company of the same humanoid butterflies.
Important! Don't forget to apply a good coat of waterproof grout and two or three layers of exterior paint, otherwise the rains will quickly turn your masterpieces into a pitiful sight.
How many people - so many ideas
DIY garden figures made from tires are often found in the courtyards of estates and even large cities.
Now we want to say the main thing. You are not limited by anything except your imagination and creative thinking: garden figures made of metal, empty pots, old dishes, toys - and what not you will find.
DIY concrete garden figures are frequent inhabitants of fairy-tale courtyards.
Experiment and don’t be afraid of anything - this recipe has given many interesting and even important results during the history of human development, and work and creativity will make you truly happy people.
Start small, try your hand at different techniques, and over time you will understand that nothing is impossible, you will find your own material and technique, style, and, perhaps, people will start talking about you as a new self-taught sculptor, whose work will be used as an example others and post on design forums.
By gradually improving your skills, you can discover the true Master within yourself.
Most of those who make money today by making exclusive garden sculptures started out this way, without having the slightest idea about painting or sculpture, or what about sculpture – banal modeling.
What is important here is not academic knowledge (although it will not be superfluous), but the desire to create, the desire to feel like a child again, the desire to give people moments of joy from contemplating your work.