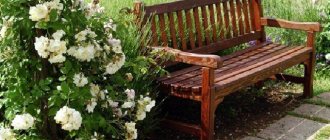
A bench for relaxing in the fresh air should be on any local area. They use different materials for it, but more often we are talking about the symbiosis of metal and wood - a durable frame is made from the first, and the flooring for it is made from the second.
Benches made from profile pipes are popular; this material has many advantages, and the result is of high strength and quality.
A simple do-it-yourself metal bench covered with wood
Bench protective covering
Wood and metal are processed separately. It is better to use a primer for the frame. Ideally, red lead will be used, which will protect the metal frame from corrosion for decades. Especially when you consider that at the dacha such garden furniture is under the snow for six months.
The wood can simply be painted. But if you first dry it, let it dry for a couple of days, then apply varnish in two layers, then such a coating is guaranteed to protect the wood from environmental influences.
In any case, color compatibility and design ideas are important. For example, if the frame is covered with Kuzbasslak, then it is better to varnish the wooden parts, this will emphasize the natural texture of the material.
To make the protection of the bars effective, the treatment is carried out before fixing to the frame.
Required Tools
- saw (for cutting wood if it is too long);
- screws;
- roulette;
- manual grinding machine;
- pencil;
- eye and ear protection.
Metal profile pipes as a material - advantages and disadvantages
Metal profiles are widely used for making benches. The material is made of carbon steel and has a number of positive characteristics:
- easy to process;
- resistant to loads;
- welds well;
- has an affordable price;
- has a small mass.
Despite many advantages, profiled pipe has some disadvantages:
- to give the pipe blanks a curved shape, special equipment should be used;
- It is necessary to install plugs at the ends to seal the internal cavities of the pipe in order to prevent corrosion.
Sketches of benches made of metal and wood
The simplest form of a bench consists of 2 supports and a seat. More comfortable models are equipped with backrests and armrests.
The simplest form on supports does not require special knowledge and experience to create
The design of the bench with a backrest is more convenient for relaxation.
Sketch of a bench made of a metal frame with a wooden seat and back
The photo of the drawing of a bench made of metal and wood shows a model with a height of 95 cm, a length of 150 cm and a width of 60 cm. The shape of the product with armrests and a back allows the vacationer to sit comfortably. This element is placed in the garden and recreation area.
Bench layout for comfortable use
When selecting the size of a bench, the following rules apply for comfortable sitting of one person:
- Length is 60 cm.
- Width 30 cm.
- Back height 30-50 cm.
- The angle of inclination of the backrest in relation to the seat is up to 120.
- Height 38-45 cm.
Sketch of a garden bench that is particularly comfortable.
Wooden elements are arranged transversely or longitudinally. The first design is more convenient to use. The second one is easier to install.
Options for the arrangement of wooden blocks
During operation, the element may be damaged; replacing transverse parts is more economical than longitudinal ones.
The metal frame and wooden cladding are treated separately with protective agents, since the mixtures are different in composition. The profile base is treated with an anti-corrosion compound and covered with decorative enamel.
The wooden beam is coated with moisture-resistant impregnation and decorative varnish or paint that is resistant to weather conditions.
The color of the decorative coating is chosen to match or contrast.
Briefly about the main thing
Folding garden furniture is convenient not only when there is a lack of space on the recreation area. When the table is not needed, it is removed with one movement of the hand, turning the dining set into a comfortable bench with a backrest.
To have this opportunity, learn how to make a transforming bench with your own hands. A simple structure can be made from either a metal profile pipe or wood.
This will require ready-made detailed drawings, since the most difficult thing is to manufacture all structural elements in exact accordance with the project. Combining them into a single whole is a matter of technology. After looking at the photos and videos in this article, you will surely cope with this task.
Ratings 0
Bench dimensions
The dimensions of the bench depend on the purpose, model, and type of seat. When choosing, you should pay attention to the width of the boards, the depth of the seat, and the height of the backrest. It is these parameters that have a significant impact on comfort.
The typical length of a park bench is 150-180 cm. These are universal dimensions; this design can accommodate 3-4 people. The height of the bench also varies, but the typical version with a backrest has a height of 90 cm, which is exactly the size we are used to. The height of the seat is measured from the ground and is at least 40 cm. If you want to equip an individual area, you need to consider whether this particular height is needed, because completely different proportions are suitable for children. The key factor in determining the height is the legs, which, depending on the shape, have different sizes.
How to create a metal bench for the garden
Stationary benches in open space, suitable for year-round use, are made of metal profiles.
What materials are best to use
- steel profile;
- vice;
- welding, electrodes;
- grinder, wheels;
- drill;
- measuring instruments (tape tape, building level);
- file;
- snail machine;
- blowtorch (bending);
- metal paint and its processing (priming of seams);
- sand for filling the inside of the profile when working with it;
- fasteners (bolts).
This video shows the process of creating a garden bench with your own hands along with drawings
The variety of variations in cross-sections of profile pipes made of low-alloy and carbon steel determines their popularity from an aesthetic point of view. And the affordable price and lightness of the material, strength characteristics elevate it to the category of the most profitable. It is advisable to make combined variations from a metal frame, provided you have the necessary tools and minimal skills.
Making a metal bench with a wooden seat will require adding:
- planer for untreated boards;
- paints (stains);
- hammer, pliers;
- self-tapping screws;
- wooden beams.
The legs of the frame are covered with plugs. Making a garden bench with your own hands involves installing wooden elements after applying anti-corrosion agents to the metal and allowing it to dry completely.
DIY metal bench
Next, we will present step-by-step instructions for assembling a homemade bench from a profile pipe.
Frame assembly
In the example under consideration, the master used a 20*40 mm profile pipe bent into an arc as the main material, which remained unused after assembling a small polycarbonate gazebo. Here's how it happened.
Do-it-yourself garden bench from a profile pipe - the source material for making the bench
The use of bent parts made the final result interesting and elegant. If desired, several figured forged elements can be included in the structure.
First of all, it is necessary to cut off the crease that forms after the pipe bender from the bent tube. You can also cut off the second end of the pipe, which remains straight.
Trimming a crease from the end of a pipe using a grinder
Next, marking and cutting of the parts from which the base will be made is carried out. As you can see, this required a section 1 m long. By the way, in fact, the pipe section will be longer, since the tape measure is installed without taking into account the rounding.
The cut of the pipe must be clearly perpendicular - to mark it correctly, use a carpenter's square. First, one part is made, after which it is used as a template to measure the second.
Marking the meter base part
Shorter parts are noted - there will be 4 of them, exactly 40 cm long. Keep in mind that you now need to measure the length of the pipe clearly along the radius, and not directly, as was done earlier.
We assemble the side parts of the bench frame from the obtained parts, as they will be installed after welding. At this stage, you can adjust the position of each element, achieving the most convenient one.
This is what the base of the frame will look like
Again we take up the measuring tool and the grinder. Now we need to check the length of the front legs, which in the example under consideration was 46 cm. In your case, you may get completely different values, since they will be influenced by the steepness of the bend of the pipe and in general your own dimensions, maybe you are 2 meters tall and an oblique fathom in shoulder
After the described manipulations, the fitting of the joined parts begins. The main difficulty is to make cuts at the correct angles, otherwise the finished product may be fragile and even misaligned.
When working with curved parts, it is impossible to use special tools for these purposes. You have to rely only on your own eye. An example of work is shown in the following photo.
Marking the connection of metal parts
We advise you to measure and cut the parts one by one. Before you take up the grinder, double-check it several times, not forgetting the well-known saying. After making sure that there are no errors, we try to make the adjustment. In some places, part-time work may be required. We are not afraid to do them while we are assembling the first side; now we have much more room for maneuver. The second part of the base will have to correspond exactly to the first.
This is what happened in the end.
Parts ready for welding
Parts of the first side of the base are used as templates for the second. The parts are made identical, otherwise there will be irreversible distortions during installation.
The parts of the base are welded exactly according to the markings. It is recommended to first secure them with clamps.
First, spot welding is done in order to only grab the joints without allowing the metal to warp. After this, the seams are completely welded.
We remind you that when performing welding work, you must protect your eyes and skin. Clothing is used only with long sleeves, since due to the abundance of emitted ultraviolet radiation, the skin receives unpleasant burns. We work in a mask, not glasses.
Carrying out welding work
After welding, the metal must be prepared for further work. Parts are cleaned and polished. Scale is knocked off the weld seams, and untidy deposits of metal are removed with a grinder. The main thing here is not to overdo it and not to damage the integrity of the seam.
The rest of the surface is treated with a wire brush. In principle, such processing could have been carried out in advance, since some faces of the structure may be inconvenient to access.
Next, two pieces of 155 cm each are cut from a straight profiled pipe. With their help, both sidewalls will be connected to each other with a plow. The details will give the bench the necessary rigidity. They are welded front and back to form a closed frame, as shown in the following photo.
Frame assembly is almost complete
Welded joints also need to be cleaned of scale and made as smooth as possible.
The boards will be installed on top of this frame. The outer ones will be supported along the length of the metal frame, while the central ones can sag. To prevent this from happening, you can weld one short cross member in the middle, or two, dividing the frame into three equal segments.
The back in the middle should also be strengthened. Fortunately, there is still a piece of bent pipe left for this. The reinforcement is installed without legs.
The tops of the backrest also need to be connected with a piece of profiled pipe. We measure its length after the fact and weld it into an almost finished structure.
Reinforced with jumpers both seat and back
Since the seat and the sides are connected by only two points on each side, there is no need to talk about the reliability of the bench yet. To increase strength, it is worth adding at least one bevel. They are also made from bent parts, if you still have any at your disposal.
Plates should be welded to the legs to increase the stability of the structure. To create them, you can take cut out walls of the same pipe, but it is better to find metal of a larger area.
In our situation, the master showed ingenuity and used old brake pads, ground to evenness, as thrust bearings.
Thrust bearing made from the metal part of the brake pad
Frame covering
To cover the frame, profiled boards 25 mm thick were purchased. If you want to save money, you can use any convenient lumber, but then you will have to spend a lot of time processing it.
Trying on the board - if the calculation is done correctly, everything falls into place
All that remains is to estimate the position of the boards and screw them on; when working with rough lumber, perform the following steps:
- If the boards are moved by a “helicopter”, they are first passed through a surface planer, simultaneously precisely adjusting the size of each element.
- They are then cut into pieces of the same length according to your drawings. For work, it is better to use a miter saw so that the cuts are exactly 90 degrees. The boards need to be cut on all sides.
- The side edges of the boards are processed using a milling machine or a hand router to give them shape.
Forming curved edges with a manual router - Next, the material is polished - first a larger abrasive is used (120), after which it is gradually reduced down to 300.
- If there are cracks on the surface of the boards, it is recommended to putty them, but only if opaque paint is placed on top, otherwise the putty will show through and differ in color from the wood.
Let's return to assembling the bench. Having completed the preliminary layout, we accurately mark the position of the boards so as not to accidentally displace them. We drill holes with an electric drill, simultaneously going through the thickness of both the metal and the board.
First, you should accurately measure the point where the drill enters the wood so that there are no noticeable displacements.
Metal drills are used for work
Since the length of the boards was not adjusted initially, we trim them after installation, drawing one straight line. For this we use a square and a circular saw.
It's easier to mark a tree with a pencil
We leave 10 cm overlaps of the board along the edges of the bench. This way it will look more beautiful and the usable seating area will increase.
We do the same with the back - the gaps between these boards may be larger, since there will not be such a load on them as on the seat.
Further processing of metal and wood
When the parts are ready, the bench needs to be disassembled, so there is no need to tighten the bolts in advance - they are simply inserted into the holes. We do this for the convenience of painting both the frame and the wooden parts of the structure.
- The last metal treatment that was performed was wire brushing. Next, it should be washed with a degreaser. To do this, the composition is poured onto a soft rag and rubbed over all parts of the structure.
- Then the metal frame is painted. The paint chosen is hammer paint, which means the coating will be durable and aesthetically pleasing. The composition must be applied in two layers, allowing time for intermediate drying.
Painting a bench with hammer primer-enamel
The advantage of paints with a hammer effect is that it creates not a simple one-color coating, but an iridescent surface, somewhat reminiscent of granite. This can be seen upon closer inspection.
Hammer paint finish – beautiful and durable
Next we process the boards. They can be coated with dark varnish, which will give the material a noble shade. If you want a deep color change, we advise you to saturate the wood with stain before applying varnish, which will color it thicker.
Transformation of lumber Return to contents
Hanging bench for rest
It looks like there is a hook screwed into the ceiling. On it hangs a bench suspended from ropes. If your vision of the perfect summer involves sitting on the porch with a cold lemonade and a good book, you'll want to add a fun hanging relaxing bench to the equation. With just a few metal pipes, canvas fabric, strong rope, and a support hook, you can build this stylish rocking bench in no time. It's the perfect place to relax in the summer, read magazines and sip lemonade.
What you need:
- 3 metal pipes 1.5 meters long and about 10 cm wide;
- two wooden sticks 5 cm wide and 1.5 meters long;
- rope (make sure the weight limit is at least 300 kg);
- hook (make sure the weight limit is at least 300kg);
- canvas, which is used as a seat;
- drill;
- tape measures, scissors.
How to do it:
- Cut five metal pipes 1.5 meters long and about 10cm wide. If you want more color contrast from the canvas, paint all five metal pipes.
- Cut a piece of thick fabric measuring 2 x 1.3 meters. Fold the shorter edge of the fabric over and stitch so that you can thread the pipe through. Do the same on the other side of the short edge of the fabric. Thread the two tubes into the fabric (at the short edges). You should have a seat: fabric with pipes inserted along the short edges (one pipe from each edge 1.3 meters). Now, for the stability of the structure, we thread two more wooden pipes perpendicularly into the metal pipes. To do this, you need to make holes in the metal pipes, stepping back 10 cm from the edge. We insert a wooden stick into these holes from the left side. We screw it to a metal rod. Now do the same on the right side. The seat is ready. At the top and bottom there are metal pipes threaded through fabric, and on the sides there are wooden sticks for stability of the structure. Now the seat needs to be hung.
- Drive a metal hook into the ceiling.
- Hang the rope in the hook: thread the 6 meter rope in the middle into the hook. The ends should be 3 meters on each side.
- Tie a third metal stick under the hook: tie ropes down from the hook at the ends of the stick. Place the ropes down and hang the top of the seat around the edges.
- Tie the lower part of the seat on each side to the third stick under the hook. All is ready. The bench is ready.
- Trim the excess rope (you can leave some rope hanging again if you like). The ends of the hanging rope can be unraveled and fluffed for decoration.
Tags
Benches for Benches for 2 benches Arched bench Wrought iron bench with Active leisure and Active leisure and Interior trees and wood wood Natural wood solid wood made of wood with a wooden covering around wood and non-wood wood make a bench from Open benches from make a bench from A beautiful bench is made from the elements of a bench A bench made of blue metal and metal Forged metal metal metal base Loft metal made of metal
wood plotdescriptionenlargegrayart
Combined designs
In addition to standard benches made from one raw material, there are combined analogues. They come to the rescue in the following situations:
- If a specific consumable material, be it metal or wood, is scarce;
- When you need to achieve good strength, light weight and expressiveness at the same time;
- If you need to give the product ergonomic properties.
In the latter case, a simple wooden bench can become a swinging or folding bench using metal in the form of fittings.
Some people complement the themed product with a canopy to provide shelter from rain and sun. Moreover, the canopy can be arranged so that it is detached or located separately.
Synthetic textiles or transparent slate are usually used as roofing material.
