How to build a hut on a tree with your own hands?
Clear the area for building the house, remove debris and large weeds and thorns. Choose the right tree. When choosing a tree, rely on its stability and branching.
- Build a platform.
- Install additional supports, placing them on adjacent sides of the trunk
- Install a rectangular frame, which in the future will be the floor for the treehouse.
- Make a roof from branches with the largest number of leaves and lay the branches fastened together on beams prepared in advance for this.
- Arrange the entrance to the treehouse - it can be a ladder, wooden or rope.
- You can put hay or an armful of leaves down to soften the blow when falling from the stairs.
Types of huts and choice of location
Depending on the needs and available resources, different types of shelters are built. Usually huts are built on a flat surface, but they can also rest on a tree - in this case, make sure that it is alive and healthy, otherwise its dead branches may fall on your head. The support can be a mountain slope, but this option is associated with the risk of landslides.
Important: When choosing a location, avoid dry river beds, especially in the mountains, as in the event of a rainstorm, a powerful rushing stream of water can appear, which can cause serious injuries and even death. Even a dry stream can cause a lot of problems if it rains.
You should not install a shelter close to the shore of an unfamiliar river or lake, as the water level can change rapidly and flood you. In addition, many insects live near water, including those dangerous to health. Build your hut as far as possible from open sources of water. It is better to choose hills rather than lowlands.
Accommodation options
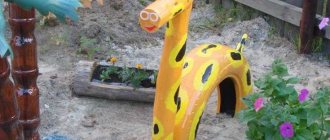
The most suitable location for a self-made hut is a summer cottage. Prolonged exposure of children to fresh air will have a positive effect on their health. There will be enough space for active games on the territory. And the hut itself will be an excellent addition to a summer cottage.
Hut for children in the country
An alternative location would be an apartment if there is enough free space. This option is less convenient, because there is much more space at the dacha. However, a homemade hut in an apartment can stand regardless of the season. And at the dacha only in the warm season.
Children's hut for an apartment
The type of homemade hut will also depend on the location. A structure made from dry branches is much more preferable in a country house rather than in a living room.
What is needed to build a hut
A hut can be built from different materials, depending on the area. Usually this:
- branches and sticks;
- spruce branches;
- straw;
- leaves;
- tree bark;
- plant stems;
- earth and clay;
- snow.
You can use “artificial” materials that you brought with you or found in the forest. At a minimum, it will be helpful to bring plastic sheeting in case of rain and some thin rope to secure the joints of the structure.
General principles of construction
Regardless of the installation location, appearance and variations of a self-made hut for children, several principles should be followed during its creation. The design needs to be as reliable as possible. When installed in a country house, the hut must remain stable even in strong gusts of wind.
A hut for children must be stable and reliable
Manufacturing materials should be made safe. If these are some kind of perches or sticks, then they need to be leveled so that the child cannot get any splinters. By analogy, all resources for the hut should be made safe for children, this is very important.
Before installation, carefully treat the components of the hut
When designing a hut, the main attention should be paid to its safety. The design of the product must be as reliable and stable as possible. And the various elements of the hut should not cause any harm to small children. Contact with wooden parts without splinters and so on.
Make sure the children's hut is stable
How to build a hut in the forest with your own hands
Building a hut is not very difficult, you just need to understand how to do it correctly.
Construction principles
Each hut consists of a frame, usually made of branches, and an outer covering that protects from bad weather. There are several main types of hut frames used:
- single-slope;
- gable;
- tent;
- halabuda;
- with recess, etc.
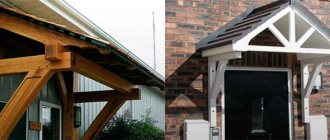
Great luck will be to find a fallen tree with one end resting on another tree at a convenient angle. Then construction is greatly simplified. Just make sure the tree is stable and won't fall on you.
Finding a fallen tree will be a great success.
It is better to build a hut under the canopy of large trees, which will additionally protect the building from rain.
How to make a hut from branches
In the forest, the basis of a hut is usually tree branches. You can cut down or break off living branches, or find already broken ones on the ground, but they should not be rotten. Strong dry branches are better than fresh ones, as they are lighter, but finding a sufficient number of such branches is difficult.
Lean hut
Perhaps the simplest type of hut. It is a canopy located at an angle of 45 - 60 degrees.
A lean-to hut is the simplest type of hut.
Pros:
- Easy and quick to build;
- Protects from sun, rain and partially from wind;
- Does not require special skills or specific materials.
Minuses:
- Does not protect against cold, rain, animals and insects.
- A very strong support is required on which the canopy will be installed
How to do:
- Find a long, strong crossbar (long branch, board, pole, etc.) that will serve as the basis of the building;
- The crossbar can be installed between two trees, or rest on one side of the tree and the other on the ground. You can also use one or two spears (a stick with a forked end) as a support, which are driven into the ground and a crossbar is placed on them;
- Branches are laid on one side at an angle of 45 - 60 degrees to the ground. A sharp angle is necessary to protect from rain. The joints can be tied with rope, strips of bark, plant stems;
- Rods are laid across the branches to form a net;
- Spruce branches, hay, moss, fabric, film, etc. are laid on the resulting surface.
- The sides are also covered with available materials;
- The floor is laid with dry leaves, straw or spruce branches.
A lean-to hut is used in cases where you need to quickly build some kind of shelter and the weather is quite favorable. In cold weather, you can light a fire on the open side of the structure.
Gable hut
Unlike the single-pitch version, it has two walls.
Pros:
- Good shelter from bad weather;
- Not difficult to build.
Minuses:
- Requires time and a lot of building material;
- It is inconvenient to light a fire for heating. If you make a fire at the entrance, there is no constant opportunity to get out.
It is built similarly to a lean-to, but the walls are built on both sides.
Tent hut
It is a cone-shaped structure.
A tent hut provides excellent protection from wind, rain and insects.
Pros:
- When properly constructed, it provides excellent protection from rain, wind and insects;
- You can make a fire inside;
- Looks aesthetically pleasing.
Minuses:
- Difficult to build, requires experience;
- It's difficult to build alone.
How to do:
- Long poles are taken and installed around a certain axis. The axis can be a tree, but in this case it will not be possible to light a fire in the center of the hut. Another option is to gather the top ends into a bun and tie with string, but this will likely require several people;
- The lower ends of the poles are driven into the ground to a sufficient depth for the structure to be stable. It is advisable to sharpen the ends. The poles are located at an angle of 45 - 60 degrees;
- Rods or ropes are stretched across the poles to create a mesh on which the outer covering can be laid.
- The resulting mesh frame is covered with spruce branches, leaves, and moss. If the frame is covered with fabric or film (in the classic version, skins), you will get an Indian hut;
- If you plan to light a fire in the center of the building, the top should remain open to allow smoke to escape. The area around the fire is cleared of leaves, twigs and the like, the perimeter is laid with stones to prevent the spread of fire.
Similarly, you can build a Wigwam: the same as a tent hut, but in the shape of a three- or four-sided pyramid (with three or four poles, respectively).
Halabuda
This is a free-form house or booth, built from available materials. Halabuda can be built on a tree, which is difficult, but it will protect you from forest animals.
Halabuda can be built on a tree.
You can build a halabuda next to your house: children really love tree houses. Since location on a tree requires special structural strength, it is preferable to use building materials rather than natural ones.
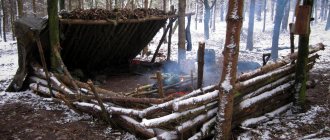
Shelter in a recess
A combination of hut and dugout.
Pros:
- Protects well from wind;
- Keeps you warm, especially in cold weather.
Minuses:
- Digging the ground is long and hard;
- There may be problems with water drainage.
How to build:
- Choose a dry place; it should not be in a low area where precipitation flows. Avoid places where dry stream beds are noticeable, especially in the mountains;
- You can dig a hole yourself, or find an existing one and expand it to suit your own needs. The pit is dug with the expectation that there is one meter of space (in width) per person. Length and depth are selected depending on needs. If you plan to use such a shelter in winter, then the depth should be quite large - one and a half or two meters;
- A shelter of the type required is placed over the recess. To prevent water from flowing in, furrows should be dug around the perimeter to drain it.
Gable
Using a long stick and large slingshots, you can build a hut frame. Its dimensions depend on the dimensions of the parts used. The rods are driven vertically into the ground until they are completely stable. The approximate limit of hammered spears reaches a third of the length. After this, a pole is laid on top and additionally strengthened at the joints with binding objects (fishing line, wire).
The next step is to select thicker poles or poles that will serve as supports for the installation. Using spruce paws, branches with leaves, reeds, ferns, straw or hay, you can build a structure.
In most cases, the sides are attached at intervals of 20 cm. But the base can be compacted with the help of transverse branches attached to the poles on the side. This will create a sheathing that is covered with spruce branches or other suitable material. The installation process is carried out from the bottom. Subsequent rows are partially covered by the previous ones, providing safe fastening and protection from raindrops. The remaining walls of the hut are built using the same principle, not forgetting to leave one of them as an entrance.
How to build a hut in the forest in winter
The main task of a winter shelter is to preserve heat. Materials with low thermal conductivity should be used: snow, spruce branches, straw. In addition, it is important to reliably protect yourself from the wind.
The simplest solution in winter is a snow cave:
- You need to find a large enough snowdrift and dig a hole in it. It is better not to make a large hole, otherwise it will be difficult to warm it up.
- You should lay spruce branches or straw underneath, otherwise your clothes may get wet from the melting snow;
- You can heat the interior with fire (it is better to use gas or dry fuel, but you can also try to make a fire), then you should make a hole in the roof for ventilation;
- In case of strong winds, the entrance can be closed, leaving small openings for fresh air to enter, although in this case there is no constant possibility of getting out.
The main task of a winter hut is to keep warm.
A more comfortable, but also more complex option is the famous Eskimo invention - the igloo . A well-built igloo allows you to survive frosts down to -40°.
- You will need to cut blocks from dense compacted snow and build a house from them. To save time and effort, it is best to build an igloo on a slope, then fewer blocks are needed;
- Usually the blocks are laid in a circle, so that the top blocks gradually move towards the center, forming half a sphere. In this case, the builder himself is in the center of the building, laying blocks around himself;
- At the end there is an exit, and do not forget about the ventilation holes.
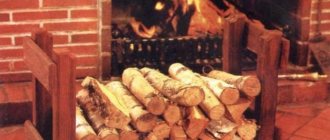
To avoid freezing in the winter forest, hunters also use a hut with a node . It is quite simple to build:
- Build a lean-to hut that will protect you from the snow;
- A node is made on the open side of the canopy: two long logs are laid on top of each other and secured in this position with pegs or supports. A fire is lit between the logs along the entire length of the structure;
- Nodya burns slowly and provides a stable supply of heat to the shelter, allowing you to survive a frosty winter night.
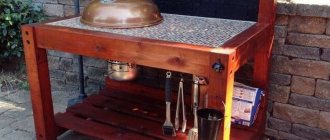
Tree house
Photos of treehouses:
A suitable tree is selected. The trunk must be strong, it is advisable to find a triple branching closer to the base.
First, the height of the future shelter is determined. The structure on the tree must be reliable, so it is made according to the drawing from durable materials.
Useful video on how to draw a hut:
Instructions:
- it is necessary to create a rectangle of strong boards on which to lay the floor;
- 4 bars 50 by 50 mm are placed vertically in the corners;
- the boards are attached to the beams in parallel. This is how walls are built;
- for strength, the walls are sheathed with several boards diagonally;
- when the walls are ready, a shelter is placed on top;
- There is a rope ladder clinging near the entrance.
Wooden parts are fastened with nails for reliability. Self-tapping screws are not recommended because they cannot support weight.
Video on how to build a treehouse:
Winter hut in the ground
If there is little snow on the ground, you can make a shelter with a depression. Earth is a good thermal insulation material that will provide shelter from the cold. But frozen ground is extremely difficult to dig (digging, chiseling).
Your best bet is to find an existing hole in the ground, such as a hole left by a large old tree falling (when the tree falls along with its roots and soil). Adjust this hole to the required size, and build a canopy of one kind or another on top. To make the frozen ground more pliable, you can light a fire and warm it up.
Important: The construction of such a shelter in winter is associated with a lot of physical activity, as a result - clothes become wet from sweat, and then hypothermia may follow. In this case, it is better to take off some of your clothes in advance.
Construction of shelters
Nature provides great ideas for constructing buildings. Wasps, ants, and beavers build durable and stunning homes with a unique design. A person needs to understand the essence of the building and apply the theory in practice.
For temporary stays in the wild, survivalists prefer to make lean-to, tent and cone huts. For long-term living in the forest, they build a dugout or a primitive house made of logs. In winter, a thick layer of snow is laid on the roof - this will not only protect the structure from heat loss, but will also provide good camouflage.
Materials
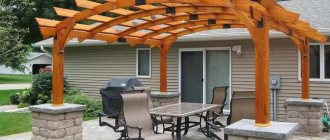
Houses with roofs down to the ground have fairly simple assembly, so site owners can implement a variety of projects without the help of specialists. For construction can be used:
- beam;
- lining;
- wooden shields.
Quite often a dry board is also used. The interior space of a house with a timber roof down to the ground is not so vast. To save usable space, the stove and fireplace chimneys are moved outside the building. But this approach has some disadvantages, because a significant part of the heat will go outside.