Lately there has been a real boom in blacksmithing. Young people are becoming blacksmiths. The knives and axes made by their hands are real works of art.
Active advertising on social networks, photos of how to make a beautiful ax, fuels not only the desire to own such a thing, but also to try to make it with your own hands.
Nothing is impossible
Looking at the work of blacksmiths, the thought comes to mind that there is nothing difficult in making an ax. But in practice, this turns out to be much more difficult.
In addition to a piece of metal for forging an ax, you need: a forge, an anvil, holes for the eye. Not everyone has such a set of tools. Of course, you can make a forge and punches, but you can also try to make an ax in a different way.
Etching is the most important stage in hatchet making
For etching, it is best to use an inverter welding machine at a minimum current (30 A). As an electrolyte, a solution of water (3.5 l) and salt (700-750 g). Before starting work, it is better to check the intensity of etching on any piece of metal.
PHOTO: YouTube.com The electrolyte is ready, the welder is in place, you can start
Connecting elements to welding wires
First of all, a hatchet is attached to the positive cable, which is completely immersed in the electrolyte. But the negative contact needs some work. To increase the area immersed in the electrolyte, you can use a mounting plate for a metal profile. It should be curved so that the contacts are on both sides of the hatchet.
PHOTO: YouTube.com The mounting plate is perfect for etching
Etching procedure, inspection, protection of the welding machine
Having lowered the negative plate into the electrolyte, you need to make sure that both its sides are equidistant from the hatchet. Only after this can the welding machine be turned on. A violent reaction will begin almost instantly. It looks as if the electrolyte is boiling. In fact, this is not far from the truth; electrolysis does its job. Unpainted metal is etched away. No harm is caused to the painted surface; it remains untouched.
Etching is carried out in 5 passes. The welder turns off every 2 minutes to allow it to rest. It turns out that the total etching time is about 10 minutes. After this, the ax can be removed from the electrolyte.
PHOTO: YouTube.comThe electrolyte first boils and then turns dark
After the required time has passed, the hatchet can be removed from the container and the result can be assessed. If the etching depth seems shallow, you can continue. If everything is in order, then it’s time to remove the paint.
PHOTO: YouTube.comIf the etching depth is satisfactory, you can move on to the next stage
The final part of working with metal
The ax needs to be washed off the salt under running water and dried, then remove the paint from it. This can be done with fine sandpaper or acetone. Next, the entire surface must be polished. A felt circle mounted on an emery board or drill is perfect for this purpose. Only after polishing can you fully evaluate what the result of the work done is.
PHOTO: YouTube.com We can say that it turned out very well
Making an ax using the metalwork method
Ideas on how to make an ax outside the forge lead to the metalworking method. The ax consists of three parts:
- ax blade
- ax handle
- wedge
If everything is clear with the materials for making an ax and a wedge, then the question of what, and most importantly how, to make a canvas is puzzling. Knowing that the blade consists of a blade and a butt, you understand what is needed to make an ax:
- metal strip for blade
- piece of pipe for butt
Making a form
Now we must give the desired shape, also according to the instructions:
- On the blade we draw a contour according to this template. If there is no printer and there is no way to transfer the form, then you will have to work according to calculations. We retreat a centimeter from the top of the butt and put a dot. Now we draw a straight line from the selected place to the toe. We also step back a centimeter from the heel and make a mark. We apply any round object so that it simultaneously touches the selected point and the beard. Let's circle.
- How to make a Viking ax straight? Is it not so easy to cut a circle by hand? We draw rays along the inner circle and cut along them. Now we cut out the circle.
- All that remains is to polish it. We take special grinding attachments for the grinder and polishing pastes. Cheap ones include GOI or diamond pastes.
Hardening
A handmade ax must be hardened and this is best done using technology. The metal can be burned, causing it to become brittle due to carbon burnout. In general, everything consists of 3 stages:
- Annealing. It is necessary to remove the tension from the steel, which is there in any case. This is easy to do - heat it to 760-800 degrees. The metal will be red-burgundy. Then we put it on a brick and let it cool. Next we remove the scale.
- Hardening. A much more complex process. Initially, prepare 2 buckets of water. One contains water, the other contains oil. Anything will do, including working off. Heat the blade to 830 degrees and lower it 4 centimeters into the water for 5 seconds. Then completely lower it into the oil. Don't forget to make circular movements to knock down air bubbles.
- Vacation. After hardening, the steel is hard but brittle, like glass. If it falls, it will simply break and need to be released. You need to heat it to 200 degrees and let it cool slowly with the oven for an hour. Even a regular oven will do.
By the way, you can harden an ax from rails or reinforcement in the same way.
Now the blade can be sharpened. There is no point in doing this in advance, since heat treatment will remove the cut anyway. Moreover, the blade can also lead.
Sharpening an ax is a simple matter. We take a grinder with an abrasive disc and try to maintain an angle of 20 degrees.
Making an ax handle
How to make an ax handle with your own hands? Very simple, you only need a block, a marker or pencil, a bow saw, chisels and sandpaper.
We take the sketch of the ax handle and apply it to the block. Cut out the handle along the contour. We remove sharp corners with chisels and round them with sandpaper.
Now you can decorate it. We apply the design to the ax and cut it out in any convenient way. This could be wood carving or engraving.
Adjusting the ax handle to the blade
There is only one thing left - to connect the handle and blade. How to place an ax on an ax handle correctly? According to the instructions:
- The head of the ax is adjusted to the size of the hole in the blade. To do this you will need a saw and sandpaper. There is nothing complicated about this.
- After fitting, if it fits correctly, it's time to wedge. If we make an ax from reinforcement, the hole is made at our own discretion.
- We make cuts at the end of the planting. A simple option: 1 longitudinal cut and 1 wedge. But it's not that effective. The optimum is a cross. 1 longitudinal and 1 transverse cut. Wedges are cut into them according to size and driven in with a hammer. Professionals say that it is better to make wedges from the same wood.
- We saw off the excess with a saw.
Blade
The full size drawing will show the amount of material needed. The blade requires a hard metal, such as a car spring.
We transfer the outline of the drawing to the spring and saw off all the excess. We also make descents using a grinder. It is important here not to overheat the metal so that the edge remains hard and holds an edge well.
Work process
Materials and tools for work
Handmade axes require at least basic plumbing and carpentry skills. We will make a DIY Viking ax from a simple ax that can still be used to chop wood. For this we need:
- A block of wood. No, regular pine or spruce will not work. Below is a list of acceptable breeds. There is one requirement for all of them - there must be longitudinal fibers, not transverse ones.
- Paper with pencil for sketch.
- Wedges.
- Varnish or oil (linseed, tung, teak).
- A small piece of leather or leather substitute.
- Ax blade. Any one will do, even one that is corroded.
From the tools:
- Angle grinder.
- Welding machine. Regular MMA welding is sufficient.
- Grinding machine.
- Bormashinka.
Separately, we need to talk about the tree. We will need a little bit - a 40x40 block. But what breed? There is a choice:
- Beech. In principle, inexpensive and beautiful material. Of all hardwoods, it is the cheapest. The only thing that needs to be taken into account is the intensity of moisture absorption. It needs to be covered with a thick layer of oil.
- Oak. Probably the best material for a handle. Strong, durable, reliable.
- Maple. Its advantage is elasticity. Where oak cracks under stress, maple will remain intact. By the way, one of the most beautiful types of wood.
- Ash. The hardest rock of the list, and inexpensive.
Now we can make a Viking ax with our own hands.
Cleaning corrosion
It will also need to be divided into several stages. And the first of them is cleaning:
- Before you make an ax handle with your own hands, you need to remove the old one. The easiest way is to knock it out. We cut straight along the beard of the blade and knock it out using a chisel or drift.
- Now let's move on to processing the blade. You need to remove the rust from it using a grinder. For this, a regular petal circle is enough. We'll do the polishing later.
- Now we look for cracks and grooves on the blade. If there are any, we simply brew them and clean them with a grinder. There is nothing complicated here.
Assembly of the canvas
The blade and butt are connected by welding. It is important to weld the metal thoroughly so that the ax does not crack during operation.
Then we grind the seam with a grinder, if necessary, boil the shells, and grind again. For additional strength, you can rivet the butt and blade with strips of metal.
Weight parameters
The possibility of its use in wood processing depends on how heavy the tool is. The minimum value is considered to be a mass of 0.9 kg. Lighter models are used only for a limited range of household and household purposes when finishing small workpieces, for example, for sharpening wedges.
For standard work with wood, you will need a tool of 0.9-1.7 kg. It will be effective both when cutting medium-thick firewood and when carrying out construction work. Heavier splitting axes weighing 2.2-2.5 kg are used for chopping large firewood. They have a longer ax handle.
Toporische
A good ax requires the presence of a properly made ax handle. To the question - what can an ax handle be made from, there is a simple answer - from hardwood.
The most common wood for making ax handles is birch. But, if you make an ax not only for chopping wood, but for the soul, then you should look for a type of wood with a more expressive texture.
What types of axes are there?
First, let's look at the types of axes. It may seem like they are all the same, but they are not. The location of the center of gravity and sharpening depend on the shape. Some species are better suited for cutting wood, while others are better suited for splitting firewood. Therefore, we will consider them separately.
Lumberjack
Good for cutting down trees. Its center of gravity is strongly shifted towards the blade, so the main blow is concentrated at the beginning. For this reason, it is held with both hands. The ax is relatively long to increase the swing and force of the blow.
Cleaver
It has a wide, short and narrow blade. From the name it is clear that it is designed for chopping wood. The butt of the ax is thick to effectively penetrate the fire. Medium length handle. A photo of the ax can be seen below.
Plotnitsky
A carpenter's ax has a relatively short shaft to make it easy to use with one hand. The blade, on the contrary, is wide. Indispensable for preparing logs for building a house.
Srednerus
Also called taiga axe. It is considered a universal-purpose tool, as it was often taken along on expeditions. They can chop firewood and butcher an animal carcass.
Combat
These include Viking axes, axes and other tools related to edged weapons. It is worth noting that the production and sale of such products is controlled by government agencies, so it is not worth doing. Or you will have to register with an examination.
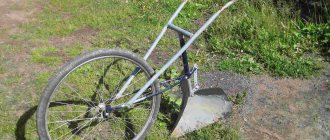
Sturdy
A beautiful ax with a short handle and a large blade. It makes no sense to buy it for home, as it is inconvenient, but is indispensable for hiking. It weighs almost nothing, is compact, but is not suitable for regular chopping of firewood and felling of wood. For hiking, such an ax is often made from rebar.
Wood for an ax
An ax handle made of ash, elm, or hornbeam will look very beautiful. It’s just difficult to buy boards made from such types of wood in some regions, especially in the outback. Of course, you can use online trading.
The wood for the ax must be well dried and free of knots. At home, the wooden board is dried at room temperature for six months
The longer the wood dries, the stronger the ax handle will be. According to custom, wooden blanks were dried for years in the attics of houses.
Sequential creation of the wooden part of the ax
All work on turning the ax is carried out starting from the stage of making the template. It is created on paper (cardboard). As an auxiliary part, a ready-made ax handle is often used, which is placed on a sheet of cardboard and the desired contours are obtained by tracing the laid part with a pencil.
The resulting template is cut out and placed on the beam, again tracing with a pencil. A centimeter is left at the front, and nine centimeters are added to the back.
When cutting out an ax from a block, make sure that the section parameters of the part of the workpiece that is machined for the eye are exceeded by two or three millimeters.
Fitting a metal part onto a wooden part is done with a mallet. The metal is clamped in a vice to perform a rigid joining with greater comfort.
When there is no doubt that the wood will fall out or crack, carefully sand the surface of the ax with sandpaper.
The final stage is to bring the product to perfect condition. The smoothness and strength are checked, all unnecessary roughness and sagging are eliminated.
To give the ax a beautiful appearance, the handle is covered with stain and varnish.
If desired and if there are available means, anyone can make an ax on their own. For an experienced craftsman, creating such a tool is not a question.
For a beginner, we can recommend turning to video materials with the appropriate titles for help. Such as “making an ax handle at home step by step” or “how to make a new one from an old blade.”
Roughing
Using the template, we outline the outline of the handle on the wood and cut out the blank. Give the handle a more rounded shape. For these purposes, you can use a plane, chisels or a small hatchet.
How to make an ax in Minecraft:
Crafting requires the following components: boards (3 pcs.), sticks (2 pcs.)
The first can be obtained from any tree by moving a block of wood to a workbench. Creation of sticks is carried out by filling two pillar-shaped cells with boards of any kind. The procedure can be done in a pocket inventory.
How to get an ax in creative mode:
open chat using the hotkey “T” (Latin) and use the commands:
- /give @p minecraft:wooden_axe
- /give @p minecraft:wooden_axe 10 (the number means quantity);
- /give minecraft player nickname: wooden_axe (indicates the name of the user who will receive the item);
Don't forget to watch the video
, in which there is a visual demonstration of creating an ax, and also leave your feedback.
https://youtube.com/watch?v=7E8MYxY1nmg
Thank you for your attention, enjoy the game!
Fit
The next stage in making an ax handle is adjusting the shape and ergonomics. We grind the wood to give it the correct shape and comfortable grip.
A large rasp, as well as a power grinding tool, are perfect for these purposes. The main thing here is not to loosen the place where the ax fits on the ax handle.
Note!
- Why do people consider healing fasting?
- Required distance of the septic tank to the well
Do-it-yourself garden beds: the best arrangement ideas and step-by-step placement instructions (110 photos)
Operation and care
When working with a taiga ax, you must comply with all safety requirements and proper handling of the tool.
The blades should always be kept closed and dried after use, otherwise they will rust and become dull, which significantly reduces the efficiency of cutting and the life of the ax. Always remember that axes are not a toy
They can be reliable helpers in difficult survival conditions, but if handled carelessly and frivolously, they cause their owners a lot of trouble. The ax is intended for cutting down trees - this means that it should not be used for digging the earth or working with materials that can dull it or simply break it. The ax should not be thrown into the ground, as this will cause the blade to deteriorate and rust. You should not put the tool into the fire - this leads to a deterioration in the technical and operational characteristics of the steel.
It is important to check the sharpness of the blade in advance; there should be no chips or burrs on the plate. You cannot start cutting if there are strangers in the work area, especially children.
You cannot start cutting if there are strangers, especially children, in the work area.
When swinging strongly, hold the ax handle as tightly as possible - otherwise the tool may slip out of your hand.
For more information about the features of taiga axes, see the video below.
Finishing
The assembled ax is carefully polished with fine sandpaper. The wood can be covered with stain or left as is. The protective layer is applied with oil or varnish.
For greater exclusivity, the ax handle can be decorated with carvings, inlays or wire notches. A pattern etched in a saline solution will look beautiful on the ax blade.
How to protect against rotting?
The wood from which the ax handle is made, like other similar materials, is susceptible to rotting. Such problems always arise over time or in inappropriate storage conditions for the tool.
It is important to take care of your homemade ax in advance, protecting it from rotting. It is strongly not recommended to use compositions such as varnishes or paints to protect wooden handles
The ban on the use of such compounds is due to the fact that their presence on the handle can lead to it slipping out of the hands during certain work. The reason for this is the glossy smooth texture.
The optimal solution for protecting the ax from rotting would be other suitable impregnations. You can coat the handle with linseed oil or good old linseed oil. There are other highly effective antiseptic agents that will extend the life of natural wood. But we must take into account that they will need to be applied periodically. Don't forget this procedure.
How to choose the right wood for a handle
It’s curious, but not all tree species are suitable for making an axe. It is recommended to use only hardwood that has been previously dried in special chambers or kept in a dry place. Failure to comply with these requirements will lead to the fact that during use the handle will dry out and securely attaching the blade to the ax handle will be very problematic.
Home craftsmen use several types of wood to make wooden handles, each of which has its own advantages and disadvantages. Let's try to figure out which wood makes the best ax handle.
Birch
This is a “come and take” raw material, but the availability of the material does not guarantee high quality. To make a high-quality birch ax handle, the wood will have to be dried for 10-12 months. Even after this, the material remains sensitive to humid environments.
Maple
It is also an accessible and widespread material with a limited scope of application. In particular, maple handles are not suitable for making quality tools for a carpenter or lumberjack. However, the wood has a beautiful texture, making it ideal for decorative and souvenir wooden products.
Hickory
This unusual name hides an American walnut that grows in Canadian forests. For the manufacture of an ax handle, this is the best option, successfully combining strength, elasticity and durability. However, only American and Canadian loggers can truly appreciate these benefits.
Jatoba
This is a type of wood unique in its properties, which is used for the manufacture of sports equipment and furniture. Jatoba is easy to process and has a presentable appearance. At the same time, such solid wood is not inferior in strength to oak, so ax handles made from it are very reliable.
Ash
Among the listed options, ash is considered the optimal balance between availability and quality. At the same time, the wood has an interesting texture, so after appropriate processing, the wooden ax handle will have a presentable appearance without loss of strength and elasticity.
Ax forging.Blacksmithing
FORGING AN AX.
.
AX (old ax) - an iron, mounted tool for hewing and chopping.
Carpenter's ax - with a wide, thin blade and a sharp toe; - butcher's - the largest, widest and heaviest; - artisan and carpenter, one-handed - small; turning, chopping or chopping - even less; A man's ax is small and thick.
Hatchet, barrel hatchet, turning hatchet - half the size, one-handed. As a weapon, the ax changes in appearance and is called: halberd, berdysh, protazan, mint, etc. He said how he chopped it off with an ax (how he cut it off). In seven courtyards there is one ax - from poverty. Such air that you could hang an ax.
Clumsy work is rough, unclean. Swimming clumsily means drowning. An axemaker is a blacksmith who forges axes. A hatchet is a ring on the belt, at the back, into which an ax is hung on the road, passing the ax handle into this ring. Dahl's Dictionary
Ax “Woodpecker” Author G. Kopylov (Guild of Gunsmiths) Steel, walnut. Metalworking, engraving, edging, carving, embossing, shotting, oxidation
The ax consists of a wedge-shaped metal (in the Paleolithic period - stone) striking (piercing) part - striker , most often called a blade (which is not entirely correct).
The steel weld on the lower piercing part is called the blade .
The upper part of the ax - the butt - is made massive and has an eye into which a wooden handle - the ax .
There are several technologies for making axes: forge welding, solid forged, and connecting the ax body with the blade using rivets. Sometimes drilling an eye in a solid metal blank was used.
Using forge welding, the ax is made from two parts. For the body of the ax, a piece 170 mm long is cut from a strip with a cross-section of 60x35 mm from steel of ordinary quality, for example StZ.
For the blade, use tool steel, for example U7. Two indentations are made in the heated workpiece, leaving a ledge in the middle to form the butt of the ax (Fig. 1, a). The workpiece is stretched approximately to the dimensions shown in Fig.
1, b, and accelerate (Fig. 1, c).
Making an ax by forge welding
After this, the workpiece is bent on the horn of an anvil or a special mandrel so that a mandrel with a cross-section equal to the cross-section of the ax at the place of the attachment enters into the hole formed after bending—the “mount” (Fig. 1, d).
A wedge with the dimensions shown in Fig. is forged from tool steel. 1, d. The finished wedge is inserted between the drawn and bent ends of the workpiece and driven in between them (Fig. 1, e). The workpiece together with the wedge is heated to welding temperature and forge lock welding is performed.
At the end of welding, the workpiece is put on a steel mandrel and the following operations are performed on this mandrel. The beard is cut and bent to protect the ax handle, and the dimensions of the ax are adjusted to approximately those shown in Fig.
Landing the ax on the handle
Before planting the butt on the ax handle, you need to remember that the exit side of the hole is wider. This feature is needed so that after wedging, the head does not fly off during cutting. When adjusting the dimensions of the handle to the butt, you need to place it on paper with the output side and trace the inner diameter. It should be smaller than the size of the head of the axe. Further work on making a wooden ax handle consists of the following steps:
- We adjust the dimensions of the end part of the handle to the output side of the butt along the entire length.
- We determine the difference between the input and output parts of the head and make a cut closer to the handle in size.
- We give the attachment part of the ax the shape of a champagne cork - widening towards the edge.
- We process the end of the handle with a rasp, chamfering it - you need the ax handle to fit into the butt.
- We make cuts - crosswise. They are needed to adjust the wedges when fixing the head.
- We drill out the bottom part of the cuts so that the handle does not split - the diameter of the drill is 1 mm larger than the width of the cut.
Additionally, you need to prepare wooden wedges and epoxy glue. The head of the ax should be planted with light blows, leaning the head against the ax handle with the entrance side. When it takes the correct position and does not dangle, the edges protruding beyond the limits are cut off, and then the wedges are driven in with a hammer. They must first be coated with adhesive.
Attention!
When attaching the butt of a homemade ax, you should not hit it with hammers - the metal may weaken and crack. For this purpose, place a small block or use a mallet.
An ax as a weapon of noble warriors
Judging by the chronicles and finds of archaeologists, this type of weapon was very popular among Scandinavian warriors. Thus, the well-known king Olaf the Saint in his time was the owner of a battle ax with the expressive name “Hel”. This is, by the way, what the ancient Scandinavians called the goddess of death. Eirik, the son of Harald Fairhair, had the respectful nickname “Bloody Axe,” which rather transparently hints at his preferences in choosing weapons.
There are frequent references to “axes lined with silver” in written sources, and in recent years scientists have found many archaeological artifacts that testify to the truth of these words. Such, in particular, was the famous Mamennsky axe, on the surface of which amazing and beautiful patterns formed by hammered silver thread are visible. Naturally, such weapons had status and emphasized the high position of the owner in society.
The Sutton Hoo burial also shows great respect for battle axes, as many richly decorated axes were discovered there. Judging by the luxury of this burial ground, one of the outstanding military leaders of the Angles or Saxons was probably buried there. What is characteristic: the deceased himself was buried “embracing” an ax with practically no decorations on it. This is a purely military weapon, so during his lifetime this man clearly preferred axes.