Despite the rather complex name of the flower, pelargonium is very famous and popular among experienced gardeners. It is suitable for those who want to have flowering plants in their room. This culture has another name - geranium. Although not everyone likes the aroma of this flower, its appearance can attract any admirer of indoor plants.
Pelargonium (lat. Pelargonium) is a flowering plant from the genus Geranium. Essential oil from Geranium is used to create perfumes and soaps, as well as to purify the air from pathogenic bacteria.
When is the best time to sow seeds?
Gardeners and people who keep indoor plants in their homes are of the opinion that pelargonium grown from a seed has an increased lifespan compared to a bush obtained by another propagation method.
But when it comes to choosing the right time for sowing seeds, flower growers disagree significantly . Some argue that the best planting period will be from the first days of November to the end of April, while others believe that good sowing occurs in December. Still others are of the opinion that the best period will be the beginning of spring.
After the appearance of young shoots, Pelargonium is planted in individual containers, deepening the seedlings by 2-3 cm.
When to sow in regions
In central Russia, lovers of indoor plants believe that it is necessary to sow the crop no later than February, or at the end of March. At the beginning of spring there is enough sun, so additional lighting is not required. But in the northern regions, without special care, the seeds may die before they have time to sprout. And they sow here closer to April.
Sowing dates according to the lunar calendar for 2020
People who use the lunar calendar to select planting dates are well aware that the phases of the moon change with constant regularity. Therefore, it is better to use a new calendar every year. This will help organize timely care for pelargonium.
The flower is often planted in January - March, but you should not sow seeds on these dates:
Description
House geranium is a low plant. But there are also subshrubs whose roots are highly branched. But mountain plants have a rod-shaped root.
Different types of geraniums have different leaf shapes and colors. They can be not only green, but also blue, grayish, and reddish. The leaves come with solid edges, with small or deep cuts. Some specimens have leaves with hairs.
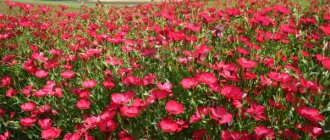
Pelargonium flowers can be very large, collected in inflorescences that look like brushes. The color range is wide: red, white, purple, blue and many other shades. In August-September, fruits appear in the form of a box, inside which seeds ripen.
What do the seeds look like?
Before sowing pelargonium seeds, it is necessary to carefully select them. The color of the grains should be brown, their shape resembles an elongated oval, and they have elongated depressions on the sides. The shell is somewhat similar in density and external features to leather and has a matte color. On average, a pelargonium seed is large in size, but depends on the species.
Grains that are deformed and small in size cannot be used for sowing.
You can collect the seeds yourself - after flowering, the plant forms a seed capsule.
Advice from flower growers
It is easy to care for pelargonium in the garden and at home if you carry out the indicated steps for sowing and replanting. And yet there are some nuances to care. Experienced gardeners recommend being aware of pests.
Most insects do not like the smell of geraniums, but spider mites love to settle on pelargonium foliage. You can get rid of the insect with soapy water and insecticides.
Depending on the climate, geranium may lose its protective qualities. Prevention of diseases (powdery mildew, gray rot, brown spot) is carried out in advance.
Standard means will help with this: fungicides, Bordeaux mixture. How good pelargonium will look in the front garden depends only on the desire of the gardener to provide quality care.
Subtleties of planting seedlings
It is better to sow several seeds at once to increase the likelihood of good germination, so pelargonium seedlings will be guaranteed to be obtained. In the case of planting seeds in one box, it is necessary to monitor the sprouts, their size and how many centimeters the interval between them is maintained.
As soon as the first leaves of the flower appear, you need to transfer the sprouts to individual containers so that after transplanting to the site the root system of the plant is not damaged.
Preparation of material for planting
Working with seeds, despite the labor-intensive process, is quite an exciting activity for a gardener. If you decide to grow pelargonium, then all the features will consist of tilling the soil and preparing the container. Seeds should be disinfected with special compounds or a weak concentration of potassium permanganate solution.
Before sowing, it is recommended to do the following:
- Sort the seeds, removing small and damaged ones. The ripeness and usefulness of grain can be determined by its elongated shape. There should be no stains.
- It is necessary to remove the outer shell of the seed, but try not to damage its core, and it is better to use a nail file.
- Treat with a disinfectant to improve seed swelling. 2-3 hours after treatment, fungi and spores will disappear.
Soil preparation
Pelargonium is suitable for both soil from the store and soil prepared from the garden. You need to add one part of sand and peat to the ground. After mixing the soil until smooth, it must be placed in the oven for roasting to eliminate bacteria and infections. How to select and prepare soil for seedlings
Selecting a container for seeds
For pelargoniums you need a container with holes for drainage. Plastic glasses or thick food boxes are suitable for this, and holes can be made with an awl.
Before filling the soil, you need to treat the container with potassium permanganate to eliminate harmful bacteria, and it is advisable to fill the soil after 2 weeks.
To sow Pelargonium seeds, you can use peat tablets, followed by planting the grown seedlings in pots
Sowing process
When sowing pelargonium seeds, the following actions should be taken:
- Place drainage at the bottom of the container, then soil, intensively moistening it.
- Place the seeds at a distance of 3-5 centimeters from each other if the container is large, if smaller, then place 2-3 seedlings.
- Gently press your finger into the soil and sprinkle the seedling with soil at a distance of 1 centimeter.
- Moisten the soil using a spray bottle.
- Stretch the covering material and send it to a warm place. At a temperature not lower than 22 degrees, but not exceeding 24.
- When sprouts appear, remove the cover and move the container to the light.
Pelargonium seeds sown in peat tablets require daily ventilation and spraying.
What should the soil be like?
Pelargonium loves slightly acidic soil that allows air and moisture to pass through well. It has no special requirements for fertility and composition, so the main concern of the grower when composing the substrate is looseness and high-quality drainage. You can make such a mixture yourself from 2 parts turf soil, 1 part peat and 1 part coarse sand. To make the substrate more loose, add a little perlite to it. A layer of expanded clay drainage must be placed at the bottom of the pot.
Before planting seeds, it is recommended to disinfect the soil. This can be done using a solution of potassium permanganate or boiling water, with which the ground is thoroughly watered. This option is suitable for store-bought substrate that has already undergone certain processing. It is better to ignite the self-prepared soil in a well-heated oven for 3–5 minutes. This gentle treatment will kill all germs and larvae without destroying the nutrients.
Disinfection and soaking of seeds
Before growing pelargonium at home, you need to properly prepare the seed. It is necessary to partially remove the seed shells to speed up the growing process. To avoid damaging the seed too much, it is better to use sandpaper. Clean only the top layer with it.
As a disinfectant for seeds, a weak concentration of potassium permanganate solution or peroxide is used. After disinfection, it is necessary to soak them in water at room temperature so that they swell for 2 hours.
Methods for sowing pelargonium at home
Pelargonium seeds can be sown in any shallow container. Most suitable:
- plastic containers;
- peat tablets or cups;
- toilet paper.
Planting seeds and caring for them at home is best done in strict order.
Planting seeds in a container
Sowing can be carried out in special trays with a depth of at least 30-40 cm. Prepared containers must be filled with soil and watered with warm water. The soil must have a temperature of at least +20 ° C.
We sow the seeds at a distance of 2 cm one after another. And it's better not to fertilize them too much. Seeds must be planted in a shallow hole and covered with soil on top, watered after planting.
It is recommended to cover the plantings with film or transparent glass to create conditions close to greenhouse ones.
Sowing Pelargonium seeds in containers
Planting seeds in peat tablets
In addition to soil, pelargonium seeds can be germinated in soil with peat. Peat tablets are ideal for them. They are selected according to their acidity level. Be sure to water before planting.
Sowing of seeds is carried out in holes of shallow depth, covered with polyethylene or glass. It is necessary to carry out ventilation and spraying every day.
Pelargonium seeds sown in peat tablets require daily ventilation and spraying.
Using toilet paper for planting
Germinating seeds using toilet paper can be called the simplest and most effective sowing method. The pre-treated grains are laid out on soaked toilet paper and placed in a container. Cover the top with a lid. As soon as the first shoots appear, the seedlings are carefully transplanted into the ground.
Germinating Pelargonium seeds in toilet paper
Flower confusion
Two different genera “Geranium” and “Pelargonium” of the same family Geraniaceae cause controversy among botanists, experienced flower growers, and breeders. Botanists claim (and they are right) that the confusion occurred due to the great external similarity in the structure of leaves, flowers and fruits. But, there are many differences and one of them is genetically fixed, which certifies that geranium and pelargonium are 2 different plants (at the genus level) of the same family.
The Geranium family includes 5 genera , including the genus Pelargonium (stork) and the genus Geranium (cranebird, cranebird). How are they similar and what are their differences?
After the appearance of wild forms of pelargonium in Europe, a real boom in developing new varieties began among breeders, but out of 200 species, only about 20 served as the source material for selection. Many species turned out to be incompatible with each other. According to the basics of breeding, it is known that the development of new varieties is possible only within one genus. The incompatibility is explained today simply - the plants are genetically different and cannot be crossed and obtained seeds.
Amateur flower growers can (without going into the wilds of science) determine which plant blooms on their windowsill or balcony - pelargonium or geranium?
Proper care of seedlings
A well-executed planting procedure is part of successful care of pelargonium seedlings. It is better to grow seedlings in favorable conditions.
Seedlings need:
- timely watering;
- correct temperature setting;
- good feeding.
Watering the seeds
The amount and frequency of watering seeds depends greatly on the time of year. In hot summers, it is better to water every 3 days, and in winter they moisten once a week. Before watering, it is necessary to place a thick layer of drainage under the bottom of the container, since pelargonium does not tolerate strong excess moisture. The moistening itself is carried out as soon as the top layer of soil dries out.
Geranium grows well only with sufficient light, but direct sunlight should be avoided. For good development of pelargonium, daylight hours should be at least 15-16 hours.
Picking sprouts
As soon as the first sprouts of pelargonium appear, it is necessary to transplant and pick the seedlings into individual containers. The sprouts are buried at a distance of 2-3 centimeters. Transplanted into containers that are shallow in depth.
Pinching pelargonium
The sprouts should be pinched at about 6-8 leaves. But pinching should not be carried out during flowering and the formation of buds. Mature species of pelargonium are pruned in spring and autumn. Timely pruning of weak and damaged shoots allows you to obtain pelargonium of extraordinary beauty that can bloom longer.
Pinching pelargonium seedlings promotes better formation of lateral shoots and significantly more luxuriant flowering
External factors
Before growing pelargonium, it is necessary to create the right conditions. This culture grows well only in bright rooms, but the plant should not be kept in direct sunlight. The daylight hours of pelargonium should be at least 15-16 hours. In summer, it is recommended to take the plant out into the fresh air.
Since the leaves of pelargonium are covered with a special layer for protection, you should not spray them, otherwise moisture on the stem and leaves can lead to rotting of the flower.
Temperature changes are unacceptable for young shoots, otherwise they will be severely damaged. On average, the required air temperature for pelargonium should be no lower than 7 degrees, but not higher than 22.
Plant nutrition
The mixture for fertilizing pelargonium is selected taking into account its needs. The best options for feeding are those that contain the following substances:
- copper and zinc;
- manganese and phosphorus;
- boron, iron;
- calcium, nitrogen.
They use complexes of mineral substances, but before purchasing you need to read the composition.
Among the folk methods for feeding pelargonium, milk or ash infusions and iodine are used.
At the initial stage of growth of the stem, leaves and roots, it is necessary to add nitrogen to the fertilizer so that pelargonium grows faster and there is no fading in the flowers.
It is recommended to feed in this way at the beginning of spring, but you need to take precautions and dosages recommended by the instructions.
As soon as the first buds begin to bloom, it’s potassium’s turn. Since it is the main component for the appearance of flowers in pelargonium, phosphorus will stimulate the strength of its leaves and stems.
Iodine also serves as a stimulant for the formation of a large number of buds . Therefore, in addition to peroxide, iodine is added to the soil. Preparing the fertilizer is simple, and after 2-3 procedures the effect will be noticeable.
Step by step action:
- Before planting, the soil must be moistened.
- Prepare a solution consisting of 1 drop of iodine, 1 liter of water and 1 ml of peroxide.
- Pour along the walls of the container, avoiding contact with the trunk and leaves.
For one watering it is necessary to use no more than 50 grams of fertilizer, and repeat the procedure at intervals of 3-4 weeks. The work is carried out long before the abundant flowering of pelargonium. You should not use this fertilizer too often, so as not to burn the flower.
Transplanting sprouts to a permanent place and further care
Pelargonium sprouts are transplanted into the ground in May. By that time, the culture will have time to develop, its root system and immunity will be strengthened. They are replanted using the transshipment method, having prepared the soil for the plant in advance.
The width and height of the hole should correspond to the container in which the pelargonium grew before transplantation. Within a week, it is necessary to water the hole abundantly and install drainage.
At the time of transplantation, you also need to water the ground so that the roots of the plant stretch out. You need to immediately loosen the soil.
In summer, pelargonium does not need special care, since weeds usually do not grow near it.
Pruning is necessary only for fading inflorescences and leaves, or for the formation of the bush itself. Feeding should be carried out if necessary, with the exception of regular watering and fluffing the flower.
Pelargonium will perfectly decorate not only flower beds in the garden, but also balconies
Choosing the “right” pot
Small compact pots or trays 3 cm deep are suitable for germinating pelargonium. You can purchase containers in special stores or make them yourself.
Boxes or pots are used for growing. The pot in which the flower will be located is selected according to the size of the root system. Transplantation is carried out only when the plant becomes crowded (more details on how to transplant and root pelargonium can be found here). It is advisable to use clay pots. They allow air to pass through well and absorb moisture. You can use plastic pots, but they do not allow air to pass through and can cause excess water to stagnate. This can lead to root rot and plant disease.
If it is possible to prepare the growing substrate yourself, then you should take advantage of it. In purchased soil, seedlings appear later, seedlings are weaker, the bush forms thin or excessively thick stems, and the plant blooms sparsely.
Ways to obtain and collect seed material
Before collecting seeds for planting yourself, it is necessary to pre-pollinate the pelargonium, using a brush to move pollen to each flower. After flowering, a seed box is formed on the pelargonium. And after it dries, you can remove the seeds.
Only ordinary pelargoniums are propagated using seeds, while other varieties require a different technique.
Propagation by cuttings
This method of propagation is considered the easiest to perform, fastest and most effective, and at the same time preserves the mother plant. The main key to a successful procedure is maintaining the required temperature and constant sanctification.
The advantage of this method is that cuttings can be collected several times a year. But in the period from November to January, the mother plant will be at rest, so the cuttings will not produce a strong bush.
In order for pelargonium to bloom this year, reproduction begins in March. This way the plant activates all its powers. And a flower planted in April will produce buds next year.
You can cut the plant in the fall, until about September-October, after pruning, and by summer the first flowers will appear. To properly separate cuttings from a plant, you must do the following:
- Pick up shoots from the top that have 3-4 leaves. The length of the cutting must be at least 7 cm.
- Cut the cuttings with sterile instruments, carrying out the operation with gloves so as not to cause infection on the cuts.
- Place the material in a shaded area for several hours to allow the cut area to heal.
- To prevent the cut from rotting, you need to sprinkle it with coal, or use Kornevin.
- Place the cuttings in water and wait for roots to form before planting in the ground.
- It is necessary to avoid overexposure in water and immediately plant it in disinfected and moistened soil.
- Cover the container with the shoots with a lid for protection and to create a greenhouse effect. But this procedure is best carried out if the plant is not very strong and healthy.
Plants must be provided with good conditions at a temperature of +22-23 degrees, and air humidity should not exceed 80%.
Pruning pelargonium cuttings. Reproduction by cuttings
Propagation by flower seeds
For many gardeners, this method of propagation is a real pleasure. Despite the fact that this is not the most popular method compared to cuttings, it also has its advantages.
For example, it can be used to develop an individual variety of pelargonium with unique properties.
This plant has excellent germination; young bushes grow quickly and unitedly. Plants grown by seed can bloom after 5-6 months.
Sowing seeds can be done all year round, but in winter it is necessary to monitor soil moisture and additional lighting. Therefore, the best decision for planting is spring and summer.
Pelargonium seeds are quite large and are planted quite simply . For seedlings, loose and light soil is used, with a minimum amount of nutrients so that the seedlings do not consume them in large quantities. It is better to make the soil for planting from garden soil and peat or sand; you can also add a small amount of humus if the soil is scarce.
Peculiarities
What do they look like?
ATTENTION : Pelargonium seeds are similar in shape and structure to coffee beans. One side of the seeds is convex, the other is flat with a pronounced dividing line of the cotyledons. Typically, pelargonium seeds have a rich brown color. On the plant, the seeds are located in the seed capsule.
The ripe seed pod is brown in color. The seeds themselves are surrounded by a dense shell with a small umbrella of fluff. When the basket with seeds is ripe, it bursts, and fruits form in its place.
What is needed to appear?
When flowers appear on indoor plants, you need to take care of the seeds. Artificial pollination can be carried out. To do this, you need to take a needle or tweezers to transfer pollen. In the center of the flower there are ten stamens and a pistil with stigma. Using the sharp side of the needle, you need to carefully remove the pollen from one flower and transfer it to the stigma of the pistil from another flower. Its flower should bloom a couple of days before this procedure. It is possible to pollinate in this way many times.
How do seeds ripen and when to collect them?
If pollination has occurred, after 3-4 days the column begins to slowly grow and lengthen. An elongated and pointed fruit-box is formed. When ripe, the box greatly increases in length and thickness. When the seeds are ripe, the fruit bursts . Oblong brown seeds, covered with long white fibers, hang on thin elastic threads.
How to collect seeds at home? Seeds must be collected immediately after ripening. It is advisable to collect seeds from dry, cracked boxes, this indicates that they have ripened. Do not wait for the moment when the box opens and the seeds fall. They may begin to sprout, making it impossible to store them.