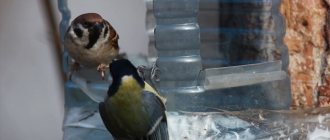
In this article we will look at the most practical material for making DIY bird feeders - milk cartons. While you can use almost any material to build a simple box with a roof that can hold a handful of birdseed and a sturdy perch, why not use the materials you have on hand to be eco-friendly? Firstly, make a bird feeder from a milk carton very easy, and secondly, apart from a little cutting with a sharp knife, this project is completely suitable for children of any age. You can usefully spend a family day at the craft table, and teach children not only to do milk carton feeders, but also from other available materials, and at the same time tell what benefits they will bring to nature. These 35 projects have been carefully collected from the Internet so that you can use instructions and step-by-step photos on how to make a simple DIY milk carton feeder.
DIY milk carton feeders
Winter is a difficult time for entertaining children. It gets dark early and it's below zero outside. We have already made snowmen and went sledding. What can you do to keep them occupied when they start complaining that they're bored? Creative bird feeders made from milk cartons are the perfect craft for you and your kids to spend time together indoors. This is not only fun, the craft teaches children how important it is to be kind to other living beings - birds, which can find it difficult to find food in winter. There are two types here: a simple milk carton feeder and a barn feeder, which is a little more complex.
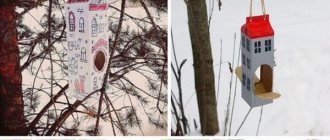
Simple instructions. Parents should cut an arched hole in the cardboard box on the side opposite the spout. Using an X-Acto knife, carefully poke a hole 25cm below. To enlarge, rotate the knife slightly. Trim the raw edges with scissors. Make a hole at the same height in the back of the box and in the top above the “roof” for the hanger. Paint the outside of the box and let dry. Add stickers or decorations.
Break branches to fit on the “roof” or parents should trim them with pruning shears. Glue the top of the cardboard box on both sides. Carefully insert a 20cm branch into the hole under the door and push it through the hole on the back, leaving about 8cm in front for the perch. Thread about 60cm of twine through the hole at the top. You can use a nail to pierce. Fill it with food and tie it to a tree branch. The second barn style feeder is a little more work. (Same instructions except changes noted below) Cut a rectangular hole in the cardboard box on the side opposite the spout, making sure both sides of the “door” are attached to the cardboard box. Paint the cardboard red and let dry. Using scissors, cut about 10 popsicle sticks in half and paint one side brown. While drying, cut more sticks according to the design shown on the doors and paint them white. Glue brown sticks on both sides of the roof and white sticks on the door.
Photo source: www.yakimaherald.com/playdate/diy/do-it-yourself-milk-carton-bird-feeders/article_57eafd68-ff79-11e6-b8ee-db074157665e.html
Other options for making poultry canteen
All of the above options were the most common. But there are also alternative options. The first is the feeder, which is made from tableware. You can also make a birdbath out of it. It is also very necessary for birds. Such original products are made from a saucer and a cup, and by adding a deep plate, you can get a drinker and a feeder at the same time. Some people manage to make bird food out of old plastic buckets. But the disadvantage of such a dining room is its large dimensions, due to which the structure cannot be placed everywhere. But the disadvantage, oddly enough, is also a significant advantage: large birds can feed, several at a time, and more food can be added.
Exotic options also include tableware made from food mesh or pumpkin. You can use regular compressed food to feed parrots.
Milk carton bird feeder
Winter is coming and the birds need some food, why not make a bird feeder out of things you can find everywhere?! Everyone loves projects where you don't have to buy anything.
Here's a list of what was needed for this milk carton bird feeder , but feel free to use your imagination if you can't find these exact items! This includes a carton of milk, popsicle sticks, paint, glue and string for hanging. If you have everything, wash the milk carton and let it dry. Paint the feeder (we used black paint here).
Cut a square hole on both sides. Make a hole 6x6cm 2cm from the bottom edge. Make a hole for the perch and place it in the center so birds can sit on both sides. Cut the popsicle sticks in half and glue them on top to create a roof. Make a hole at the top to hang the house in a good place. Fill with bird seeds.
Photo source: makencreate.com/?p=1833
Second way
The easiest way to make a bird feeder at home for children. We are preparing a large jar, and for it you will need:
- marker;
- stationery knife;
- hot glue;
- acrylic paint, brush;
- satin ribbons;
- drill with a thin drill bit;
- decorative decorations (for us it’s a large sunflower and sparkles).
If everything is there, let's start making:
- Remove the sticker from the can. We draw an entrance for the birds on both sides.
Our hole will be in the form of a large semicircle, you can make another one. The entrance is located on both sides. Cut out what is marked with a utility knife. - Now let's paint the jar with acrylic paint. We used yellow for the base of the jar and red for the design on the lid.
The sides of the lid and the bottom of the jar were sealed with satin ribbon. - Drill holes in the lid and thread another ribbon through them, using which we will hang the structure from the tree. Decorate the jar with sunflowers and glitter.
We pour millet, raw seeds, oats, pearl barley, millet inside and watch as feathered guests fly to us. It is best to use raw, unroasted seeds and cereals for birds.
Decorating the product, using it to decorate the site
In addition to its main functions, a bird feeder can also serve as a decorative accessory for a garden plot. By showing creative imagination, you can give these products an unusually original look.
Paper and cardboard products can be decorated with drawings. For this purpose, oil paints should be used. Plastic bottles and eggplants can also be beautifully painted.
Using paints, the container can be imagined as a house with windows and a door. The feeder can be stylized as a wooden frame. Crafts with images of birds and flowers will look beautiful in the garden.
To decorate products, ropes, twine, and burlap are used. Compositions of pine cones, spruce trees, chestnuts, straw, and artistically selected scraps of fabric are placed on top of the craft. Particularly talented craftsmen can decorate their products with forged elements and carvings.
If ceramic dishes act as a feeder, this option can be beautifully played up by using items from one set to create an integral composition.
You can decorate the area using disposable feeders in the form of cardboard figures. These can be stars, Christmas trees, hearts, bears and other molds.
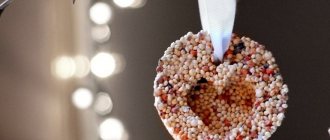
Gelatin or a nutritious adhesive mass based on oatmeal mixed with raw egg and honey is applied to a cardboard base. The figurine greased with “glue” must be rolled in a food mixture of grain, seeds, nuts and bread crumbs.
Next, a hole is made in the figurine for the fastening thread, threaded through it and the products are sent to the refrigerator for 3-4 hours. After hardening, the cheerful and nutritious figures are hung on trees. If it happens on New Year’s Eve, such figurines can act as Christmas tree decorations.
How to quickly make a beautiful feeder:
Where should a bird house be located?
An important factor is the location of the dining room for birds. If possible, avoid installing in areas where they are difficult to reach . For example, you should not place feeders in dense branches and other similar places.
You should also pay attention to ensure that cats cannot approach this place. As is known, all over the world they are excellent hunters. Many people have them in the country, in the countryside, in private buildings and in cottages.
Experts advise placing the bird canteen in places where it will be clearly visible.
Successful examples
The last thing to mention are the interesting examples. In fact, there are quite a lot of them, and new items appear every day. It is not possible to describe absolutely everything, so let’s take the most striking and interesting examples that deserve attention and are very convenient.
A very interesting solution would be a snowman made from an ordinary five-liter container. Such options will be good due to their capacity both in terms of food and in terms of the number of birds that can feed there at the same time. And the design option in the form of a snowman’s head will be an interesting solution to attract the attention of birds. The snowman's eyes are made from plastic covers, and the holes where birds can fly are lined with corrugated tubes. This allows the birds to sit down and not injure their paws. Definitely a good idea that can be implemented.
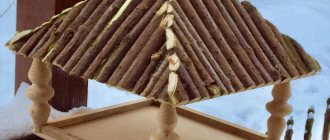
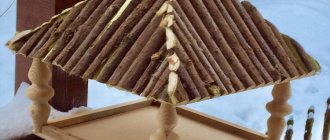
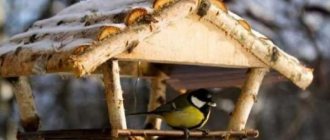
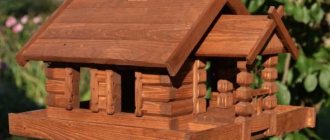
Feeders made from birch branches would be a good idea. You can make very original and comfortable designs from them that will be so elegant that you yourself will want to live in them. In addition, we should not forget that this material is completely environmentally friendly and does not cause harm. Birch bark will perfectly protect the insides of the wood from the effects of water and wind, so this option can be called durable.
A model made from a single piece of log can also be called successful. The inside of the log is cleaned, and food is added there. This solution is protected from wind and snow and will be durable. Although there is a drawback - if moisture gets inside, sooner or later the structure will collapse. But, taking into account environmental friendliness and originality, this option can still be called an excellent solution.
In general, it should be noted that it is possible to make a bird feeder with your own hands; there are options for every taste. You can build something simple from scrap materials that each of us has at home, or you can make a structure that will be almost a work of engineering, with your own diagrams and drawings. It all depends on how interested you are in the implementation of this idea, and what goals, besides feeding the birds, you want to achieve.
See below for more details.
What is important to know
Making a bird feeder is a great opportunity to spend time with children, as well as a useful environmental lesson. To choose the best place and food for birds, you need to know the habits of birds and possible dangers.
- The feeder should be placed at a height of 1.5 m above the ground, in a quiet place, inaccessible to predators, away from a noisy street.
- Avoid bright colors that frighten birds. Natural wood can be impregnated on the outside with colorless varnish. Sharp elements must be smoothed, edges and corners must be sanded.
- An important element for the proper functioning of the feeder is its location and suspension. Ideally, the feeder is placed at a height of 1.5-2 meters, on a thin stand. This will protect the birds from cats (who should also keep their food and water bowl in a warm place).
- The feeder must be made of materials that are resistant to water and weather conditions, otherwise it should be protected by painting.
- It should protect the food from falling to the ground - it should have sides.
- The roof must be wide enough so that snow or heavy rain does not cover the bottom of the feeder, so the roof is made wider than the floor.
- The roof should be low enough to prevent predators from fitting inside the box. It should protect the food tray well from rain and ensure easy landing and take-off of birds.
- Lard hanging on a stick should be raw, without spices, and should not hang for more than 3-4 weeks. It should be removed if the air temperature rises above 0 °C.
- The food is replenished regularly.
- The tray is cleaned regularly.
- It is worth checking what species of birds are visiting the feeder and adjusting the feed to suit their needs.
- It is convenient to place the feeder near the bushes, where the birds feel confident, group together, and can hide from predators.
Simple paper crafts
Any child can make original and cute birds from paper. The following ideas are suggested:
- Birds made from disposable paper plates. The plates are painted in the desired color. Eyes are drawn on them, and a paper beak is glued on. Wings and tail can be made from natural feathers or colored paper. Such figures can be used as appliqué parts or hung on ribbons.
- Lark. A body with a head is cut out of thick cardboard. A slot is made approximately in the middle into which a strip of paper is squeezed. It is pre-formed with an accordion. On both sides the strip expands, forming wings. The bird's tail is also made from an accordion.
- Stork. This voluminous applique looks very beautiful. Circles of different diameters are cut out of white and black thick paper. They are bent in half and glued with one half to the base sheet. The second half, bending slightly, provides volume to the plumage.
