The wooden stump-stand for a vase in the shape of a concrete swan has completely rotted and the time has come to make an artificial boulder to replace it. This idea arose quite recently when a swan was placed for testing on a large stone that had once been dug out on the site.
The boulder looked pretty good and the question arose: how to replicate it, at least close in size and outline.
After reading articles and watching videos on this topic, we were convinced that mainly three methods are used to make an artificial boulder:
- On a metal frame with a mesh and applying a concrete mixture, just like concrete sculptures are made.
- Using polyurethane foam applied to a metal mesh or an assembled non-metal frame.
- Using synthetic resin, fiberglass and formwork.
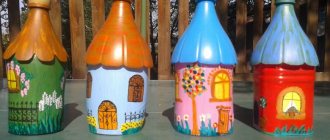
But I wanted to try something different. I remembered the method of making vases from fabric. There was enough old fabric to throw away (we use it as a rag) and it was decided to take this method as a basis and modify it a little, since the swan vase is very heavy and the artificial boulder must be strong enough to support it.
How to make an artificial boulder for the garden with your own hands
Do-it-yourself artificial boulder is popular in the field of landscape design:
- does not require large financial outlays;
- easy;
- lasting;
- environmentally friendly;
- resistant to weather changes;
- has many colors and textures.
It is used to decorate ponds, fountains, rocky gardens, to decorate garden paths, flower beds, and alpine slides. Sometimes used to create interiors in restaurants, cafes, and offices. Hollow boulders are used to decorate equipment on the site: artificial cobblestones are “put on” hatches, unsightly tree stumps in the garden, and used to cover pumps and wells.
There are several ways to make a boulder stone for your garden with your own hands. For example, using a wire frame and burlap.
These methods are simple, and therefore popular for creating decorative decorations at home. After all, to make a boulder for the garden, there are enough available materials that are available in every home (old waste paper, plastic bags, burlap, fabric). Surely, there will be components for preparing cement mortar, and if not, then they are inexpensive.
To watch a video of what the product looks like in a landscape:
Necessary materials for making stone
To make an artificial boulder with your own hands, you do not need hard-to-find materials. The bulk is represented by secondary waste (construction waste).
You will need:
- latex gloves;
- cement;
- sand;
- water;
- wire mesh;
- polystyrene foam, newspapers, cardboard, bags - for filling;
- burlap or old fabric;
- pigments - optional;
- sealant;
- plastic film.
Preparing a solution for the future stone
To prepare cement mortar, mix 1 part cement with 3 parts sand in a bucket, dilute with water until medium thick, stir with a stirrer. If the solution is too liquid, it will flow down the frame. Therefore, it must be such that it can be laid in “flat cakes”.
Area of use of decorative stone
Thanks to its significant advantages, artificial stone is an ideal finishing material. It is used indoors and on facades, depending on the manufacturing method. In addition, certain types of material are used to manufacture specific products. Let's take a closer look at what can be made from artificial stone:
- countertops for kitchen furniture, which are highly resistant to damage;
- bar counters that are durable;
- sinks and sinks that have an attractive appearance and original design;
- window sills of various sizes and shapes;
- coffee and dining tables;
- stylish and custom mirror frames;
- shelves in a variety of colors.
Stone shelves in the interior Source design-homes.ru
Decorative stone material is used to create wall panels, when cladding steps, railings, and arched structures. The use of artificial stone in the interior and when arranging a garden plot is an indicator of respectability and excellent taste.
Process of making boulder using wire frame
With your own hands, you need to create a stone frame from wire, fill it with bags, foam plastic, newspapers, cardboard (whatever is at hand) and secure the structure with cement mortar. The frame can be round, oblong, vertical - whatever you want.
The first layer of concrete must dry, after which the future boulder is coated with a more liquid solution. This can be done by hand or with a spatula. At this stage, depressions and bulges are formed that imitate natural stone. Then the workpiece is covered with plastic film and allowed to harden. After which the artificial boulder is turned over and the bottom is formed.
For greater resemblance to natural cobblestone, you can add pigments of warm and black shades. Light ones are added first, then black ones, then sprinkled with water and brushed over. To get the desired shade, you can repeat the coloring several times.
Finally, after complete drying, a sealant is applied to protect against adverse environmental conditions.
In the video, manufacturing technology using a garbage bag:
Making Hollow Stone Boulder
A hollow stone with a void inside is created similar to the previous version. A cardboard frame of the desired shape is covered with construction mesh and covered with a thick cement composition. The walls must be more than 2 cm, otherwise the decorative element will be fragile.
The workpiece is covered with film and left to dry for at least a day. After hardening, you can paint with pigment or concrete paint. When everything dries, the result is sealed with sealant. The last step is to remove the cardboard. The hollow boulder for the garden is ready.
Making an empty cobblestone inside:
Tools and stages of working with decorative concrete
In our case (an artificial boulder), for the upcoming work we will use a trowel, a brush with stiff bristles and a brush brush as tools (see the link at the end of the article).
Using a trowel, we alternately throw the prepared concrete mixture onto the surface of the block. Alternatively, it can be pre-mixed by making several turns with a spatula (as was done when making a vase for a fountain).
We vary the thickness of the layer, roughly forming the main outlines and shape of the stone.
Since the mixture is soft and plastic, like sculptural plasticine, using a trowel you can easily obtain any surface relief. When comparing with natural stone, you can take your time and calmly “draw” similar contours. Having finished, we slightly smooth out the unevenness with a trowel and lightly go over it with a brush with stiff bristles.
Pros and cons of the material
Like any material, pebbles have their positive and negative sides. Among the advantages: the ability to combine different sizes of mosaic elements, any shape of the path, the ability to use other materials.
The disadvantages include the decorative purpose of the path. Unfortunately, it will not be able to withstand heavy loads, so this type of path can only be used in the country. It is difficult to maintain the path in the winter season, if such a need arises.
Option . Pebble mosaic tile floor
The easiest way to create pebble floors involves using special tiles. It consists of grid squares (most often 30x30cm) with pebbles glued on. Each tile holds about 60 pebbles. Due to the fact that its base is a transparent mesh, and the arrangement of the stones is wavy, the joints between the tiles are almost invisible. As a result of laying such tiles, a continuous mosaic canvas is formed without visible seams. This greatly facilitates the work of a self-taught craftsman who decides to make his own pebble floor. Necessary materials:
Track service life and manufacturing cost calculation
The service life of concrete paths in stone packages depends on compliance with installation rules. The coating is durable and strong, with a service life of up to 10 years. All costs for laying concrete stones are covered.
The cost of laying concrete paths in packages under stone depends on the prices for building materials in a particular region. The final cost is also affected by the thickness of the concrete layer and the area of the garden path. 1 cu. m. of road with an area of 10 sq. m. m. thickness 10 cm) costs an average of 3.5 thousand rubles. It should be noted that purchasing ready-made concrete with delivery often costs 30-40% less.
Some important points
- When collecting pebbles, pay attention to flat ones. In terms of size, medium and small ones look more beautiful.
- When it comes to color, monotony does not matter.
- The thickness of the stones should match each other; if there is a difference, sand it down.
- The gaps between adjacent stones are minimal.
- You can come across advice on covering the top of pebbles with varnish - this is unnecessary. After all, in a damp room the varnish will crack and rub off, and the product will have a sloppy appearance.
- After gluing the pebbles, you need to let the glue dry for at least 24 hours.
Pebble rug
Kinds
Forms
The form is selected based on your personal preferences, conditions and capabilities. Circle, square, rectangle or oval - the choice is yours.
An orthopedist should recommend the use of a foot massage mat for a child.
Rectangular or square options are more common.
Size
It can be different: from small (like a bedside rug) to impressive sizes. Some parents prefer to cover the entire space of the nursery with such a rug. And sometimes they make several separate small fragments with a massage surface, and then place them close to each other.
In addition to strengthening the legs, the massage mat sends signals to the brain, thereby training its work, developing the departments that are responsible for memory, thinking, and speech.
Remember, if the rug is small, it will be inconvenient to perform exercises on it. After all, it’s only at the very beginning that the baby just stands; as he gets older, he will need to perform certain exercises on him.
There are several types of children's foot massage mats.
Materials
Variations are possible here. The main thing you will need:
- thick fabric (such as “jeans”);
- a bedspread you no longer use;
- a piece of rubber or a rubber mat (a yoga mat will do);
- laminate.
Rugs vary in the material from which they are made.
Elements for sewing
Anything that can be sewn will do:
- buttons;
- wooden and acrylic beads;
- plastic bottle caps;
- hot coasters;
- sponges for washing dishes;
- curtain rings;
- curlers;
- pencils;
- ballpoint pen refills;
- grates for kitchen sinks;
- thick braid or rope.
They can be soft and elastic, for children in the first years of life, or they can be quite hard, for older children.
And this list can be expanded endlessly.
There are options for bedding with sewn-in elements: small bags filled with cereal or sand.
You need to choose an orthopedic mat based on the age of the child.
Items that can be glued
As they say, what can't be sewn can only be glued. And this is absolutely true when it comes to creating a massage surface.
You can make a rug yourself from chestnuts, pebbles, bottle caps, and various ropes.
You can glue:
- pebbles (natural sea or artificial for an aquarium);
- coffee beans;
- beans or peas;
- walnut shells;
- wooden elements: cubes, bars, disks.
Tactile models
To make tactile models, it is important to use as many different “feel” elements as possible. Therefore, Velcro, zippers, and fabrics of different textures are added to the above details.
For a child from 1 to 3 years old, it is necessary to choose a soft surface with slight unevenness.
Developmental models
They are made using different objects and fragments, and are distinguished by the presence of numbers or letters, various geometric shapes or elements of the surrounding world (flowers, butterflies, river, bridge, etc.)
Children perceive them as a toy and activities on such a rug do not cause aggression in them.