Tree stumps
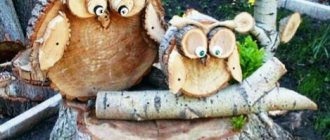
Often, stumps located on a suburban area create problems for the owners and disrupt the harmony of the appearance of the territory. However, with a special creative approach, they can become additional design elements. The final compositional solution depends on the size of the stumps and their location. The following options can be offered:
- Fly agaric from birch stumps. The white bark naturally imitates a stem. Just attach a red plastic bowl on top and draw white circles on it.
- From a large stump you can make a funny mushroom that a child will undoubtedly like. It is necessary to remove as much bark as possible and clean the surface with sandpaper. A laughing face is drawn with a brush (no special artistic skills are required for this). It is important that a cheerful character appears. A basin is placed on top of the stump and painted with brown acrylic paint.
A mushroom family can be located on a stump of sufficiently large diameter. Its cut is painted green or covered with moss. Small mushrooms made from round stones are planted in a mini-clearing. For the leg, light-colored pebbles are selected. It is better to paint hats in a bright color.
"Concrete mushrooms"
Country crafts can be made from concrete. To do this, prepare a solution from a mixture of cement, sand and crushed stone in a ratio of 1:3:3. It is brought to the consistency of thick sour cream with water. The mushroom is assembled from 2 parts - a stem and a cap. Both parts are made by pouring mortar into molds.
When making small mushrooms for the cap, you can use bowls of different depths, halves of rubber balls and other hemispheres. For very tiny products, a cup is suitable. Large hats are made using basins. The most common shape for the stem is a plastic bottle with the neck cut off. When pouring the legs, a metal rod should be placed in the center, the end of which comes out of the concrete from above. The cap is then attached to it. This reinforcement increases the strength of the product. The final operation is painting. Usually the stem is painted white, and the cap is painted brown, red, orange, etc., depending on the type of mushroom.
We use vegetables and fruits
As a basis for the composition, you can use a regular box, board or sheet of cardboard. Leaves or greens are placed on it. To make a mushroom-shaped vegetable craft, take several carrots that will act as legs.
Hats can be made from potato or apple halves. It is advisable to fasten the workpieces together using matches or toothpicks.
Application of polyurethane foam
Polyurethane foam is widely used in the manufacture of crafts. You can also create mushrooms from it. The photo shows a simple version made without pouring molds. The mushroom is simply molded from numerous layers of foam, with each subsequent layer applied after the previous one has hardened. A knife is used for shaping. The surface remains uneven even after working with a knife. This drawback is compensated by painting a laughing face with a large nose and big eyes on the leg.
Priming the workpiece allows you to create more attractive shapes. First, the excess mass is cut off using a knife and a characteristic shape is cut out. Then putty and primer are applied to level the surface and ensure the correct geometry. The final look is achieved by painting with acrylic paint.
Wooden crafts
Almost any type of mushroom can be made from wood. The photo shows boletus. To make them you need a hacksaw, chisel, axe, knife, hammer, file. If you use a grinder and a grinder, the work will be greatly simplified. The base for the mushroom can be made in the form of a saw cut 3-5 cm thick. The legs and caps are rounded using an axe, knife and file. The parts are painted and fastened with wood glue. They can be securely connected with nails or screws.
Bright wooden chanterelles look impressive on the site. Each mushroom is assembled from 3 parts:
- A short stem is a cylindrical piece of a tree trunk with a small diameter.
- Cone part. It does not need to be made symmetrical. Usually the mushroom has a displaced axis, which should be reproduced. Longitudinal grooves are made on the surface of the cone.
- Hat. It is made in the form of a cut of a trunk of any shape.
The coloring process completes. The stem and cone are painted orange, and the cap is painted yellow. Chanterelles can also be made by combining wood and foam. The leg is made from wood, and the cone and funnel-shaped cap are formed from layers laid in a circle (with a gradual increase in diameter upward).
Plasticine mushrooms
A child can take a plasticine craft to an exhibition in his kindergarten. A flat cake made of green plasticine is used as a base; grass is imitated on its surface (it should extend onto the stems of the mushrooms). Roll out 3 cylinders of white mass - legs. Round lumps of brown plasticine become caps. All parts are connected, and the mycelium is ready.
Teenagers can also do this kind of creativity. At an exhibition at school you can present a whole “fairytale mycelium”. In it, each mushroom represents a fairy-tale hero. The main thing is to be able to create the faces of the figures. The craft requires certain skills and accuracy, and if you approach the process creatively, the result will be very original.
Plasticine: a combination of simplicity and originality
This mushroom is easy to make. It is enough to roll out a cylinder-sausage for the leg from light plasticine and roll a ball from brown or red plasticine for the future hat.
The leg should not be too long - thickening is necessary at the bottom for a more durable attachment. You can make grass at the bottom. To do this, take the green mass, roll it into a sausage, and then flatten it. Using a knife, a fringe is cut out, which is then wrapped around the leg at its base.
Closer to the hat you can make a skirt. To do this, wrap a white plasticine sausage around the leg, secure it and slightly flatten it, as can be seen in the photo of the mushroom.
A hat with grooves will look original. The rolled out pancake for the hat is turned over. On the inside, grooves are made using a toothpick, running from the center.
To make a double hat, just roll two balls from white plasticine. One of them is flattened into a cake, which is fixed on the leg. A white ball is placed on top of the pancake. A pancake made of red plasticine is placed on top of the ball and smoothly flows around it, connecting with the white lining.
Plasticine can also be used as a connecting element - a ball of plasticine is placed on a vertically fixed acorn, and a chestnut cap is attached on top.
Mushroom made of cardboard and paper
A simple fly agaric is made from a disposable paper plate, cardboard and cotton wool. Manufacturing procedure:
- A cylinder is rolled up from white cardboard - a leg. The ends are neatly glued together.
- The plate is cut from the edge to the center, creating a cone shape.
- The bottom of the paper cone is filled with cotton wool, which is glued to the paper.
- The hat is painted red, and then white paper circles are glued onto it.
- The base is made from thick cardboard. A layer of cotton wool, painted green, is glued onto it (you can use brilliant green).
After gluing all the parts, see the result of the work.
Fly agaric made of plasticine
This craft is suitable for children 4-5 years old.
Materials and tools:
- Plasticine in white, red and green colors;
- Stack for plasticine;
- Modeling board.
First, a foundation is made - a green clearing on which the mushroom will grow. To do this, the child rolls a ball of green plasticine and flattens it to make a round pancake. When the clearing is ready, you can begin to create the leg. White plasticine is rolled out into a sausage and attached to the base.
Note!
Crafts from toilet rolls: step-by-step instructions for creating crafts. Master classes with simple work schemes (140 photos)Crafts from corrugated paper - step-by-step master classes on how to create crafts from corrugated paper with your own hands + photo diagrams
DIY crafts made from cereals: photo reviews of the best works made from cereals. Step-by-step instructions and diagrams for creating DIY crafts
To form a hat, you need to take red plasticine and make a ball. The child places this ball on a modeling board and gently smoothes it from the center to the edges to form a cone.
By pinching off small pieces of white plasticine, the child sticks them onto the resulting red hat. The spotted cap is connected to the stem. The result of the work is a bright red fly agaric in the clearing.
Mushroom from a jar
An original children's craft is made from a small glass jar. It is made as follows:
- The glass jar is painted white or beige.
- A strip is cut out of green fabric. On one edge, teeth are made. The strip is glued at the very bottom to the can. You can attach paper flowers to it.
- A red cloth is stretched over the lid of the jar. A padding polyester or cotton wool is placed under it until the cap is given a characteristic round shape.
If the mushroom is to become a fly agaric, then white circles are glued to the cap.
Mushroom craft with children
Children's crafts "mushrooms" can be of different levels of complexity. Even children 2-3 years old can handle the simplest jobs. These mushrooms are small in size. It is important to choose safe materials that are easy and convenient to work with.
Note!
How to make a rose from paper - the best ideas for DIY crafts + master classes on creating a rose from paper (160 photos)Craft letter - TOP 120 photo reviews of craft letter. Simple diagrams + step-by-step DIY instructions
Crafts made from nut shells: the best step-by-step master classes on creating DIY crafts with photo examples of finished works
Nature prompts
Elementary crafts can be made from acorns and chestnuts. They will require large acorns and ripe (brown) chestnut fruits. The caps on the acorns are separated, and a chestnut is glued in their place. Several of these mushrooms create a beautiful mycelium. You can also include very small fungi. They can be imitated by an acorn with a completely removed branch. The hat can be tinted with brown paint.
Making crafts in the shape of mushrooms is a fascinating creativity. In addition, these simple figures can transform the space around, for example, the landscape of a summer cottage or a children's playground. This craft can be the first step towards mastering useful skills. And it will give you the opportunity to present your abilities at exhibitions in kindergarten or school.
Crafts for a summer cottage or cottage plot
Compositions made from artificial mushrooms create an atmosphere of fairy tales and comfort in the open area. A mushroom meadow will decorate the area, and toy animals can enliven the overall look.
