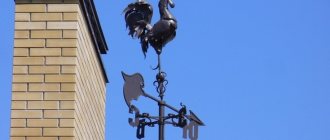
One of the most famous devices for determining the direction of the wind is a weather vane.
They were first used by sailors and fishermen before going to sea. Subsequently, weather vanes moved from ships to coastal houses, and the tradition of installing them began.
Today, a weather vane is an excellent design move that can give individuality and introduce some classic feature from the past.
Story
The weather vane has its own rich history. There is no exact information about who and when the first weather vane was made. But today it is known for certain that the first weather vane decorated the Tower of the Winds in Athens, and this was around 48 BC. This weather vane was an image of the sea god Triton and the direction of the eight winds. You can immediately understand that even the very first design had a symbolic meaning.
The tradition of making weather vanes in the shape of a rooster originated in England. There, since ancient times, it was considered a symbol of a new day, vigilance and had magical meaning. The rooster is also a symbol of Christianity. During his reign, the Pope ordered all churches to be decorated with the image of a rooster, which symbolized the Apostle Peter. Thus, the roofs of cathedrals in Catholic Europe began to be decorated with weather vanes depicting this bird.
The rooster is also a symbol of France, which is why its people love to decorate their houses with weathervanes with this particular image.
The Vikings also loved this device. They made weather vanes from bronze, often gilded, depicting figures and scenes from Scandinavian mythology. The Vikings often placed their weather vanes on their ships. The symbol of the stork - the patron saint of the family hearth - originated in the Scandinavian countries.
During the era of feudalism in Europe, the weather vane was made with the image of the coat of arms of the owner of a particular castle. The Japanese and Chinese, who had their own mythology, loved to decorate their homes with weathervanes depicting a dragon. He brought good luck to the house and protected it from evil spirits.
In Rus', weather vanes began to appear in the 15th century as home decorations. Initially they were made in the form of a flag. But over time, they began to depict animals, people and mystical creatures.
In 1782, by order of Empress Catherine II, the largest weather vane in the world was made and installed. The name he was given is symbolic - Tsar Weathervane. But, unfortunately, due to its enormous weight, it did not last long and was subsequently melted down.
Over time, this device gained increasing popularity, so in Europe, at the end of the 17th and beginning of the 18th centuries, workshops even began to appear in which weather vanes were produced en masse.
It should be noted that this trend is still observed today due to the growing demand for this design. As it turned out, weather vanes have not lost their meteorological value. Forecasts do not always correspond to reality, and modern weather vanes, equipped with a more complex design and electronic filling, can easily determine the strength of the wind and its direction.
They are most often used by modern weather services and aviation bases.
Today, the simplest version of this device has lost its scientific value due to the development of technology, but modern people still decorate the roofs of their houses with this simple device for decorative purposes.
The connection between the weather vane and symbolism
Did you know that weather vane silhouettes are directly related to symbolism. According to Feng Shui, in itself, it is considered as a kind of positive attitude towards neighbors.
Previously, they were often used as amulets for the home, and each silhouette had a separate meaning.
Most often, owners choose images of animals, where: a rooster scares away evil spirits; the owl signifies wisdom; stork - family well-being; cat - comfort; dragon - spiritual strength; Leo - power.
There are other photos of weather vanes, which are presented in a wide range in the catalogs of specialized stores.
The purpose and principle of operation of the weather vane
Many owners of private houses are thinking about how to make a weather vane with their own hands at home with a minimum of effort, money and time. However, before you start making it, it would be a good idea to learn about its purpose, structure, varieties and meaning of symbolism. Let's look at them in more detail.
A weather vane is a decorative element of the roof of a house and a multifunctional device. The principle of its operation is based on the interaction of a special part - a flag - with the air flow.
The force of the wind turns it in the direction of minimal resistance. In this case, the counterweight arrow will always show the direction from which the wind is blowing. If you have a light propeller, the device will also determine the wind load, and when connected to other devices, it will also perform other useful functions.
Depending on the tasks assigned to it, it can have one or several of the following purposes:
- Decorative.
- It is part of the exterior design of the building.
- Meteorological.
- Acts as a device showing the strength and direction of the wind, as well as its quantitative measurement when a meter is connected.
- Protective (for chimney).
- Closes the pipe outlet from precipitation, objects and wind.
- Electricity generating.
With sufficient power of the blades and constant high wind force, it is possible to connect a generator to generate electric current.
In addition, a weather vane can protect both the house itself and the surrounding area from rodents. However, in this case it is not installed on the roof, but directly on the site.
Interesting information! A weather vane is one of the obligatory elements that crown the roof of a private house in almost all European countries. Moreover, in each specific case it looks original, unique for the entire area.
Weather vane made of plastic
The main task of a weather vane is to indicate the direction of the wind. At home, it is easy to create a model of any complexity from a practical polymer. A homemade windmill will harmoniously fit into the design of the roof, garden and site.
Propeller
A plastic weather vane is a practical design that can be easily made at home. To make the model you will need polymer sheets of different colors. The drawing is fixed to the material using double-sided tape. The contours of the drawing are drawn on the surface with a marker. Using scissors, carefully cut out the figures along the lines.
If the model is simple, then the parts are glued together with hot glue. The silicone compound from the gun dries quickly and bonds small components well. For large windmills, the propeller is fixed with a self-tapping screw and a decorative cap is put on top.
Polymer model Source YouTube.com
Plastic is very light, so when creating a weather vane at home, weights are used. The body is assembled from metal pipes. The mobility of the structure will be ensured by a bearing or a small ball, which is placed between the parts.
Wheel
At home, you can easily make a weather vane repeller for birds and rodents from plastic bottles and the remains of an old bicycle. The design can combine small and large containers. Multi-colored tanks rotate to create a bright rainbow effect. The knitting needles are tinted with varnish or enamel.
The drawing is made on a piece of wallpaper or whatman paper, taking into account the diameter of the wheel and the number of blades. Transfer the schematic drawing to the bicycle part. Points are placed at the connection points, holes are drilled and bolts with bottle caps (threaded outwards) are inserted.
Repeller for the site Source eco-officegals.com
Containers are screwed onto the wheel, alternating large and small volumes. To improve the torsion of the weather vane, the bottom of large cylinders can be cut off. The blades point in the same direction and move evenly. The holder for the structure is made from a pipe or a wooden block.
Yula
A decorative garden weather vane is easy to make from plastic. At home, use a two-liter bottle. The cylinder is cut into 2 parts, a hole is punched in the center of the bottom and lid with a metal rod. The hot iron melts the polymer, so the holes have smooth edges. The structure must move freely around its axis.
On the upper and lower half of the bottle, cut the fringe to the same length, leaving 5 cm to the edge. At home, it is better to use pruning shears or strong garden shears. After assembly, the weather vane resembles a children's toy spinning top. The strips are glued together with hot glue to create a three-dimensional structure.
For decoration, the windmill is painted with acrylic paints or nail polish. The model decorated with fragments of CDs looks impressive. In the sun, the weather vane creates bunnies, which, together with the rustling sound, will scare away the birds.
Device
Basic elements of a weather vane:
Checkbox.
This is the main part of the device. Under the influence of the wind, its plane turns around and stands parallel to the air flow. It is made in any geometric shape or with artistic design - a thematic figure. Thanks to this, it gives the main decorative value to the entire device.
Arrow.
Placed on the opposite side of the flag. The main purpose is to indicate the direction from which the wind is blowing. It is not a mandatory design element - if the flag is installed directly on the vertical axis.
Counterweight.
Installed on the opposite side of the flag axis. Balances the flag-boom system (wind vane). As a rule, it has the same mass as the opposite part. Sometimes it is more difficult when the device is made so that when there is no wind it returns to the same position.
Vertical axis with housing and mounting block.
The axis on which the weather vane is located is fixed in a special housing and sits on a bearing. In an effort to simplify the design, it is often simply installed in a pipe of a suitable diameter. At the bottom, to facilitate rotation, it simply rests on a metal ball.
Protective cap.
It is placed directly above the vertical axis and serves as protection against the penetration of moisture and dust into the rotating mechanism.
Propeller.
Mounted instead of a boom and allows you to estimate wind speed. Electronic meteorological meters or an electric generator can be connected to it.
Fastening elements.
Depending on the material and design of the roof, brackets, screws, bolts and other fasteners are selected in each specific case.
Advice! When choosing how to make a weather vane with your own hands, you need to take into account the smallest details, so as not to carry out complex modifications later. One of these elements is the wind rose. It consists of a pair of rods crossed at right angles, on the edge of each of which a letter with the corresponding part of the world is installed. After it is correctly aligned with the compass, you can quite accurately determine the direction of the wind.
Installation Rules
Any type of weather vane should be installed at the highest point of the roof (on the chimney cap or on the ridge). For maximum accuracy of readings, the device should be located at a height of 10 to 12 meters from the ground. This will ensure free flow of air flow to the weather vane. To correctly orient it to the cardinal points, you need to use a compass.
The weather vane is installed on a steel pipe, which is placed on a vertical fitting. It is important to ensure that the device is installed strictly vertically.
The position of the weather vane is adjusted using special fasteners. Reliable installation of the structure is ensured by additional metal strips on the sides of the support.
New types of weather vanes are equipped with a reliable rotation unit, including 2 closed metal-graphite bearings. They increase the device's sensitivity to light winds.
It is necessary to take measures to prevent moisture from entering the rotation unit. This can be achieved by installing a special cap over the bearing sleeve.
A metal structure on the roof of a building can serve as a lightning rod. To do this, it is necessary to ensure its grounding in accordance with the “Instructions for the installation of lightning protection of buildings and structures.”
Select an option
Undoubtedly, a beautiful and original weather vane can be purchased in a store. But it is also possible to make it yourself at home. To do this, you need to select the appropriate material and develop a detailed sketch of the device.
The weather vane can be made from a variety of materials:
- plywood;
- tree;
- metal;
- plastic or plastic bottles;
- old CDs.
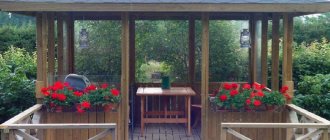
The last two options are suitable for small structures that can be placed, for example, on the roof of a veranda or gazebo. Plywood and wood are short-lived materials, even if they are treated with special means.
Metal can withstand all weather changes and strong gusts of wind, so it is considered the most successful material for a decorative weather vane.
The most important step is choosing a figure for the flag. After all, there are opinions that this is not just a decorative element, but also a kind of symbol. Therefore, any image has its own mystical overtones.
The symbols are deciphered as follows:
- The rooster is very popular in Russia; it scares away evil spirits.
- The cat is a symbol of home comfort.
- The owl symbolizes wisdom.
- Leo , the king of beasts, indicates power and strength.
- The eagle helps protect your home from enemies.
- The stork brings mutual understanding and happiness to the house.
- The goose is a symbol of vigilance, love and order in the home.
- The chimney sweep is a symbol of good luck.
- George the Victorious protects the house from any troubles.
- Baba Yaga opposes the evil influence of evil spirits.
When choosing a weather vane figurine for your home or cottage, it is better to familiarize yourself with what it can symbolize.
It should be noted that there are several main functions that this design has.
- Meteorological. First of all, a weather vane serves to measure the speed and strength of the wind and indicate its direction.
- Protective. When installing this structure on a chimney, it serves as protection from strong wind blowing.
- Repellent. If you install a propeller on the weather vane and place this device not on the roof, but on the ground, then the vibrations will repel moles, rodents and shrews. If you install an electronic windmill, the effect will be stronger.
- Decorative. This device often has a very attractive appearance, so it is installed on the roof as an unusual decorative element.
Symbolic meaning
Movable figures on the roof not only helped to determine the direction of the wind or scare away birds, but also carried a semantic load. The device decorated and served as a talisman. Before you make a weather vane at home, you need to understand the meaning of the symbols.
Rooster
The traditional model was popular not only in Western Europe, but also in Rus'. The bird wakes up first, screaming to announce the dawn. According to popular beliefs, the image protected residents from danger and warned of approaching enemies. A weather vane in the shape of a rooster protected the house from fires and robbers.
Bird on a weather vane Source arno-group.ru
Stork
The model was popular in Scandinavia. Feathers were considered a symbol of happiness, comfort and renewal of generations. The design in the form of one bird called love, success and prosperity into the house. Families wanting children installed a windmill in the shape of two storks.
Beautiful design Source eurofluger.ru
Swans
The weather vane consisted of a pair of birds that swam or flew towards each other. Swans were a sign of marital fidelity, wisdom and mutual support. Birds were considered a symbol of natural beauty, chastity and personified great love.
A pair of birds on a weather vane Source livemaster.ru
Angel or Christian saint
The design is often used by believers. The figurine of an angel on a weather vane means spiritual closeness and a symbol of true faith. St. George the Victorious will protect from evil and enemies. If there are small children in the house, then the image of St. Nicholas will bring peace and kindness to the home.
Cat and dog
The animal symbolizes the desire for freedom, love for independence. Cats have 7 lives, which they will devote to protecting their family until the seventh generation. A pet simultaneously lives in the world of people and spirits, so it will protect its residents from envious eyes and otherworldly interference.
Windmill with animals Source fotokto.ru
The dog symbolizes devotion and fidelity. The dog has excellent eyesight and sense of smell. The animal vigilantly monitors everything that happens in its visibility zone. The figure on the roof will recognize visitors with bad thoughts and will drive them away from the threshold.
The Dragon
In Europe, the mythical animal was present on the coats of arms of nobles and symbolized victory over enemies. In China, the dragon brought success, financial well-being into the home and protected against illness. On the weather vane, the Western beast was depicted with wings and a pointed tail. The eastern species resembled a long snake with paws and a pearl in its mouth.
Mythical animal on a weather vane Source westcoastweathervanes.com
Knight
The figurine of an armed man is holding the flagpole. The symbol denoted courage, spiritual perfection and strength. By installing the structure on the roof, the residents of the house showed their readiness to protect the weak and oppressed.
Baba Yaga
The witch on the weather vane symbolizes knowledge, cunning and wisdom. In fairy tales, the character lives on the border of the world of the living and the dead, and does not allow evil to penetrate human lands. According to signs, Baba Yaga on the roof will protect against the evil eye, material losses and bring peace to the house.
Windmill with a witch Source 26.teplozhar.ru
Lion or bear
Proud animals symbolize courage, generosity and nobility. A lion figurine on a weather vane signifies the ability or desire to dominate others. The design with the bear will protect the residents of the house from losses and failures.
Eagle or owl
A huge bird with open wings is the embodiment of strength, intelligence and attention to others. The noble eagle on the weather vane became a protector from evil people and betrayal. Thanks to good eyesight, an owl will warn of an enemy who has entered the home.
Griffin
The mythical animal combines the features of an eagle and a lion. The winged beast signifies prosperity, wealth and power. The structure on the roof is installed by people who want to emphasize their high status and influence, so you should not mount the figurine on a tiny country house.
Mythical creature on a weather vane Source dinora.rf
Horse
The horse on the weather vane symbolizes strength, vitality and nobility. A powerful animal will give those living under the roof endurance, prudence and endurance. A man on a horse (rider) represents self-confidence.
sailboat
The frigate on the weather vane is a symbol of hope, determination and security. Windmills with sailboats were often installed by sailors who went ashore. The image of a ship will help to destroy the boundaries that hold back ambitions and desires.
Materials and tools
Typically, the design of a simple weather vane includes the following elements:
- A flag that turns in the direction of the wind. It can have a simple geometric shape or an unusual decorative design and be the main decoration of the device.
- Arrow. The figurine is most often placed on it.
- Counterweight. It is located on the opposite side of the flag. It must have a greater mass than the mass of the flag, then it can return to its original position.
- Vertical axis. It is mounted either on a bearing or on a metal ball, which allows the structure to rotate.
- The cap prevents water from entering the bearing.
It is best to make a flag from metal, for example, it can be copper or steel. This way it will be much more durable than a product made from wood or plywood sheets.
There is always the opportunity to make a forged product, but it will be quite heavy, and not everyone can do it on their own. And the work of a master will be expensive.
Any material must be treated with a protective coating, such as paint, to withstand the elements.
The base and axle should be metal, as this is a very strong material for their construction.
To make a weather vane with your own hands, you will need special tools:
- a jigsaw for wood or metal (this is useful for cutting out a flag);
- drill;
- hammer;
- soldering iron;
- vice;
- pliers;
- grinder and files;
- sandpaper.
The principle of operation of a chimney weather vane
There are so-called chimney weather vanes, and their importance for the normal operation of chimneys is very great. You can choose designs that help drain rainwater and protect pipes from birds and even small animals. It is worth noting that the smell from a burnt nest that a bird made in the summer will be simply unbearable. Weather vanes that are designed to protect chimneys are called weather vanes, chimney caps or chimney caps.
- The protective role of the weather vane
A smoker, or weather vane, is used to cover an open chimney pipe. This device performs protective and decorative functions. Chimneys are installed above the pipe and visually complete it. The problem with this device is that the weather vane bearings need to be periodically maintained and lubricated. In winter, ice forms on the surface of the chimney due to the steam contained in the smoke, which needs to be knocked off.
The main task of a chimney weather vane is to prevent backdraft. It is worth noting that conventional caps that are installed on chimneys are just the opposite.
Evgeniy Filimonov
Ask a Question
may contribute to backdraft if strong winds blow.
As noted above, the design of a weather vane includes an axis, a figure and a cross indicating the cardinal directions, which distinguishes it from a simple cap. This device gives the chimney pipes an aesthetic, finished look.
Why is it worth installing this type of weather vane on the chimney? This decorative element provides effective wind protection, which is especially important for the northern regions of the Russian Federation. Its design helps deflect the air flow and prevent it from being blown into the pipe. Chimney weather vanes are equipped with a special damper that closes the chimney from the wind. This element allows smoke to exit the chimney calmly from the leeward side. Thus, a draft is formed that removes combustion products.
The weather vane on the chimney prevents raindrops and snow from falling directly into the channel. To prevent the resulting condensate from penetrating inside the pipe, special drips are installed on the wind vane. Without such a design, the upper part of the chimney will get wet and collapse. In winter, condensation will enter microcracks in the chimney. After freezing, water droplets in the pores of building materials will expand. Constant expansion and contraction due to freezing/thawing of moisture significantly accelerates the destruction of the chimney.
- Weather vane deflector
Another type of chimney weather vane is called a deflector. The term "deflector" refers to its ability to deflect air currents. The design of such weather vanes, as a rule, includes two cylinders, above which cone-shaped umbrellas are fixed.
The principle of operation of such a device: the air flow, resting against the wall of the upper glass, bends around it and is directed upward. As a result, the speed of air movement inside the pipe increases, which leads to increased draft in the chimney. Air flows moved by the wind are diverted by the upper cone-shaped cap and do not enter the pipe.
A correctly selected weather vane-deflector model will not only prevent the occurrence of reverse draft, but also enhance the removal of combustion products. The fact is that the weather vane, turning with a cone towards the air flow, creates turbulence. It should be taken into account that in winter ice may appear on its surface, blocking the operation of the device, so you need to get rid of it periodically.
When installing a weather vane deflector on a chimney, you should use only bearings that are protected from moisture. During operation of the device, it is necessary to lubricate such bearings once a year. Modern models of weather vane deflectors usually have the shape of a crown or a crown that adorns the top of the pipe.
Drawing
First of all, you need to decide which figure will crown the weather vane. Then you need to create its drawing with your own hands. If you have never cut out this kind of shapes before, then it is better to stick to a simple option for better execution.
The circuit is very easy to make yourself. It is better to first draw a drawing on a regular sheet of paper, and then complete it in exactly the size that the figure will be, thereby obtaining a stencil. This stencil will be universal for any manufacturing material. It is better to choose its dimensions in the range from 300 to 500 mm, otherwise the flag may break.
Manufacturing stages
Regardless of the choice of materials and shape of the figurine, the manufacturing steps will be the same.
- The main parts of the structure are the axle and its body. The process of rotating the weather vane will depend on them. It is better to install the axle on a bearing, and the diameter of its base should clearly match the diameter of the bearing. The bearing must be covered with a housing to prevent moisture from getting on it.
- During the manufacture of the device, it is very important to follow all the technology, since its functioning will directly depend on this.
- Figures cut out from a stencil using a plasma cutter or sawed out with a jigsaw are very beautiful. An updated version of the fan type can be made from an old weather vane. It will look more modern.
- The first step is to make a flag. A pre-prepared stencil is placed on a sheet of metal, secured with clamps and cut out using a jigsaw. Cutting out a design with a regular hand jigsaw is a very complex process. Therefore, if you have a jigsaw, then it is better to use it. If you prefer metal, for example, plywood or a plastic panel, then you can use a plasma cutter.
- As soon as one part of the figure is cut out, you need to loosen the fastening and turn the sheet over so that you have free access to the other part. The lines must be cut carefully so that no irregularities arise. It is better to carry out all work on a metal table.
- After the figure is cut out, it needs to be sanded well using a sanding machine. Small holes are cut using a drill and smoothed with a file.
- After making the flag, you need to make an arrow. It is also better to make it from metal. A stencil is applied to it and the required shape of the product is cut out. The boom will include two parts, which are manufactured separately. Both parts need to be sanded well.
- Both parts of the pipe are welded to the turning mechanism. A metal ball or bearing can be used as it.
- After the arrow is secured, you can attach the figurine prepared earlier. It is also better to do this by welding for greater structural reliability. The flag must be secured to one part of the arrow, since there will be a counterweight on the other at its sharp end.
Support
To make the support you will need a thick metal rod. It is attached to the end of a pipe, into which a metal ball must also be placed.
Lid
The cover can be made of any materials, the main thing is that it fully matches the dimensions and protects the bearing well from moisture.
Installation of a finished weather vane on the roof
It is not enough just to know how to make a weather vane with your own hands from scrap materials; you also need to correctly install it in the cardinal and vertical directions, and also securely fasten it in accordance with the roofing material. In general, the installation procedure is as follows:
Initially, the structure is assembled, then checked for correct assembly.
- Fastening elements are being prepared.
- The device is brought onto the roof and installed with alignment to the compass (if there is a wind rose) and vertical to the building level.
- The fastening block is fixed with screws, nails or other fasteners.
- Before completing the installation work, you must make sure that all parts of the weather vane are in place - especially the bearing or ball for the rotary axis. Without the last element, the device will not function correctly. The ease of impact of the minimum wind load on the flag and its response will depend on this.
Important information! When installing the weather vane, it is important not to damage the waterproofing layer of the roof. Otherwise, you will have to not only reinstall it, but also repair the roof from leaks.
Optimal weather vane size
To choose the optimal appearance of a weather vane, you need to be able to view its figure from a great distance.
First you need to determine the location where you plan to install such a structure:
- Bathhouse, garage, shed or gazebo
The average height of such buildings does not exceed 3.5 meters. When installing a weather vane on a bathhouse, barn or gazebo, it will serve as a bright landmark, but only on the site. The length of the silhouette of the figure of such a device should be from 40 to 60 cm. With these dimensions, the weather vane will look proportionate against the background of the garden building.
- Cottage
If the weather vane is planned to be installed on a one-story residential building, then its length should be from 60 to 80 cm. With such dimensions, the structure will be clearly visible not only from the site, but also from the street.
- A house with two or three floors
A weather vane for a cottage with 2 or more floors should be chosen with a silhouette length of at least 80 cm.
Stages of creation
Making a weather vane is quite a responsible and troublesome task. The incorrect shape of even one seemingly unimportant part will lead to the device not working properly. Therefore, it is better to entrust the production of such a device to real professionals. For those who have some experience, you can offer an example of the following instructions on how to make a weather vane from a stainless steel sheet yourself:
- A drawing of the weather vane design is made.
- Draw the main figure in full scale on a large sheet of paper.
- Then the figure is cut out with scissors.
- The resulting stencil is applied on top of a suitable size stainless steel sheet about 2 mm thick.
- Draw the outlines of the figure with a marker/pencil/chalk.
- Then the sheet is clamped in the layout table.
- After this, using an electric jigsaw, the required figure is cut out exactly along the outlined contour.
- Next, burrs are removed from the edges, irregularities are removed, and corners are adjusted.
- The cut out contour is given elements of artistic processing - eyes, mouth, nose, mustache, etc. are made.
- After this, a weather vane is made from a metal rod with a counterweight.
- All elements are carefully verified before fixation so that there are no distortions in weight.
- The figurine is welded to a weather vane with a counterweight.
- A rotary axis is attached to it at the bottom.
- For it, in turn, a bracket is made in the form of two plates at an angle of the roof and a pipe coming out of the corner, into which a rotary axis with a ball will be inserted for better rotation.
- When all the elements are ready, they are assembled and tested for functionality.
- Next, the weather vane is painted, processed and brought to its final state.
- Finally, the device is installed on the roof with vertical alignment using a building level.
- During manufacturing, it is important to maintain proportions, angles, balance and distance between all components - so that the weather vane works even from the slightest breath of wind.