Home » Building a house » Do it yourself
Vladimir 03/17/2020
19281 Views
Growing plants and creating extraordinary flower arrangements requires different types of containers. Some of them can be found in your nearest store. But in most cases, their shape and design leaves much to be desired. Therefore, today we will master the technique of making flower pots with our own hands.
Features of the pots
A flower pot and a regular flower pot are somewhat different from each other. Typically, a flowerpot is understood as a flowerpot that has a non-standard design. It can be used alone or as a beautiful shell for a pot.
There are no drainage holes in the flowerpot, so it can serve as a decoration not only for the garden or home window sills, but also become a decorative element for bedside tables, shelves, furniture walls, or hang from the ceiling, becoming the highlight of the interior.
Examples for inspiration
By creating your own decor, you express yourself and make your home unique. To do handicrafts, you don’t have to acquire expensive materials - improvised materials will also work: branches, ice cream sticks, ropes.
In a flower pot, unlike a pot, you will not find holes for moisture to escape - this is one of its advantages: you do not have to worry about creating them and that water will ruin the furniture.
Making beautiful flower pots yourself is not only useful, but also a very exciting process.
Types of flower pots
With the help of flower pots you can add greenery to any room and create an amazing corridor.
Large flowerpots make beautiful floor decorations for the garden or large rooms.
Smaller pots will take up space on shelves and bedside tables.
The smallest plant houses can be placed on walls or hung from the ceiling, freeing up surfaces and accommodating a large number of plants indoors.
Hanging planters help create cozy green walls, quickly replace plants as they fade, and provide the most comfortable conditions for green pets. Plants hanging from them will help cover up wall imperfections.
What materials are best to use?
Floor, table, wall or unusual hanging planters can be made from many types of materials. The most important thing is that it is strong enough and lasts as long as possible.
Flowerpot decor
You can make them from:
- sand and cement with the addition of liquid glass
- alabaster
- cerenzite: products from a solution prepared on the basis of calcium and aluminum salts are not only original, but also unusually durable
- wood: you can use both thin slats and massive wooden blocks of suitable size, in which the central part is removed
- vines: a wicker flowerpot-basket will fit perfectly into the decor of a room decorated in country style
- plastic: you can imitate weaving from plastic cut into thin strips or twisted plastic bags;
- heat resistant clay
- papier mache
- felt
- yarn, braid, twine, strong synthetic threads: they are coated with glue and wrapped around containers of a suitable size
For decoration, burlap, cotton fabrics of original weaving, twine, colored stones, nut shells, grain, tree bark, dried flowers, fur, paints and enamel, etc. are used. More massive flowerpots for garden flowers are made from rubber wheels.
Original decor of flowerpots using wooden clothespins
Do not forget that the shape of the container should be combined with the outline of the plant. After all, even the most unusual flower in an unsuitable flowerpot will look ridiculous.
Plastic buckets
Instead of a bottle, you can take a mayonnaise or ice cream bucket. You won’t have to cut it and sand the top edge, which will significantly speed up the production of an elegant pot. Yes, and there is already a handle for hanging.
Note!
Macrame: diagrams, interesting projects and detailed descriptions of making crafts
- Crochet amigurumi - examples of how to make a beautiful toy with your own hands (75 photos)
Coffee topiary: step-by-step master class on how to make a small decorative tree from coffee beans
Glowing outdoor flower vases
A new feature in country house design is illuminated objects. Garden figures are illuminated with LEDs, which consume little energy. Even small solar panels can serve as a power source for them, which accumulate enough charge during the day to operate throughout the night.
Manufacturers offer for sale outdoor flowerpots with lighting in the shape of stumps or geometric objects.
Unusual flower pots from a bottle
Instructions on how to make a beautiful flowerpot from plastic bottles can be very varied. But one is the most popular. To implement it, the bottle will have to be cut, as in the first option. You just need to use the top along with the cork.
The workpiece is turned over from top to bottom and glued to a strong stand. All that remains is to coat the future flowerpot with paint and place a pot of flowers inside.
For a garden plot, pots made from bottles in the shape of funny pigs, bright bumblebees, unusual cats and dogs are more suitable.
Finish options
For large outdoor flowerpots, you can choose original decor that will be the finishing touch to their design.
The easiest way is to paint the product with paint. You can use one shade for all the flower girls made, or you can create a multi-colored composition of all the colors of the rainbow. The main thing is that the planted plants harmonize in color with the painted container.
For areas with houses in ancient styles, artificially aged flower beds are suitable. To do this, they are coated with the chosen paint, and a layer of craquelure is applied on top.
In order for the paint to last for a long time, the surface must first be coated with a primer.
Another way to design an outdoor planter is to decorate it with various available materials. The decor can be created from cones, branches, small stones or pebbles, broken tiles, mirrors or colored glass, creating a mosaic effect. To do this, you only need special glue.
If it spills or stains the surface, it must be removed immediately, otherwise, after it has hardened, it will be impossible to do this.
After this, the pot should be allowed to dry. If tiles, glass or stones are used as decoration, the surface can be additionally treated with grout to complete the work. In addition to natural stones, you can use artificial ones, which will be perfectly sized and look more aesthetically pleasing than natural ones.
Cement plant pots
A unique device for placing pots can be created from cement and a large rag (a piece of tablecloth or towel).
A master class on making flowerpots will show the ease of making such a decoration, and photographs will demonstrate the variety of shapes.
To create an unusual object, you will have to stock up on cement, a container for stirring it, a bucket or any other object that will become the basis for giving shape.
Cement is diluted in a basin and the selected fabric is immersed there for 5-7 minutes, ensuring that the entire surface is hidden in the composition. After the rag is completely saturated, it is taken out and hung on an inverted bucket. You can make the product asymmetrical or add fluffy folds. It all depends on the desire of the creator.
After the cement has completely dried, the bucket is carefully removed, and an unusual vase for a flower pot appears. It can be painted or left in its original form.
Variety of shapes
Garden and home pots can be made in any shape, especially if you have interesting ideas. Familiar round pots can be easily turned into original decorative items. The main thing is to leave enough space for the development of the root system of a certain type of plant.
The shape of the pot will depend on the material it is made of. When choosing a suitable option, you should pay attention to the environment and design style. It should also be remembered that each type of raw material has its own characteristics, negative and positive aspects, methods of processing and further care.
For a miniature bonsai tree, a square, oval, or round pot with low sides is suitable. Indoor plants framed with burlap and textiles will look great in a niche or on a windowsill. It is wise to take concrete antique flowerpots outside and place them at the entrance to the veranda. The best place for an oval hanging pot is on the balcony, in an outdoor gazebo.
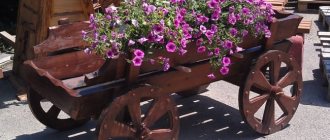
Wooden flower pots
A unique home or garden flower bed can be made from an ordinary wooden box. You can ask for it at a fruit store, or make it from leftover boards.
The finished product is sanded and painted, and small pots of flowers are placed inside.
You will get an even more original flowerpot if you fasten ropes around the edges of the box. Such a structure can be hung on a tree or a special bracket on the wall, or fixed on the ceiling.
An unusual flowerpot would be a stump or a thick piece of wood. To create such a unique product, you will have to hollow out the middle, place a pot of flowers there or fill it with soil and plant a small plant.
You can braid an ordinary pot with light soft branches, turning it into a unique basket. And ice cream sticks will decorate a fairly large pot. Instead of sticks, you can use colored pencils; they don’t even have to be adjusted to the same size. The asymmetry of the craft gives it additional charm.
Large wooden blocks will be used to make a beautiful lattice planter. Nails or screws will help connect individual elements, and bright colors will complement the decoration of an ordinary pot.
Wooden flowerpots
Wood may not be the best choice for making outdoor flowerpots, but it is very affordable, flexible, and easy to process. That's probably why it's popular. Wooden outdoor flowerpots can be made from scrap boards, moisture-resistant plywood, timber, tree trunks, stumps, old barrels and tubs.
From boards and plywood
If you want the flowerpot to retain its color for a long time and not turn gray, but you don’t want to paint it with some kind of opaque paint (such as oil paint), you will need to buy wood oil. It gives the wood a tint, but leaves visible pores (like a stain). Along the way, this oil kind of “preserves” it, protects it from fungi, insects, and mold.
The easiest way to make flowerpots is from rectangular or square boards. You need to cut several pieces of the same length, put them together into a box, and nail the bottom.
Wooden flowerpots made from boards
To prevent the bottom of such a flowerpot from blooming, it must be raised on its legs. In the simplest version, four small pieces of board can be nailed to the bottom, in the corners. If you want, you can try to make more decorative legs (as in the photo above).
When nailing the boards, do not try to knock the planks very tightly. When watered, they will swell and, if nailed tightly, they can lift. However, you shouldn’t leave very large gaps - the earth can spill out through the bottom.
Another way to make an outdoor flowerpot from wood is to cut four identical pieces of timber with a small section of 25-25 mm, for example). Use the bars as the ribs of the structure, nail boards to them, and attach the bottom to the bottom. This option is good because such flowerpots immediately have legs.
The second option for making wooden flowerpots
Using the same principle, you can make a flowerpot from moisture-resistant plywood. Cut out the sides from it and attach them to the bars. Wood screws are usually used instead of nails, and you will also need a drill. Before tightening the screw, drill a hole. Place the sidewall against the timber post and drill, stepping back 1 cm from the edge. The diameter of the drill is 1-2 mm less than the diameter of the screw. So, firstly, the block will not burst, and secondly, the fasteners fit into the plywood easier. Instead of wooden corners, you can take metal ones, preferably stainless steel.
The next version of a flowerpot is made of wooden beams (photo below). Here everything is even simpler - fold the beam so that the connection is in one plane, then in another. After laying each beam, it is nailed to those located below. Be sure to drive nails in the corners; you can also nail them once or twice on the long side.
Outdoor flowerpot made of timber
It's simple. Difficulties can arise only with the first row. It can be attached to some kind of bottom, for example, a piece of waterproof plywood knocked down from boards with holes drilled in it for water drainage.
Flowerpots combined with a bench
Any of these flowerpots can be combined with a bench. It will be a wonderful place to relax. Such a group can be placed in the garden, near the entrance, somewhere on the site, near a gazebo or a homemade small fountain.
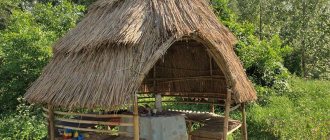
From stumps and logs
In a garden or at a summer cottage, you have to periodically cut down old trees. From their stumps and trunks you can also make outdoor flowerpots. First let's talk about how to use barrels. It is better not to peel off the bark, as this will make the flowerpots look more decorative. Depending on the idea, the trunks are cut into logs of some height. You can cut with a regular hand saw, but faster - with a chainsaw. These logs can be placed standing or laid on their sides.
Sections of tree trunks make excellent decorative outdoor flowerpots.
The main task is to remove part of the wood so that a container is formed that can be filled with earth. There are several methods for removing the core. Usually they take a drill and a large-diameter drill bit. A conical or blade-shaped drill (as in the photo) works better.
This drill makes it easier to remove the core
They make a number of holes to the depth you need. It depends on the type of plants you plan to plant in this pot, but usually 15-20 cm. You can make a lot of holes - the thinner the walls, the easier it is to remove them.
The walls are destroyed with a chisel or a wide chisel. The handle of these instruments is hit with a hammer, and a sharp blade breaks off pieces. So, gradually, the core is released. Then the edges of the resulting container are slightly aligned using the same technique.
Alternative to a drill
If the stump has a large diameter, you can use an ax or pick. You just need to work carefully so as not to destroy the walls. Near the walls, you can use a drill to finally decorate the inside of the flowerpot with the same chisel.
Another option is to make some cuts with an ax, crumble the wood, and make a fire inside. But whether it will be possible to extinguish it in time is the question. The charred insides are then removed with a chisel or chisel.
Flowerpots made from stumps and tree trunks can be of different sizes
By the way, very interesting compositions can come out of a very old and rotten deck. It is cleared of very crumbling wood. In this case, the inside is picked out very easily - the inner part of the trunk is the first to decay. What remains can be coated with wood oil, stopping the destruction for a certain period.
Rotten decks make very interesting compositions
Such hollowed out logs or stumps make excellent flowerpots. Some design ideas are collected in the photo gallery.
You can plant petunias in a flowerpot made from a stump. Hanging ones look better in tall ones
Several plants with decorative foliage and one or two flowers with large bright flowers are planted in low stumps
By cutting a hollowed out log into rings and attaching a bottom at the bottom, you can make a two or three-tier flowerpot. This decoration will take a long time to grow, but it looks magical. The powerful roots are painted, soil is also poured between them and plants are planted. An interesting fence around the lawn - flowerpots made from stumps alternate simply with logs
Hanging flowering vines look wonderful on a high stump
Chornobrivtsy are unpretentious flowers with a long flowering period. Design an outdoor garden flowerpot as a house for fairies.
Primroses will bloom earlier in the stumps - they receive more sun and are located higher from the cold ground
And even a tree stump, on a spring day... A cute little train
From barrels and other cooperage products
The easiest way to make outdoor flowerpots is from old barrels, tubs and other containers that are no longer used and cannot be used due to old age, but it would be a pity to throw them away. They can be sanded a little - manually or by attaching an appropriate attachment to a drill/grinder. Then they can be painted, coated with exterior varnish or wood oil. And you can plant plants.
Barrels sawn lengthwise
Barrels are sawn, and in any plane. But if you cut lengthwise, you will have to nail the planks together. The barrels, cut crosswise, look like two identical (or almost) flowerpots.
Option for a homemade flowerpot that looks like a barrel
Even old wood does not need to be treated. This way the composition looks more natural. But such a flowerpot will not fit into all styles. In this case, use a special paint for exterior use, which can be used on wood.
With tubs or halves of barrels everything is generally simple
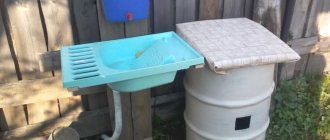
Outdoor flowerpot made of plastic with wooden lining
If you like the appearance of wood, but want to have a sealed container to avoid drips on the site after watering, you can cover the plastic container with wooden strips. The planks are treated with antiseptics, painted, and dried. Then you can start converting a plastic container (bucket, tank, barrel) into a flowerpot for outdoor flowers.
Attach the legs to the bottom of the tank
First, holes are drilled in the bottom. The diameter is 10-14 mm. Leave the two opposite zones at the edges untouched. Here we will attach the “legs” - two strips, cut so that they do not protrude beyond the contour of the barrel. You can attach it with bolts, drill a hole under the head so that the fasteners are “recessed”.
We cover a plastic barrel with strips
We take universal glue, which is suitable for gluing plastic and wood, and glue the planks onto it. The narrower the planks, the more monolithic the surface will be. Such outdoor flowerpots do not shrink or swell.
Fabric plant pots
Burlap, felt, and felt can also become an exquisite decoration for a flower pot. To do this, you will need to cut out suitable blanks and sew them together.
Sometimes such pots are left without a bottom, so the fabric will retain its attractive appearance longer.
Pot decorating ideas
Indoor plants create an atmosphere of comfort in the house, filling it with life and lightness. An excellent addition to natural decoration is a beautiful flowerpot. The design of standard pots is boring and monotonous. To add originality and brightness, they can be beautifully decorated. There are many master classes that allow you to quickly and practically costlessly decorate a nondescript container.
Decoupage
An effective way to decorate pots with napkins will help you organically fit a simple flowerpot into any interior. The selected material is attached to the pot with glue and coated with varnish. A container made of any material is suitable for decoration. If it has a slippery surface, like plastic, it will need to be sanded for better adhesion.
To make the picture look attractive, you need to choose a good transfer material. For beginners, it is better to use a simple three-layer napkin or special decoupage cards. A huge variety of stylistic orientations allows you to choose the right picture for any occasion.
Transferring the design to the pot is very simple. The container must be washed, rubbed with fine sandpaper and degreased, and painted with primer. Then apply the main background color. Cut out the picture you like and place it on cling film or file.
Wet a piece of paper with water and gently spread it over the surface with a brush. We apply the film to the pot with the area with paper and press down. Carefully remove the file; the cut out motif will remain on the side of the container. We fix everything with PVA glue and varnish.
It is worth considering that decorating clay pots using the decoupage technique will require more glue. This is due to the property of clay to absorb moisture. It will also take longer to dry.
Marine style
A fertile basis for such decoration is flower pots and flowerpots. A marine theme can be created from various shells, small stones, and glass shards. Each element will look beautiful separately, but it is better to create an original composition in a marine style.
Attach decorative elements to quick-drying construction glue. It is applied to the surface of the flowerpot and to the base of the parts. Each shell must be leaned against and held for a few seconds. When the entire pot is covered, it is necessary to treat the gaps with grout for the seams. The nautical elements can be left in natural colors or covered with multi-colored acrylics.
Cereals
Creating a mosaic from seeds and cereals is an unusual and exciting activity. Making a unique picture is not at all difficult, and a pot decorated in this way will look attractive and original. We will create using various bulk products, wrapping paper, ceramic glue, acrylic varnish and a brush. The technique of applying decor is as follows:
- Wrap the container in paper and apply a design;
- We cut out the necessary elements and transfer them to the base using carbon paper;
- We mark areas on the pot, places where various grains are attached;
- We sort bulk products by color;
- We coat the marked areas one by one with glue and sprinkle with decor;
- Cover the pots with varnish and leave to dry.
Pencils
Multi-colored pencils are an original decoration for an indoor flower container. We glue the equally sharpened elements around the pot with a fence using a glue gun. For decoration, a flat pot without bulges or dents is more suitable, so that the pencil fits completely against it and is well fixed.
The second decorative option is to use plain pencils with an eraser at one end. We place them with the elastic side up and adapt them to the pot. You can also use felt-tip pens, wax pens, and crayons as decoration. The finishing touch is a bright ribbon with a bow around the product.
Fabric: lace, burlap and other textiles
Pots in an ensemble, decorated with the same type of textile, look beautiful. Particularly suitable materials for the popular shabby chic trend are burlap and lace. We start working with lace by preparing it. Carefully coat the piece with glue from the inside out and lean it against the pot. Drops of the composition that appear through the fabric mesh must be immediately removed with a dry cloth.
Burlap decorations are more suitable for pots in the garden. Such a container can be used as an accessory, giving the yard a rural look. The technology for fixing the material is identical to lace. It is better to plant low, upright growing bushes in such a container, reminiscent of an armful of young ears of corn.
Knitted covers for pots can be made on knitting needles or cut off sleeves from an old sweater. You can also use part of old socks in the elastic area or out-of-fashion mittens.
Eggshell
To create a simple decor you will need the most affordable materials. To decorate a medium-sized pot, you need to prepare the shells of three eggs, glue, acrylic paints, a brush, and aerosol varnish. The decorative technique consists of the following steps:
- We peel the boiled eggs, remove all the films and dry the shells well in the sun;
- Apply the adhesive composition to the flowerpot, lay out the crushed shells with the convex part on the face and press lightly;
- We correct the elements with a toothpick;
- Apply a thin layer of PVA glue to the finished surface;
- After drying, paint the pots with acrylic paint;
- Then we spray the pot with clear varnish or pearlescent enamel.
Unusual flowerpots
Old unnecessary things can also play the role of a unique home for plants. Most often they become old buckets, pots or basins, but unnecessary teapots or graters will look no less interesting.
Such crafts can even be placed on the kitchen table; they will not take up much space, but will add summer charm and natural beauty to your home dining room.
Flower pots made from an old suitcase or an unnecessary bedside table will look beautiful and unusual. They just have to be additionally protected from moisture.
For a small room, you can make a flowerpot from a thick book or a stack of unnecessary magazines.
Original flower pots can be made from any material, the main thing is to come up with a placement and beautifully design the future craft. Photos of non-standard flowerpots are intended to help in choosing.
How to register a summer cottage?
When choosing containers for flowers as decoration for your site, you should first of all evaluate their safety for people. For example, commonly used tires from car tires are not the safest option. They can release toxic substances into the air and be dangerous, especially if there are small children in the family.
In addition to safety, the flowerpot must meet the requirements for appearance: match the size and style of the site.
Its size should fit harmoniously into the space. In addition, if the house and the entire site are decorated in a certain style, the flowerpots must correspond to it.
Not all plants are suitable for planting in outdoor pots. To decorate an area with flower arrangements, it is worth taking into account the characteristics of their root system, watering and need for sunlight.
The following plants are suitable for planting in flower beds:
- Petunia. These are easy to care for flowers of various colors that bloom all summer.
- Pansies. Their flowering continues for a long time. They are unpretentious, come in a variety of colors and varieties, and grow short but fluffy.
- Ageratum. It has a long flowering period and is unpretentious in watering.
- Fuchsia. Thanks to its cascading appearance, it creates the impression of being in a blooming, fragrant garden.
- Verbena. Suitable for planting in containers, has a modest root system, and can be combined with other plant varieties.