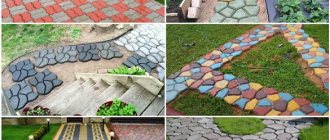
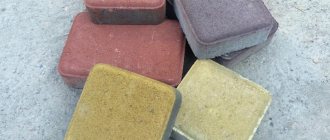
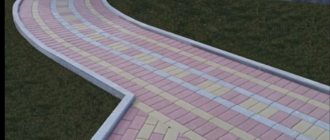
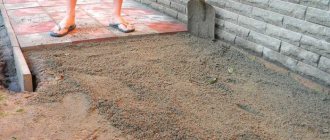
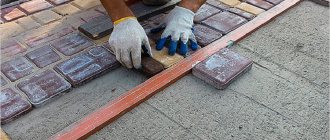
Stone-paved paths in the local area or in the garden are beautiful and very practical. Paving stones made from natural materials are not available to everyone, but artificial stone, which appeared relatively recently, does not have this drawback. More and more homeowners are choosing this durable and hard-wearing decor for their spaces. Another advantage is its simple installation, which you can do yourself. We will analyze all the stages of laying paving slabs so that you can easily lay out the path with your own hands.
Criterias of choice
When choosing a suitable material, you first need to focus on its cost. High-quality tiles that will last for several decades are made mainly from natural raw materials and have a relatively high price. The following types of raw materials are most often used in the manufacture of finishing materials:
- hard and soft varieties of natural stone;
- fake diamond;
- polymer sand mixtures;
- concrete mixtures;
- firing materials.
An additional criterion for choosing a finishing material is the thickness of the tile. To design, for example, narrow paths, it is quite possible to choose a material whose thickness does not exceed 0.4 - 0.6 cm. If you are laying a road or parking lot, you need to choose especially durable tiles, the thickness of which varies over 0.8 cm.
Tiles made from a mixture of concrete Source plitkaoskol.ru
Rules for constructing paving stone paths
Knowing some aspects will help make a comfortable and durable design.
- The width of the path for people to move varies from 0.6 to 1.5 m . The optimal size that allows you to disperse when meeting is at least 0.9 m. A structure with a width exceeding 1.2 m will be comfortable for pedestrians.
- Curbs should be installed on the sides, preventing the path from deforming and preventing the appearance of dirt during rainstorms.
Curbs should be installed on the sides - The path should be away from trees . This is important so that their root system cannot destroy the coating. Usually it is enough to maintain 2 meters.
- When choosing the type of substrate for paving stones, it is necessary to take into account the type of soil, purpose of the coating, characteristics of the material being laid.
What types of substrates are there?
Required Tools
Before laying paving slabs, you should prepare in advance additional materials and tools that will be useful primarily when performing the work, for example:
- cement;
- curbs, which can be either plastic or stone;
- crushed stone, the fraction of which should not be more than 40 mm;
- geotextiles;
- shovel;
- a manual concrete mixer, however, if you don’t have one, you can do without it;
- hammers;
- sand.
As for the amount of materials required to design the paths, before carrying out the work it is necessary to carry out preliminary calculations, taking into account the characteristics of the soil, the area of the territory, and the features of operation.
Making drainage and borders
When you finish working with geotextiles, pour crushed stone on top (layer thickness - up to 20 cm), this will be a drainage system that controls the collection and removal of water.
This way moisture will not accumulate under the tiles. Once you have compacted the crushed stone, top it all off with a small amount of sand, and then lay out another layer of geotextile, which will let moisture in from above, but not let it back out.
After this, you can begin installing borders. There are no restrictions or recommendations here; you can choose any building material, for example, wood, slate, brick, concrete, stone, etc.
Concrete is the most popular, although today new solutions for plastic borders have appeared on the market, which boast durability, low cost and easy installation. You should begin installing this part only after you have finished with the drainage.
Step-by-step instruction
To eliminate possible errors in work and prevent damage to materials, before laying paving slabs, it is recommended to carefully read the detailed instructions for this process.
To obtain a high-quality coating, it is important to follow the algorithm below for performing the work Source serp-art.ru
Marking
Immediately before starting work, you should mark the future territory or paths, which will subsequently be tiled. To do this, it is necessary to draw up a detailed schematic drawing on the site plan, taking into account the presence of plantings, buildings, and shrubs. When drawing up a plan, it is important to take into account the characteristics of the site, the presence of slopes and lowlands in which rainwater accumulates.
The second important nuance of drawing up a diagram is calculating the width of the tracks. The optimal option is 1 – 1.3 m. This width allows two people to move freely on the path. If you plan to create a road for a car, it is important to take into account that in addition to the vehicle, there may also be a person on the paved area, that is, the width in this case should not be less than 2.3 - 2.5 m.
After drawing up the diagram, you can begin marking paths directly on the territory of the area being improved. This must be done using a tape measure, rope and pegs. When installing pegs, it is necessary to add 10 - 15 cm on each side to the width of the path - this distance will be necessary in the future for installing curbs.
The first stage when laying tiles is marking Source optolov.ru
See also: Catalog of companies that specialize in landscape design.
Excavation
Before laying paving slabs with your own hands, you need to remove the protective layer from the area chosen for finishing work. The process in this case depends entirely on the characteristics of the soil. For example, if the top layer is made of dense clay, it is enough to simply level the surface to be treated. In other situations, it is necessary to remove at least 25–30 cm of turf or soil. Next, you need to pour a layer of sand no more than 3–5 cm thick, level and compact the surface.
The next stage involves laying geotextiles on the compacted surface of the paths. This process is not mandatory, but experts recommend including it in the algorithm of work being carried out. Geotextiles prevent the germination of weeds, soil shrinkage, and moisture penetration during spring floods.
When laying textiles, it is important to observe the following principle: the canvases must overlap each other at a distance of at least 15 - 20 cm. When decorating the edges of the path, it is also important to take into account the above rule. The use of geotextiles and their proper installation will significantly increase the life of the paths.
Before the main work, you need to remove the turf and dig a shallow ditch Source sovetclub.ru
Drainage
The next step before laying paving slabs with your own hands is preparing the drainage system. At this stage, it is necessary to pour a layer of crushed stone onto the textile-lined base, the volume of which should be about 12 - 14 cm. Laying it is necessary to absorb moisture, the freezing of which during cold weather can lead to the formation of unevenness and pits on the surface of the paths.
The crushed stone must be thoroughly compacted, then lightly sprinkled with sand, leveled and covered with a second layer of textile base, following the instructions given above. Laying textiles is especially necessary if the area to be improved is located in a lowland. The material will allow water to pass through, preventing its penetration onto the surface.
Installation of curbs
After completing the drainage work, it is necessary to install curbs. To carry out the work, you can use various materials, including slate, artificial and natural stone, wooden elements, and bricks. A mandatory requirement in this case is that the finishing material for the borders be flat.
Within the construction market, concrete and plastic piece curbs are especially popular. They are easy to install, have an excellent appearance and a high level of wear resistance. When choosing borders, it is recommended to take into account their compatibility with tiles.
One of the most popular types of borders is made of concrete Source vopros-remonta-info.ru
Preparing the base
One of the important stages during installation is preparing the base. The strength of the paths, as well as the external qualities, depend on the correctness of the work carried out. The type of foundation should be selected in accordance with the expected level of load on the area being improved. For example, before laying paving slabs with your own hands to design paths that are not expected to bear significant loads, it is recommended to pour a sand base.
Sandy base Source dinerocelo.weebly.com
If significant loads are expected on the surface of the tiles to be laid, for example, use as a parking lot, it is reasonable to choose a concrete base. It is the most durable, provides a long service life, but requires quite complex work. So, how to lay paving slabs by arranging a concrete base? In this case, it is important to follow the following recommendations:
- Step one. The most important task is to reinforce the base. For this purpose, you can use both a ready-made mesh, the cell size of which is 10 by 10 cm, and suitable remains of building materials, fittings, and scrap metal. Before reinforcement, it is necessary to drive metal or wooden pegs into the ground so that the grid is 3–5 cm above the surface.
- Step two. Next, the concrete is poured directly. This must be done in such a way that the surface of the concrete base is located at least 3 cm below the ground surface - this is the distance required for laying decorative tiles. Filling must be done at one time - it is important to take this into account and prepare a sufficient volume of the mixture in advance.
Concrete base Source kirpich174.ru
Overview of types of paving stones
There can be many options for designing the territory. That is why manufacturers offer a large selection of paving stones for making paths. This gives the consumer the opportunity to choose the best option, taking into account his taste and the design features of the site.
Figured concrete paving stones
Concrete paving stones
The main type of paving coating is concrete products (heavy or fine-grained). The requirements for them are established in GOST 17608*2017. Based on their purpose and characteristics, paving stones are divided into 4 categories.
Table. Groups of paving stones made from concrete.
| Group | Purpose |
| A | Paving paths for pedestrians, including gardens and parks, sidewalks of local streets |
| B | Construction of surfaces in squares, public transport stops, areas for cyclists, sidewalks on main streets |
| IN | Paving driveways inside blocks, squares, car parking areas |
| G | Arrangement of high-load areas |
Concrete paving stones are laid using a certain technology
The standard standardizes the performance characteristics of all product groups.
Characteristics of all groups
Paving stones can have different shapes, but the most popular are square and rectangular products . The edges (vertical and horizontal) must be mutually perpendicular. The thickness of the slabs, depending on the shape and purpose, varies from 60 to 100 mm. The coating is available in one and two layers and can have different shades and surface textures. Paving stones are produced by casting or vibrocompression.
Ingredients for the production of products:
- Portland cement;
- fine aggregate – natural sand of fraction up to 2…2.2 mm;
- crushed stone from natural stone or gravel (up to 10...20 mm in size (depending on the thickness of the tile)) as a coarse filler;
- additives;
- pigments;
- water.
Photo of paving stones
To reinforce paving stones, steel wire or reinforcement (basalt or fiberglass) is used.
Today, concrete slabs for paving sidewalks and paths have worthy competitors.
Poor installation
Prices for concrete paving stones
Concrete paving stones
Products with rubber filling
Tiles made from crumb rubber bound with a polyurethane adhesive are also actively used today in the construction of paths, platforms and sidewalks. It has excellent characteristics; in addition, if it falls on a surface lined with rubber, it is almost impossible to get injured. Laying rubber products is not at all difficult.
Rubber paving slabs
Prices for rubber paving slabs
Rubber paving slabs
Polymer sand coating
For paving paths intended exclusively for the movement of people, tiles made from sand, polymers, additives and pigments are used. It is light in weight, can be operated under large temperature changes and has a long service life. Installation of such a coating does not present any special problems.
Polymer sand tiles
Technology for laying polymer-sand paving slabs
Prices for polymer sand tiles
Polymer sand tiles
Granite paving stones
Products that were especially popular earlier have not lost their relevance today. Paths lined with paving stones from this material are used for their intended purpose for a long time. Granite, a natural stone, is not afraid of unfavorable external environments; it is resistant to mechanical damage, vibrations and the effects of aggressive environments. And the aesthetic qualities of stone pavement do not need advertising.
Granite paving stones
Prices for granite tiles
Granite paving stones
Shapes of paving stones
The choice of product configurations is wide enough so that you can choose an option to suit your taste. The appearance of the paths, laid out using standard rectangular products, resembles masonry. The most popular options for paving stones of this type are “Old Town” (a set of rectangular and square slabs) and “Brick”. Beautiful designs are made from coil-shaped tiles. Square and radius products are also in demand.
Laying paving slabs
Video description
The video shows the technology of laying tiles on a concrete base:
The most common option for decorative walkways is a mixture of cement and sand. This type involves laying elements on a dry base made of sand-cement mixture. To prepare it, the following proportions must be observed: 1 part cement and 5 parts sand. The optimal thickness of the base in this case should not be less than 10 cm.
When choosing this base, it is especially important to first familiarize yourself with the recommendations on how to correctly lay paving slabs. Decorative elements in this case are laid strictly on a dry surface, that is, before filling the ditches for paths with the mixture, it is important to make sure that there will be no rain for two to three days. However, immediately before laying the tiles, it is necessary to slightly moisten the mixture and compact it additionally; this measure will significantly simplify the work process.
Sand-cement base Source plitka-pol.ru
Basic elements of landscape design
Landscaping using natural components is carried out by land owners in accordance with their preferences, needs and financial capabilities. However, in order for the opening landscape to please the eye, it is necessary to take into account many nuances.
Laying paving stones
It is important to pay attention to the location and appearance of the main groups of elements:
- buildings, both residential and auxiliary;
- lawn;
- green spaces;
- artificial reservoirs;
- small architectural forms, decorative details;
- technical components, such as lighting, watering system, etc.;
- platforms and paths.
Paving slabs in the landscape
Garden paths can perform a primary function - providing access to objects, or a secondary function, allowing you to walk around the territory. Properly made, they help you move comfortably, without fear of getting your feet dirty. The main materials used in their construction are paving slabs and paving stones.
When choosing the type of coating, the area of the site, the characteristics of the material, and the type of cladding of buildings are taken into account. Many, using their design abilities, combine different types of products.
Types of garden paths
Video description
Video about laying tiles on sand:
Processing of decorative tiles
The next recommendation on how to properly lay paving slabs in the courtyard of a private house or in another area is to treat individual elements with compounds that will significantly increase the performance of the material, its wear resistance, and ensure moisture and frost resistance. Hydrophobic compounds are used for treatment, which also effectively protect elements from the appearance of mold stains and improve the appearance of the decorative coating as a whole.
The tile processing process is quite lengthy. It involves dipping each element one by one into a pre-prepared composition, then drying it thoroughly and repeating the procedure. When processing tiles, it is also recommended to inspect each element for cracks or chips. There is no need to throw away damaged tiles; they are quite suitable for laying on inconspicuous surfaces.
Before installation, it is recommended to treat each of the elements with a special solution Source almaty.flagma.kz
What are the benefits of concrete paving stones?
It is no coincidence that the products are actively used for paving paths and constructing parking lots. This is due to their excellent performance characteristics:
- high strength and wear resistance, allowing to withstand the constant movement of a large number of people and vehicles (even trucks);
- resistance to the external environment: sunlight, temperature changes, precipitation and wind;
- durability;
- environmental safety.
Concrete paving slabs
The material can be reused many times. Unlike asphalt, paving stones do not react to heat. And for its use in regions with cold climates, special additives are added to the composition to increase frost resistance.
In addition to functionality, the material also has decent aesthetic characteristics, allowing you to create not only a practical, but also an externally attractive coating. What is very convenient is that you can lay paving stones yourself, without resorting to the services of specialists. It is important to decide on the design in advance.
Paving slabs “Roman beech”
Paving options
- When placing products in the direction of movement, the path looks dynamic.
- Laying the slabs crosswise creates the impression of staticity and solidity.
- Decorative paving looks very aesthetically pleasing, in which the tiles are arranged in a circle or in a herringbone pattern.
A diagram of the installation of paving stones is shown in the photo.
Layout of paving stones
Geotextile layer
Preparation for installation of tiles includes laying a waterproofing layer, which is placed above the drainage as a substrate. This prevents moisture from reaching the top load-bearing layer and improves the quality and integrity of the coating. A layer of geotextile is lined on the bottom and walls of the earthen structure. The artificial material does not rot from prolonged exposure to water, does not decompose even with prolonged use, and provides the road with protection from water.
Flowerbed care
To create a bright accent in the garden, it is important not only to know and be able to properly decorate a flowerbed with tiles, but also how to properly care for it. In order for the flower garden to delight others throughout the season and not lose its high decorative characteristics, you must adhere to the following recommendations for caring for it:
- Carry out regular and timely irrigation activities. Plants must be selected with the same requirements for growing conditions, soil moisture and nutrition.
- After irrigation, loosen the soil to avoid the formation of a dry crust on the surface. Otherwise, the roots of ornamental crops will experience oxygen starvation, begin to get sick, wither, and shed flowers and leaves.
- Remove weeds. If there are weeds, the crops will not have enough nutrients or moisture. It is convenient to do this together with loosening the soil.
- If necessary, prune plants that have already bloomed. To prevent faded buds from spoiling the appearance of the flowerbed, they also need to be removed.
- Apply fertilizer compounds. With insufficient nutrition, both annual and perennial plants will have reduced immunity. They will not be able to fully resist pathogens. To feed flowering specimens, it is good to use mineral compositions twice a month, with an interval of 15 days.
- Plantings should not be allowed to become dense. In such conditions, where there is a lack of light and heat, the plants begin to stretch out greatly and weakly form buds. In addition, decorative crops planted very densely are more quickly attacked by harmful insects and pathogenic microorganisms.
- Given the rapid growth rate of the root system of many plants used for flower beds, it is recommended to update them every 3-4 years. In autumn or spring, those specimens that have grown greatly need to be dug up and their roots divided into sections. After this, they are assigned to a permanent place in the tile flower garden. The main thing here is to know when it is better to carry out these manipulations so as not to harm the plants. For example, the optimal time for dividing irises is June-end of summer.
Only an integrated approach, compliance with all the rules of agricultural technology, allows you to maintain the presentable appearance of a flower garden equipped with tiles for a long time. For beginning gardeners, you can first create a medium-sized flower bed, only a couple of meters in diameter, or make several miniature ones.
Advice! To make a round flowerbed made by yourself look more advantageous, its central part should be slightly raised.
Tips for arrangement
When arranging the covering, you can use rain inlets (rain trays). They are placed a few millimeters below the paving stones. If a concrete base is chosen, not only crushed stone can be used as the first layer; a mixed device is allowed: crushed stone, sand.
The solution is mixed as it is used. The recommended time for complete drying of a concrete site is 28 days. In practice, work often continues 3-4 days after pouring.
Similar articles:
- How to lay paving stones with your own hands
- How to make paving stones with your own hands
- Tips for choosing and creating paving molds
- Manufacturing technology of self-leveling 3d floor
- Do-it-yourself installation of parquet boards, various methods
Preparing for work
Preparing the work area is an important stage. A high-quality foundation is the key to the success of all other work, so first you need to carry out work to prepare the soil:
- Remove the top layer and make a trench 20 cm deep in the soil. This indicator is conditional - there are no universal solutions and there never will be. The depth of the trench depends on many characteristics: soil composition and freezing depth, groundwater level, and terrain. For hard soil, 20 cm is enough; for loose soils, increase the depth. The average for paths is 20 cm, and for a car area or driveway the trench needs to be deepened another 7–10 cm.
- From the bottom of the trench, carefully remove the roots of grass and plants , stones, wet the soil with a watering can or hose and walk along it with a tamper, which will allow you to avoid subsidence of the soil in the future.
- Line the bottom of the trench with geotextile or agrofabric. They will not retain water, but they will also not allow the roots and seeds remaining in the soil to germinate and spoil the path. In addition, geotextiles will prevent the interpenetration of continental soil and sand.
