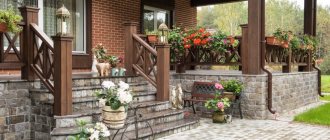
Non-trivial flower beds
Flowers are the main decoration of the territory. Objects that are out of order and lying around in the pantry will help you avoid routine when creating flower beds. Take a closer look at your worn-out shoes. Flowering plants in old shoes, shoes, and boots look very impressive. Such exhibits are displayed on the porch, near the paths, and hung on the fence.
In addition, there will definitely be a broken wheelbarrow on the farm, which will become an excellent tray for flowerpots in the center of the lawn. The cascading multi-colored perennials look amazing in it. A faulty bicycle will replace a stand for flower pots, and its decoration and coloring will complement the overall picture.
Proper arrangement of a summer cottage with your own hands
Surrounding oneself with beautiful and original objects, things and designs has been around for a long time, but this process must be approached competently. In order not to clutter the area with bulky buildings, non-functional structures and non-aesthetic decor, it is important to use a few simple principles:
- competent and thoughtful zoning, which is used for the correct balance of working and free territory and the ability to rationally use land resources;
- mandatory landscaping of the area, beautiful and bright greenery is already an excellent decoration for a summer cottage, and caring for flower beds and flowers will help you take your mind off work;
- the use of modern devices and structures, drip irrigation systems are installed for watering, effective lighting and illumination systems, and a shower on the site.
A balanced combination of practicality and aesthetics ensures that harmony and tranquility will always reign on the site. Pleasant little things and flower beds will become bright accents, garden paths will zone the space and additional decor will enhance the overall impression of the landscaping of the site.
New life for unnecessary things
Ideas for garden beds are very diverse. For these purposes the following is used:
- an unusable birdcage;
- leaky buckets, pots, kettles;
- chairs without seats;
- suitcase;
- open umbrellas.
Barrels and tubs can be painted in bright colors, with dolls or fairy-tale creatures depicted on them, or covered with shells, grains of corn or beans. Broken furniture placed along the walls with flowering compositions, an outdated boat with fragrant plants, a bed covered with flowers - all these elements transform the surrounding atmosphere, introducing a fresh note.
Non-standard offers
Large cobblestones are painted a light green color and placed in a heap; a broken jug with delicate flowers is placed on top; this ensemble looks very attractive. Interesting ideas for a summer cottage include an idea with an overturned can from which a flower “river” flows. The container is filled with soil, and the required types of low-growing plants of the desired color are planted in the dug up bed and fenced with stones. The recreated picture is very realistic and immediately attracts the eye.
Flower beds are laid out spirally, in a pyramid. Baskets made from stones have an unusually advantageous appearance.
Zoning of space and territory
Effective and competent distribution of space makes it possible to rationally use the entire area of any site. To comply with the principle of zoning, various techniques are used, which reflect the ideas for a do-it-yourself cottage and garden presented on our website with photos:
- arrangement and design of garden paths for comfortable movement;
- flower beds and flower beds of different shapes and sizes, vertical and horizontal;
- installation of decorative fences and fences dividing the site into zones.
In the evening, lighting is ideal for zoning space; different lighting devices are used for this. In addition to illuminating plants and ponds, alpine slides and flower beds, you can install lamps with solar batteries that do not require a power connection.
Garden paths
Pedestrian and walking paths make it possible to divide the site into separate zones and avoid pollution of the territory. To arrange them, it is better to use a pre-drawn plan and decorate them using various and inexpensive materials with good wear resistance parameters. This could be tree trunk cuts, outdoor ceramic tiles and sea or river pebbles, plastic bottle caps, bricks and laminate.
Flower beds and flower beds
The landscaping of the site, in addition to the emerald lawn, may contain bright and colored inclusions from arranged flower beds and flower beds:
- multi-tiered flower beds in the shape of a pyramid with borders made of stones and bricks, wood and lumber, plastic bottles;
- beautifully decorated flower beds made from old car tires, used furniture, wheelbarrows and bicycles, and other improvised means;
- flower paths and flower beds with geometric configurations and different color schemes, compositions of flowering plants;
- vertical flower beds and original hanging structures installed on fences or walls of utility and residential buildings.
Flowerbeds arranged in the form of columns made of mesh and PVC film, covered with flowers or strawberry bushes, look very unusual and original.
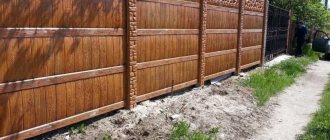
Fences and fences
Decorative fencing helps to effectively zone a space and highlight functional areas. Small picket fences, fences made of plastic bottles filled with colored sand and wicker fences made of wicker or other materials attract attention.
For fencing, you can use branches of cut trees, previously cleared of bark and bleached, stumps and large stones, brick and laminate, and tile tiles.
Outlandish stumps
There are probably some old stumps left in the square that will serve as flowerpots. Manufacturing method:
- The core is removed with a pickaxe, jigsaw, or chisel.
- The bark remains, you just need to treat it and the inside with an antiseptic.
- A container with soil is inserted into the excavation and vegetation is planted.
Such structures are equipped with lighting, which will allow you to admire masterpieces in the evenings. From the deck they make a fly agaric mushroom with a funny face; the role of the cap is played by an inverted basin, painted with polka dots. In nature you will certainly find strange driftwood that resembles animals, sea monsters or goblins. They will also decorate the plot of land, hiding in secluded places.
Car tires
Durable clothing for wheels tops the list of the most interesting ideas for a DIY garden without holding back the imagination of the craftsman. Tires appear not only as single or multi-tiered flower beds, but also as sofas, armchairs, swings, and hanging flowerpots. Charming birds and animals are cut out of them. Cartoon characters or characters from fairy tales are reproduced by painting and coloring. Rubber, folded in rows, will serve as garbage cans or turn into picturesque cups on saucers. In addition, these products can be used to build a reliable fence for the site.
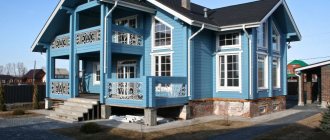
Interior arrangement of a country house
To relax in comfort at your dacha, it is not enough to just build a house. It also needs to be properly arranged inside to make it pleasant to be there. The size of the room is completely unimportant, because even a single room can be very cozy and comfortable to live in. The interior of the building can be done with your own hands, thereby introducing a piece of your own soul.
Tips for arrangement
To create a beautiful and cozy design, there are the following recommendations:
- Remove everything unnecessary from the rooms.
- Place multifunctional furniture that will not take up free space in a small room.
- Instead of wall cabinets, use light shelves.
- Give preference to light colors of furniture, textiles and interior decoration.
- Try to make the most of vertical space. It is convenient to place a bedroom under a gable roof, and long, high window openings will let more natural light into the room.
Materials for interior finishing
Recently, plastic panels have become popular among owners of summer cottages due to their low cost and availability. Such products are presented in two varieties - with photo printing and lamination. The first type is suitable for lovers of bright creative design, while the second type will appeal more to adherents of the classic style. Among the advantages of panels are the following:
- Easy to use.
- Durability.
- Wide palette of shades and textures.
- Fire safety.
Also, various types of wallpaper are often used for interior decoration of the house. There is a huge variety of these products on the market - paper, acrylic, non-woven, liquid, photo and glass wallpaper. In addition, popular options for home improvement include plaster, the use of natural stone and lining.
Styles for decorating a house
The most interesting directions for country interior:
- Russian style. Since the concept of a dacha is characteristic of Russian culture, the use of this direction looks as natural and logical as possible. For example, you can add antique window trim to make the interior cozy and time-appropriate.
Interior in Russian style Source pinterest.ru
- Vintage. It's hard to imagine a more suitable place for antiques than a country home. Starched tablecloths and lovely grandma's dinnerware will create a unique atmosphere at the dacha.
Interior in vintage style Source ethnoboho.ru
- Boho. This direction implies relaxation and a summer mood, reminiscent of days of rest in warm countries. Wicker furniture and ethnic accessories will help you quickly feel like you’re at a famous resort.
- Eco. Placing the house close to nature and using natural materials can be successfully complemented by appropriate furniture and interesting plants.
- Provence or country. The provincial style seems to be specially created for use in country houses. Colorful textiles and an abundance of lace details create a relaxed atmosphere.
Interior in Provence style Source topdom.ru
- American classic. For fans of classic styles, this cozy style is suitable, which is associated with family meetings and friendly gatherings. There is a complete absence of pomp and pretentiousness here, but there is warmth and simple comfort.
- Functionalism. In such an interior, the maximum usable space is used, and each item is suitable for performing a specific task. Therefore, even a small country house can accommodate all the necessary furniture and accessories.
- Modern style. This is not the most obvious choice for suburban housing, since we are used to seeing similar solutions in city apartments. But still, by correctly combining such an interior with natural materials and finishing, you can get an original and memorable design.
Interior in a modern style Source craftmaster.com.ua
- Scandinavian style. The calm and cozy northern direction is perfect for a secluded country holiday. To create it, you need to abandon the curtains in order to let in as much light as possible into the room, and choose the shades of furniture and textiles in light colors.
Room in Scandinavian style Source polyakova.biz
Wattle
Miniature wicker fences add a rustic flavor to the exterior. They can be used to fence off the front garden and paths. The picturesqueness will be enhanced by painted pots on stakes. This is a real exclusive created with your own hands. Not only willow twigs are suitable for the job, but also raspberry branches, watering hoses, ropes or thick rope with which to braid the pegs.
Unusual landscape decor
A stream without water with blue pebbles has a stylish look. Lost among the greenery, it creates the illusion of a flowing river. To convey the reflection of the sky in a non-existent water surface, it would not hurt to add white, yellow, pink stones to the riverbed. The log bridge achieves the completeness of the picture.
Great importance is given to winding, multi-level paths made from tree cuts, stones, ceramic tiles or their fragments, and glass bottles. Installing stumps with internal lighting along the perimeter of the path will give the area a special charm.
The fence is the calling card of the residents. It can be made into a work of art that sparkles in the sun thanks to the colored pebbles embedded in the boards. The fence is decorated with vertical landscaping and original lanterns.
Note!
Trellis for grapes? do it yourself - ready-made solutions for the garden plot. Instructions + 120 photos of options for the correct trellis
Planning a vegetable garden at a summer cottage: ready-made diagrams for practical and effective do-it-yourself planning
House for a well: a step-by-step master class on how to make it yourself, recommendations from craftsmen with simple work patterns
Exclusive versions offered by designers for landscape decoration:
- crafts made from stones in the form of a cactus, children's sneakers, ladybugs painted with fluorescent paint;
- hanging objects that sound when the wind blows: sets of bells, glass balls, beads;
- multi-colored bottle caps nailed around the window like trim;
- a home zoo located in the depths of the garden, horses made of birch logs, pigs made of five-liter bottles, etc.
Hands holding flowers are delightful and can be easily made using rubber gloves filled with cement mortar.
DIY country house: diagrams and instructions
After purchasing a country plot for a summer residence, the question of how to build a country house with your own hands becomes urgent. Well, building it yourself is quite possible, unless, of course, you are planning a huge “palace” that requires the involvement of construction equipment and a team of professionals.
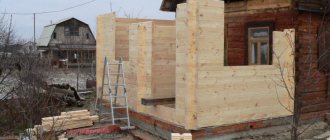
DIY country house
Usually compact buildings are chosen for a dacha, but, nevertheless, the house must have everything necessary for relaxation - rooms, a kitchen, a veranda. The latter will become a favorite place for the whole family to hang out in the evening. It is very important to make the country house cozy and comfortable, so you need to think through all the nuances of its arrangement.
The optimal material for a country house building is wood, and the principle of construction is a frame structure.
Of course, the first thing that will need to be done is to decide on the location and size of the building, draw up a project, and plan further work.
Small country house project
The size of the future home largely depends on the area of the dacha plot, the number of family members and the financial capabilities of the owners. If you plan correctly, draw up a successful project and choose inexpensive but high-quality material for construction, you can save space, money and work time.
In any case, the first steps are drawing up a project
Most often, a country house has a size of 5.0 × 6.0 or 4.0 × 6.0 m. Larger buildings are erected much less frequently, and mainly in cases where they are planned to be used year-round. But this, most likely, will not be a country house, but a full-fledged country house.
The layout of the house may have to be carried out on the basis of requirements that can be established by the board of the gardening association, therefore, when purchasing a plot, you need to find out about such nuances in advance. The following distances are most often required:
- The house must be installed at a distance of 3 meters from the border of the neighboring plot, and from the fence separating the plot from the general passage (street) - 5 meters.
- In order to ensure fire safety, a stone house is placed at a distance of at least six meters from another stone building, and ten meters from a wooden one. If the house is wooden, then it should be installed at a distance of no closer than 15 meters from another wooden building.
- To prevent the house from blocking neighboring buildings from sunlight, if it is placed on the eastern, southern or western side of the site, it is located at a distance from another residential building at least equal to its height.
Usually, to install a country house, the highest place on the site is chosen, in which water will not collect when snow melts or from heavy rains. Increased humidity under the house will never benefit any building material, but it will always have a negative impact on the overall strength and durability of the structure.
Most often, the following construction technologies are chosen for the construction of country houses: frame-panel construction, log houses, walls made of blocks or bricks.
For summer cottages, designs of one-story houses with closed or open verandas or terraces are predominantly chosen. Often a building has an attic space used for storing garden tools and other things that seem unnecessary in everyday use, but which can always be useful in the country. However, it also happens that in some projects there are no attic floor beams at all, and then the roof slopes simultaneously serve as a ceiling.
This miniature house has no attic at all.
If the family is large, and the area of the plot is not as large as we would like, then you can plan a two-story house that takes up very little space at the base. In this case, the first floor can be used as a living room, terrace and kitchen, and on the second floor you can arrange cozy sleeping areas for the whole family.
Country house with a small attic
It is not at all necessary to erect a full-fledged second floor in a dacha building, since its role can be perfectly fulfilled by an attic superstructure. By decorating it with natural materials, you can create a wonderful, healthy country atmosphere.
Country houses are mainly used during the warm period of the year, starting with the arrival of spring and ending in autumn. Therefore, they do not require enhanced insulation of walls and roofs, but devices for heating the premises must still be provided - in case of cold nights or a drop in temperature during unstable weather. Typically, electrical appliances are used as heaters, for example, convectors or infrared film emitters, but sometimes owners even prefer to install fireplaces or cast iron heating and cooking stoves.
By the way, if you plan to build a real fireplace or brick stove, then they must be included in the project being compiled.
There are also ready-made versions of country houses, sold complete in disassembled form, which simply need to be delivered to the site and assembled. Any such set of parts must be accompanied by detailed instructions, which outline the procedure for carrying out the work, basic technological techniques and connection diagrams of individual elements and assemblies.
Prefabricated house built from a ready-made set of parts and components
For the owner of the site, who has basic construction skills, it will not be difficult to assemble such a country house on his own. The main advantage of this option is that the kit often already includes everything necessary for the building’s electrical network, its ventilation system, and even for installing the water supply.
Video: a small, neat country house that lives up to its name
What type of house to choose?
Having decided on the approximate plan of the future house, you need to choose the material for its construction. This choice will determine not only the appearance of the building itself, but also the comfort of staying in it, as well as the costs of its construction.
- The traditional material for a country house is wood, which will create a favorable microclimate in it, filling it with the smells of the forest. A wooden house can be built using a frame method, from timber or logs. The disadvantage of wooden buildings is considered to be the high fire hazard of the material.
Wood is probably the best option for a country house.
However, wooden houses have always been built, and many of them have stood for centuries. Today, there are special fire-retardant impregnations on sale that significantly reduce the risk of fire in wooden buildings. And in general - the most important thing here is not the material, but the human factor - it is people’s neglect of basic fire safety requirements that in the overwhelming majority of cases becomes the cause of fire.
- The construction of a brick structure will cost much more, but it can with good reason be called a full-fledged house, which can be used not only in the summer, but also, if necessary, in the winter, if you install a stove in it. Brick buildings are much less susceptible to fire and, with high-quality masonry, will last a very long time. Their disadvantages include a more complex and lengthy construction process, requiring special skills, and the high price of materials.
A small dacha built of brick.
This category of buildings also includes block houses made of expanded clay concrete, aerated concrete, foam concrete, etc.
- Very often, different materials are used when building a country house. For example, a house is built from wood, but on a foundation made of concrete, brick or blocks.
Wooden house on a brick columnar foundation
This option can be called optimal, since a foundation made of moisture-resistant materials will create optimal conditions for the construction of walls made of wood, thus becoming a reliable foundation for the house.
It is this last option that is worth considering, since it is the most popular of all types of country houses.
Stages of construction of a country house
Materials for building a country house
If you don’t want to bother with calculations, then it’s better to purchase a prefabricated model of a house that has a certain area, for which you only need to prepare a place.
In all other cases, you will need to purchase building materials. Their type, size, volume, total number - all depending on the size of the planned building, which is determined by the project.
Prices for various types of timber
timber
Foundation material
For any type of foundation you will need the following materials:
— sand, crushed stone, cement;
- third-grade board and timber for formwork;
- brick or concrete blocks;
— waterproofing material (roofing felt);
— expanded clay of the middle fraction.
Wall and roof material
Since wood was chosen for the construction of the walls, other materials will be selected based on this:
— bars and boards of different sizes, depending on the design parameters;
- fastening elements - nails, self-tapping screws, bolts, studs;
- corners of different configurations, metal plates - for fastening nodes;
— vapor barrier film;
— insulation — mineral wool, ecowool or expanded clay;
— to cover the roof, it is better to choose a lightweight material — ondulin or corrugated sheeting.
Once the installation location for the future house has been determined and the materials have been purchased, you can proceed to arranging the foundation. True, first you will have to decide on its type.
Country house foundation
Even when erecting such a small and light building as a wooden country house, you cannot do without a foundation. In this case, one of two types is ideal for these purposes - a columnar and strip foundation. Which one to choose depends on the preferences of the builder.
- A column foundation will be a less expensive option, as it will allow you to seriously save on building materials. In addition, such a foundation can be completed independently, without outside help, which will also save some money.
Columnar foundation with bottom frame bars
How to properly build a columnar version of the foundation can be found out in full detail by following this link to the corresponding page of our portal.
- To create a strip foundation, you will need not only a larger amount of materials, but also a fairly long period of time. This is not surprising - along the entire perimeter of the future house you will need to dig a trench, waterproof it, install a reinforcement structure, build formwork and fill the foundation pit with concrete. And after that, whether you like it or not, it will take another month until the filled tape completely hardens and gains brand strength.
Strip foundation
However, strip foundation is still very popular among individual developers. This option is convenient because it allows you to make a basement under the house, however, to do this, the foundation walls will have to be raised above the soil surface by 700 ÷ 800 mm. The structure of a strip foundation is described in detail in the article, which can be found on our portal by following the link provided.
If a columnar foundation is selected, then it is recommended to remove the top layer of soil by 150 ÷ 200 mm from the site, which will be located under the house and around it by 500 ÷ 600 mm. Then pour a 30 ÷ 40 mm layer of sand into the resulting pit, which should be compacted. A layer of medium-fraction crushed stone is laid on top of the sand cushion and is also compacted, and the remaining space must be filled with expanded clay of the middle fraction. All these procedures are done to ensure that small rodents cannot get close to the house. They cannot stand expanded clay (especially small clay), as it contains a large amount of dust and has a loose surface.
Fine expanded clay is an excellent rodent repellent
To protect the house from the penetration of large rodents or other uninvited guests from the animal world, it is advisable to cover the space under the house with a metal mesh with cells no larger than 10 mm.
Construction of a frame structure
For a country house, the best choice is a frame structure.
A frame house can be placed on either a columnar or strip foundation. Construction always starts from the base, which must be reliably waterproofed with two or three layers of laid roofing material.
- If the project includes a veranda, you must immediately separate its zone, over which a roof will be erected, but there will be no solid walls. To support the roof over the veranda, you can use the racks of the general wall frame. Another option is that the veranda will be attached to the house separately.
- Without exception, all wooden workpieces must be treated with antiseptic compounds and fire retardants. These impregnations will increase the wood's resistance to fire and rot, and will prevent the appearance of insect nests or colonies of microflora representatives - mold or fungus.
Laying and assembling the beams of the lower crown trim
- After the workpieces have received proper preparation and are completely dry, during construction, a lower frame (crown) is first made, which will be laid on the foundation and will subsequently be used to install the floor.
In order for the floor to be reliable, it is necessary to use high-quality timber of the required cross-section for the frame. If funds allow, then it is better to choose wooden elements not according to the “lower limit” of dimensions, but by placing a certain margin in their cross-section.
The table shows the optimal dimensions of timber for a frame house:
| Material and its purpose | Section size (in mm) |
| Bottom frame beam | 100×150 |
| Top frame beam | 100×100 |
| Beam for gable wall studs | 100×50 |
| Beam for side posts | 100×100 |
| Floor beams | 100×80 |
- The frame support beams are mounted on crown bars located along the perimeter of the foundation, at a distance of 600 ÷ 700 mm from each other. They are secured using corners or by inserting. If the elements are large in cross-section, they can additionally be fastened with metal brackets.
Connecting unit at the installation site of the vertical stand (optional)
- When the lower frame with support beams is ready, the wall frames are made. They can be assembled separately, and then, when finished, lifted and secured to the framing bars.
Installation of the wall frame
Another option is to raise the frame directly in place. For example, if a house is being built independently, without helpers, then it will be very difficult to lift the finished wall frame to the height of the frame alone, install it evenly and temporarily fix it until it is finally secured. This means that each of the bars will have to be placed separately.
- The size of the bars for the wall frame posts must be at least 100x100 mm, but it can also be mounted from boards with a cross-section of at least 50x150 mm.
The bars are secured to the lower frame using powerful corners that can hold them in a vertical position. It is best to use self-tapping screws rather than nails for fastening - the difference in price is not so significant, but the quality and reliability of the assembly is incomparably higher.
- When installing vertical racks, you need to immediately mark the location of the openings for windows and doors. It is best to leave the area where they are to be installed free in the frame, and install the part of the wall with the window opening separately.
Section of the frame with a window opening
Then, when the upper strapping block is installed and secured on all other vertical posts, the section with the window opening is fixed to the space left for it.
- All four walls are assembled in the same way. At the corners, the side posts are fastened together with corners, or instead of two separate ones, one common corner post is mounted. It is recommended to support it with diagonal struts on both sides - they will add rigidity to the entire wall structure.
Simplified assembly of frame walls with braces
- The doorway is installed in the frame immediately. It is reinforced with an additional rack, since a door suspended on hinges has a certain weight, which must be calmly supported by both the reinforced opening and the entire wall frame.
A doorway is left on one side of the frame
- If you plan to sheathe the frame from the outside with clapboard, then this is the next step. The sheathing will give the structure additional rigidity, which will allow the installation of the attic floor and roof truss system to continue.
Covering it with clapboard will give additional rigidity to the entire frame structure.
Installation of the floor can be carried out immediately after the outer cladding of the walls, but only if the roof is covered with a roof on the same day. It is highly undesirable for your freshly laid flooring to get wet if it rains unexpectedly at night. Therefore, it is better to first resolve the issue with the roof, and then calmly deal with all other construction activities inside the house.
Roof construction and roofing
Types of rafter systems
A few words need to be said about the types of rafter systems, since, moving on to the construction of the roof, it is necessary to have a general idea about this, to know which design is best to choose.
There are two types of rafter systems - hanging and layered.
Hanging system
The hanging rafter system is distinguished by the fact that it is installed only on external load-bearing walls and has no other supports. It is perfect for erecting over a small country house building. In order to lighten the load on the wooden walls and on the foundation, hanging rafters are fastened with ties.
Hanging rafter system
The hanging structure itself consists of a transverse beam, which also performs an overlapping function, and can simultaneously serve as a frame for lining the ceiling, as well as rafter legs that form the roof slopes.
Layered system
A layered system is installed if the house, in addition to external walls, has internal permanent partitions that will become additional support points. This scheme can also be used when constructing the roof of a country house, if it has a large area and its rooms are separated by walls built on the foundation.
Roofs made according to the layered scheme
When installing this system, the load on the load-bearing side walls becomes weaker, so it will be possible to use fewer retaining elements. It is perfect for attic structures that will be used as living quarters.
Floor beams
An important structural element is the floor beams.
The beams are laid exactly above the vertical posts of the wall frame. In order for them to fit tightly on the upper strapping belt, grooves are cut out at their edges. The size of the grooves can be calculated based on the formula shown in the figure.
Option for inserting floor beams into the upper crown (mauerlat)
The beams are secured to the frame structure of the walls using nails or self-tapping screws, and in addition they are sometimes fixed on both sides with metal corners.
Having completed the installation of the ceiling beams, you can proceed to building the roof truss system. For safety reasons, temporary plank flooring is laid on the floor beams to ensure comfortable movement along the attic plane during installation of the rafters.
Installation of the rafter system
Elements of the rafter system
The roof rafter system can be mounted using different sequences of fastening its elements:
- First option. It is necessary to fasten the outer pairs of rafter legs on the ground, then lift them onto the harness and install them ready-made on the gable walls of the house. And then connect them with a ridge beam, and mount the remaining pairs of rafters on it.
- Second option. To begin, install the middle posts along the gables, then fasten them with a ridge beam or board, onto which the rafters are then attached.
- Third option. In this case, pairs of rafter legs in their upper part are attached to each other with a ridge plate, and their lower side is fixed to the wall frame, which in this embodiment will act as a mauerlat.
The cross-section of beams or logs used for rafter legs must be strictly maintained - depending on the length of the rafters between two points of support, and depending on the pitch between adjacent pairs of rafters
| Maximum permissible rafter leg length (in mm) | Rafter spacing (in mm) | |||||||
| 1100 | 1400 | 1750 | 2100 | |||||
| Section of the rafter leg (in mm) | ||||||||
| bars with cross-section | logs Ø | bars with cross-section | logs Ø | bars with cross-section | logs Ø | bars with cross-section | logs Ø | |
| up to 3000 | 80×100 | 100 | 80×100 | 130 | 90×100 | 150 | 90×160 | 160 |
| up to 3600 | 80×130 | 130 | 80×160 | 160 | 80×180 | 180 | 90×180 | 180 |
| up to 4300 | 80×160 | 160 | 80×180 | 180 | 90×180 | 180 | 100×200 | 200 |
| up to 5000 | 80×180 | 180 | 80×200 | 200 | 100×200 | 200 | — | — |
| up to 5800 | 80×200 | 200 | 100×200 | 200 | — | — | — | — |
| up to 6500 | 100×200 | 200 | 120×220 | 240 | — | — | — | — |
It should be noted that the attachment point for the rafters in its lower part will depend on the angle at which they are fastened to the ridge and how long they are.
If the rafter is long enough and protrudes beyond the load-bearing walls, then a notch is cut out on it, with which it will be installed on the strapping beam (mauerlat). An example of such a notch is shown in the picture:
Cutting the rafters into the mauerlat
If the rafter ends at the edge of the load-bearing wall, then its lower edge is cut at a right angle to the Mauerlat, and the leg itself can be fixed to it using a special fastening plate, a sliding support, an angle, a bracket, nails or long screws.
Other options for attaching rafters to the upper crown
If the house is very small, then after securing the rafters to the frame, tying them with ridge beams or boards, you most likely will not have to install additional supporting elements.
Detailed information on the exact calculation of the rafter system can be obtained from a special publication on our portal by following the recommended link:
For installation of additional reinforcing elements of the rafter system, the material can be selected in accordance with the recommendations indicated in the table:
| Elements of the rafter system | Sectional size of timber or board (in mm) |
| Mauerlat beam | 100×100; 100×150; 150×150 |
| Struts | 100×200 |
| Runs | 100×100; 100×150; 100×200 |
| Puffs | 50×150 |
| Supporting crossbars of racks | 100×150; 100×200 |
| Racks | 100×100; 150×150 |
| Fills, boards for assembling the cornice box | 50×150 |
| Front and hem boards | 22÷25×100÷150 |
Prices for various types of fasteners for rafters
Rafter fasteners
Roofing system
After the rafters and additional elements form the roof slopes, you can proceed to the installation of the subsystem for the roof deck.
- The first thing that needs to be done on the outside of the roof, after installing the rafters, is to lay a vapor barrier film, securing it first with staples and then with counter-lattice strips on the rafters.
The film is laid perpendicular to the rafters, starting from the lower eaves of the roof. The overlap between two adjacent strips must be at least 200 mm.
Vapor barrier film flooring
Next, thin wooden slats are placed on top of the film on the rafters, which will fix the vapor barrier and create the necessary ventilation gap.
- The main batten is mounted perpendicular to the counter-lattice, onto which the roofing material will be attached. The installation step of the guides depends on the type and size of the sheets of roofing material.
If a soft roof is chosen to cover the roof, then instead of sheathing slats, the slopes are covered completely - with plywood, and then with waterproofing sheets of roofing felt, which are overlapped by 150 ÷ 200 mm and glued together with bitumen mastic. Another option is to use soft bitumen decorative tiles, which are laid using a similar technology.
By following this link, you can learn more about the stages of work on installing a soft roof :
- The following roofing materials are most often used for wooden houses (depending on the steepness of the roof slope).
| Roofing material | Roof slope | Weight (kg/sq.m) |
| Corrugated asbestos-cement sheets (8-wave slate) | from 1:10 to 1:2 | 11 ÷ 14 |
| Corrugated cellulose-bitumen sheets (ondulin) | from 1:10 and more | 6 ÷ 7 |
| Soft roofing (flexible tiles) | from 1:10 and more | 9 ÷ 15 |
| Galvanized sheets (metal profiles) | from 1: 4 and more | 3 ÷ 6,5 |
| Metal tiles | from 1:5 and more | 5 ÷ 7 |
- The selected roofing material is laid and secured onto the prepared base. The work starts from the cornice, and if the first row is laid from right to left, then all other rows are installed according to the same pattern.
Some types of roofing materials have a strictly specified installation pattern in direction, which cannot be changed. This must be indicated in the instructions supplied with them.
Also, for any type of sheet roofing material, the amount of overlap in the direction of the slope is determined (usually 150 ÷ 200 mm), and the number of waves (relief protrusions) in the horizontal direction, along the roof.
- Almost all roofing materials are secured to the sheathing using special nails or self-tapping screws with waterproofing gaskets.
Fastening the ondulin roof
- It is very important to correctly select and secure the ridge elements of the roof, otherwise it will leak at the first rain. Typically, the ridge element is selected from the same material as the covering of the roof slopes.
- Next, the eaves of the roof are finished - this can be done with wooden or plastic lining. Sometimes special plastic elements - soffits - are used for these purposes.
Lining the eaves overhang from below with soffits
- Then elements of the roof drainage system are installed on the wind board - funnels, gutters on brackets, pipes, etc.
Never overlook your drainage system
- Next, the gable sides of the rafter system are sheathed. Most often, wooden or plastic lining or even planed boards are used for this.
For the lining, a special profile is fixed around the perimeter of the pediment triangle, into which the prepared panels, cut at the desired angle, will be installed. Installation is usually done symmetrically - from the middle post to one side and then the other - then the cladding will be smooth and neat.
Roof gable cladding
By the way, you can also install the lining horizontally, in a herringbone pattern, or come up with a more complex pattern.
Detailed information about roof construction can be found in the article posted on our website by following the link.
Now, having completed the external finishing of the roof and being confident that rain will no longer get inside the country house, you can move on to installing windows and doors, insulation, flooring and wall cladding.
Installation of windows and doors
- Window frames are mounted in the frame openings left for them and leveled. For preliminary fixation when placing the frame, spacers made of wooden blocks or slats are installed between it and the opening bars.
Seal the gaps between the window and the frame.
Then, after checking the correct installation, the frames are attached to the wall frame with metal strips. The remaining gaps between the frame and frame bars are filled with polyurethane foam. After it dries, the excess is cut off, and platbands are installed around the windows on the outside of the wall, which will close the unsightly appearance of the gaps and give neatness to the overall appearance of the house.
- It is best to install the door together with the door frame, if it has sufficient rigidity. This will make it much easier to align the entire structure with the level in the wall doorway.
It is best to install the door as a block - together with the frame and leaf.
When exposing the door frame, if necessary, to achieve a clear vertical position, place wedges (inserts) from wooden slats. The door frame is secured to the frame in the same way as window frames, using metal strips, and the gap is filled with polyurethane foam.
Having installed all the windows and doors, you can proceed to installing the floor.
Installation and insulation of floors
Approximate structural diagram of a frame floor
To begin with, the temporary flooring from the boards (if there was one) is removed from the lower frame, and then you need to install the subfloor.
- To do this, cranial bars are nailed or screwed onto the frame supporting beams. They are necessary for laying transverse subfloor boards on them.
Beams with stuffed cranial bars
- Next, boards cut to exact size or plywood 8 ÷ 10 mm thick are laid on the skull blocks - this flooring will serve as a subfloor.
- The subfloor laid on top is covered with a hydro-steam-insulating film, which should cover both the load-bearing beams and the entire plane of the floor. Individual sheets of material are laid overlapping (by 150 ÷ 200 mm) and taped at the joints with waterproof tape.
Membrane and insulation
- Next, insulation material is laid or poured onto the vapor barrier film. If you do not want to have rodents as neighbors who like to live under the floor, then it is better to use expanded clay of medium or fine fraction, or ecowool, to insulate the floor - these toothy pests simply do not live in such materials.
Insulation of frame floors with expanded clay
- Another layer of film membrane is laid on top of the insulation, which is nailed to the supporting beams with staples. The installation principle is exactly the same as on a subfloor.
The floor is finished!
- The entire structure is then covered with thick plywood or wooden floorboards.
Prices for thermal insulation materials
Thermal insulation materials
Measures for additional thermal insulation
When the floor is completely ready, the walls of the house are insulated and sheathed from the inside. If the building will be used only in the warm season, then the insulation will still not hurt - it will work as an insulator of the premises from heating in extreme heat. Therefore, it is recommended to lay a thermal insulation layer not only in the walls, but also in the ceiling, and if it is missing, place insulation along the internal slopes of the roof.
Ceiling lining
- First, a vapor barrier material is attached to all walls and ceiling beams. Then the ceiling is covered with clapboard, plywood or plasterboard.
- After covering the ceiling, the walls are insulated. Insulation mats are laid between the frame posts. It is necessary to ensure that the mats fit as tightly as possible against the bars of the wall frame, so that there are no gaps left.
Walls insulated with mineral wool mats
This is why mineral wool is most often used as insulation - after being tightly laid between the studs, it will expand, completely filling the entire space. The material is usually selected so that the thickness of the mats and the thickness of the frame posts are the same.
- After this, all walls are again covered with vapor barrier film.
Walls before final cladding with clapboard or plasterboard
- The next step is covering the walls with wooden paneling, plywood or plasterboard. The latter, during subsequent decorative finishing of the walls, can be painted with water-based paint or covered with wallpaper.
Wall cladding inside the house
- Next, the attic floor is insulated, where the insulation is placed between the floor beams.
If the ceiling is sheathed on the side of the house with plasterboard or clapboard, then we must not forget that you cannot step on it, since the sheathing will not support the weight of a person. You must move carefully along the floor beams.
Insulation of the attic floor
- If the attic is planned to be used for storing various garden supplies, then a flooring made of boards or plywood with a thickness of at least 10 mm should be secured on top of the insulation on the floor beams.
- The finishing touches of the interior decoration will be the installation of platbands on windows and doors, ceiling and floor skirting boards and closing the corners with fittings.
Extensions to the house
The last stages of arranging a country house are installation work on the veranda and porch.
If a place is left in advance for the veranda on the frame lying on the foundation, then a board is laid on this space to cover the floor (material for open areas is used), a fence is installed and a canopy is mounted.
An example of a country house with a veranda
If the foundation is raised high enough above the ground, then a porch is also attached to the veranda.
Building a country house with your own hands is a completely doable task, but it will be quite difficult to do without helpers. Therefore, it is best to seek help from a knowledgeable craftsman who has experience in such work, will always give useful advice and show how to correctly install certain components in the structure of the house. You can “mobilize” your relatives and friends - it is possible that a knowledgeable person will be among them.
Video: building a country house using frame technology
Romantic relaxation area
The area where it is pleasant to sit with friends in anticipation of a delicious dinner is separated by a fence. A stationary barbecue or an antique stove with niches for firewood is appropriate here. An excellent solution is to build a rounded, wide bench made of wood around the grill. Here you can also place a table and sofas from cheap flights, covered with bright blankets and pillows.
Such areas are located next to an alpine slide or other eye-catching objects.
It’s hard to imagine relaxing without a hammock. You can use ideas for a do-it-yourself summer house in the form of a stationary model made of wood, suspended on chains under a canopy. An alternative would be hanging chairs made from a mattress or from gymnastics hoops braided using the macrame method. While the barbecue is being prepared, it’s a good idea to have fun playing tennis. To do this, you will need a tennis table made of chipboard or plywood.
Wooden building
Wooden buildings for your dacha
offers a wide selection of various wooden buildings for a turnkey cottage:
* sheds, storerooms and outbuildings for storing tools and materials;
* premises for animals;
* showers, toilets and sanitary blocks;
* workshops;
* summer kitchens;
* cabins.
The construction of a building is possible anywhere in a personal plot or yard on a foundation or other foundation. For construction, frame technology is used - erecting a frame from timber, and then lining the outside and inside with eurolining. The company's catalog includes both small simple wooden buildings and full-fledged blocks with 2-3 compartments with a common or separate entrance, which can even be used as a garage or workshop. These wooden structures will help simplify the organization of country life, protect materials, equipment and other garden supplies from bad weather, robbers, and ensure their normal storage. These are compact, roomy, strong and durable buildings that are compactly placed on a summer cottage and economically use up its space. Easy to install and operate, unpretentious and economical, wooden premises will be an excellent choice when you need to organize life in the country.
Advantages
The construction company specializes in wooden buildings and is engaged in the construction of buildings at dachas and suburban areas in Moscow and the Moscow region. Our advantages will definitely interest you:
* favorable prices. The company's pricing policy is completely transparent and focused on customer needs. We have managed to reduce the cost of our services without sacrificing quality. Savings are achieved through the use of our own building materials, workers and transport;
* high quality. For construction and finishing, only high-quality timber and class A eurolining are used. The construction of wooden buildings is carried out exclusively in compliance with technology, building codes and safety regulations;
* fast work. The construction of any structure will be assembled on the site in literally 1 day;
* guarantees. Construction work is carried out under a contract. “DachaMaster” does not miss deadlines, does not cut corners and guarantees the high quality and durability of its buildings.
To ask any questions, calculate an approximate estimate or order a service, call our consultants or leave a request on the website.
All the best for children
When life is filled with children's laughter, this is true happiness. A sports space is a great addition to the home, promoting the physical development of children. It is replenished with a sandbox, an obstacle course, and a slide with stairs. The site can be equipped with:
- By railroad.
- A pirate ship.
- A tree house for teenagers and a house on the ground for kids.
- A complex including horizontal bars and ropes, labyrinths.
When creating a swing, they use an old skateboard tied with ropes threaded through drilled holes. A small child will be satisfied with the tire version. By cutting out two side rings, a roomy bottom is left and the rubber is turned inside out.
Note!
- Do-it-yourself canopy over the porch - choice of materials, types of structures + instructions for making it yourself
Do-it-yourself bathhouse in the country: expert recommendations, choice of materials, step-by-step description + instructions for DIY construction
- How to sew outdoor curtains for a gazebo with your own hands: step-by-step instructions + 140 photos of ready-made ideas
The main attention is paid to the reliability and safety of structures.
Reservoirs
A well-maintained swimming pool is the dream of every owner. When such a variation is not affordable, ideas for a pond in the country will suggest an alternative solution in the form of a homemade mini-lake that gives a feeling of tranquility. Having dug a hole of the desired size, lower a bathtub or basin into it, decorating the shore with pebbles. Craftsmen even install pump-powered fountains. The murmur of water jets will turn this corner into a favorite place of relaxation.
Water lilies, duckweed, and water lilies can float in the water. This will give the pond even more charm. Arranging a magical waterfall will add grace to the creation.
Convenient vegetable garden
Gardening work can be made easier by using boards, slate, and bricks to create neat beds raised above the ground and separated from each other. The soil around is covered with crushed stone to prevent the appearance of weeds. It will be convenient to water and weed vegetables.
You can scare away birds with a device made from CD disks attached to a hoop on a pole. This will serve as decoration and protection for the grown crop. No less original is the idea with a scarecrow dressed in the latest fashion.
You should not give preference to factory-made goods, because there is no end to the ideas for a summer house made from scrap materials. Decorating your acres is very exciting. A person becomes the creator of his own landscape design, developing his creative potential and revealing the artist in himself.
How to build a country house yourself
Residents of noisy cities dream of a relaxing holiday in the lap of nature, where they can escape from the hustle and bustle and be alone with their thoughts. But more often than not, dreams never turn into reality, because there is an opinion that suburban housing is difficult and expensive. To save effort and money, you can build such a house with your own hands according to your own design.
Selecting a location
Planning plays an important role, since it is necessary to rationally use every centimeter of the site. Even though the land is private property, there are also building regulations that must be strictly adhered to to avoid problems with neighbors and the law. The most important thing is to maintain minimum distances from objects. They are: 3 meters from the nearest site and driveway, as well as 5 meters from the street.
You should not consider low-lying areas or depressions in the territory, otherwise water from rain and melting snow will constantly accumulate there. The most advantageous option is an elevation in the north or west of the summer cottage.
Country house options
Depending on the desires and needs of the owner, various types of residential buildings can be implemented on the site:
- One-story building with an attic. This is one of the most popular solutions that has won the love of users due to its convenience, accessibility and unpretentiousness. An advantage is also the savings on building a utility unit, since all the tools can be conveniently located in the attic.
House with an attic Source domsmam.com
- House with a terrace. In the summer season it can be used as an outdoor dining room.
Terrace near the house Source domaizkomi-2.ru
- Building with an attic. Although in this case there is no full second floor, the house has almost all the advantages of the two-story option. The kitchen and living room are conveniently located downstairs, and the guest and master bedrooms are located upstairs.
Two-story house Source proekt-sam.ru
Prefabricated buildings
Buildings of this type are quickly gaining popularity among consumers due to their ease of installation. The appearance of such houses is laconic and neat, simple rectangular shapes and straight outlines predominate. This design never goes out of style as it combines convenience and beauty.
Prefabricated building type Source ratatum.com
A prefabricated building is a kind of construction kit that can be assembled by any user with minimal knowledge of construction. This building provides all modern communication systems: plumbing, electrical wiring, ventilation and air conditioning. All this greatly simplifies installation and protects against possible errors during installation. Thus, even a beginner is quite capable of coping with the construction of a house.
Prefabricated country houses are well suited for long stays outside the city, seasonal holidays and travel with family and friends. Such buildings have quite a lot of space and can have one or two floors. Inside there are all the necessary premises and communications, the house is completely ready for use after completion of assembly.