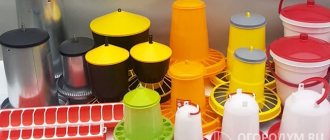
Feeding method
According to this parameter, there are three main options: tray, groove and bunker.
- Tray feed. This type has the most primitive design and is suitable for both chicks and adult chickens. The tray feeder has high sides that prevent food from spilling out, and the elongated configuration provides the bird with easy access to food.
- Grooved feed. This type is close to the first, but is additionally equipped with demarcation bars. Thanks to their presence, you can simultaneously feed different types of food without fear of mixing them.
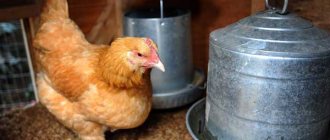
- Bunker feed. The bunker feeder is used exclusively for dry food. The structure of such automatic feeders allows you to add food only once a day, or even less often: when there is little grain in the tray, part of the food from the reservoir is automatically refilled into the container. The food always remains clean and dry, and the chickens have constant access to food throughout the day. It is believed that this type is most suitable for chickens.
Automated lines
Large farms use automatic feeders to feed chickens of different age categories. They work on the principle of bunker structures. Have advantages:
- allow you to form feed for a large number of poultry;
- simplify the feeding process, save human resources;
- with their help, you can distribute feed additives to the entire livestock or part of it.
Operation of the equipment requires electrical power. The cost of the equipment and the costs of its installation pays off already in the first batch of chickens.
We looked at different chicken feeder ideas. A person decides for himself: to buy finished products or make them himself. There are advantages and disadvantages in both cases.
In the first option, the farmer uses the developments of professional designers. The product is manufactured in a factory environment.
In the second option, the product is manufactured to meet the individual requirements of the owner, taking into account the characteristics of the chicken coop. With the right approach, this provides undeniable advantages.
Main material
The most common of them are wood, plastic and metal. Each of them has its own characteristics that can influence decision making.
- Wooden feeders. Wood is an environmentally friendly and popular material. It’s easy to make a feeder out of wood with your own hands, but it’s worth remembering that it’s only suitable for dry food.
- Plastic feeders. It is best to serve chicken mash in them. Thanks to the perfectly flat surface, food residues are easy to remove. Do not forget about quality - the thickness of the material and its chemical composition must be absolutely safe. For young animals, it is recommended to choose models with low edges. For adult chickens, stable containers are needed that will not tip over during feeding.
- Metal feeders. They are similar in functionality to plastic ones, but have a number of disadvantages. Metal will rust from contact with moisture, and containers made of stainless steel will be expensive even if made independently.
Bucket products
A metal or plastic bucket or food box will do. Perform the following actions:
- the dimensions of the future product are marked on the workpiece;
- the workpiece is cut, the edges are polished;
- metal edges can be bent.
You will need metal scissors, a file and other tools.
Feeder placement options
According to this criterion, two groups are distinguished: floor and wall-mounted structures.
Floor feeders are much more popular than wall-mounted ones: they are not tied to a specific location and can be moved if necessary. The second type is fixed to the walls to prevent overturning.
Depending on the number of birds on the farm and their age, one of the types or a combination of them is selected.
Wooden crafts
Having on hand a piece of plywood, scraps of thin slats and hand tools, you can easily make a wooden tray container. For this you will need:
- calculate the drawing;
- make blanks;
- assemble them into a single structure.
Fix wooden blanks with nails, screws or glue. To increase the service life, paint and varnish coating is applied.
Important Details
After deciding which type of feeder is best suited, you need to move on to evaluating individual models.
When making your own feeder, such details should be taken into account even more strictly.
- Ease of maintenance. When choosing a feeder, you should evaluate its shape in advance. Easy access to all its corners must be provided, both for filling the container with food and for consumption by poultry. You should not lose sight of the need for washing - there should be no hard-to-reach places.
- Strength of materials. The fragile structure will quickly become unusable and can even injure birds. Sturdy and overly heavy feeders will be inconvenient to use: they are difficult to clean and move.
- Feed quality control. A properly chosen design will not allow chickens to scatter food, trample on it, or bring dirt and excrement into the container. Contaminated feed will harm both the health of the chickens and the quality of the products obtained from them.
- Possibility of feed dosing. When choosing a feeder, it is worth considering the number of birds. You cannot take a container that is either too large or too small: for adult chickens you need to allocate at least 10-15 centimeters of space, feeders for chickens should be selected with a minimum length of 5 centimeters per head.
- Safety. A good feeder will not have sharp corners that could injure the bird. It should not be painted or treated with any harsh chemicals.
All these nuances must be taken into account when purchasing or manufacturing, without regard to the selected configuration and type.
General requirements
To save feed, the first thing you need to pay attention to is that the chickens cannot climb into the container themselves and scatter the feed. In addition, this is necessary for its safety, so that excrement does not fall into it. You can protect the grain with sides, limiters, or by moving the container itself outside the cage.
It is also necessary to remember that the container will have to be cleaned and filled daily; the design should not create obstacles to this. In general, you need to pay attention to the weight of the container and its volume (it should be enough to feed the entire livestock for a day).
Approximately 15 centimeters of the length of the feeder are allocated per bird, which should be enough for everyone so that weaker individuals do not remain hungry. If the cage contains only chicks, you can reduce this size.
What else to pay attention to
To select a configuration, it is worth considering certain nuances: the number and age of livestock; chicken coop dimensions; type of feed used; feeding frequency. How can these nuances influence decision making?
- Chicks should be fed exclusively from a bunker feeder, but adults can be fed from any type of feeder.
- In a chicken coop with a large area, it is worth using several floor feeders; for modest dimensions, it is better to give preference to one or two hanging structures.
- A balanced chicken diet should consist of a combination of dry and wet food. If you take this into account and do not limit the bird to one type of food, then a trough feeder would be a better option than a tray or hopper feeder.
By carefully analyzing all possible characteristics and variations, you can clearly understand which choice will be optimal given the existing conditions.
Neglect in selection can lead to nutritional disorders in birds. The bird will starve, laying eggs will stop, and health problems will begin. In order to avoid such a development of events, it is necessary to approach decision-making with the utmost seriousness, evaluating all kinds of feeder ideas and their implementation.
Manufacturing procedure
Using a jigsaw, you need to cut out rectangular parts of the following sizes from a plywood sheet:
- 29x17 cm (bottom);
- 29x40 cm, 2 pcs. (blanks for sidewalls);
- 28x29 cm (front wall);
- 70x29 cm (ibid.);
- 29x26 cm (lid);
- 40x29 cm (back wall);
The proposed feeder is made according to the following scheme:
- In rectangles measuring 40x29 cm, which serve as blanks for the side walls, you need to make cuts at an angle of 15 degrees. The end result should be pieces that look like slightly beveled letters “L”, with the top edge measuring 24 cm and the bottom edge measuring 29 cm.
- Holes for screws should be drilled in all parts, not forgetting to use a drill of a larger diameter to make recesses for countersunk heads.
- Now you need to assemble the feeder. It will look like a box with a drawer pulled out from below. The front wall is formed in two parts: the narrow one is fixed on the “pull-out drawer”, the larger one covers the rest. The hinged lid is attached to the top.
- All edges, protrusions and burrs must be sanded so that birds cannot be injured by them.
- The assembled feeder must be treated with a biocide. It cannot be varnished or painted.
To ensure that the parts fit together as tightly as possible, before screwing in the screw, press them with a clamp or other clamp.
Wooden feeder diagram
The feeder is ready and you can pour dry food into it. The main supply will be inaccessible to the bird, but a small part will be visible in the “pull-out box”, which acts as a feeding tray. As food is consumed from the tray, it will gradually spill out from the main part of the feeder. This part is called a bunker, and feeders operating on this principle are called bunkers.
Another version of a wooden feeder turned out to be quite popular, for which the following parts need to be cut out of plywood or boards:
- a rectangle with dimensions 100x15 cm (this will be the bottom);
- two rectangles measuring 100x8 cm (front and back walls);
- two parts in the form of a “house”: a rectangle measuring 15x8 cm, to which a triangle is attached;
- rail with a cross section of 2x3 cm and a length of 100 cm.
Drawing of a bunker feeder
The “house” parts are the side walls. A rail is attached between the tops of their “roofs”, so that the feeder looks like a toolbox. Only the rail in its upper part is not so much a handle as a barrier for the chickens: thanks to it, they will not be able to climb into the feeder.
Please note that such a feeder is easy to tip over, so it is advisable to cut the bottom from a thick board.
Metal mesh is also an effective barrier. The size of the cell is selected so that the bird can freely stick its head into it and get to the food.
In conditions of limited space, a two-story feeder would be very appropriate. First, a frame is assembled from the bars, then it is sheathed with sheet material, for example, the same plywood. The lower floor is made 25 cm high and 26 cm wide. The length is chosen in accordance with the number of chickens. The second floor is made in the form of a trough with sides 10 cm high.
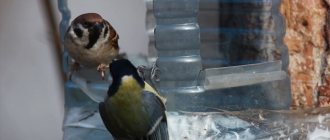
Photo of a homemade feeder
We do it ourselves
Making an automatic waterer for chickens is not difficult and does not require any special skills. For these purposes, you can use an ordinary unnecessary 5-liter bottle and bath. So, attach several clamps to the bath, which will later hold your bottle. Then fill the bottle with water, turn it upside down and insert it into the previously made clamps. That's all, your automatic drinker is ready. It works on exactly the same principle as a store-bought one: it fills the bath with water as it is emptied.
At the moment, nipple drinkers are becoming increasingly popular. Making it is as simple as the previous version. So, for production you will need:
- nipple 180 and 360;
- screwdriver;
- drill;
- container for water;
- pipe adapter;
- water plug;
- adapter;
- flexible hose;
- drip eliminator.
Don’t be intimidated by the amount of required material: you will now see that everything is done simply and quickly.
So, having prepared all the tools, you can get to work. To begin, use a marker to mark where you plan to make the holes. The best option is to place them at a distance of 30 cm. If your pipe is about a meter long, then you can place about 3-5. There is no point in making more holes; it will be inconvenient primarily for the chickens. Then drill holes, it is best to do this on the side that has internal grooves, this will prevent water leakage in the future. The holes should be drilled with a diameter of 9mm, and then we insert the nipples, having previously wrapped them with Teflon tape so that water does not leak in the future. You can purchase nipples at any specialized store or order them online. Then place a plug on one side of the pipe and connect the other end to the hose that leads to the water. For greater comfort for chickens, a drip eliminator can be attached.
But there are also several disadvantages: firstly, this is a rather financially expensive type of drinking bowl; secondly, an adult chicken can climb onto the pipe and thereby break it. To avoid this problem, it is recommended to build a small fence.
If this method seems too complicated to you, then there is a more simplified option. To do this you will need any vessel or a simple bucket, nipples and a 9mm drill. Drill one hole in the bottom of the bucket and simply insert the nipple there. Then fill the vessel of your choice with water and simply hang it in a convenient place so that the birds can reach it without any problems. And that’s it, the drinking bowl is ready.
You can also make a vacuum drinker. This is the most economical and simple option. The principle of its operation is very simple: pressure prevents water from spilling out. But it has several disadvantages: it is easy to turn over and chickens can climb on it, thereby dirtying the water. To make a vacuum drinker, you will need a three-liter bottle and a special stand. Just combine them and you're ready to use.
It is worth noting that all types of drinking bowls presented above can be used both in cages and in free housing. After learning how to make each waterer, it is up to you to decide which is the most comfortable and best suited for your pet birds.
Video “DIY nipple drinker for birds”
The video shows how to easily and inexpensively make an automatic nipple drinker for poultry (chickens, quails, etc.)
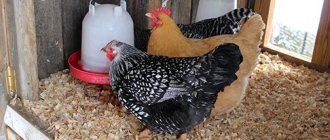
Eating fresh eggs every day and chicken raised in their own backyard - more and more people are thinking about raising chickens to provide their family with similar nutritional conditions. It is impossible to achieve high poultry productivity without complying with the requirements for watering and feeding chickens. There should always be clean water for drinking in the cage or house. The most convenient to use are homemade or store-bought automatic drinkers for chickens.
The amount of water a chicken should consume depends on many factors: ambient temperature, age of the bird, and feed consumed. On average, each individual should drink at least half a liter of water to eliminate the possibility of dehydration.
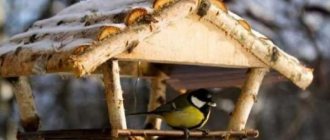
Few rules
The feeder must have a roof. Otherwise, the food may quickly become unusable, becoming wet from snow or rain. It is not recommended to leave the roof transparent. The bird may not notice it and may be hit hard during takeoff.
The width of the hole should make it easy to get inside and just as easy to leave the bird restaurant.
It is a good idea to provide plastic dishes with holes for draining water, this is especially true for feeders placed in wet weather.
The color of the dining room can be whatever the author of the creation wants. Although some argue that birds prefer the color of the tree, while others believe that a bright spot will more quickly attract the feathered inhabitants of forests and cities. In fact, birds will be more attracted to the constant availability of food.
Lightweight structures will be constantly swayed by the wind. And this is not entirely pleasant in the process of satisfying hunger. Therefore, it is better to place such creations in a place more or less protected from the wind or to provide additional fastening elements.
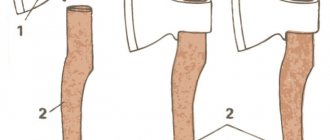
Required Tools
To make a regular feeder you will need simple tools that are found in every home.
The main thing is to take precautions when working, especially when the child uses sharp objects. So, you will need tools such as:
- a stationery knife or scissors - we will use them to cut, cut, cut;
- old cable, electrical tape or tape - for the safety of the birds so that they do not get hurt;
- marker - to draw the entrance and make it more visible;
- an awl for holes or you can use a nail heated over a fire, but then don’t forget the pliers;
- pliers - they are convenient for holding a hot nail, and also for fixing the visor so that it is above the entrance;
- ruler - to draw beautiful and even windows;
- A hot gun is not a necessary tool, but if you have one, it is convenient to use for decoration or for gluing something.
In addition to tools, it is worth preparing the following materials:
- a 5 liter bottle and another 1.5 liter - the latter is useful for automatic feed supply;
- rope or wire - to hang the feeder;
- skewers, pencils, sticks - will be needed for perching;
- stones - for structural stability;
- decor, if you want a beautiful feeder - there are no exact elements provided here, it all depends on your imagination; it could be paint, twine, branches, glue, pine cones.