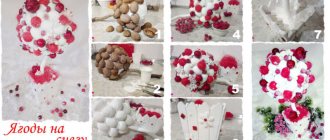
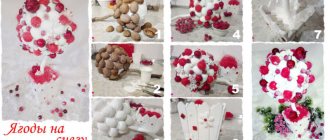
How to make topiary with your own hands
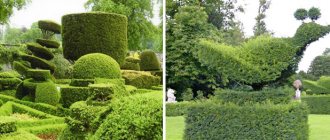
An exciting activity that can brighten up the monotony of everyday life has emerged thanks to people’s desire for variety in life. Gardeners often transform their garden plots with original plant figures. This could be ducks or a peacock, an elephant or a lion, or perhaps the presence of a flower car in the garden.
Topiary in the shape of a car.
Topiary gardening is an ancient art that has been reimagined in a modern way. You can create topiary yourself in just one day. However, with large-scale ideas that can amaze the neighbors from the surrounding mansions with the scope and breadth, naturally, more time will be needed.
At first, don’t dream about too large compositions, but try yourself by creating a small garden figurine using the frame technique. Only after you succeed, you can perform more complex compositions.
Cropped models
To perform simple trimmed models, regular crown trimming is sufficient. In this way, basic figured models are often created. The crown is drawn up as:
- ball;
- Cuba;
- cone
Complex compositions based on simple figures are less often made. The haircut can be done by eye or using improvised means. When decorating, it is permissible to use wire mesh, which serves as a temporary tool.
Arranging a topiary using a ready-made frame
Self- construction of a topiary , which uses a ready-made metal frame, is possible for all gardeners who have the proper patience and perseverance. First, choose a frame for the intended flower figure. Moreover, the figure should, with its size and shape, harmoniously complement the landscape of the land plot. A small but expressive form is preferable, on which you can create an accent that will not fail to attract the attention of others.
To make ready-made frames, which are offered for sale by specialized garden stores, wire with a diameter of 2-3 mm is used. Such frames are lattice structures that are made with certain gaps for penetration inside them. In addition, there must be a lid on top of the frame, thanks to which it is even easier to get to the “insides” of metal structures in order to fill them with a substrate, which is a mixture of soil and peat, or sphagnum moss.
Frame for topiary in the shape of a turtle.
Before you start filling the frame, you need to prepare the moss, which is soaked in warm water for about half an hour. When you fill the frame with substrate, try not to forget about the prudent creation of holes for the subsequent planting of ground cover or climbing, succulent or herbaceous garden crops. It is advisable to plant juveniles, saxifrage, sedum, loosestrife, ivy or grapes in these holes.
If you are forming a topiary using climbing plants, you need to move the earthen ball from plastic containers to metal forms and distribute the shoots along the frame.
Moreover, the shoots must be grabbed using U-shaped clips. If you decide to create a figure that is medium or large in size, in order to lighten its weight, place bags filled with pieces of crushed foam into the substrate.
Frame topiary requires constant care: regular watering of plants and fertilizing the soil, as well as pinching and pruning. Remember that such a green sculpture should not be left outdoors during the winter. It is better to bring it into a room that is not heated and in which the air temperature is about 5 degrees. If the topiary is large in volume or weight, leave it on the site, just cover it with a wooden box that is insulated with straw or polystyrene foam.
History of the emergence and development of topiary art
The history of the art of creating topiary goes back centuries. Initially, the original topiary design was created only by trimming shrubs and trees, but over time, the possibilities for creating figures from living plants and artificial materials have expanded significantly.
Topiaru is an English word derived from the Greek word for place. In Latin, "topiaria" means the art of gardening. By doing topiary, it is possible to recreate a wide variety of figures for the landscape - from fantasy to completely realistic.
For the original decor of the site, even one figure may be enough
In Europe, this type of art has developed since the time of the Roman Empire. During the heyday of the Renaissance, large areas filled with figures of animals, people and geometric shapes cut from plants made up impressive compositions and were combined into outlandish gardens.
The popularity of this design of trees and bushes has only grown over time. Similar works of art began to appear in France, Holland, England, Portugal and other countries.
Thoughtful pruning of plants allows you to create a unique landscape design
Landscape figures from living plants formed the basis of a new trending trend - the creation of small-sized decorative trees for interior design. This topiary decor is distinctive, suitable for many styles, and can even be made with your own hands from available materials - coffee beans, ribbons, artificial flowers, etc.
Topiary for interior made of artificial materials
For your information! To create many complex shapes, a wire or mesh frame is used.
Making express topiary
Express topiary came into being thanks to people’s desire to speed up the process of creating green figures with complex shapes. This method of forming green sculptures is quite simple. In spring, climbing plants are planted in open ground, which quickly form shoots: periwinkle, maiden grapes, ivy or hops.
How to make topiary with your own hands.
After this, a metal mesh frame is installed on top of the planting - the basis for the future topiary. The plants grow and their branches begin to spread throughout the frame. They must be secured using rope made from natural materials, or trimmed. By the end of the season, the frame has time to overgrow and completely cover the metal rods under its green cover. The main thing is to always remember about timely watering and feeding of topiary plants.
Frame variations
When making frame topiary, you will need a base. The skeleton is a wire product that allows you to form and support the “body” of the composition. The plant is planted inside the base. When a sufficient height is reached, a haircut is performed. This topiary frame is not removed.
Subsequently, the ensemble can be supplemented with other plants:
- moss;
- cereals;
- succulents;
- flowers.
A figure containing different shades and textures looks especially colorful. Additional plants are planted in cavities filled with soil mixture.
Building a classic topiary
The ancient Roman gardener could not even imagine that modern society would be able to transform the art of park classics in such a way. When the ancient Romans had free time, they created living sculptures, without trying at all to speed up the process. On the contrary, they preferred the leisurely search for ideal shapes and sizes.
Making topiary of a classic shape.
If you are an adherent of the classical approach, then perform topiary the way it was liked by the ancient Romans, and later by the gardeners who lived and worked in the 18th and 19th centuries. You don't have to be a wizard to do this. It is enough that you are patient, that you have imagination and a sharply honed instrument:
- Garden or trellis shears;
- Lopper;
- Secateurs;
- Wooden slats.
Some tips that will be useful to you when equipping a classic topiary:
First, the skill and hand are “trained” by making simple geometric shapes. It is possible to complicate simple but three-dimensional figures, for which it is transformed into another, for example, a cube is turned into a ball, and a cylinder becomes a pyramid or a cone.
Golden nuts
A walnut topiary will fill your home with the atmosphere of a forest fairy tale. To work with the craft you will need (in addition to the ball, trunk and pot), halves of walnuts, moss or sisal, gold or silver paint (acrylic or spray can).
Note!
- DIY candles
- Crafts from foamiran
- Glass crafts
The principle of making the base of the tree is the same as for other topiaries. But there are some nuances in decoration.
- Prepare even halves of walnuts. To do this, the shell must be washed and dried;
- Apply paint to the parts in advance, before gluing it to the ball, since spray paint corrodes the foam;
- paint over the gaps between the nuts or decorate them with organza ribbons and beads;
- Glue moss or sisal onto the surface of the pot.
For the trunk, use a driftwood or branch. Open it with varnish or saturate it with stain. This will emphasize the naturalness of the craft.
Making topiary with a simple geometric shape
First you need to understand what kind of figure you want to get when performing your first exercise. You need to find a specimen of a tree or bush that is five years old or older, as well as a well-developed root system and crown. Its dimensions should be larger than the intended dimensions of the figure. Ideally, topiary can be made from the following plants:
- Spruce or prickly spruce;
- Cotoneaster;
- Bladderwort purpurea;
- Hawthorn pinnately incised;
- Tatarian maple.
The best time for a topiary haircut is March-April or June-August. It is not a good idea to trim the plants during autumn days as this will weaken them before they head off for the winter.
Topiary of a simple frame shape.
You must follow the step-by-step instructions for making a cube-shaped topiary:
A square having the desired length of the side of the cube is drawn on the ground, directly under the crown.
In the corners of the square it is necessary to install wooden slats or bamboo sticks with a diameter of 2-3 cm. They are fastened together using horizontal transverse strips. The result is a frame - a landmark.
Using trellis shears, make a rough cut to roughly outline the outline of the intended figure. First, cut the top edges, then process the side edges.
After checking the sides of the cube for evenness, it is necessary to correct the planes and proceed to finishing cutting, during which the volume is gradually trimmed.
Grab your pruning shears for the finishing touch. At the same time, small branches that stand out from the overall composition are removed.
From time to time, evaluate the correctness of the forms from the outside. To do this, you need to move 3-4 meters away from the sculpture.
Tools for work
Simple garden shears will not be enough for topiary. The gardener needs to prepare a full set of tools:
- lopper;
- trellis shears;
- pruner
Additionally, you will need a level, wire, twine, and slats for the frame. To process the cuts you need a garden varnish. When preparing cutting tools, pay attention to their sharpness. Dull blades are not suitable for work.
Looking through photos of topiary, it seems that it is simply impossible to create some specimens with your own hands. Marvelous objects are so intricate and bizarre that they evoke admiration. Mastery requires practice and careful actions. With the right approach, everyone can cope with the task.
Making topiary of complex shape
By truncating the faces of a cube, you can get a topiary, which is a ball. Ball-shaped topiary is best obtained from the following plants:
- Purple willow;
- Barberry Thunberg;
- Bladderwort;
- Thuja occidentalis;
- Spiraea sulfur;
- Common spruce;
- Tisa;
- Boxwood and others.
To obtain a cylindrical topiary, thuja occidentalis is suitable, a natural variety of which is the column shape. For beautiful cylinders the following are also suitable:
- European larch;
- Irga roundifolia;
- Small-leaved linden.
Topiary that looks like a column is cut, just like a cubic one. A circle is drawn on the ground under the tree crown, guide stakes made of wood are installed, and a cylinder is cut out. Topiaries are beautiful, trimmed like a cone or truncated cone.
To build a frame for a cone-shaped topiary, you need to dig in three or more poles and fasten them in the center - this is the place where the top of the cone, similar to an Indian wigwam, is supposed to be located. Beginning topiaries are supported by nature itself, which created the plant - thuja occidentalis, which has a cone-shaped crown.
Topiary of complex frame shape.
To train your hand, you can try yourself by performing pyramidal topiaries with three and four sides. This way your garden will be decorated with a mini-complex representing Egyptian pyramids, which will make the plot of land completely unique. Gradually, you can become a perfect master, and gradually begin to create such complex green sculptures, which are made in the form of a spiral, tiered geometric volumes with various combinations, and a little later create figures of animals and people.
Deciduous options
Shrubs with leaves have a fluffier crown. Instances grow faster, but require more attention. The choice for the purposes of forming green sculptures is usually made among the following options:
- willow;
- hawthorn;
- cotoneaster;
- spirea;
- vesicular carp;
- barberry.
A striking feature of deciduous shrubs is also the variety of crown colors. You can choose not only typical green shades, but also tones with yellow, red, blue, and white patterns. This allows you to significantly diversify the design of the territory.
Making a classic topiary with a frame
Trimming classic topiary is greatly simplified thanks to a removable metal frame placed on top of the crown of a tree or bush. The use of such an auxiliary element makes it easier to obtain topiary yourself and is most useful for beginner topiaries.
The planted plant grows without removing the mesh garment, thus adapting to the necessary shapes, and the gardener only frees it from unruly branches that make their way in the wrong direction.
After the crown is finally formed, the frame is removed. True, many gardeners do not like this method of equipping a topiary, because the plants can grow together with the frame to such an extent that later, when it is removed, the crown can be damaged.
From napkins
You will need a set of components such as a stapler, multi-colored napkins of different sizes, wire, one or more sticks, a spherical shape, a pot, beads, and ribbon. Napkins are usually used to make flowers, and less often - various figures. You will need to pin several napkins together in the center (or one large one, folded several times). After this, a circle is cut out of them. The edges are made smooth or wavy. The irregularities will help create chaotic petals. The cuts will make them more voluminous and fluffier.
As each layer is lifted, the shape will become more and more flower-like. To finish a ball with a diameter of 20 cm, you will need about thirty of these elements. They are secured with glue and wire. It should be remembered that to recreate the natural size of the flower, you will need circles about 10 cm wide. Green foliage from fragments fastened or glued in the shape of a leaf should be added to the flowers.
