Why do children love to go down the slides? An idle question. Well, it's cool, that's all. These smart adults and aunts have discovered that downhill skiing trains the vestibular apparatus, coordination of movements, teaches how to correctly assess the degree of risk and group in a fall. Many animals make smooth paths for themselves on wet clay slopes and slide down them.
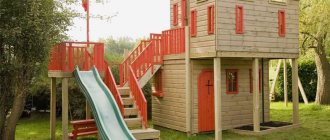
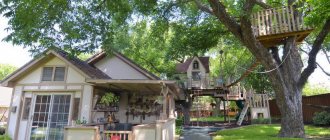
You can make a children's slide with your own hands without much difficulty. You can find many slides for children to ride that their mothers built for them. There is always a place for a children's slide on a plot of any size, see fig. below. The cost of materials for a no-frills children's slide, as long as the ride is good, fits into the equivalent of $15-$20.
Homemade children's slides
Parents who have some excess free time and money can practice craftsmanship and design using a sample slide for children to ride (see examples in the next photo), without risking spoiling something significant and prestigious: any indispensable foundations of the design of a children's playground there is no corner. But there are certain technical rules for the execution of playground slides in the material. They are dictated by safety requirements that take into account the characteristics of the child’s body.
Examples of children's slide design
To get started, watch a detailed video on how to build a children's slide like those that are still widely available in kindergartens and playgrounds:
DIY slide for children in the country
Installing and making a slide for children is, of course, a task for dad. It will not be easy for a woman to master metalwork. You can also order a project in a special workshop.
Material for the slide.
You should choose an environmentally friendly material that will not emit harmful fumes. In addition, the material should be pleasant to the body and not have nicks or a rough surface.
The most successful would be a slide made of natural wood. But modern wood-based particle board (chipboard) is also suitable.
For the basic design you will need:
- Wooden beams, slats, lining, planed boards.
- Metal pipes of different diameters;
The following materials are suitable for the slope:
- Sheet of laminated glossy chipboard;
- Galvanized steel sheet with a thickness of at least 0.5cm;
- Thin plywood (in order for the surface to slide, the plywood is painted with environmental acrylic paint or high-quality varnish);
- A sheet of linoleum (which is firmly attached to a wooden base);
- A special ramp from the store, which is made of plastic (plastic ramps have their drawbacks; over time and exposure to weather, the plastic cracks and bends);
Tool for making a children's slide with your own hands:
- Drill (manual or electric).
- Plane.
- Screwdriver.
- Wood saw (electric or manual).
- To fasten wooden elements you need nails, screws, and anchors.
Which material should you prefer?
Despite the huge range of building materials, only wood or metal is suitable for arranging a children's slide. Despite the fact that the design will be the same type for both the first and second options, the manufacturing process will be completely different. This is explained by the fact that each material has its own characteristics, which should be taken into account before making the final choice and starting to study the construction technology of the structure.
Metal children's slide
At the very beginning, it is worth paying attention to the fact that it will be quite difficult to make a slide without a welding machine. Therefore, it is necessary to have minimal operating skills and the welding machine itself
In addition, do not forget that metal is a delicate material that, when heated (during welding), can deform and bend. Any idea without special knowledge of working with metal may not end up as originally intended.
Despite this, it must be said that a children's slide made of metal has many advantages compared to wood:
- long service life;
- strength;
- reliability;
- does not pose a danger to the life of a child if the installation technology is followed.
Wooden children's slide
The main advantage of wood is its ease of processing, which requires a standard set of power tools:
- drill;
- electric jigsaw;
- grinder with special attachments (for polishing wood).
Even a beginner in the construction business can easily cope with the task. Unlike metal, a slide made from any lumber has virtually no flaws, and if there are any, they are insignificant and can be easily eliminated. For example, if it is necessary to protect a structure from moisture, it is enough to treat it with special protective equipment, as well as paint it with any paint and varnish material. This will create a protective layer.
It is also worth noting that when considering the option of purchasing a ready-made children's play complex or slide, you can consider another option - plastic. In most cases, manufacturers combine it with wood or metal, which makes it possible to obtain a wide variety of shapes and designs of slides.
Everyone decides for themselves what material to use to make a children's slide. But, if you are faced with a similar problem for the first time and do not have welding skills, then the choice is obvious - wood.
Project for a children's home slide
Before starting work, you need to draw a schematic drawing on paper of what the future slide should look like.
There are many ready-made projects available online. We will provide an option for a simple wooden slide for children. But any standard drawing can be adjusted to the necessary parameters of your summer cottage.
When choosing a sketch for a future slide, the following features should be taken into account:
- Child's age. It will be difficult for small children to climb steep steps, and a very steep descent can be very dangerous.
- The area where the slide will be installed. There should be enough space so that the child can safely slide down the slide without crashing into a fence or other structure.
- The size of the slide will depend on the area that you allocate for the playground.
- The wishes of the child himself and, of course, his own abilities.
Construction rules
Before you figure out how to make a slide for children with your own hands, you should study the rules for its construction and installation. You need to remember the following:
- the design should be comfortable for the child;
- there must be a “brake pad” on the descent. This is the area where the slope should be parallel to the surface of the earth. If the descent speed is not reduced, there is a risk of injury;
- The length of the homemade slide should be twice the height of the structure. For example, with a ramp length of 5 m, the height of the launch pad should not exceed 2.5 m;
- there should be no other structures a meter from the descent so that the child does not hit himself during acceleration;
- in the descent area there is a special covering (for example, a rubber mat);
- a swamp should not form under the structure;
- For the construction of the structure, use only safe and environmentally friendly materials. No matter what you choose, they should not contain harmful ingredients. This also applies to the paints and varnishes with which you will cover the slide;
- if the slide is made of wood or plastic, it must be resistant to fire;
- When constructing, be sure to use fences and railings. Thanks to these elements, the child will not only maintain balance when climbing up, but will also not fall during active movement. These structures must be present on the slide no matter how old the child is;
- the structure should not have cracks or openings so that the child does not get injured or get stuck during play.
The slide must certainly be stable, functional, durable and have an attractive appearance. Its base can be concreted or metal supports can be used. All structural elements should be sanded and varnished.
Be sure to take into account the age of the child; if we are talking about preschoolers or primary schoolchildren, then the height of the slide should be a maximum of 3.5 m.
Do-it-yourself slide for children in the country: stages of construction
After selecting the material and location at the dacha, we begin installing the home slide.
We will consider in detail the option of installing a wooden slide.
Markings are carried out on the site. Optimally, a plot of 2 x 2 m is sufficient. If the construction of a sports complex or house is planned along with the slides, more space is allocated.
The first step is to strengthen the foundation. It doesn’t matter whether it is metal pipes or wooden beams for the base, reinforcement should be made.
To do this, dig a hole 60 cm in the ground, place a thick wooden beam in the hole, and fill the space around it with concrete (a mixture of cement, sand and crushed stone). A cutout is made in the timber into which the board is hammered.
The base of a home slide for children is made from thicker boards. Leave space between the boards (a few centimeters so that the child’s foot does not get stuck there). These spaces are needed to prevent water from accumulating on the site.
According to the project, wooden boards are cut. All boards and beams must be cleaned so that the child does not drive in a splinter.
The slope for the children's slide is made 80 cm wide. This is the standard size of the slide. Both the smallest playful person and an older child can ride on such a ramp. After choosing the slope option for the slide, it is mounted at an angle. The size of the angle depends on the age of the child.
The stairs are being installed. For steps and balusters, choose a board with a thickness of 20 mm. The stairs are installed at an angle of 450. The width of the steps also depends on the age of the child. A small child under six years old will not be able to climb steep stairs without help from someone else. The spacing between steps and their frequency should be very convenient.
To ensure the safety of children playing on a slide in a dacha built with their own hands, railings on the stairs and sides on the descent must be installed.
At the end, all protruding parts, nail heads and screws are hidden or cleaned. The slide is coated with acrylic paint or varnish. Bright colors are chosen for beauty.
Design examples
Good owners never have too much space in their dacha or garden, and this is where a corner slide comes in handy. But don’t squeeze it into the corner of the fence: the distance from the slide to any obstacle must be at least 1.3 m!
Drawings of the corner children's slide and its upper platform are given on the following. rice. Of course, it is better to make the slope profiled. In the same way, as a platform, you can build a sandbox for landing; then the length of the boards for it needs to be 1800 mm. The slide platform is supported by 4 pillars 150x150 at its inner corners.
Drawings of a corner children's slide
The pillars do not need to be concreted. It is enough to scald their lower ends with hot bitumen to a height of 750-800 mm, sprinkle them with sand while still hot, wrap them in roofing felt and dig them in to a depth of 60 cm or more. In the pits you need cushions made of 15 cm of sand + the same amount of crushed stone, i.e. pit depth from 900 mm.
For scalding, the ends of the beams are immersed in almost boiling bitumen. Slowly, otherwise hot splashes will fly! Then they wait until the bitumen around the tree stops hissing and bubbling. This means that air and moisture are forced out of the wood. After this, the beams are kept in bitumen for at least 10-15 minutes so that it saturates all the pores. After installing the pillars in the pits, they are covered 3/4 of the depth with crushed stone in layers, 15 cm each, with a tamper and topped up with excavated soil with a height of 15-20 cm. Wooden non-foundation buildings on such supports last for 40-70 years or more.
In Canada, whose climate is similar to Russia’s, only even wetter, top platforms for children’s slides are common, which do not require excavation for installation, see fig. below. For proper rigidity and reliability of the entire structure, it is necessary, firstly, that the upper platform itself be of a box-shaped structure. That is, there may not be a roof, but balusters and reinforcement connections from the rear (stringer) are required. Secondly, the ladder legs must be attached to the strapping bars with rigid, one-piece units (leg brace), consisting of persistent jibs and attached earrings on the outside.
The upper platform of the children's slide, which does not require excavation for installation
It is better to fix the entire structure on the ground, of course, not with pegs, but with L-shaped anchors made of reinforcing bars. The anchors are driven to a depth of 60 cm. In order for the ladder support brace, exposed to both soil and atmospheric destructive factors, to last for a long time, they must be protected from rotting especially carefully. For example, the same as the heels of a fence for a front garden, which is also installed directly on the ground.
The development of the idea of a slide for children to ride, installed on the ground without excavation, are the samples shown in the following. rice. They use the rigidity of not only the triangle and the box, but also the so-called. biplane box. This gives a large supporting area, so such slides do not need to be attached to the ground at all, and the entire material is a 150x24 board. The second interesting feature is the sides of the slopes, which decrease in height along the slope. You won’t fall off the top, but you’ll roll around - wave your arms and scream from your heart. Ready-made factory products of this type are available for sale; they are brought and simply placed where the owners indicate.
Drawings of children's slides installed directly on the ground
How to make a descent slippery
- The surface of the slide must be really slippery so that the child can slide down it easily. There are several ways to achieve a perfectly smooth surface.
- Consistent sanding of a wooden surface after varnishing. If you repeat the procedure of cleaning the varnished board several times, you can achieve a mirror surface.
- Cover the drain with bathtub acrylic. It is sold in hardware stores and is used for remodeling acrylic bathtubs.
- Special wood oil will also provide a good sliding surface and prevent moisture from entering the wood. It is necessary to open the slide with oil several times.
Playground concept
You need to start with an idea. Take a closer look at your child - what is close to him? Maybe he dreams of being an astronaut - then a town in the shape of a starship is unlikely to leave him indifferent. And if he wants to travel, then why not become the captain of a pirate ship?
Once the concept is chosen, think about how to incorporate details that will support the chosen atmosphere. In our case, the shape of the children's playground will resemble a sea schooner; the given direction will be supported by fences on the captain's bridge, in which figures will be cut out.
Safety requirements for a home children's slide.
Slides for children must meet certain safety requirements. Materials for the slide must be made from environmentally friendly and non-hazardous materials. The coating paint is non-toxic.
Children should not catch protruding parts or protruding nails with clothing.
The slide should be located away from the roadway, outbuildings, poles and other structures. Access to the stairs and descent must be free.
Slide play for small children only under adult supervision.
It is better to plant the ground around the slide with lawn or cover it with special rubber sheets. Don't rely on your child's dexterity. The baby can always fall; the ground covered with grass will soften the fall.
Children's slides for apartments
You can also install a children's slide in the apartment. It can be made from wood. The drawing of the slide is made taking into account the dimensions of the room. This structure is combined with a house or a child’s crib.
There are plastic structures on sale that can be folded when not needed. In an apartment, plastic will not deteriorate from the sun and frost. The disadvantage of such home slides is their cost. You can buy a slide in an online store or in a children's store.
There is no greater joy for a child than going up and down a slide. This activity can keep little playful kids busy for a long time and give parents a chance to relax in the fresh air.
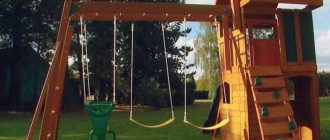
Finishing the swing
We made the basis for the swing in the previous stages. Now let's complete the design. We assemble a bench with a seat 130x50 cm and a backrest about 30-35 cm high. You can change the dimensions at your discretion. To fasten the seat, it is convenient to use chains or ropes - we hang the bench from the crossbar using them and you’re done.
It is more convenient to attach the seat at this stage, because if installed earlier, the bench will interfere with the installation of other structural elements.
With this our playground is ready. All that remains is to paint the elements of the complex at your discretion.
Area
Area
Area
Swing
Swing
Swing
Swing
Follow the instructions, check the photos and everything will work out.
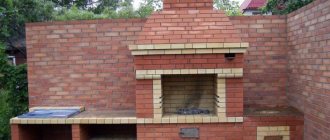
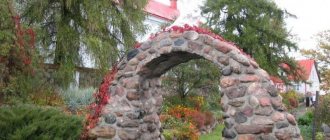
Decor for the site
Decor for the site
Decor for the site
Decor for the site
Playground decor
Children's playground decor at the dacha
Good luck!