Violet or Saintpaulia is an elegant and delicate flower that requires special care and attention. One of the important conditions for growing a healthy flower is replanting.
To preserve its decorative qualities and ensure its full development, the plant should be replanted in a timely and correct manner. Let's take a step-by-step look at how to transplant Saintpaulia yourself and without mistakes .
When should a violet be replanted?
Several factors indicate the need to replant the plant:
- A white coating appears on the ground. This indicates that the soil has poor air permeability. Also, the presence of a white coating indicates oversaturation of the soil with minerals. As a result, the roots begin to rot and the plant loses its attractiveness.
- The root ball grows too much and is visible on the surface of the soil, under the leaves. This interferes with the growth and development of the flower.
- The soil is depleted , has become dense, and the plant does not receive any nutrition.
- Violet leaves turn brown ; fertilizing does not help.
- The plant has grown and part of the bare stem has appeared. The transplanted flower will be more magnificent and beautiful.
- New “babies” have appeared that need to be separated from the mother’s outlet.
The appearance of any of these signs indicates that it is time to change the Saintpaulia container.
In this video you will be told about the importance of replanting violets with changing soil.
What are ampelous violets?
Ampelous Saintpaulias or trailers are violets with: Elongated stems; And numerous rosette growth points.
Interesting materials:
How many children are there in one orphanage? How many diagonals can be drawn in a hexagon? How long did Maidan last in Ukraine? How long do White Nights last in Murmansk? How long is an hour on other planets? How long is a week on the Moon? How long does one skating rink last in PUBG? How long does a break in Dota 2 last? How long does a round last in Pubg? How long does the regional stage of the Olympiad last?
Transfer time
For violets to take root better, spring is . At this time of year, the plant has enough natural light, and the temperature for transplantation is optimal. As a result, Saintpaulia will tolerate a change of “place of residence” well.
September and October are also recommended for replanting capricious violets into new pots. In the summer heat, it is undesirable to touch the plant . At high temperatures, the transplant will cause him unnecessary stress. The same applies to the winter period. Due to a lack of sun and uncomfortable temperatures, the plant may not take root and die.
Optimal conditions for the transplantation procedure are ten-hour daylight hours and a temperature of +18 degrees . If you still need to replant Saintpaulia in winter, you need to install special lamps for additional lighting and ensure the required level of humidity in the room.
Beginning flower growers often ask whether it is possible to replant a blooming violet. Transplanting Saintpaulia during flowering is resorted to only in emergency cases .
If a plant is exposed to a disease or is attacked by pests, it must be replanted immediately, regardless of flowering or time of year. The violet is also replanted if it is too flooded , which can cause the roots to rot.
Important! After transplantation, flowers or buds should be removed so that the plant directs all its energy to rooting and not to flowering.
Under normal conditions, the flower is not touched during the budding period. Flowering indicates the plant is in good health. Since it blooms, it has enough nutrients. Therefore, replanting can be delayed until flowering is complete.
Some gardeners rely on the lunar calendar for transplanting violets. It indicates favorable periods for planting, down to the day.
Is it possible to replant a flowering Saintpaulia?
We are often asked: is it possible to replant a blooming violet? One of our experts will answer this question for you.
Expert opinion
Klimkina Elena Vladislavovna
Florist, businessman. Organized her business on a country plot of land
First of all, you need to find out for what purpose you want to transplant. Just because the time has come, do you think the pot is too small, etc.? In this case, we would recommend that you wait until after flowering. After all, if a plant blooms, it means it is quite comfortable and in such conditions, no critical or dangerous processes occur.
But if you understand that the flower needs to be saved - for example, the soil in the pot has become sour, pests have infested, or the soil has already become too poor, then you need to act immediately. Even if the violet is blooming at this time.
Yes, it will most likely stop flowering, but at the same time you will save the plant
Transplanting violets after purchase
After purchasing a violet, you need to carefully inspect it, remove dried buds, flower stalks and leaves. Store-bought flower pots usually contain a peat mixture that contains no nutrients. Therefore, after purchase, the plant should be replanted as soon as possible .
To do this, prepare a new substrate by mixing high-moor peat with vermiculite. This mixture will be moderately sour and loose. If you wish, you can purchase ready-made soil for violets .
After transplantation, the plant is covered with film to obtain a greenhouse effect . After 7 – 10 days, the film can be removed.
If the flower was purchased not in a store, but from familiar flower growers, you don’t have to rush to change the pot. In this case, the young plant is not immediately replanted, giving it time to develop the root system.
Diseases of violets with photographs and their treatment
Diseases of violets with photographs and their treatment
No matter how unpleasant it is to admit it, sometimes even with proper care, a violet can get sick. In this case, the cause of the problems is microscopic pests that damage the leaves, stems and roots of the plant.
Such diseases are more dangerous than medical ones, therefore it is necessary to get rid of them as soon as possible. If this is not done, the flower will inevitably die, infecting all those plants that stood near it.
Diseases and their treatment:
- Late blight (you can get rid of this disease with the help of Phytosporin, by spraying the affected plant).
- Fusarium (you can try to get rid of the problem with any fungicide suitable for combating diseases of indoor plants).
- Powdery mildew (plants are sprayed with an antifungal agent such as Benlat).
- Gray rot (first, all damaged leaves are removed, and then treated with Teldor fungicide).
How often to replant
In flowering perennials, the root system develops quickly . The plant quickly draws all the nutrients from the soil, and it becomes depleted. The roots begin to peek out of the drainage holes or above the ground. The violet needs to be replanted at least once every 7–8 months.
Timely transplantation of Saintpaulia into a new pot will help prevent diseases , and the violet itself will delight with beautiful flowering.
How to replant a violet
Without a doubt, the violet or Saintpaulia is one of the most popular indoor plants. A blooming violet looks very touching and helps create coziness. Lovers of these indoor plants collect entire collections of plants with different colors of inflorescences and leaves, exchange rare specimens and create the most comfortable conditions for violets. Beginning flower growers, when purchasing a violet, should be prepared for the fact that the plant will require attention and care, but in return it will delight you with its flowering almost all year round. One of the important factors influencing the appearance, flowering and general comfort of the plant is the timely transplantation of violets and rejuvenation of the bushes. In this article we will talk about when to replant a violet and how to do it correctly so as not to expose the plant to much stress.
How to choose a pot
Shallow pots are chosen for relocating Saintpaulias , since the roots of these flowers develop from the bottom up. A height of 10 cm and a diameter of 9 cm will be sufficient. If the plant is planted in a larger pot, it will intensively develop roots and entangle the earthen ball, and there will be no strength left for flowering.
A pot made of clay or plastic is suitable for violets . A clay pot provides good air permeability and maintains soil moisture at the roots. In such a pot, the plant is less likely to get sick and be attacked by pests. The downside of these pots is that they are heavy and not cheap.
A plastic flower pot is lightweight and easy to care for. Its disadvantage is poor air circulation. To fix this, holes are made with a nail in the bottom and side walls.
In this video they will show and tell you what pots and soil to plant violets in.
Features of planting garden varieties
Most varieties of garden violets prefer slightly shaded areas with loose, moist soil. These plants are propagated using seeds, cuttings, and also by dividing the bush.
Annuals
To obtain annual violet seedlings, seeds are sown in early spring , at an air temperature of at least +10°C. The sown seeds are lightly crushed with earth and covered with plastic wrap.
After 7-10 days, sprouts will appear . When the seedlings develop at least four leaves, they are planted in a permanent area.
Two-year-olds
To plant a two-year-old violet, the seeds are sown in June in a special prepared area :
- Within a few weeks, sprouts will appear; after the formation of two true leaves, the seedlings are plucked;
- At the end of August, young violets are ready for planting in a permanent place, while maintaining an interval of 10-15 cm between plants.
These violets can only be expected to bloom next season , but their flowers will be much larger and their blooms will be more abundant.
What soil to plant violets in
To independently prepare soil that is best suited for violets , you will need the following components in equal parts:
- two parts of leaf soil;
- part of coniferous soil;
- part of the peat;
- part of the turf land;
- some river sand;
- a handful of charcoal.
Advice! For better results, vermicompost can be added to the soil 2 weeks before transplanting.
The prepared substrate must be disinfected. To do this, it is steamed in the oven or doused with boiling water. After the soil has cooled, you can begin replanting the Saintpaulias.
How to carry out the procedure correctly?
Soil preparation
It is recommended to purchase soil in a store, otherwise there is a risk of infecting the plant with diseases . If it is not possible to take it in the store, but it is necessary to disarm the soil: it is necessary to steam it and fertilize it with a solution of potassium permanganate.
Soil composition:
- River sand – ½ volume.
- Coniferous soil – 1 volume.
- Crushed moss – 1 volume.
- Leaf soil - 1 volume.
- Turf soil - 2 volumes.
Tip : Expanded clay, brick chips, pottery shards or moss can be used as drainage. For young plants (up to 6 months), drainage should occupy 1/3 of the pot, for adults - ¼ of the pot.
Fertilizers
Usually, when replanting, it is not recommended to add fertilizers, since if the soil is prepared correctly, it already contains all the necessary nutrients . But when preparing the soil, you can slightly “revive” it by adding microbiological fertilizer “Baikal EM-1” 14 days before transplanting. “Baikal EM-1” is mixed in a ratio of 1 to 100.
You can also add Fitosporin-M to the new soil when replanting. First, you will need to prepare a liquid concentrate from it, according to the instructions, and then dilute the resulting concentrate in a proportion of 1 ml per 2 liters of water, and moisten the soil with it before replanting.
Just before transplanting, you can add a little vermicompost, charcoal or coconut substrate.
Dishes
You can choose a plastic or ceramic pot or container as a container for replanting. A clay pot contains pores, which causes the earthen ball to dry out faster .
The dishes should be wide, the diameter of the dishes should be 1.5-2 times greater than its height. In this case, the diameter should be 2-3 times smaller than the plant itself. There must be holes for drainage.
We recommend watching a video about choosing a pot for violets:
Preparing the plant
Before transplanting a violet, it should be prepared for the procedure . The soil in the pot is moistened so as not to damage the roots of the plant. There is no need to fill the pot with water until dirt forms; the substrate should remain loose.
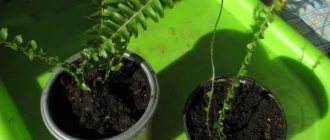
The violet is carefully removed from the old flowerpot, trying not to stain the leaves. Some of the root shoots are cut off and large leaves are removed . These manipulations activate the rejuvenation of the flower.
Step-by-step instructions for transplanting at home
When replanting, you need to prepare a new container for the flower, a universal soil mixture that is suitable for perennial ornamental plants, and the flower itself.
A week before replanting, you need to reduce watering the violet so that the roots can dry out a little.
Step-by-step instructions for replanting Saintpaulia:
- moisten the soil with a spray bottle so that it does not stain your hands during the procedure;
- remove all excess soil from the violet roots, remove rotten areas;
- rinse the roots under running tap water and leave to dry on a paper towel;
- put a drainage layer at the bottom of the new pot - vermiculite, stones, clay shards;
- sprinkle the drainage with a small amount of soil mixture and then install the violet on it;
- place the Saintpaulia and carefully fill all the free space in the pot with soil, sprinkling it in small portions;
- a layer of earth is poured up to the beginning of the rosette , leaving it and part of the rhizome on the surface;
Do you collect violets? Then we recommend that you pay attention to very spectacular varieties that do not require special care - “Raisin”, “Duchess”, “Wedding Bouquet” and “Royal Lace”.
Three methods of transplantation
Depending on the purpose or reason for the procedure, there are three methods , each of which has its own advantages.
Complete substrate replacement
This type of plant replanting is resorted to when the violet stops growing and developing, does not bloom and looks unhealthy . This is a signal that the plant has used all the microelements and the depleted soil can no longer nourish it.
Complete removal of old soil involves cleansing the root system . It is inspected and dried, rotten and damaged parts are removed. As a result, the root part is significantly reduced, and the plant can be planted in a pot of smaller diameter.
Expanded clay is scattered on the bottom as the first layer . Then a small amount of soil is poured on which the violet is laid out, carefully straightening its roots. Next, fill the remaining soil until it comes into contact with the lower leaves. The soil is mulched with vermiculite.
To check whether the soil is well compacted, shake the pot with the plant. compact the soil again .
To maintain soil moisture for the first day, the plant can be covered with plastic film .
This video explains in detail how to properly transplant a violet.
Partial soil replacement
Partial replacement is carried out every time a healthy plant needs to increase the pot . To do this, part of the soil is removed, but the earthen ball around the roots is not touched.
The violet is removed from an old pot in which the soil has been previously moistened. Having transplanted it into a large pot, add the prepared nutrient mixture and tamp it down with a teaspoon.
Transshipment
Transshipment is used when it is necessary to urgently relocate a flowering plant or replace a container that has become cramped with a more spacious one.
The violet is carefully removed from the container along with the earthen lump. Drainage and part of the prepared soil are poured into the new pot. Then the used container is inserted, and the space around it is filled with soil. After this, the unnecessary pot is removed and a flower is placed in its place. All that remains is to carefully level and compact the earth.
Obtaining planting material
Before transplanting a flower, you need to prepare it . The soil will need to be moistened so that the flower and the lump can be easily removed from the pot. The roots are cleared of soil and damaged ones are cut out. If the roots are very overgrown, approximately 2/3 of them can be removed without harming the plant.
If a flower needs to be rejuvenated, then for this you will have to remove not only part of the roots, but also part of the leaves. When rejuvenating, transplant the plants into a smaller pot. You can also rejuvenate the plant by cutting off the roots along with the stem and dried leaves. In this case, a sharp, disinfected knife is used during circumcision. The remaining upper part is placed in a glass of water, and, after waiting for a good root system to form, it is transplanted into a pot.
Growing from a leaf
You can obtain planting material using leaf propagation:
To do this, it will be necessary to select healthy, elastic leaves located in the second or third row from the rosette.- These leaves are cut with a sharp, disinfected knife, dried for 15 minutes and sprinkled with charcoal.
- Then cool boiled water is poured into a dark plastic cup and an activated carbon tablet is dissolved in it.
- Next, the stem of the leaf is immersed there no more than 1 cm.
- The resulting planting material can be replanted after the cut roots become longer than 1 cm.
We recommend watching a video about growing violets from leaves:
You will find all the detailed information about growing violets in a separate article.
How to seat children
It is important to know how to plant young shoots so that they take root. Young rosettes are distributed into pots with a diameter of 6 cm after two pairs of leaves have appeared on them. To prepare the soil, use vermiculite, peat and chopped sphagnum.
The babies are separated from the mother's rosette along with a large leaf. Then they are seated in separate containers at a shallow depth. The soil is moistened , and before rooting, containers with young plants are placed under a lamp.
This video will tell you when it’s time to separate violet babies from the mother leaf and how to do it.
How to plant young plants
The rosettes obtained from a rooted leaf are transplanted after 2 - 3 months into separate cups, where they will grow for a long time until they bloom and the pot becomes small.
The main thing in keeping such babies will be the creation of favorable conditions for development - good lighting, temperature conditions and moderate soil moisture.
Care after transplant
To ensure that transplanted plants do not experience stress and recover faster, they need to be helped with proper care . It is necessary to maintain optimal temperature, soil moisture and lighting.
After transplanting the perennial, adhere to the following rules for 2 weeks:
- cover the plant with film ; when condensation forms, remove it for a couple of minutes for ventilation;
- the flower pot is left in a warm place (24 degrees) ;
- Saintpaulias provide sufficient lighting, but protect from direct sunlight .
Caring for violets in spring, summer, autumn, winter
Caring for violets
As for care in spring, summer and autumn, it is quite standard. All that will be required of you is to regularly water the flower and do not forget to fertilize. If you do all this on time, then the violet will definitely delight you with its bright appearance. But with the arrival of winter, violet care becomes a little different.
First, you must make sure that she receives the right amount of light throughout the day. Therefore, it will be better if you move it to the sunny side or try to turn on the room lighting immediately after it starts to get dark. Secondly, during this period it is necessary to strictly monitor the humidity and temperature in the room. If these indicators are very low, the flower will probably die.
It is also worth remembering that violets do not need to be fed in winter. You can quite easily carry out the last fertilizing in November, and the next time you add nutrients to the soil at the beginning of March. During the dormant period, the violet will rejuvenate and with the arrival of spring it will begin to delight you with a large number of bright flowers.
Possible errors during transplantation
Knowing how to replant Saintpaulia correctly, you can avoid mistakes and prevent the death of the plant . The most common mistakes made when performing this procedure are:
- The planting depth is chosen incorrectly . Too deep and the roots will rot; too high and the rosette will sway.
- Choose a pot with a large diameter. The plant will not be able to bloom; it will try with all its might to develop the root system.
- The substrate is not prepared correctly . It should not be too dense and oversaturated with nutrients.
- They use soil from greenhouses and greenhouses , which contains pest larvae and fungal spores.
- When watering, water is not poured under the root, but poured into the center of the outlet . This leads to the death of the plant.
This video talks about mistakes when rooting indoor violet cuttings.
Transplanting violets at home requires preparation and
adherence to certain rules .
However, the reward for good care will be a healthy plant that pleases the eye with lush flowering. Read more about when to repot indoor plants here.
How many days does it take for violet roots to appear?
During the rooting process, we do not change the water, but add it as it evaporates.
As practice shows, on average, the roots of cut leaves begin to appear approximately 20 days after they were lowered into water. But, of course, this does not always happen. This process is influenced by the water in which the plant material was dipped, the very condition of the leaf, and no matter how funny it may sound, the time of year. Those who are involved in growing indoor plants know that at the end of winter and the beginning of spring, all decorative flowers begin to develop intensively.
Due to the fact that during this period they begin to receive much more natural light and heat, all their processes accelerate and, as a result, they begin to bloom more intensively and produce leaves. These processes slow down towards the end of summer, and practically stop in the fall. In view of this, if you propagate a violet in the spring, its leaf may take root even after two weeks. If you try to do this in summer or autumn, you will only be able to see the first roots after a month and a half.
Reproduction by daughter rosettes
A daughter rosette is a young offspring formed from a planted leaf cutting. Often the leaves delight owners with several rosettes at once; this is more likely when rooting in water, especially if the leaves are not planted before the babies appear.
Some time after planting the leaf, young offspring appear.
All children formed on the sheet can be used for reproduction
It is important to allow the rosettes to grow together to an acceptable size for replanting.
Children are separated if each has:
- Minimum of two leaves;
- Own growth point;
- And also at least 3-5 roots.
The division is carried out very carefully; if they have grown together strongly, they are cut:
- With a sharp knife;
- Or a blade.
Next, each plot is given its own pot and planted in the ground.
Advice! Children from one sheet should be designated not only by the name of the variety. If the baby does not exactly repeat the flowering of the mother (when chimeras reproduce, the chance of repetition is 20-30%), then those formed from the same leaf will be the same.
Varieties of indoor violets
At the moment, the number of varieties exceeds 32 thousand. Uzambara indoor violets are classified according to the size of the rosette, leaf characteristics, shape and color of the flower.
According to the size of the socket there are:
- Standard – the diameter of the rosette of an adult plant is from 20 to 40 cm; Most modern varieties belong to this group.
- Large standard - more than 40 cm. These include varieties Ward Brown or Louisiana Lullaby.
- Semi-mini - from 15 to 20 cm. For example, Aca's Eloise, Emerald Pink. Examples of varieties of domestic selection include AB-Favorite Toy, BR-Provence.
- Miniature form - from 7 to 15 cm. For example, LE-Princess Leia, N-Aurora.
- An ultra-miniature form, it is sometimes called a “micromini”. The rosettes of these Saintpaulias do not exceed 7 cm in diameter. Among them are varieties such as Lil Periscope, N-Kapelka.
Modern breeding work is being carried out towards reducing the size of the rosette. Trailer violets have become popular recently. They are distinguished by an elongated stem and form many stepsons.
Violet leaves are distinguished as follows:
- boy – regular flat plain;
- girl – a plain flat sheet with a lighter spot at the base;
- variegated - with a variegated color (spots or a border of white or yellowish-green);
- spoon – the edges of the sheet are curled upward;
- holly – with scalloped bends;
- serrated – serrated edge;
- lance - an elongated leaf.
Violet flowers are divided into:
- Non-double: 5 petals, the lower three larger than the upper two.
- Star-shaped: 5 petals of the same size.
- Semi-double: Some of the stamens develop into additional petals, but the anthers are still visible.
- Terry: more than 10 petals that completely cover the anthers.
- Frilled: The edges of the petals are ruffled or fringed.
Based on color, violets can be single-colored, bicolored, or multicolored. In this case, additional colors can be located on the main background in the form of a border, prints, strokes or spraying. Chimera violets stand apart. This variety has a stripe of contrasting color running down the center of each petal. This color is obtained due to the presence of two layers of genetically distinct cells in the petals. Chimeric coloring is rare and is transmitted only when propagated by stepsons or peduncles, so the cost of such violets is higher.
Sowing seedlings for open ground
Selection of soil mixture
Experienced violet growers advise sowing seedlings in late February - early March. The most important thing when sowing is the correct choice of nutritious and moisture-permeable soil.
Since it is impossible to prepare the soil yourself, the best option is to buy ready-made ones. Good recommendations and reviews about soils:
- "Terra Vita Floral universal";
- "Seliger-Agro";
- "Agricola-Fertility".
Terra Vita soil is well suited for sowing.
The nutritious mineral complex contained in these soils will ensure the initial development and beginning of the life of violets.
Planting young violets
In the process of rejuvenating an adult bush, you can root some of the cut leaves. Approximately 2.5 months after rooting, they should be planted in separate cups, in which they will remain until their first flowering.
After the young violets have finished blooming, they can be planted in plastic or ceramic flower pots of a suitable size. Regardless of the size and age of the violet, it must be provided with the necessary lighting, proper watering and suitable temperature conditions.
If you prepare well for the transplant process, it will not cause you any difficulties. Over time, you will adapt, and you will do it quickly and carefully, since violets need to be replanted quite often, and given the beauty of these plants, their number in your home will constantly grow.
Acquisition
By the way, about what else to call these flowers when searching and buying: this name for domestic violets is less familiar to us, but our same native domestic violets are still called Saintpaulia or Usambara violets.
So, the first thing a florist who plans to buy violets needs to know: these flowers are conventionally divided into industrial and varietal. Industrial violets (those that were grown in greenhouses on an industrial scale and do not have a variety of varieties) can be bought in a regular store like Leroy Merlin, OBI, etc., and varietal violets can be bought from private breeders, at specialized exhibitions, or simply from familiar flower growers. What's better?
Experienced violet growers do not recommend buying flowers in regular stores, since often after flowering they do not take root and die. If you are a beginner, then it is safer to buy both “industrial” and varietal violets from private individuals.
Here are some tips for purchasing varietal violets:
Having bought a violet, be sure to save the name of the variety, otherwise it will be difficult to restore it - there are too many similar hybrids. By the way, more than 25 thousand varieties of Saintpaulia are registered in the world. All of them are derived hybrids of “wild” violets and have a common name - Saintpaulia hybrida. As a rule, each flower is signed in the format: name of the breeder-creator of the variety - name of the variety.
- If you want to save a lot, buy leaves rather than mature flowers. After all, growing a violet from a leaf is very easy and the result is almost always successful.
- You can find and buy the flowers of your dreams through Instagram. Type in the search the hashtag #varietal violets and you will see many photos of violets with the names of the varieties and contacts of breeders who send plants and leaves for propagation throughout the country.
However, with proper care and a bit of luck, even discounted and diseased industrial violets (see photo below), or as violet growers lovingly call them, “soakers,” have a great chance of life.
How to choose a violet in a store?
The abundant bloom of homemade violets in the store may distract you from the leaves, but their condition can help assess the health of the flower. Spots and dried edges are a bad sign, fleshy green leaves are a good sign. A violet with dense buds and the first opened flowers is suitable for us: it is their color and shape that you should fall in love without words, otherwise why did we start all this!
Which lighting should you choose?
Both natural and artificial lighting are perfect for violets, but it should be diffused, since direct sunlight is detrimental to the leaves of the plant. They burn out and fall off. In order for the violet to feel comfortable and grow, the daylight hours for it should be from 10 to 14 hours. If you grow Saintpaulia with thick and dense leaves, then the daylight hours for it should be longer.
If a situation arises when it is necessary to extend daylight hours, it is better to resort to the help of artificial light sources. Fluorescent lamps, LEDs, and so on are ideal for this. Just remember to rotate the plants to avoid bending. In this case, the bushes will be compact, dense and attractive.
Problems during cultivation
Growing violets is not without difficulties caused by violations of agricultural technology.
| External manifestations | Causes | Remedies |
| Yellow spots on leaves | Exposure to direct sunlight | Move the Saintpaulia to a more suitable location |
| Brown spots | Appear on leaves after watering with cold water | Use water warmed to room temperature |
| Yellowing leaves | The lower leaves of Saintpaulia turn yellow as a result of natural dying. If the process affects the entire outlet, the cause may be excess power or improper watering. | Follow agricultural practices |
| Droopy leaves in wet soil | Most likely, root rot has begun, caused by excessive watering or low temperature. | If the leaves at the growth point have not lost turgor, the plant will be helped by resuscitation. The roots are completely freed from the soil. Lateral roots are easier to remove; the central root is examined for the presence of rotten areas and cut down to healthy tissue. In advanced cases, when rot has already begun to rise up the stem, it is necessary to remove it along with the leaves. The remaining part of the plant is treated with a fungicide and planted like a stepchild. If the leaves at the growing point are limp with signs of rotting, the rosette is thrown away. It is better not to take leaves from it for cuttings - they will rot. |
| Saintpaulia does not bloom | There may be several reasons: lack of lighting or nutrients, low air temperature, too large a pot. | Follow agricultural practices |
Most problems when growing Saintpaulias can be avoided by strictly following the care rules.
Leaf propagation
Planting methods differ depending on the method of rooting the violet cuttings.
In water
For rooting in water, a leaf is selected without damage from the middle tier, and in no case from the lower one. Cut carefully with a sharp knife, being careful not to damage other leaves. The cuttings are left no more than 3-4 cm in length.
As quickly as possible, the cut leaf is placed in an opaque container with settled water. The cut is immersed in water by 1.5-2 cm; it should not touch the walls of the vessel. To do this, the sheet is secured with paper or a plastic cover.
Rooting in water.
After 2-4 weeks, roots begin to appear. The leaf is ready for planting when the roots reach 2 cm in length. Take a small pot and fill it one-third with drainage. The soil is prepared in the same way as for adult plants.
In the ground
Quite often, novice gardeners are concerned with the question of whether it is possible to plant a violet without roots. It is possible, and this method is even preferable because the leaf takes root quite quickly, and the new plant develops faster.
The leaf is cut in the same way as in the first case, buried in the prepared slightly moist soil by 0.5 cm and the soil is gently pressed around the cutting. Then the container with the sheet is covered or placed in a plastic bag. This mini-greenhouse will allow you to maintain optimal temperature and humidity.
Rooting in the ground.
After a new rosette of leaves appears, the planting leaf can be cut off.
Advice! To grow violets from leaf cuttings, it is very convenient to use peat tablets. The dry tablet is placed in a container and filled with water.
The cutting is carefully immersed in the swollen, moist substrate using a sharp wooden stick.