The desire for beauty is inherent in man by nature. Therefore, when arranging landscape design and arranging a personal or summer cottage, we try to create things that are not only practical, but also beautiful.
DIY wooden garden paths
Take, for example, a garden path. Its purpose is purely utilitarian - to provide passage to a house, gazebo, terrace, veranda, swimming pool, outbuildings or between beds in the garden. However, even in this case, using imagination you can get something completely unique.
Garden paths in a country house or plot of land can be made of various materials: gravel, sandstone, stone, concrete, brick, paving slabs, paving stones and even plastic bottle caps. But what could be more natural than using natural wood to create a path in the garden? And in all its diversity.
Wooden paths near the house can be realized in a variety of forms and types. The main thing is that paths or paths made of wood can be made with your own hands without spending a lot of money.
Types of garden paths made of wood
Design options depend on the following factors:
- location of the flooring - directly on the ground or on supports, otherwise such paths may be called “walkways”;
- the material used - boards, slabs, cross cuts, timber, logs, poles, and so on;
- using wood as a main or auxiliary material.
Most often, for reasons of convenience, a more expensive device is used on the ground, with preliminary filling of the route with sand/crushed stone, made of solid boards or transverse cuts. Such paths are especially convenient on sloping or terraced areas - in places where there is a difference in height, you can make steps or a ramp from the same material.
Let's consider the main options for arranging paths and preparing for them.
Advantages and disadvantages
Like any other building material, wood products have their strengths and weaknesses.
The main advantages of wooden paths for gardens and cottages include:
- environmental friendliness of the raw materials used;
- the ability to create a coating with a unique pattern;
- ease of manufacture;
- low cost;
- a simple construction tool that can be found at any dacha.
Wood products have several significant disadvantages. The main one is fragility; in addition, the tree is damaged by insects and often suffers from fungus and mold. Special impregnations and antiseptics will help reduce the negative impact of the environment.
Material for wooden paths on the site
Regardless of how exactly you plan to make the trail, the material for it must be prepared. In this case, it is necessary to meet the following requirements for the material:
- absence of rot, mold, woodworms and rottenness;
- The rock resists the destructive effects of moisture well. Optimal types of trees are larch, oak, ash, aspen. The use of pine is justified in fairly dry climates for not very important or temporary paths;
- the tree is cleared of bark and treated with an antiseptic.
These requirements apply to long-term structures! If the path is made temporarily (for example, during the construction of a house and landscaping), they can be neglected.
The presence of woodworms can be determined by the presence of small holes and worm-like passages under the bark, on the surface of the tree, as well as by the rot next to wood that has been piled in one place for a long time.
Before use, lumber is processed. Elements hidden from view can be coated with resin or bitumen in one or two layers; visible parts are best treated with an antiseptic.
Compositions strictly intended for outdoor use should be used; they include protection against moisture, mold and blue fungi, insect pests, as well as UV filters.
Also, if you want to change the color of the wood, you can purchase antiseptics with tinting properties and antiseptic glazing compounds.
In addition to wood, when arranging garden paths, sand, crushed stone (including recycled), gravel, and pebbles are used. Any of these materials can be used as filler under wood flooring or as a complement to the main elements.
Quartz sand of various fractions
Gravel natural fractions from 1 to 12 mm
Primary construction crushed stone, fractions 5…150 mm. Fractions from 5 to 40 mm are suitable for making paths; larger stones are used for fencing and decoration
Secondary crushed stone, fraction 5...40 mm, suitable for filling the bed of a path (under flooring)
The choice of specific material or proportions of sand-gravel, sand-crushed stone mixture depends on the type of soil.
Requirements for wood materials
A prerequisite is that initially there should be no traces of rotting on the surface, since already infected wood cannot be cured with any impregnation. The exception is blue - a fungal infection of a bluish color. It does not destroy the structure of the wood, and you can get rid of it with special bleaches. The product is applied to the stain for 25-55 minutes in several layers. After treatment, the blue discolors and disappears.
Much more dangerous are spots of black, green or red color. They need to be removed as deeply as possible, and then bleaches and impregnations must be used.
Photoaging is another dangerous factor for wood. The sun's rays destroy the lignin that glues the fibers together, cracks appear, and the wood itself turns gray. To avoid this, it is recommended to use impregnations for outdoor use with a UV filter. They protect wood from harmful radiation, preserve its color and structure.
Impregnations with UV filter for wood
Choosing the type of path depending on the type of soil
Regarding the choice of path design on a wooden site - on the ground or on supports - everything depends on the characteristics of the soil on the site. Sandy, rocky, dense chernozem soils allow the construction of embanked paths. If the soil is clayey or loam predominates, and the groundwater level is high, it is necessary to create structures raised on supports.
In wet areas, pile supports may be needed.
Important: when marking the route, it is necessary to take into account the location of not only buildings, but also plantings. This is especially true for paths that require excavation for a bed or driving piles.
In addition to the swampiness of the site, there is another reason for constructing wooden walkways - significant unevenness of the soil. In this case, the use of posts or piles of different heights will allow you to lay even paths without labor-intensive work on leveling the area.
Work procedure
Arrangement of a path made of wooden materials with your own hands begins with its marking. To do this, pegs are driven along the path of the gasket, along which the cord is then pulled. The width of the path is chosen so that two people can pass on it without leaving the surface. Typically this value is taken within the range of 0.8-1.2 meters.
Marking with pegs.
The distance to the trees should not be less than one and a half meters so that growing roots do not damage the base. It is advisable to make turns rounded, allowing the loaded wheelbarrow to turn while performing household work.
Temporary paths
This is the simplest and cheapest option for arranging paths on the site. Unfortunately, it is also short-lived, so it is suitable only as a temporary measure - for example, for the period until normal paths made of tiles, boards or saw cuts are laid in the garden.
Important: for this type of track there is no need to prepare a bed! Bark, twigs, sawdust or shavings are poured without removing the soil!
This option is filling with bark or sawdust. Waste obtained from removing bark from trunks, large chips, bast, sawdust and shavings of various sizes are excellent for avoiding “trampling” dirt in a damp, low-lying area. The thickness of the backfill depends on how large the elements are used, but in general it is at least 3...5 cm. The backfill gradually dries out, is crushed under the weight of users and pressed into the ground. Subsequently, you can arrange a permanent path directly on this flooring.
With finely chopped bark (hardwood), with the addition of sawdust or shavings, you can make a more aesthetically pleasing path. This material is often used for mulching the soil; it is sold in gardening stores ready for backfilling.
In order for the path to remain within the specified limits, it is necessary to arrange a fence - from wattle fence (photo above left), boards or panels (right) or dense green spaces (bottom left).
Execution sequence:
- remove large debris, branches, and stones from the route. If the soil is very uneven, it is advisable to level the ground by removing large protrusions and filling in potholes;
- install fencing elements along the edges of the future path - treated with an antiseptic, coated with resin or burnt boards, wattle fence, large stones;
- fill the bed of the path with the prepared material. If there are fragments of different sizes, larger ones should be placed downward and smaller ones upward, thereby leveling the coating.
Good to know: if the path is not being made on a temporary basis, it is necessary to make an arched profile of the path by adding soil (sand, crushed stone) to the middle and compacting it. You can also make an embankment over the entire area, thereby raising the path above the level of the surrounding soil. In this case, installation of a fence is mandatory.
From the raised path, during rains and snow melting, water will flow into the ground, thereby ensuring the relative dryness of the embankment and ease of use of the path.
Decoration
You can decorate the wood with colored paint to create a mood. The dark shade of the stumps, coated with a 20% solution of copper sulfate or varnish, looks noble. Between the cuts, ground cover crops and plain pebbles look very nice. Some owners use rolls of lawn grass as a base for wide spaces in the path.
You can buy multi-colored gravel to fill the space. Various herbaceous and flowering plants are planted along the edges of the borders and decorated with stones, small figurines and miniature lanterns.
Find out more about the use of old brick in landscape design.
Wooden garden paths made of boards or timber on an embankment
This type of structure requires proper organization of the bed. The sequence of actions is as follows:
- The route is being marked. It is convenient to mark the contours with a cord on pegs. It is necessary to take into account that the width of the bed (pit) is slightly wider than the future path;
- Then the soil is removed from the marked route. The sampling depth depends on the number of layers of bedding and whether it is planned to build the path above the level of the surrounding soil or at the same level as it. Typically the depth is 10...20 cm;
- fences are installed (if necessary). If these are boards, they are driven into the ground to at least half the width, if stones - to 1/3...1/4 of the height, stakes or round timber - to a third or half of the height;
- embankment is being performed. First, sand is poured into approximately half the depth of the bed, spilled with water, and compacted. Further, almost to the top of the recess - gravel, crushed stone, pebbles, tamping is also carried out. To prevent the embankment from spreading, you can use geotextiles as a backing. In this case, the fence is placed after completing the embankment to mask the protruding edges of the canvas. You can also lay the canvas between the fencing elements;
- Lastly, lay the flooring board/timber. You can do this with a certain step or with a minimum gap (0.5...1 cm). Wedges or inserts will help maintain the correct intervals. When laying, the timber/board is driven into the embankment using a mallet (wooden or rubber hammer), and leveled horizontally using the rule.
Important: when laying sparsely, it is better to choose crushed stone/gravel with a fraction of 20...40 mm or pebbles of approximately the same size as the top layer of the embankment. This will make the embankment more stable.
With a curved route (with smooth turns, bends), sparse laying gives more opportunities to carefully design the path.
Paving slabs
To lay tiles yourself you will need:
- Shovels (bayonet and shovel);
- Pegs;
- Mallet;
- Level;
- Rake.
The operating procedure is as follows:
- First, the area must be cleared of all unnecessary things and the grass must be pulled out.
- After this, the location of the track is determined and its boundaries are marked. It makes no sense to make wide paths, since it will take a lot of money and territory. To mark the boundaries, you need to install pegs and connect them with rope.
- Now you need to dig a hole. Its size depends on the height of the tile. For example, if the height is 7 cm, then it is better to dig a hole 10 cm deep.
- After this, a side is made with a shovel.
- Unnecessary layers of soil inside are removed.
- It is necessary to evenly pour sand into the space that appears.
- You can start laying tiles. You need to control the process using a level.
- Any cracks that appear are eliminated with sand.
- After this, you need to lightly moisten the structure with water. And everything is ready!
Garden path made from wood cuts
This arrangement option differs from the previous one in the type of lumber. Transverse cuts made from round timber or (less commonly) timber better withstand dynamic loads and look more interesting than a regular board or timber.
Preparation of the path bed (with excavation of a pit, construction of an embankment) does not differ from the technology described above. The only difference is that it is better to place massive saw cuts directly on the sand, and fill the gaps between them with gravel, crushed stone, screenings or pebbles after installation.
The cuts themselves require preparation, namely coating/impregnation with resin, bitumen or antiseptic.
Sequence of work:
- trunks or timber (you can use used wooden sleepers) are sawn into parts of approximately the same height. If possible, it is better to take round timber of different diameters - this will allow you to get “nickels” of different sizes to more densely fill the space of the path;
- the lower part of the cuts (the one that will face the sand cushion) is treated with resin or bitumen;
- round timber is installed on a sand base and “adjusted” to one level using a rule and a mallet;
- the gaps between the cuts are filled with prepared gravel or other similar material. The fraction is selected based on the minimum size of the gaps - the stones should be two to three times smaller.
Important: it is not necessary to remove the bark from the cuttings. This is only necessary if there is a suspicion of the presence of woodworms. Also in this case, the lower end of the cut and the adjacent part of the bark are treated with impregnation/waterproofing, which increases the consumption of the impregnating/coating material due to the deep relief of the bark.
It is not necessary to fill the entire surface of the path with saw cuts. It is enough to install large parts in critical places - for example, at turns - but with such a sparse installation, you should be careful about compacting the gaps.
When using cuts of complex, irregular shapes, it is necessary to plan their position in advance and, possibly, number them.
When designing slopes or complex geometry of the site, it is better to increase the length of the round timber for paving (up to 50...100 cm) and drive it into the sand cushion to half or two-thirds of the height. Also in this case, it is necessary to install the round timber as close to each other as possible, “playing” with different diameters of the elements.
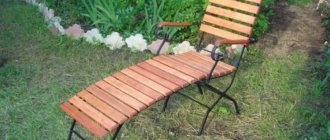
Table with succulents
For those who don’t know, succulents are plants that can accumulate moisture - cacti, aloe, agaves, etc. A table with succulents can be placed on the veranda, it looks very nice and original. For this table we needed bars and old boards. Also prepare expanded clay, soil and, of course, plants. You make two tabletops in a frame, between them there is a box of four boards, and you screw on the legs. That's all.
Photo source efariya.ru/?p=680
Pallet coffee table with drawer
Another country table made of pallets, there is practically nothing to make, just process and paint two pallets, fasten them and install them on legs made of cinder blocks. The idea is to make a small container for flowers. Mark the dimensions, drill and cut out the hole. There is minimal work, no costs, and you have a stylish table.
Photo source www.bhg.com/home-improvement/porch/outdoor-rooms/pallet-coffee-table/
Paths in the country house made of wood on supports
In the form of supports for wooden paths, logs or piles (blocks) laid on a prepared cushion with a longitudinal (along the trajectory of the path) connection can act.
The first option - longitudinal logs from edged boards or timber - is relatively simple to implement.
- The track bed is prepared (as described above).
- They are installed on the edge of the board (beam with the narrow side up). At the same time, for a stable position, the logs are strengthened with spacer pegs, preferably on both sides. The wedges are driven into the prepared cushion to a depth of 15...30 cm.
- Laying plank flooring. To compensate for the thermal expansion of the material, a gap of 1...3 cm is provided between the boards.
In the gaps between the logs you can lay communications - for example, a hose for watering.
By smoothly changing the height of the logs (by trimming, installing wedges), you can make an inclined path.
It is not necessary to immediately install boards of a certain length. You can trim them after installation is complete.
The second option - supporting the logs on piles or blocks - requires more materials and labor.
Concrete/stone blocks are installed on the prepared pad, as shown in the diagram below, or piles are driven into the ground. Next, logs are mounted on the supports. It is better to fasten to concrete/stone blocks using metal brackets, to piles - depending on their material. You can adjust the height of the upper plane of the logs using linings and trimming. Flooring from boards is carried out as usual, fastening to the joists is done with nails or self-tapping screws.
A high-quality, but quite expensive edged board can be replaced with a slab.
If the width of the path does not matter, but it is important to do everything as quickly as possible, you can lay the logs across the path, and the flooring along it. Concrete or wooden sleepers can be used as logs, since they are not afraid of moisture and do not require an embankment.
Construction stages
After the preparatory steps have been completed to create a country wooden sidewalk, you can begin the main work.
Construction consists of the following stages:
- trench preparation;
- preparation of the base, waterproofing and borders (if necessary);
- laying of cuts.
Every step requires care. In case of an error, the owner will have to spend money on additional materials to fix the problem. If all steps are followed according to the recommendations, the wooden walkway will serve for many years.
Also check out landscape design ideas for a summer cottage using scrap materials.
Trench
This recess for fixing the path is necessary for long service life and safety during movement. The depth of the trench depends on the height of the cut itself. In this case, you can add an additional 50–100 mm, taking into account the type of soil and the load on the pavement. The width is identical to the parameters of the planned track.
Typically, about 15–20 cm of fertile soil is removed, and the path is formed at a slight slope to drain precipitation. On the side with a greater degree of slope, you can install a drainage system.
Also learn how to use logs in landscaping.
Substrate preparation and waterproofing
The bottom of the ditch must be waterproofed. Geomaterial or special polyethylene film is suitable for these purposes. Gravel or crushed stone (mixed with sand) is poured onto the waterproofing coating, which helps protect the wood from moisture. This layer should be 25–50 mm. The drainage must be thoroughly compacted. The sand and crushed stone layer should be leveled using a level.
At this stage, you can also build sides, which are made of stone, bars and other materials. Next, you need to add another layer of sand so that the height of the pillow is up to 100 mm. You can water it to compact it.
Did you know? Arkhangelsk is characterized by the largest number of restored and created wooden sidewalks in Russia. City authorities call this element of landscape design a highlight for attracting tourists.
Laying cuts
The process of laying out wooden circles does not have any specific rules. The installation of elements depends on the preferences of the owner of the yard and the intended pattern. Today you can find variants of paths where the saw cuts are very densely grouped. It is also permissible to place each element at a distance from its neighbor, creating straight lines or a zigzag. The main requirement is to deepen the hemp and align all cuts at approximately the same level.
Application of mulch
This economical option is suitable for cases where either decorative or rarely used paths are laid on the site. Mulch cakes quickly and requires constant topping. This material sticks to the soles and spreads throughout the area. When laying mulch, it is necessary to organize a border along the path. Otherwise, the material will spread to the sides and the path will lose its original appearance.
To create a mulch path, you will need:
- Remove the top layer of soil 50-100 millimeters thick.
- Dig boards or install other fencing structures along the perimeter of the trench.
- Spread mulch along the trench.
- Level the mulch.
Due to the fact that mulch is recycled tree bark, paths made from this material drain water well.
Laying decking
Garden parquet, or decking, is more common abroad. This material is produced in the form of square or rectangular tiles of different sizes, consisting of lamellas that are fixed to a lattice base. For connection, locks are placed on the sides of the parquet. In garden areas, it is recommended to lay tiles with gaps between the slats.
This configuration ensures the natural outflow of water. Parquet is made from various types of wood. But, despite the type of material chosen, decking is significantly more expensive than the above options.
Laying garden parquet does not require any special skills. Each tile has sharp legs at the bottom, which are pressed into the ground and hold the decking. Some models of garden parquet require the installation of joists, to which panels are attached using self-tapping screws. In this case, it is recommended to prepare the concrete base in advance.
How to make a multi-tiered model?
Multi-tiered paths will be required where the site has a natural slope. To make such a design, you need:
- Mark the area and drive in pegs.
- Dig a trench along the stakes. At this stage, you need to form platforms that will serve as wide steps.
- Insert the beams into the trench and secure the logs (boards placed on edge) to the last ones. Each such structure is the next step. The side joists should rest on the next board attached to the lower beams.
- The frames of each platform are fastened together using corners.
- Boards are sewn onto the prepared frames.
As in previous cases, all wood materials are treated with an antiseptic. It is also recommended to sand the boards so that you can walk along the path barefoot.