Review author: Terrari School of Design
Gnomes have been used to decorate gardens for a very long time - approximately since the beginning of the 19th century. Decorative gnomes on the site are especially popular in Germany, where they are considered a symbol of prosperity. A correctly selected figurine will become an interesting decoration for your garden and will create a cozy and fabulous atmosphere.
Read in the article how to correctly complement the landscape design of your garden with a decorative gnome, what types of figurines there are and whether you can make them yourself.
Who are gnomes
In Germanic and Scandinavian mythology, gnomes are small creatures with a long gray beard and a pointed cap, usually carrying a pick and shovel. They live underground, have magical abilities, are famous for their wealth and skill, and are extremely reluctant to make contact with people. Depending on human behavior, a person can be either rewarded or punished.
Many mysteries and miracles that happen to people in German mythology are explained precisely by the tricks of fairy-tale dwarves. They also served as the prototype for popular decorative figurines - garden gnomes.
Freezing
It’s easy to guess that now you need to leave the gnome to freeze. Mom placed him in the gazebo and did not touch him for 24 hours. To be on the safe side, you can give the gnome more time to “mix,” but in our case, the cement solidified securely, and we continued our work. Mom took the scissors and cut off the same knot from the stocking that was on the gnome’s head. Then she completely removed the stocking, and in her hands was a smooth craft made of cement mortar, with even shapes and funny arms and legs. The only negative is that there is a trace left by the knot on the top of the gnome’s head. It can be sanded down with sandpaper, but there is no point in doing so, since further decoration will hide everything.
A little history
For more than 200 years, garden figurines gnomes have been decorating and protecting gardens and vegetable gardens. It is believed that the first decorative fairy tale old men appeared in Thuringia (Germany) at the beginning of the 19th century. They were also liked in other European countries. How could it be otherwise, because just the sight of mischievous and bright characters makes despondency disappear and the mood lifts.
Interesting: in France there is a movement called the “Garden Gnome Liberation Front”. Activists are stealing figurines from gardens to give them freedom.
Modern gnomes differ from their mythological counterparts by their pleasant, pretty features; they engage in gardening, fishing, playing musical instruments, and they are not averse to mischief.
Cat flower bed.
This cute flowerbed cat is made from a plastic bottle and cement. We will need: cement, sand, plaster, water, large plastic bottle, wire, paint, wooden slats, varnish. The owner of this cat, Natasha Koneva, will tell us how to make such a funny figurine with her own hands. We cut off a plastic bottle - this container will be our flower garden. To prevent the cement from slipping off the plastic, we tightly wrap it with wire. We knock down a wooden frame from slats. We attach our plastic container to it. Mix the cement mortar with the consistency of thick sour cream at the rate of 1 part sand, 1 part cement. We will add gypsum only to the finished portion that we have in our hand, because... the solution with gypsum hardens instantly. We work in rubber gloves. Take a handful of solution in your hand and add a tablespoon of gypsum to it. Knead it in your hands, roll it into a sausage and attach it to the frame. So, step by step, we apply portions of the solution on top of each other, creating the necessary bulges and smoothing the surface. We sculpt our cat’s face from small balls of solution in much the same way as we sculpted from plasticine in childhood. In order for small parts to hold better, before attaching them to the body, lubricate the surface of the figure with water. With a damp hand we polish the surface of our garden figurine. To dry, cover the figurine with cellophane for 3-4 days. On the first day, the figure must be periodically additionally moistened with water. After drying, sand the surface with sandpaper. You can paint such a figurine with water-based paint, enamel, or car paints. After painting, coat the surface with varnish. For the winter, the garden figurine must be removed from the street, because... It may crack due to frost. You might also want to get yourself such a wonderful cat. The great thing about cement figurines is that they are cheap to make compared to garden figurines made of metal or wood. You can start with simple garden crafts, which can be no less interesting than some particularly complex ones. You can combine cement with other materials. — for the face of this little garden fairy “Ladybug” we took the head of an old doll.
Gnomes are a difficult decoration
Decorative gnomes in landscape design most often play the role of decoration, but not only. People who settle one or more representatives of a mythical people in their garden, as a rule, tend to believe in miracles.
And gnomes, according to popular belief, are the creators of all sorts of miracles: they can make flowers bloom at an inappropriate time, they can change the color of leaves on trees.
But it’s not only miracles that the owners of land plots expect from their “guests” - it is believed that fairy tale crumbs come to life at night and begin to take care of the territory on which they live.
So, despite their small size, gnomes are good helpers in the garden. Sometimes they get so tired during night work that they fall asleep, and at dawn they turn into stone again, without having time to wake up.
Interesting ideas for beginners
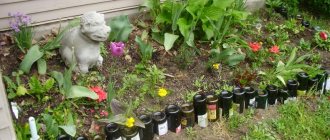
Having no experience in using cement for decorative purposes, it is better to start with something simple that does not require modeling skills and obtaining the desired consistency. The first exhibits in your garden can be cute mushrooms, colorful balls or original flower pots.
To make a mushroom you will need an old rubber ball (the size of the cap will depend on its size), a plastic bottle (it will become the basis for the stem, its size should be proportional to the cap), a metal rod to attach the cap to the stem. The ball is cut into two halves, one of which is placed in a bucket of sand and pressed evenly. Next, cement mortar is poured into the resulting form and leveled.
The bottom and neck of a plastic bottle are cut off and inserted into the filled form in the center, immersing it by 1 - 2 cm. Then, using a long iron rod, the future stem and cap of the mushroom are connected and the cavity inside the bottle is filled with the solution. The product should harden for several days, after which you need to remove the piece of the ball and the plastic cylinder.
After a few more days, the product can be coated with paint and decorated with various elements. Mushrooms of different sizes look impressive on the plot in the form of a small clearing. It is also worth noting that your imagination may tell you to use other containers (bowls, jars) and methods for making garden mushrooms.
https://youtube.com/watch?v=Q15KI_10P7k
It’s enough to just make an openwork ball that seems so light and airy. For the base, use a balloon (the size of the future shapes depends on how much you inflate the balloon). Next, any rope is placed in the prepared solution and then the ball is wrapped around it.
Do not wrap the base too tightly; you need to leave enough holes for further removal of pieces of the burst ball. When the product is dry, you can begin decorative coating.
If you cover the balloons with cement mortar with a small amount of gypsum added for faster hardening, you can get original garden lanterns or flower pots.
Using this technique you can also make vases for dried flowers. In this case, not only the outer side, but also the inner side is subjected to decorative painting.
If you pour the solution into a small hole in rubber balls, you can get monolithic balls of different sizes. Painted in different bright colors and randomly scattered around the garden, they will become a laconic and stylish decoration.
Using plastic containers, you can make a flower pot for Crassula and Crassula Ovata cacti. The container is wrapped in a plastic bag, and a bag of clay or sand is placed inside so that the container holds its shape. Next, it is covered with cement mortar. After complete drying, all auxiliary materials are removed, drainage holes are made in the bottom using a drill, the product is primed and painted.
It's very easy to make a flowerpot using a plastic bucket or vase and another suitable container.
One container is inserted into another, and the solution is poured into the space between them. The result is a high-quality product that can be further decorated by showing your imagination to the fullest.
Flowers planted in flowerpots made from crossed palms look attractive. To create such a masterpiece, use ordinary rubber gloves, which are evenly filled with the solution. For rigidity, you need to insert a thick wire rod into each finger. To ensure a high-quality product, air bubbles must not be allowed to form.
When the gloves are filled, they are given the desired shape and fixed. After a few days, the rubber is cut and removed. If you need to connect two palms, then use the same solution. At the final stage, the surface is polished with sandpaper, primed and painted.
How many gnomes should there be?
It all depends on the size of the plot and individual preferences, but the gnome will suffer alone. Representatives of fairy-tale people are very sociable, prefer collective work, and often live in kind of communes.
Therefore, it is better to take care of a suitable company for the hero you like. In gratitude for your care, the gnomes will even more diligently protect the garden from any evil spirits.
What are gnomes made of?
Traditional gnomes are made from terracotta clay by casting into molds, then fired and painted. Nowadays, cement, gypsum, and polymer clays are used instead of clay. The material for the figurine can be wood, marble, glass and even metal.
Help: metal and marble figurines look good in gardens designed in the Art Nouveau style, while wooden ones fit perfectly into the country style.
Preparation of working staff
It is very easy to prepare the working solution. The main condition is a sufficient amount of it. Since the mixture quickly turns into a solid state (literally after three minutes), you need to prepare it with a small margin. If there is a lot of it when pouring it into the mold, you can simply remove the excess with a spatula. When there is not enough solution, difficulties may arise in the work, and this will affect the appearance of the figure. To prepare liquid gypsum you need:
- Choose a suitable container to make it convenient to mix the contents.
- Pour 5 liters of water (the ratio is usually 10:7).
- For this volume of liquid you need to add 3.5 liters of gypsum.
- Mix the solution with an electric mixer, bringing it to the consistency of sour cream. There should be no lumps or foreign particles in it.
The powder must be poured out carefully, since the cloud of dust rises strongly. It is better to protect the respiratory tract by tying a scarf around the mouth and nose area.
DIY gnome
The most successful material for homemade crafts is considered to be gypsum, and in craft stores you can buy molds for pouring, glue (PVA or wallpaper), paints, brushes and varnish.
Information: plaster figures do not crack from wind and frost, but have a significant drawback - they are very fragile.
Note!
- How to make a hot smoked smokehouse - 75 photos of the best ideas and step-by-step instructions
Molds for paving slabs - easy instructions on how to make them yourself (80 photo ideas)
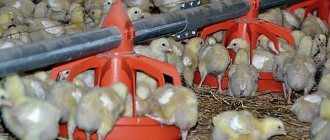
Feeder for chickens - ideas, description of construction and features of creating feeders from scrap materials
To make your own garden gnome worthy, you need to follow the technology:
- dilute the plaster according to the instructions on the package;
- add glue (its volume should be 1%);
- pour half the solution into the mold, tap it to avoid bubbles and voids;
- pour the second half of the solution into the mold, level it, knock again;
- dry in the open air;
- remove from the mold.
Now you can start decorating. After the gnome is completely painted and decorated, the figurine must be varnished.
Important: for figures above 50 cm, a reinforced frame is made.
A character made of cement is made in the same way.
Painting
Inspired by my mother's experience, I decided to make gnomes myself to live in my mini-garden. But an idea occurred to me - to build larger-scale sculptures. Of course, my gnomes did not have human height, but they became a little taller than my mother’s. Another difference in our crafts was that I decided to decorate mine. To ensure that the paint held securely and was not affected by rain, wind or sun, I used acrylic, and then sealed all this splendor with varnish. The gnomes turned out to be very bright and cheerful. But my mother’s original crafts, even compared to mine, looked very original.
Just like that, my personal “do it yourself” section was replenished with another brilliant idea.
Hello, friends!
We continue the gardening theme, or rather, decorating garden plots!
This time, we will make a cute gnome from cement. This decorative craft will wonderfully decorate the landscape of your garden, but it is simple to do and will not cost much at all.
To work you will need:
- Cement mortar;
- Nylon stocking;
- A sleeve from an old sweater or jacket;
- PVA glue;
- Acrylic paints;
- Aerosol paint;
- Aerosol, universal varnish.
Step 1.
We make a standard cement mortar: 1 part cement, 3 parts sand and water. We take a nylon stocking and fill it with the required amount of solution.
Step 2.
We form the solution in the stocking in the form of an elongated drop.
Step 3.
Approximately in, we make a small protrusion and fix it with an elastic band or thread, this part will serve as the gnome’s nose. Let the solution dry for about a day. To ensure that the “drop” does not lose its shape while the cement hardens, the upper part of the stocking can be tied to something.
Step 4.
We remove the stocking and begin making a hat for the gnome. To do this, cut off a straight part of the sleeve from the sweater and tie one edge of it with thread. We make a liquid cement mortar with the addition of PVA glue and thoroughly saturate the sleeve with it. Then, we put the sleeve on the gnome’s head and shape it beautifully.
Step 5.
We wet the area under the nose and sculpt a part from the solution in the form of a beard to this place. Using a fork, we make grooves that imitate beard hair and form a mouth. This step is optional, you can act at your discretion. Leave the craft until completely dry.
Step 6.
Let's move on to coloring the craft. Cover the gnome’s “face” with a rag and paint his hat with spray paint. Then, remove the rag and paint the rest with acrylic paints.
Step 7
After the paint has dried, we coat the entire product with aerosol varnish, this will protect the paint from external influences.
Work is done. Now, you can easily give your garden plot originality with the help of such a wonderful gnome))).
Alternative materials for garden sculptures
If you are not satisfied with the finished form and have the skills to work with papier-mâché, you can create a unique gnome from this material.
There are other ways to realize the original idea:
- make a flat figurine from plywood;
- crochet or knit;
- cut from hardened polyurethane foam;
- sew from fabric;
- made from plastic bottles;
- glue from paper lumps or straw bundles;
- order wooden or metal sculptures from professionals.
The choice of materials is limited only by imagination.
Self-made gnomes require special care: they cannot be left outside in wet weather and must be put indoors for winter storage.
Cat flower bed.
This cute flowerbed cat is made from a plastic bottle and cement.
We will need: cement, sand, plaster, water, large plastic bottle, wire, paint, wooden slats, varnish.
The owner of this cat, Natasha Koneva, will tell us how to make such a funny figurine with her own hands. We cut off a plastic bottle - this container will be our flower garden. To prevent the cement from slipping off the plastic, we tightly wrap it with wire. We knock down a wooden frame from slats. We attach our plastic container to it.
Mix the cement mortar with the consistency of thick sour cream at the rate of 1 part sand, 1 part cement. We will add gypsum only to the finished portion that we have in our hand, because... the solution with gypsum hardens instantly. We work in rubber gloves.
Take a handful of solution in your hand and add a tablespoon of gypsum to it. Knead it in your hands, roll it into a sausage and attach it to the frame. So, step by step, we apply portions of the solution on top of each other, creating the necessary bulges and smoothing the surface.
We sculpt our cat’s face from small balls of solution in much the same way as we sculpted from plasticine in childhood. In order for small parts to hold better, before attaching them to the body, lubricate the surface of the figure with water.
With a damp hand we polish the surface of our garden figurine. To dry, cover the figurine with cellophane for 3-4 days. On the first day, the figure must be periodically additionally moistened with water. After drying, sand the surface with sandpaper.
You can paint such a figurine with water-based paint, enamel, or car paints. After painting, coat the surface with varnish. For the winter, the garden figurine must be removed from the street, because... It may crack due to frost. You might also want to get yourself such a wonderful cat.
The great thing about cement figurines is that they are cheap to make compared to metal or wood garden figurines. You can start with simple garden crafts, which can be no less interesting than some particularly complex ones. You can combine cement with other materials. — for the face of this little garden fairy “Ladybug” we took the head of an old doll.
How do gnomes dress?
An indispensable attribute is a cap. The first gnomes wore red pointed caps; their today's compatriots can have a headdress of any color that is in harmony with the rest of the outfit and the surrounding environment. Another wardrobe item favored by dwarf characters is striped knee socks.
It is important to remember that gnomes are a wealthy people, and they demonstrate this with their bright outfits. They will be happy to put on red pants, a yellow shirt and a blue vest at the same time, and complement all this splendor with bells and bows.
A special pride is his long thick beard. When looking for a whimsical outfit idea for your pet magical creature, you can look at photos of garden gnomes.
Definition
Before delving into the topic, let's find out what garden gnomes are.
Garden gnomes are small figures of little people in various poses and clothes. Such figures are very popular in Europe and the USA.
They are not so widespread in Russia, but still true connoisseurs do not lose the opportunity to decorate their garden with such beautiful figures.
Functions of gnomes
First of all, it is a decoration and a talisman. But many modern figurines are multifunctional, for example, equipped with solar panels, they illuminate garden paths at night.
Flower pots in the shape of a fairy-tale gnome are also available for sale. Whatever character is chosen - crafty, wise, sleepy, boastful, musician - his mere presence on the site creates an atmosphere of warmth and comfort.