Do you think it’s difficult to set up a winter greenhouse? I won't lie to you, this is true. First you need to prepare the foundation, install a reliable frame, and cover it with a double layer of polycarbonate. And that is not all. Next, you should equip heating, irrigation and additional lighting systems. If you are still full of enthusiasm, I will tell you where to start building a winter greenhouse, what nuances to consider, what to pay attention to. I give everything I know from my experience, as well as examples from other gardeners and agronomists.
What is a winter greenhouse?
It is clear that a winter greenhouse is fundamentally different from a summer one, although its essence remains the same - it should be warm and even hot in the greenhouse.
The very principle of arranging a winter greenhouse is different, it is a much more complex structure, often even equipped with electronics, and you certainly won’t get by with constructing a primitive frame and covering it with film, although something similar will still have to be done.
A winter greenhouse is necessarily a permanent structure that has a foundation that can withstand powerful wind and snow loads. A winter greenhouse can be a full-fledged separate structure or an extension to the wall of a house or other building.
What to grow?
In fact, you can grow anything in a heated winter greenhouse. These can be not only traditional vegetable crops, but also green crops, berries, ornamental crops and various kinds of exotic crops, and, of course, flowers.
| ADVICE It is best to initially decide on the crop that you want to grow in winter and build a greenhouse for it, and not vice versa. |
It is clear that certain cultures require different conditions.
- For example, lettuce and green crops will require a minimum of heating, a minimum of light, but if we are talking about cultivating tomatoes, then more reliable heating and maximum light are needed.
- Do not forget about the proximity of crops, for example, tomatoes and cucumbers are not good neighbors, they have different requirements for moisture, light and temperature, so it is permissible to grow them only in large greenhouses, where their placement can be differentiated.
________________________________________________
Read my article about growing cucumbers in a winter greenhouse ________________________________________________
Video review of a winter greenhouse for growing flowers
Most energy efficient design
An excellent solution is a “thermos”. She is endowed with a huge number of positive qualities. The main thing is significant savings and heat conservation.
It operates 12 months a year. It is not afraid of frosts and northern winds, and is capable of supplying not only food, but also becoming a source of income. She has the following positive qualities:
- Fresh vegetables will delight you all year round.
- Works in any climate.
- Excellently transmits sunlight, distributing it evenly over the entire area.
- When high-quality insulation is used in construction, the sun's energy is converted into heat and can be retained for a fairly long period of time.
- Savings on utility bills.
- Thanks to its design, you can grow vegetables, perennials and exotic fruits, grape bushes.
Important! “Thermos” - almost everything is in the ground, but there is no shortage of lighting in it. Thanks to the huge window openings there is always a lot of light inside.
Foundation for a winter greenhouse
Typically, a winter greenhouse is placed on one of two types of foundation - on a strip foundation or on a foundation made of individual blocks . You can install a greenhouse on a columnar foundation or on slabs, but this does not happen very often.
It is advisable to insulate the foundation on the north side.
Foundation preparation
Usually the foundation is prepared like this:
- To begin with, the area around it is removed with turf to a width of approximately 0.5 m and formwork is made from boards.
- Next, a layer of sand is poured, which acts as an equalizer.
- After this, insulation is laid (polystyrene will do this role perfectly).
- And finally, the blind area is filled with concrete over the laid out reinforcing mesh, or the second option is to lay the paving stones on a layer of laid sand.
Video on how to make a foundation for a greenhouse
Vodyanoye
There is an opinion that the heating system must necessarily operate on a coolant liquid - water or antifreeze.
In fact, this is only necessary for transferring heat over long distances, when significant heat losses occur: the volumetric heat capacity of water is almost 4 thousand times greater than that of air.
So it makes sense to install water heating only if the heat generator is installed remotely, for example, in a house.
If the installation is located directly in the greenhouse, it is more correct to use air heating (convector oven), its advantages over water heating:
The heat generator in a water heating system is a boiler - a furnace with a heat exchanger. In a small greenhouse, it is not necessary to install radiators - it is enough to lay a pipe with a diameter of 50 mm or more around the perimeter.
The most practical heating systems with a circulation pump. But if there is no connection to electricity, natural circulation of the coolant is ensured: a vertical section (accelerating manifold) is connected to the outlet pipe of the heat exchanger and then, after a few meters, it is lowered down; pipes of larger diameter are used; they are laid with an increased slope.
Winter greenhouse frame
There are no special differences in the frame with a regular summer greenhouse. Often two types of frames are used to build a winter greenhouse - either metal or wood.
What kind of frame should I make?
The shape of a winter greenhouse largely depends on what the frame itself is made of, the climate conditions of your region, and also on preferences, because some people like one shape, others a completely different one.
Typically winter greenhouses are:
- arched,
- single-pitched,
- gable.
Arched greenhouses, of course, cannot be made of wood, or rather they can, but making such ones is extremely difficult and expensive.
Typically, arched greenhouses are metal, but lean-to or gable greenhouses are often wooden, although, of course, there can be exceptions.
Wooden frame
Oddly enough, but wooden frames are sometimes given more preference. Why?
- Wood is cheaper and in terms of strength it is practically not inferior to much more expensive and more difficult to install metal.
- A wooden frame heats up much less strongly than a metal one, and in winter wood practically does not give off heat, which cannot be said about metal.
- What speaks in favor of the wooden frame is that since we are placing the winter greenhouse on a full-fledged foundation, therefore, the tree will not have direct contact with wet soil and will last much longer, so is there any point in paying more?
It is clear that when building a greenhouse, snow and rain loads must be taken into account; a lot depends on the length and width of the greenhouse.
Plastic frame
As for the frame made of low-density polyethylene (HDPE, polypropylene pipes), such structures can only be erected for the warm period of the year. But in winter, especially in regions with abundant rainfall, it is not advisable to use such greenhouses - they will simply break under the weight of snow.
How to install the frame?
- First, you need to secure the bottom trim to the foundation using anchor bolts.
- Next, install the vertical posts on the trim using bolts and welding.
- Then connect the vertical profiles with a horizontal lining along the top.
- And finally, install the frame on a pitched or other type of roof.
How to make a wooden frame for a winter greenhouse with your own hands
Interior arrangement
To create optimal conditions for growing various crops, the beds in the greenhouse need to be raised above the soil level by 20-30 cm and fenced off with boards or borders. For ease of maintenance, arrange paths and cover them with non-slip materials. Now it’s a matter of organizing watering, ventilation and heating.
Automation
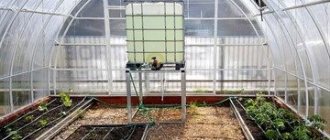
Devices for automating the maintenance of greenhouses allow you to maintain the desired parameters in the room without 24-hour human presence. Now you can buy ready-made kits for organizing ventilation, lighting and drip watering of plants.
The ventilation mode is started using hydraulic cylinders mounted on the windows or transoms. Inside the device there is a substance called cyclohexanol in a liquid state. It responds to temperature fluctuations by creating a certain pressure in the cylinder. As a result, the piston closes or opens the door, thus regulating the temperature in the room.
Automation can be electrically driven, where air parameters are monitored by sensors. In order for the devices to work, the greenhouse must have an uninterrupted power supply.
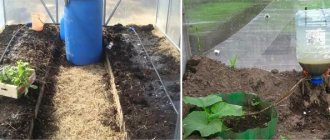
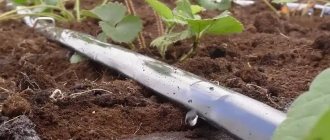
Drip irrigation is the best alternative to a watering can or hose. It can be organized either manually or automatically. From the supply pipe, water enters the droppers and then into the soil directly to the roots of the plants. For many crops, this is the most favorable method of watering, since the risk of the spread of fungal diseases is significantly reduced.
Heating
If the greenhouse is intended to be used all year round, heating will be required. It must be economical and at the same time effective.
The cheapest way is to accumulate solar energy. The rays, passing through the translucent coating, heat the soil and are then stored inside due to the low thermal conductivity of polycarbonate.
water heating
Other options - heat guns, water pipes, radiators and infrared heaters - work in any weather and in any climate. The disadvantage is the significant cost of electricity or fuel.
Gas heatingThe biological heating method is affordable and effective. During decomposition, organic matter can heat up to 70°C. Branches or loose mulch are placed on the bottom layer of warm beds, biofuel is placed in the middle, and nutritious soil is covered on top. The reaction releases a lot of methane, so the room needs to be ventilated regularly.
Material for winter greenhouse
In the past, even winter greenhouses were actively lined with plastic film. Of course, glass was also used, but film was more accessible and cheaper, and it was used quite often. Now both film and glass are actively becoming a thing of the past, and they are being replaced seriously and for a long time by cellular polycarbonate.
It is interesting that even glass, which for a very long time was considered almost an ideal shelter for a greenhouse, is very much inferior in thermal conductivity to cellular polycarbonate, although, of course, glass outperforms cellular polycarbonate in durability, but it is more dangerous, and the price of glass over the years only growing.
Winter greenhouse "Thermos"
“thermos”, rule the roost . The essence of this greenhouse is simple: it is not one layer of cellular polycarbonate, but two, with air between them. It turns out to be a kind of window “plastic bag”, only made of polycarbonate.
- Typically, the thickness of the outer layer is about 0.6 cm, and the inner layer is about 0.4 cm.
- You should know that the thicker the sheets of cellular polycarbonate, the lower the thermal conductivity will be, which means that there will be less heat outflow if the ends are insulated from the entry of cold air.
- In the case of arched greenhouses, however, you should not lay too thick polycarbonate sheets; it may simply break or the bending force will be critical and it will break much earlier than its service life.
- Of course, price also plays a role; thick polycarbonate sheets, say thicker than 1.5 cm, already cost quite a lot of money. So you shouldn’t take risks and overpay - 1 cm, no more.
| BY THE WAY The Thermos greenhouse will be good in the summer too - during the hot period it will prevent the air inside from overheating. |
Construction of a gable polycarbonate greenhouse on a foundation
Calculation formula
It is especially important to correctly calculate the amount of heat required for industrial greenhouse buildings.
To calculate the heat for any heating system, you need to use a special formula: Q=1.1*l*f*k*kINF*(tin-tnar) kcal\hour Q=1.1*l*f*k*kINF*(tin-tnar) kcal\hour
Q=1.1*l*f*k*kINF*(tin-tnar) kcal\hour.
When calculating, the following indicators are taken into account:
- kinf – infiltration value;
- tout – temperature outside the greenhouse;
- tin – internal temperature of the greenhouse;
- k – heat transfer coefficient of glazing;
- f – area of the room;
- l – fence value.
If you choose the right energy carrier, then any calculation will show how much the cost of products produced inside such a greenhouse will decrease. Wood-burning stoves or boilers with a water system are the most effective option, the calculation will also confirm this.
Heating a winter greenhouse
First, the greenhouse needs to be made as airtight as possible so as not to heat the street.
- Insulate all cracks, make the windows and doors hermetically sealed!
Soil thermal insulation
Such a structure requires thermal insulation of the soil; this is done as follows:
- To begin with, mark the areas where the beds will be located in the future.
- There it is necessary to make a pit about 60-70 cm deep; river sand (7-8 cm) must be placed at the base of each pit.
- You need to lay insulation boards on top, pour expanded clay (12-15 cm) onto them - expanded clay also serves as drainage and will save polystyrene from a sharp shovel when you dig up the beds.
- The last layer is laid with fertile soil or a composition for a warm bed.
Types of heating for a winter greenhouse
There are 4 types of heating:
- air,
- contour,
- subsoil,
- combined.
Air heating
This heating option is simple and straightforward - air is supplied through air ducts located at different heights and heated by a heating device located in the greenhouse itself.
Circuit (water) heating
Its essence is to create a thermal contour located at the edges of the structure, but with a large area in the middle of the structure. Typically this method involves the use of water.
- To build contour heating, radiator systems with pipes should be installed.
- The boiler itself, which heats the structure, can be installed both in the greenhouse itself and outside it.
| When the structure is connected to a heated room, it is easier to connect it to an existing system. |
The entire configuration consists of
- heating boiler,
- heating circuit made of pipes,
- radiators,
- registers,
- expansion tank,
- and circulation pump.
This configuration is very complex in terms of layout and is expensive. Therefore, it is often installed only in large-area and free-standing greenhouses.
Subsoil heating
It is typically used in areas with mild climates that do not experience excessively harsh winters. If you combine subsoil heating and a “thermos” structure, then such a greenhouse will need minimal heating.
Typically, such a greenhouse is equipped with a water-heated floor circuit or electric heating using heating mats.
Combined heating
Typically, this option combines the use of air and contour heating with subsoil heating. This option is suitable specifically for crops that have specific requirements for soil temperature.
An example of contour heating of a greenhouse using water
How to heat?
What to use as an energy carrier? Usually, electricity comes first - a fairly cheap and accessible energy carrier, heat loss when using it is minimal, including when there are night tariffs.
The next most frequently used gas is main gas, it is even less expensive, but its disadvantage is that gas is not available in all regions.
The choice of heating option depends both on the region and on the crops that you plan to cultivate.
- For example, when the structure is intended for the cultivation of green crops, then heating the soil will be sufficient.
- But if you plan to grow tomatoes, peppers, cucumbers, then you need to provide a stable microclimate, constant heating and lighting.
Electricity
This type of warming is realized in two ways, for example,
- using a heating cable that needs to be laid in the soil,
- or use electric heaters or convectors for heating, as well as infrared heaters or lamps, and of course an electric boiler.
The heating cable is placed directly into the ridges; this warms the soil and protects it from freezing.
Conventional systems or radiator systems are placed along the main walls of the greenhouse; they protect the room, preventing cold air masses from penetrating.
| IMPORTANT Do not place heating elements near polycarbonate - it will become deformed! |
Infrared heaters are interesting because they do not heat the air, they heat the surfaces on which the rays fall.
- Their influence warms the soil and plants, as well as paths, fences, equipment, and irrigation systems.
- Such heaters are usually placed, clinging to the frame of the greenhouse.
- The spectral composition emitted by them practically corresponds to the spectrum of sunlight, and therefore it is very useful for plants.
Stove
Solid-state stoves in terms of combustion are also in demand, because the need for regular loading has practically disappeared, because they produce long-lasting boilers.
- The maximum available stove is in which logs or other things are burned.
- The furnace is placed in the coldest part of the structure and, thanks to natural convection or using air ducts, the greenhouse is heated.
- Air masses should be distributed in different ways, such as natural convection, using fans or using air ducts. You can burn with logs, brushwood or various waste from the woodworking industry.
- It is appropriate to warm the greenhouse in the evening or when it gets cold outside.
Advantages of heating with a stove:
- quick start of the stove and its warming up,
- affordable fuel,
- elementary installation and simple operation,
- the ability to manufacture various stoves from bricks or metal by welding.
Minuses:
- impossibility of automating this type of heating,
- the presence of a person in the process of heating the greenhouse.
Infrared heating of a greenhouse video
Simple heating methods
If your greenhouse or other structure for growing crops is not equipped with a heating system, and, for example, a sharp deterioration in weather conditions (frost at night, cold snap) is expected, it is quite possible to use quick heating methods:
- using kerosene lamps. In this case, kerosene stoves are installed between the rows of plants and metal plates are placed on them, which, when heated, will transfer heat to the air;
- using candles. This method is suitable only for small structures and can be used for a short time - such a heat source shines for a very short time;
- using bottles of warm water. Filled bottles are laid out around the perimeter of the building, between the rows, and maintain a completely comfortable temperature inside.
When thinking about how to heat a greenhouse, you can choose the most suitable method of heating it from the many existing options. Having settled on any of the options, study in detail the principle of operation, as well as the intricacies of installation and installation, and then a comfortable temperature will always be maintained in your building, ensuring a favorable climate and a good harvest.
Watering in a winter greenhouse
Watering should be regular, the plants should have enough moisture, and there should not be excessive watering.
To prevent the soil from becoming oversaturated with moisture, it is necessary to provide for the presence of windows in the greenhouse. It is best to place them in the roof of the structure, or, even better, to build forced ventilation with a recuperator. This is, of course, expensive, but quite reliable.
Direct watering can be done:
- from a watering can,
- by installing sprayers on booms or hanging tubes,
- by placing an insulated underground water supply system,
- by laying out dropper tapes.
Biological method
This method of heating a greenhouse has existed for a very long time and its main advantages are high efficiency along with low organization costs, as well as the fact that it practically does not affect the internal appearance of the greenhouse and does not take up additional space. The method is based on the ongoing process of decay of food processing residues, which release a certain amount of heat, sometimes even providing sufficient heating of the greenhouse in winter. The process of organizing this heating method involves placing manure in a greenhouse or hotbed (horse manure is most often used for these purposes), which is placed among the beds.
Manure is laid out in the soil in advance (about a week before use), then placed in prepared areas in a dense layer of 40-60 cm, if necessary, updating it every two to three months. On top, the so-called “fuel layer” is densely covered with earth and compacted.
The disadvantages of this method are that it is quite labor intensive, which is also associated with a specific smell of the heat source; in addition, the heating intensity cannot be adjusted - the temperature can be reduced by periodic ventilation, and if necessary, the heating will need to be increased by using an additional heat source.
Option #1. Brick oven with hog - the old fashioned way
Massive stoves for greenhouses exclusively using wood are best built with a hog - this is a horizontal pipe with a rise along the flue gases, which provides good draft
To build such a stove for heating your greenhouse, you need to get a couple of old iron pipes and at least two iron slabs from old brick stoves, plus about four hundred stove bricks - new or used, it doesn’t matter
So, the first thing you need to do is build a foundation for such a furnace - preferably monolithic, along the entire length. It should not “walk” - otherwise cracks in the walls will not be avoided. It can be made from concrete, or you can do it this way: firmly connect two slabs with a frame made of pipes.
In the upper part of the firebox, you need to install two pipes to allow air to pass inside the greenhouse. The draft will always be created due to the fact that the air in the greenhouse is rarefied - it goes to burn wood in the firebox
It is only important that the cleaning door is tightly closed. From the greenhouse itself, air will pass through the side pipes into the blower chamber, and the pipes themselves will be connected to the channels
Air will enter the channels through the air intake, and then warm the soil in the side beds.
We place a water tank above the firebox - in early spring there will always be warm water for irrigation, and on hot days there will be additional moisture for cucumbers and peppers. This stove will be heated from the street. And to clean these channels, there is a special door and a pit at the bottom of the riser where you can rake the soot. It is convenient to do this with a stiff brush on a long handle.
Landing
Preliminary preparation of the plant is necessary: the shoots of the seedling are shortened to 3-5 buds, cutting off weakened growths, the roots are trimmed and left in water with the addition of a biostimulant (for example, “Zircon”) for 24 hours. The soil at the planting site is prepared in advance by digging it up with humus and the necessary fertilizer complex.
When planting a young crop, ensure its correct location: the root collar is buried 10 cm into the soil. Upon completion of planting, the soil is well compacted, and the tree trunk circle is watered abundantly.
The coil is fixed
Step 5
We will install a chimney. Cut a hole for the pipe in the upper back of the stove. We weld the pipe to connect the chimney. We monitor the quality of the welds, otherwise the draft and operation of the boiler will be disrupted.
We weld the chimney pipe in such a way that it will pass at an angle of about 20 degrees through the entire greenhouse. The chimney will exit through the back wall of the greenhouse, rising 1 meter above the roof. Be sure to consider thermal insulation at the point of contact between the greenhouse wall and the chimney so that a fire does not occur.
We connect the chimney pipe to the stove pipe using sheet asbestos and a coupling, tightening it with wire.
Best projects
The following modifications are noteworthy:
- Mittleider's greenhouse. A gable or arched roof is divided in the middle into two parts and one of them (northern) is raised relative to the other. In the ridge area, a vertical plane is obtained where vents are installed for ventilation. To compensate for the height difference, the northern slope (or half of the arch) is made steeper. Placing the vents at the highest point ensures effective ventilation, since warm “exhaust” air rises. Overheating of plants is also prevented;
- thermos greenhouse Anatoly Patiya. The building has a concrete floor, heated in the northern regions. The beds are raised, on racks or in boxes. The walls are made of polystyrene foam thermoblocks, all seams are blown in with foam or plastered. The roof has a two-layer polycarbonate sheathing; the metal rafters are painted white to prevent overheating. The inside walls are covered with foil or thermal film that reflects infrared (thermal) radiation. In a thermos greenhouse, with minimal heating and lighting costs, a microclimate is created that is comfortable even for tropical plants.
The Ivanov greenhouse is popular; the following solutions have been applied:
- the slope on the south side of the roof has a large slope so that the sun's rays fall on it perpendicularly (reflection is minimized);
- the north wall is covered with foil;
- recovery operates: warm air from under the roof is driven by the ventilation system through pipes laid in the ground, giving off its heat.
Many gardeners create their own versions, borrowing the most successful solutions from the described greenhouses.
