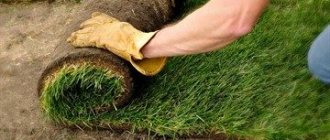
Everyone wants their home to be not only reliable, but also beautiful. And if there are a lot of ways to decorate, there is also the option to complement it with a beautiful local area. Many people plant flower beds, plant trees and clean up the area. Some complement the entire composition with a lawn and garden paths. You can see the lawn more and more often. But it’s not enough just to plant it, it’s important to properly care for the grass so that it remains beautiful and grows well.
There is special equipment that helps take care of the site. We are talking about a manual lawn roller. A garden roller is a very useful thing that any gardener needs. Many people buy it, but there is an option to make it yourself. We will look at the features of this design, as well as options for creating it yourself.
What is it used for?
First, let's figure out why it is needed at all. This is a universal gardening tool. Some people don't realize how useful it is. It is a simple design that is used for the following purposes:
- The roller is ideal for leveling the soil surface. This is necessary before sowing the lawn or for other purposes.
- Used for site treatment, such as watering, mowing. With a roller, the process will be completed quickly and easily. The tool is simply irreplaceable when you need to sow a lawn.
- With a skating rink it is easy to maintain the aesthetic appearance of the site.
- Often, owners of private plots are faced with the fact that in winter the paths are covered with ice. Using a garden roller is very easy to destroy ice. It will take less effort.
- A garden roller is needed to regulate the circulation of moisture and oxygen in the soil.
- It is used to compact areas of the lawn that have been repaired.
- The roller can be used to form pedestrian paths and paths, especially when it comes to paths made of gravel or sand.
- They remove bumps and other defects throughout the entire territory. This will guarantee safety for those living in the house.
It is worth noting one more point that concerns the safety of lawn mowing equipment. For example, after treating the soil with a roller, the surface will be smooth, without any bumps or protruding objects. Typically, a lawnmower or hand scythe will become dull when it encounters them. It turns out that the equipment will last longer and be intact.
What is it needed for
A lawn is not just uncultivated land on which fresh emerald grass grows by itself. Even if you purchase a special mixture of meadow grass seeds from a specialized store and randomly sow them on your plot, the resulting result will not even approximately resemble the neat golf course that almost all owners of personal plots dream of.
Important! A real lawn can only be grown on a perfectly leveled area, completely cleared not only of all foreign objects and debris, but even of the grass that originally grew on it.
It is precisely to ensure that the area is not just level, but truly immaculate, before planting grass or laying a rolled lawn on the site, the following work is carried out sequentially:
- cleaning;
- removal of plant residues (treatment with herbicides or removal of the top layer of soil with a turf layer);
- leveling (leveling with a mandatory slope of approximately 5° for water drainage);
- decompaction (digging to a depth of 5–10 cm);
- primary rolling;
- laying fertile soil layer;
- application of starter fertilizers;
- another careful alignment;
- re-rolling;
- sowing grass or laying rolled turf;
- the third rolling for pressing the seeds into the soil (in the case of using the roll version - for ideal contact of the natural grass cover with the soil).
Thus, with proper arrangement of the green area, you need to roll the area at least three times during the process of laying the lawn. This procedure will ensure uniform germination of the grass, avoid bald spots, retain moisture and fertilizers in the soil, prevent the seeds from being blown away by the wind and, thus, allow you to achieve exactly the result that is associated in the minds of any person with the concept of “English lawn”.
Did you know? A flat area with short-cut grass as an element of landscape design first appeared in England, and the first mentions of it date back to the 14th–16th centuries. Even then, according to their purpose, lawns were divided into decorative and sports - the former were used for walking, the latter were used for tournaments and competitions.
A lawn that is level and properly compacted at the laying stage is very convenient to subsequently process with a lawn mower , and this is also an important reason for using a roller. Moreover, if when using a trimmer the presence of bumps, potholes or small stones in the work area can still be regarded as minor interference, then for an expensive machine with wheels such a factor not only significantly worsens the result (the grass is cut unevenly), but can also lead to breakage of knives and other parts of the device, which will then need to be repaired or completely replaced.
To maintain the initially achieved result, it must be constantly maintained. For this reason, after each mowing, it is recommended to roll the lawn again to ensure that the grass remains beautiful, soft, even and silky. Thus, the lawn owner will need a special roller not only when planting the lawn, but also throughout the entire period of caring for it.
In addition to its direct purpose, a lawn roller at the dacha can also be used to solve some auxiliary tasks, for example, leveling paths made of sand or gravel, carefully and safely for plants removing crust (ice) from the surface of the earth in order to ensure access of oxygen to the soil, etc.
Did you know? Around Canberra, the capital of Australia, lies some of the most expensive lawn in the world. The state spends hundreds of thousands of dollars a year on its maintenance, including a complex irrigation system and the wages of dozens of specially hired employees.
Types of lawn rollers
Before you make a garden roller with your own hands, let's look at what types of this tool there are.
The garden roller itself is a simple tool consisting of several parts. At the base is a large cylinder, which levels the soil. A handle is attached to it. The differences between the products are based on several criteria:
The note! The compaction efficiency of the roller depends on the weight of the cylinder. If there is heavy soil on the site, you will have to buy or create a garden roller, which has a drum weight of up to 120 kg. As for sandy soil, a small roller will be enough to process it. Its weight should not exceed 50 kg. This will be quite enough.
If we talk about the width of the tamping cylinder, then it is selected taking into account the characteristics of your territory. The width will affect the one-time capture on the site. On average, the working part of the tool has a width of 50 to 100 cm.
Below are the 3 most common types of garden rollers that you can use:
The simplest option is a regular device, which consists of a drum and a handle. This is the easiest way to do it yourself. But some people ask the question: what is better, buy a tool, or make it yourself?
How to choose?
The choice of garden roller depends on the size and characteristics of the area that you plan to cultivate, as well as on the quality of the soil. The denser the soil, the heavier the roller will be needed to maintain it.
When choosing a lawn roller, you should pay attention to the following parameters :
- size and weight of the product - the wider the roller, the faster the area can be processed;
- the material from which it is made - if it is metal, then it is better if it is stainless steel or thick plastic;
- the thickness of the metal affects the durability of the device;
- use of material to fill it (water, sand);
- quality and type of fastenings;
- manufacturer and cost of the product.
Having opted for a manual roller, you should pay attention to the handle : it should be of sufficient length and comfortable. The longer the handle, the easier it will be to move the heavy roller across the lawn.
Buying a skating rink or creating
Of course, the easiest way is to buy a tool. It will be reliable, high quality and will serve well. However, it is important to consider a few points. For example, if the plot is really very large and it takes a lot of time to process it, then it is most rational to buy it. The downside is that equipment made at the factory is expensive. Therefore, not everyone can afford this purchase.
If the area is small or medium-sized, then the ideal solution is to make a lawn roller yourself. To do this you need to have tools and materials for the job. It is clear that creation requires effort and time, however, in economic terms, this option is much more profitable. Let's look at exactly how to cope with this task.
Vibrating
The design of the vibrating roller is characterized by the presence of a device that generates strong vibration. The principle of operation of the vibrator is simple: a heavy shaft rotates around a knocked down center of gravity, resulting in high-frequency vibrations that can compact the soil.
The frequency with which the work roller can vibrate ranges from 24 to 48 Hz. 1 Hz is equal to one oscillation per second. The vibration amplitude of the drum also plays an important role in soil compaction. This indicator of the roller vibration system can be adjusted by the operator. Most often, two types of modes are used: amplitude from 0.6 mm to 1 mm and amplitude from 1.35 mm to 2.2 mm.
Control systems for modern vibratory rollers allow you to adjust both parameters: the amplitude and frequency of vibration of the drum. This feature allows you to adapt the machine to work with a specific soil, adjusting it to the characteristics of its density, viscosity, flowability, and so on.
Soil compaction with vibratory rollers can be accomplished using different tactics. Compacting the soil in several passes is considered an effective strategy. First, with the maximum amplitude and the lowest frequency of vibration of the drum, and then with a gradual increase in the vibration frequency. Thus, the deep layers of the soil are compacted first, and then the upper ones.
The advantage of the design is its relative lightness. Such a roller copes with the task at a much lower weight than its static prototype. The downside is the quality of the work done. The static mechanism leaves behind a more even soil than the vibrating mechanism, after which light waves on the ground surface are noticeable.
Choosing materials for the skating rink
To reduce the cost of production, you need to use materials that are at hand. Such improvised materials are inexpensive and will be able to fully cope with the task. So, to make a garden roller you can use:
As for technology, a garden roller for rolling can be made either by welding or by simply tying it with a rope. Therefore, those who are not familiar with welding can use a simple option.
Above is a drawing of a garden roller made of wood. Its types: smooth cylinder (a), aerator roller with spikes (b). They consist of: 1 – a body (a cylinder made of wood), 2 – a bracket, 3 – a cross member, 4 – a handle, 5 – a washer.
Manufacturing procedure
A homemade skating rink is made as follows:
- Disks with a diameter equal to the diameter of the workpiece for the drum (gas cylinder, barrel, pipe, etc.) are cut out of a steel sheet. This can be done using a grinder: make many short straight cuts, getting a polygon, and then cut off the corners with a grinding wheel. The second method: drill many small holes along the contour and then cut off or remove the walls between them with pliers. Next, the edges of the disk (now it resembles a bicycle “star”) are polished, giving them the shape of a circle. The center of the circle drawn during marking must be clearly marked - it will be needed later;
- a hole with a diameter of up to 50 mm is cut out in one of the disks and then a threaded fitting is welded here. A plug is made for the fitting: an internal thread is cut in a short part of a pipe of the appropriate diameter and then welded on one side with a square plate with ground off corners. A rubber gasket is inserted into the plug to prevent water from spilling out of the skating rink;
- a piece of rod with a diameter of 12 mm is ground on one side to a diameter of 10 mm - this is an axis with a seat for a bearing. The end is chamfered on the machined side, then the axle is lubricated and a bearing is pressed onto it. The second axis is manufactured in the same way;
- From a pipe of the appropriate diameter, eyes are made for the U-shaped frame into which the bearings will be inserted. Part of the pipe is bored from the inside, then cut into two identical parts;
- Having lubricated the eyes, they are pressed onto the bearings;
- each axle with a bearing and eye is welded end-to-end to the disk exactly in the center;
- Weld the discs to the ends of the drum blank. The tightness of the seams is checked by filling the drum with water;
- from any rolled steel, for example, a corner 50x50x4 mm, a U-shaped frame is welded with dimensions such that the drum fits in it;
- weld the frame to the lugs;
- a T-shaped handle welded from a pipe with a diameter of 20 mm is attached to the frame;
- a rubber hose is put on the handle on both sides to make it more convenient to grasp it with your hands;
- if necessary, strengthen the frame with reinforcement braces;
- if a ripper roller is required, many bolts or dowels for a construction gun are welded to the surface of the drum in the form of spikes.
- https://refite.ru/katok-dlya-gazona-sadovyj.html
- https://fb.ru/article/223461/katki-dlya-uplotneniya-gruntov-vidyi-i-otzyivyi
- https://masterlandshafta.ru/gazon/katok-svoimi-rukami.html
- https://masterlandshafta.ru/sadovaya-texnika/ruchnoj-katok-dlya-uplotneniya-grunta.html
- https://fb.ru/article/224835/sadovyie-katki-mojno-li-sdelat-svoimi-rukami
- https://nashgazon.com/instrument/inventar/sadovyi-katok-dlya-gazona.html
- https://rovnayadoroga.ru/tehnika/ruchnoj-katok-dlya-uplotneniya.html
- https://rusolymp.ru/raznoe/sadovyj-katok-svoimi-rukami
Making the skating rink heavier
The main requirement for a skating rink is heavy weight. It is thanks to this that the equipment can compact, loosen and shape the soil. But if you take pipes or a barrel, you cannot say that their weight reaches the required 50–120 kg. What to do in this case? The body needs to be weighted, so it needs to be filled with something. Various materials are used for this purpose:
Each of them has its own advantages and disadvantages. For example, if you use water, you can save time on filling and save money. However, this volume of water will not be as heavy as, say, sand and gravel or cement. In addition, water will contribute to premature corrosion of the garden roller and failure.
Note! The downside of water is that you can forget to drain it and leave it in the garage or shed. With the onset of winter, the water inside will freeze, and as it expands, it can deform the instrument.
The best option for filling a garden roller is sand. It has a reasonable price, and it compacts well if you moisten it with water. There will be no problems with loading into the drum either. As for the sand-gravel mixture, it doesn’t even need to be compacted. If you take 1 m3 of water and 1 m3 of sand and gravel mixture, then the second one will be exactly twice as heavy.
As for cement, this is a good option if you need to make a heavy roller. However, there are several disadvantages. One of them is the inability to remove the filler back. For example, if you need to transport or move a skating rink, then it is enough to drain the water or pour out the sand. This will not work with cement. And the cost of cement will be higher than other aggregates.
Now that the filler for the homemade skating rink has been selected, you can begin to create the equipment yourself. We will look at several options so that everyone can choose the right one for themselves.
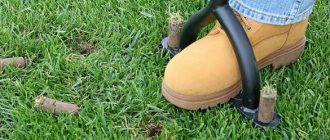
When to aerate
As a rule, to maintain the grass cover in good condition, do-it-yourself aeration is carried out in late spring or early autumn. The first option is more preferable. In the spring, you will be able to objectively assess the condition of the “green carpet” and identify overgrown areas or bald spots.
At the end of summer, the grass already has a formed root system, and organizing ventilation will be beneficial. When planning, you need to calculate the time so that by the onset of winter there are no exposed roots.
Spring is the best period for aeration
When thinking about when to aerate your lawn, you should take into account the characteristics of the soil, the condition and type of lawn grass. Nuances of organizing the process:
- If the site is planted with bluegrass, bentgrass, fescue or ryegrass, then it is better to carry out the procedure in the fall. When growing pigweed, zoysia or other heat-loving grass, aeration is carried out in late spring.
- On clay soil and loam, grass growth slows down, so the area needs double aeration - in spring and autumn.
- Sandy soil does not compress as easily as clay soil. It is enough to aerate it once a year.
- When there is a high load on the planted grass, unscheduled aeration is permissible. Places with yellowed vegetation or moss need additional ventilation.
- It is better not to actively saturate the soil with oxygen in an area with an abundance of weeds. First you need to overcome the weeds, and then start aeration.
- Tillage should be avoided on a newly planted lawn. Work should begin after the grass has taken root - a year after sowing.
- It is undesirable to carry out aeration during drought. This will accelerate the evaporation of moisture and expose the root system, making it vulnerable to sunlight.
Assessing the condition of the root system
The lack of oxygen is indicated by the condition of the grass roots. If their length is up to 5 cm, then the plants are experiencing oxygen starvation and need aeration.
We use plastic bottles
This option is the simplest and fastest. You don't need to spend a lot of money to create it. The equipment is perfect for a small area. To make it yourself, you need to choose bottles that do not have a handle. They should be perfectly round. After which they need to be combined into one structure. The operating principle is as follows:
The weight of this structure will be about 100 kg. This is quite good not only for small areas, but also for soils with heavy soil. All that remains is to attach a handle to the roller. Some people make it soft by simply tying a rope or belt to the neck. It will take about 30 minutes or 1 hour to create a garden roller from bottles.
Average prices for finished rollers
The price of an industrial garden roller depends on several factors:
- product size;
- the material from which it is made;
- on the type of construction (mechanized or manual);
- from the manufacturer.
| Manual lawn roller | Trailed lawn roller for mini garden tractor | ||||
| Options | Brand | Price | Options | Brand | Price |
| ELMOS EMT-51 | 4500 rub. |
| MTD 190-229-000 | 36990 rub. |
| Grinda 422115 | 10163 rub. |
| MTD 190-228-000 | 29990 rub. |
| Grinda 422117 | 8163 rub. |
| Agri-Fab 45-02681 | 16990 rub. |
| Elephant 0596 | 5491 rub. |
| Agri-Fab 45-02167 | 56990 rub. |
| FINLAND 1305-CH | 8951 rub. | |||
| SIBRTECH | 4467 rub. | |||
Making a skating rink from a metal pipe
This option is more complex, but the finished skating rink will be more reliable and better. To make it, you will need the following materials:
- a metal pipe with a diameter of 30–35 cm and a length from 60 cm to 1 m. It is needed to create the base of the structure;
- a small sheet of metal, the thickness of which is from 2 to 5 mm;
- to create bushings for the roller, you need a pipe with a diameter of 20 mm;
- second pipe, diameter 15 mm. As an option, use a 50 mm corner. They are needed to create a frame;
- shaft and two bearings for the shaft (10 cm);
- reinforcement as spacers for the roller.
When everything is ready, you can start working:
Note! A garden lawn roller can be made from a barrel or a gas cylinder. The principle is the same, only it takes less time to create the cylinder, since it is already ready. You can watch a video on exactly how to do this.
Required Tools
To make a skating rink similar to factory-made models, a home craftsman will need:
- welding machine;
- grinder with several cutting and grinding discs for metal;
- hammer;
- brush with metal bristles;
- roulette.
Some parts will need to be ordered from a lathe.
DIY seeder-spreader
In almost every house, there are unnecessary things lying around on the veranda or in the basement, with which you can make your own manual mechanical seeder. To make the device convenient, you need to prepare the following materials:
- Drive wheel.
- Opener with boards.
- Wheels (can be from a children's car).
- Metal strip.
- Bicycle sprockets - 2 pcs.
- An old canister.
- Bulgarian.
- Welding machine.
- Spanners.
With the help of such materials and tools, you can create a simple but very effective device for spreading lawn grass.
Manufacturing stages
- For the mechanism to work, you will need to make a drive wheel. To do this, you can unscrew it from some old drive.
- The prepared wheel is welded to the hub of one of the opener discs. To prevent the unit from falling apart during operation, the welds should be of high quality.
- At this stage you will need a bicycle chain with sprockets. This will be the main mechanism of the design.
- Next, a steel base is made from thin pipes using a welding machine, to which a canister and a handle (metal strip) are attached.
- A compaction roller is made from two small wheels, which is attached to the back of the resulting structure.
The dimensions of the base and the length of the handle of a self-made seeder depend on the weight and height of the person who will operate it. Changes can be made to the design, and parts can be replaced with others that are similar in structure and function.
Whatever type of lawn seeder is chosen, as a result, with the help of such a unit you can get a beautiful lawn, high-quality fertilized turf and a lot of free time. From now on, caring for your lawn will be more pleasant, faster and easier.
Buyer rating
Roller-aerator “Hedgehog”
A simple device made in Russia, suitable for processing small areas. Copes with lawns of complex shapes, levels paths sown with grass. Good for regular and rolled grass coverings, as well as lawns. The body is covered with spikes that provide aeration. An empty roller weighs 10 kg; after filling with wet sand, the weight increases to 60 kg. Equipped with a comfortable long handle with an ergonomic bend.
"Giant"
Professional roller for universal use. Levels any lawns, lawns, good for processing gravel and sandy surfaces. Made of powder-coated metal, working surface width 600 mm. Equipped with sealed, factory-pressed bearings to extend tool life. The handle is ergonomic, two-component. The sand-loaded roller weighs approximately 120 kg and is suitable for compacting difficult soils. The kit includes a blade for cleaning the drum.
AL-KO DW 50
Manual roller for laying lawns, leveling paths and lawns. Suitable for all types of soil, gravel, sand. Can also be used for household work: laying linoleum and other floor coverings. Made in Austria. The size of the working surface is 0.5 m. Weight without filler is 13 kg, after filling with wet sand – 120 kg.
This is one of the heaviest manual models, ideal for difficult to work soils. The working cylinder is made of metal with an anti-corrosion, self-cleaning coating. An ergonomic handle with a stop makes it easy to move the unit around the site and adjust the degree of pressure. Internal bearings guarantee smooth running and ensure long, trouble-free operation.
Haemmerlin
A small manual roller made in France. Designed for work on small grassy areas of complex shape, compaction of paths and recreation areas. The ergonomic handle makes it easy to move. Can be used throughout the season, guaranteed to last for several years. The width of the roller is 0.3 m, and when unfilled it weighs only 10 kg. You can fill the cylinder with wet sand or water, changing the weight from 40 to 70 kg. Users note the very smooth running of the roller, which makes work much easier.
Sadko
Unit made in Slovenia. The size of the working part is universal - 0.5 m. Suitable for laying lawns, compacting soils, leveling paths. Copes with any soil and can be used in summer and winter. Suitable for construction work. The body is made of high quality steel with anti-corrosion coating.
Sowing
Before sowing, you need to carefully read the instructions on the package with the selected grain mixture. As a rule, there are recommendations on how best to plant these particular herbs. They will also come in handy at the maintenance stage: how often to mow the lawn, the frequency and amount of watering.
There are three ways to sow seeds:
- 1Manually. The least successful method, since the seeds will fall unevenly on the soil, and the lawn will end up with “bald spots.”
- 2 Mixed with sand. You need to mix the seeds with sand 1:1 and then distribute this mixture on the ground.
- 3Using a hand seeder. A method that allows you to plant a lawn evenly and minimize seed consumption. But you will have to spend money on a seeder.
It is better to sow in calm weather, otherwise the seeds will be blown by the wind. On average, seed consumption is 40 g per square meter.
After sowing, you need to sprinkle the seeds with soil, compact them with a special roller, a log, or simply walk on the soil. If the soil is dry, water the crops with low pressure of water, splashing it so as not to wash the crops. It is better to use special sprayers for watering.
