A common problem when setting up a vegetable garden, flower garden, or lawn is the presence of various uneven spots, holes, and small ravines on the site. To plan the placement of beds and flower beds, you need to level the territory. This requires knowledge of the methods and rules of alignment.
Layout of the site begins with preparatory work, since it will not be possible to level the beds at random. Calculations and consultations with specialists are required. It is possible to fix everything yourself if the area planned for leveling vegetables and flowers is small.
What to consider when planning a path
When planning a path, try to do everything sequentially:
- First of all, make a plan in which you highlight the beginning and end of the route. Lay household items. paths of optimal length. Try to avoid sharp turns and do not make the paths very winding.
- Limit the number of garden paths.
- Calculate the correct length and width of the path on the site.
- Do not forget about the overall style; the path should be designed accordingly and not be conspicuous.
- Use materials that are designed specifically for garden paths.
Optimal size
After you decide on the location of the path on the territory, take care of the dimensions. Almost the entire path should have the same width. It should be increased only at the approaches to commercial and residential buildings.
After planning the route, determine the optimal width of the garden path, taking into account the following architectural features:
- make a main path between the gate and the cottage, about 1.5 meters wide. This is necessary so that two people can walk along it;
- make secondary paths (to the bathhouse, gazebo, barn, etc.) narrower.
- approximately the width of the garden path should be 90 centimeters.
Paths are often made that run through the garden. They must be laid between the beds so as not to touch the bushes when moving. If there is a corner on your territory where wild plants grow, then the paths there should be a maximum of 60 centimeters wide.
In order for the car to safely move around the courtyard area, the approximate parameters of the overpass should be -300 cm. At the same time, the areas that are used for boarding the car need to be expanded: next to the garage, in front of the cottage, near the gate, etc.
It is also worth paying attention to those. passages, or rather, the blind area of the house
The typical width of a path on a site of this type is 1 m.
Approximate widths
The main tropics in the local area, which lead from the gate to the dacha and flower garden, should be quite wide. Therefore, when marking for their construction, site owners need to prepare a measuring tape and leave a distance of approximately 90 - 150 cm between the pegs. This configuration of the path will provide free passage for several people. From 60 to 90 cm in width, garden paths are built leading to secondary structures on a summer cottage:
- to the bath;
- swimming pool;
- large greenhouse;
- parking space;
- river or fountain;
- woodshed;
- barbecue;
- gazebo.
The narrowest paths are made in the garden. To pass between flower beds, greenhouses and vegetable beds, you will need a path 30-50 cm wide. The construction of such a path will require minimal money and labor costs.
However, when choosing this option, you need to take into account the fact that working in the beds will be more difficult. For example, a garden-type cart will hardly pass along a narrow thirty-centimeter path, let alone a mechanized cultivator. The above figures are considered indicative. Summer residents can adjust them at their own discretion, taking into account in the process:
- total area of the territory;
- plan of paths on the site and various buildings;
- budget;
- garden landscape style;
- personal desires.
EQUATE
Ushakov's Explanatory Dictionary. D.N. Ushakov. 1935-1940.
See what “EQUAL” is in other dictionaries:
equalize - level, balance, equalize; make an equation; equate, compare Dictionary of Russian synonyms. equalize see equalize Dictionary of synonyms of the Russian language. Practical guide. M.: Russian language. Z. E... Dictionary of synonyms
equalize - and equalize. In meaning “to make equal, identical; equalize” equalize, equalize, equalize. Death equals everyone. Justice makes all citizens equal. In meaning “make even, smooth; level” level, level, level. Level paths in the garden. Skating rink... ... Dictionary of difficulties in pronunciation and stress in modern Russian
EQUAL - EQUAL, yay, yay; imperfect, whom (what) (colloquial). 1. Make equal, identical. You can't have all r. when assessing knowledge. 2. with whom (what). When comparing, give something to someone. equal rating. R. with me. | Sovereign equalize, yay, yay (to 1 value). Death of all... ... Ozhegov's Explanatory Dictionary
compare - what with what. Machine embroidery cannot be compared to hand embroidery... Management Dictionary
Equalize - I ness. trans. 1. Make the same, equal in some respect; equalize 2. transfer Consider, recognize as equivalent, equivalent; equate. II Nesov. trans. Place in one row in a straight line. Ephraim's explanatory dictionary. T.F.... ...Modern explanatory dictionary of the Russian language by Efremova
equal - equal, yayu, yaet (equal) ... Russian spelling dictionary
equal - (I), equal / yu (sya), nya / eat (sya), nya / yut (sya) ... Spelling dictionary of the Russian language
equalize - 1. Syn: level, balance, equate 2. Syn: make an equation 3. Syn: equate, compare ... Thesaurus of Russian business vocabulary
equalize - yay, yay; nsv. who what. 1. (St. compare). To make equal, the same in which l. attitude; equalize You can't p. all people, identifying their needs. * With her scythe she makes everyone equal (about death; Tyutchev). 2. with whom than. Comparing, counting... ... Encyclopedic Dictionary
equalize - equalize ... Dictionary of archaisms of the Russian language
Source of the article: https://dic.academic.ru/dic.nsf/ushakov/993346
How to clean the area
Why do we need warm beds and how to make them in the spring?
Cleaning the plot where you plan to lay out a lawn must be done with the utmost responsibility. Rubbish after construction, stones, branches, wood chips are completely removed from the site. It is impossible to hide garbage in the ground, so that it does not subsequently harm the roots of plants and does not interfere with the operation of equipment. When cleaning old paths and flower beds, try to remove them completely, without any residue.
Refinement of virgin soil will take a lot of time from the owners of the site. It will be necessary to cut down trees, dig up bushes and young growth. If you have large trees, find money and pay for the services of an excavator. The work of the Titan will be completed by the excavator bucket in a matter of seconds. If there are strong roots stretching along the ground, they will also have to be removed using technology so as not to tear yourself.
Particularly thorough cleaning is carried out with weeds. This also applies to the situation when you want to plant a new lawn in the old way. One option is to treat the weeds with chemical compounds that can kill them at the root in a matter of days. The second option is to remove the top layer of soil with a shovel. Please note that after you use herbicides to kill weeds, lawn grass can only be sown after a month and a half.
Example sentences
The following are sentences containing the word “align” for a better understanding of its meaning and use:
- After a run, it is very difficult to even out your breathing because your heartbeat remains high for some time.
- The builders' plan was to level the walls, paint them pink and lay down white laminate.
- Ivan was an excellent pastry chef, even a master of his craft, because he always considered it necessary to level the surface of the cake.
- It was impossible to level the walls of the old house - they had long since rotted.
- The coach shouted at him to always remember to even out his breathing during long-distance running.
- They were told to straighten the paths and only then go to dinner.
- Leveling the beds and giving them an equal appearance was not easy, since grandfather was too old for such work.
- It was not easy to level the car's coating because there was a huge risk of damaging the paint.
- It was easy to even out the length of his bangs all the way around.
Methods for leveling land
How to properly prepare apple trees for winter
There are several ways to level the surface of an area. It all depends on the size of the site, costs, time and effort invested. There are the following methods:
- manually;
- using a walk-behind tractor;
- using a tractor;
- method of importing soil from outside.
Manually
This method of creating a flat horizontal surface is suitable for owners of a small area. It takes a lot of time and effort, but eliminates unnecessary costs for equipment. To get the job done faster, you can hire workers or ask relatives or friends for help.
To work you will need the following equipment:
- bayonet and shovel shovels;
- wheelbarrow;
- rake;
- boards;
- building level.
Manual method of leveling a site
Do-it-yourself leveling of a site includes the following steps:
- Marking the area.
- Removing 10-20 cm of the top layer of soil. The removed turf should be placed in bags or taken to the edge of the site so that it is not in the way. Don't leave soil in bags. Without access to oxygen, it will quickly lose its fertility.
- Leveling the territory. You can control horizontality using a conventional construction level gauge. To do this, pegs are driven across the entire area and ropes are pulled to zero.
- When digging holes, you can use the removed soil. Excess soil must be removed from the site. If there is a shortage of fertile land, it will have to be purchased.
- Next you need to compact the soil. This can be done using a hand roller, a regular wooden ladder, or planks attached to the soles.
- To moisten the soil, it needs to be watered abundantly.
- Wait three weeks for the soil to settle.
- The last stage is plowing the land with a cultivator and leveling it with a rake.
Motoblock
Small-sized agricultural equipment, such as a walk-behind tractor, will help speed up and facilitate the leveling of a summer cottage. It is a small hand tractor that can be rented. A person follows the walk-behind tractor, holding it by the control levers to control the process. Using a walk-behind tractor has the advantage of not having to remove the top layer of soil. The downside is that large holes will have to be filled in manually.
Leveling the area with a walk-behind tractor
The work is divided into the following stages:
- Attaching the board to the universal walk-behind tractor holder.
- Leveling the land in sections. In this case, a small tractor will loosen the ground, and the board will level the surface.
Tractor
This is the most effective way to level a plot of more than 6 acres. To level the ground on a plot with a tractor, you will have to pay a substantial amount. Average price of leveling 1 sq. meter is 50 rubles without taking into account consultations and visits of specialists to the site.
Leveling the area with a tractor
The work takes place in two stages. First, the tractor passes the territory along and then across. The equipment for leveling the area is equipped with special teeth that deeply loosen the ground and drag layers of soil. Using a bucket you can move a large volume of earth. Instead of a tractor, you can use a bulldozer.
Delivery of soil from outside
Another effective leveling method is to bring in soil from outside. The brought earth is distributed so that a flat area is obtained. Land for import can be purchased or dug up yourself in places where it is not prohibited. If the soil on the site is clayey, then the brought soil must be diluted with sand.
Leveling the area with imported soil
Misspelling of the word "align"
The word “align” is often written incorrectly, making mistakes. The following are incorrect spellings of this verb:
- Pull out - the letter “s” is incorrect.
- Align - the letter "e" is incorrect.
- Vomit - the letters “s, e” are incorrect.
- Pull out – the letter “and” is incorrect.
- Pull it out - the letters “s, and” are incorrect.
- Align – the letter “i” is incorrect.
Remember! The only correct spelling of the verb is “to level” (to make level).
How to make a garden bed beautiful
Features of caring for raspberries in the Moscow region: how to properly prepare for winter
If you have the desire and a little imagination, you can achieve very great heights in decorating a garden bed with your own hands. In order to start work, you first have to plan everything thoroughly and think through all the little details. Beds of unusual shapes look very interesting, be it a circle, a triangle or any other geometric shapes. Moreover, you can beautifully combine them into one overall flowing pattern. Multi-row wavy beds will look very impressive, on which you can plant different types of salads and ornamental cabbage.
Beds can also be created in segments or circles, somewhat in the style of French plantings. In this form, the beds will visually diverge into rays from their middle, while something different will be planted in each of the segments.
“Trim” or “trim” - which is correct?
These are different words. Both in meaning and in terms of morphology. In the first verb, the root -rov- indicates similarity with the words already discussed. The attachments are different.
If “you-” implies the completion of a previously unstarted action (“level up”), then “sub-” means a slight correction of what was basically completed (“level up”). The main meaning is the same.
The root “-rav-” refers to the test word “equal”. That is, the action is aimed at bringing something to some identical values. This is, for example, size, weight or quantity - whatever.
The rule applies similarly to all words with a different prefix. The general meaning changes, but the essence of the action remains the same. The spelling of the words "align" and "level" (preferably "align") is generally described in the previous section.
How to level a garden bed
The optimal time for leveling is considered to be the beginning of spring, when the snow has completely melted. Any excavation work begins with clearing debris and stones
It is important to uproot stumps and roots. Then they begin the main part of the work - leveling
A horizontal platform for a vegetable garden is created in three ways:
- Select a midpoint on the garden bed, relative to which they will level. They mark it with a peg, which is hammered so that it rises up ten centimeters. From the point, squares are divided, the top of which will be in the same horizontal plane. Now we need a level. After the breakdown, it will be clear where to remove the excess layer of soil, and where, on the contrary, to add more. Level the surface with a shovel or fork. After the work has been done, the garden must be given a rest for ten days, and then it must be sown.
- If the slope in the beds is large and can be maintained, then mark with pegs both the highest points and the lowest. After this, the ropes are pulled, connecting the upper and lower pegs in pairs. You will get a horizontal platform for a vegetable garden with an appropriate slope. All that remains is to edit the area with shovels and rakes. Cultivators and walk-behind tractors are also used for work. The mechanisms are easy to control and regulate the process. A flat board tied to the back of the machine will also help to level the beds after loosening the soil.
- If you are going to sow large areas with garden crops, then leveling can only be done with the help of a tractor or bulldozer. The procedure is carried out by processing the area along and then across.
If the beds are correctly marked, it is not difficult to level them either manually or with special equipment.
Principles of crop rotation
Before you start sowing plants, you need to have an idea of crop rotation: you cannot plant a crop in the same place for years. Failure to comply with this rule leads to a decrease in yield. There is also no need to randomly move plants around the site. There are certain systems that need to be followed.
Crop rotation schemes are drawn up by everyone for themselves, taking into account the crops grown on the site. It is good to focus on predecessor plants, for example:
- legumes are sown after potatoes, cucumbers, peppers or eggplants;
- cabbage will do well in the place where potatoes, peppers and legumes were grown in past years;
- onions and garlic can be sown after radishes, cabbage, and legumes;
- tomatoes after cabbage, carrots and cucumbers;
- cucumbers, in turn, after cabbage, corn and onions.
To avoid confusion, experienced gardeners keep records of what area is being grown this year. Having such information and guided by reference books, you can determine what to sow in the beds next year so that the principles of crop rotation are observed.
Some recommendations
Caring for the garden is necessary to obtain a high harvest. The soil should be fertilized not only before planting various crops, but also before wintering. At the same time, do not forget to take into account the peculiarities of caring for each selected plant.
Variety of designs and materials for making beds
The beds themselves can have the most bizarre and unusual shapes. And for framing, not only purchased sheets of metal or slate are suitable, but also many improvised things, including empty plastic bottles.
When planning your garden and arranging a greenhouse, do not be afraid to use your imagination to create a truly convenient and interesting area for planting plants and flowers. Here are a few examples to take note of:
Everything is neat and beautiful in the yard
Rich harvest of strawberries on vertical beds
Simple and tasteful
Sources
- https://sadogoroda.net/kak-pravilno-delat-gryadki-na-ogorode/
- https://fermer.blog/bok/blagoustroystvo/landshaftnyy-dizayn/zonirovanie-uchastka/16031-dizajn-dachnogo-ogoroda.html
- https://HomeMyHome.ru/gryadki-dlya-lenivykh-foto.html
- https://svoimirykamiinfo.ru/gryadki-svoimi-rukami/
- https://dizlandshafta.ru/dizajn/obustrojstvo-uchastka/ekonomnyj-dizajn-sada/
- https://happymodern.ru/gryadki-na-dache-krasivye-umnye-lenivye/
- https://krov-torg.ru/oformlenie-grjadok-na-dache-original/
- https://vichivisam.ru/?p=21052
- https://krrot.net/gryadki-na-dache-svoimi-rukami/
- https://forumdach.ru/gryadki-na-dache-svoimi-rukami/
- https://HomeMyHome.ru/gryadki-svoimi-rukami-ne-kak-u-vsekh-interesnye-idei.html
Preparing beds for strawberries
Mulching strawberries
The bright red berry is not only an ideal source of vitamins and minerals, but also an excellent decoration for the garden plot.
But, since this crop requires special care, let’s talk about its cultivation separately:
- strawberries are very demanding on soil moisture: if there is excess moisture in the area, its roots quickly rot; and the berry turns out watery and not too tasty; so be sure to take care of its drainage
- It is better to grow it in warm beds, at the bottom of which drainage is laid from a 5-10-centimeter layer of sawdust, straw or rotted plant tops; mineral fertilizer can be added in small quantities; to protect against excess moisture, a waterproofing film is placed on the bottom of the box
- on its sides it is necessary to drill several holes to drain excess water
- It is better to make the beds high enough - high taste qualities of the berries can only be achieved if the soil is sufficiently heated by the sun's rays
- capricious strawberries simply love humus; to get a good harvest, add a couple of handfuls when planting seedlings in prepared holes
- the growing tendrils of the plant cause a lot of trouble - they have to be cut off very often; if this is not done on time, the berries will begin to shrink and the yield will decrease
- You can get rid of such labor-intensive work by mulching the beds with a dark cloth; the mustache will simply have nowhere to take root; plus a layer of sawdust, pine needles or straw will protect the strawberries from dirt: even after heavy rain, the berries will remain perfectly clean
Forget about advertising and brilliant ideas with planting vertical strawberry beds. In the first winter, the plants will simply freeze. Plus, you will have to water them several times a day - the winds will quickly dry out the soil.
Bed for early sowing
Some vegetables and herbs can be sown as early as March: their seeds germinate at relatively low temperatures, and the plants themselves can easily tolerate light frosts. Such crops include radishes, rutabaga, turnips and most types of greens. The bed for them is prepared using the following technology:
- As soon as most of the snow has melted, wood ash and mineral fertilizers (30 g/m2) are scattered over the surface of the bed.
- The surface of the bed is covered with film for a week, pressing down or digging in its edges.
- In 7 days the earth will thaw completely, it can be loosened to a depth of 5 cm or dug up to a depth of 15 cm.
- Now the ground is left open for a day so that air gets into the soil and the bed is ventilated.
- Level the surface with a rake and cut furrows for sowing seeds.
This way you can prepare the beds in advance, in the southern regions even during the “February windows”, just keep it under a black film until sowing. This will prevent unnecessary weed germination and maintain optimal soil temperature.
It is good to sow cabbage seedlings in such beds.
Preparatory work
When preparing, you need to pay attention to the following points:
Zoning. The design for the location of buildings and other areas must be drawn up taking into account the characteristics of the topography, groundwater, level of soil fertility, etc.
Drainage. It is definitely needed if the soil has poor percolation. Therefore, the layout of drainage pipes must be drawn up before leveling.
Slopes. Slopes located on the north side are always leveled, because it will not be possible to plant plants on them - the slope will take too long to warm up in the spring. Western and southern slopes are most often chosen for planting.
Changes. They should not be more than half a meter, because otherwise it will not be possible to create an effective irrigation system.
Relief. It is not necessary to make the entire area flat; many disadvantages can easily be turned into advantages. If you search the Internet for materials on this topic, it will not be easy to find a photo of a flat area. Many of them will use unique features and irregularities as participants in compositions with alpine slides, berry fields, flowers, etc.
It is the last point regarding the determination of the volume of soil masses that will influence the choice of leveling method.
When is the word “align” used?
The verb "equalize" has the meaning of the process by which something becomes equal, on the same level. It is also used when talking about something that needs to be made the same, close.
This verb is less commonly used to mean “equal” according to various characteristics (height, status, territory).
It is worth noting that this particular type of verb is rarely used at all. More often you can find synonymous forms, but with different prefixes: equalize, equalize, equalize, equalize, equalize.
Vertical bed made from pallets or pallets
For the garden bed, choose whole pallets that are not affected by rot and mold.
Pay attention to the factory markings. Typically, to extend their service life, wood on pallets undergoes chemical or heat treatment
Both options are suitable for growing ornamental plants, but for the beds from which you will harvest, use only thermally treated pallets. Be sure to check them for nails and knots.
To create a bed you will need: a pallet, non-woven covering material (agrofibre), burlap, thick fabric, soil, seedlings.
Let's get started:
- Clean and treat the pallet with paint or a compound for exterior use.
- cover the back side with a double layer of agrofibre, burlap or fabric
- we plant plants starting from the bottom row
- compact the soil tightly and fill all available space
- We water the finished bed and leave it in a horizontal position for a month for better root germination and soil consolidation.
- hang the bed on the wall, fence, crossbar, you can lean it against the wall
Tip: you can make pockets from agrofibre for each row of the bed. And although it will take a little longer, the soil consumption will be much less.
Idea: Pallets can become the basis for vertical flower beds and herb plantings. Paint them with bright paint, attach existing containers (flower pots or containers, buckets, painted tin cans, linen bags) and plant plants there.
General principles of sowing
Sowing in the garden begins with the most cold-resistant crops - cabbage, radishes, almost all greens, beans and peas. They are gradually moving to more heat-loving crops - corn, seedlings of peppers, tomatoes, cucumbers. It is important not to miscalculate the timing so that the plants do not suffer from return frosts.
Be sure to follow planting plans. If you place plants too close together, they will compete for nutrients. Excessively large distances between bushes are impractical. Information about planting patterns can be found directly on the packaging or in vegetable growing guides.
Consider also the ripening time. For example, the garden bed will be free of radishes in about 2 months and dill or pepper can be planted in its place. But you won’t harvest the carrots until April; the vacated space can then be filled with autumn radishes.
How to fill a site for building a house. When to backfill
There are many cases where the quality of a site can be significantly improved using this labor-intensive and expensive, but effective procedure. True, there is one “but”: before filling, even in cases where it seems to be “shown”, it is necessary to carry out work to study the geology. Topographical survey will show what the scope of leveling work will be, and “geology” will determine how high the groundwater is and what the composition of the soil is. In general, the backfill plan is determined based on a preliminary study of the site. But here is a general list of cases when backfilling is most likely very appropriate for you.
- The plot is flat, good, but completely “sits” in a lowland - both the neighbors and the road are higher. It is better to “raise” such an area - otherwise all the surface stormwater has a chance to collect on your area. However, if you plan to grow rice or a frog farm, leave everything as is.
- Large construction waste is scattered around your property. For example, if you bought an old house on 6 acres, dismantled it, but it doesn’t want to leave you so easily and is now found throughout the entire site - either in the form of a pile of stones from the foundation, or in the form of a board with nails. In some cases it is cheaper and easier to remove all this garbage and recycle it, but sometimes there is too much of it. And then it will be more convenient to distribute it evenly and fall asleep out of harm’s way.
- There is a real swamp on the site. Again, fans of living ecosystems may like it. If you have enough money and enthusiasm, you can turn a swamp into a charming pond. But if you just want to build a house, be able to sit on the veranda without being accompanied by frogs and mosquitoes, or grow carrots, the wetland must be filled in.
Exceptions
But, as always in our language, nuances appear:
“The officer gave the order to catch up.”
The call to align, addressed to the formation, calls on the soldiers not to become the same height, but to form a neat line.
“Be equal! Attention! Alignment to the right!
Important! Writing “equal” is a mistake!
“Look up to your uncle - thanks to honest work, intelligence and endurance, he achieved great success.”
To be like someone does not mean to wear shoes of the same size, but to adopt qualities and habits. Other exceptions: “level”, “peer”.
“You should trim your hair every three months to keep it healthy.”
“Trim the bushes like this.”
For nouns, for example, “hair”, “bushes”, both words in question are applied. In one case, the emphasis is on size (length), in the other - on appearance.
Leveling the soil for a vegetable garden and lawn
Small areas require the following step-by-step planning:
- You need to carefully remove the layer of fertile soil and place it on the edge of the future garden;
- Carry out its continuous leveling, removing soil from the hillocks and filling the depressions with it;
- Return the plant layer of soil to its place;
- Wait one or two weeks before using the area for its intended purpose.
Large areas for a vegetable garden should be prepared as follows:
- Plow the area up and down;
- Cultivate the area twice with a cultivator to remove weed roots from the soil;
- Compact its top layer with a light roller, for example, a barrel filled with liquid or sand.
The planning process for such a site involves going through several stages:
- The area needs to be marked. To do this, you need to hammer pegs around its perimeter and connect them with a cord. The distance between adjacent pegs is 60 cm.
- The site area should be cleared of debris and stones. Large stumps can be broken down using saltpeter.
- Remove and move the plant layer of soil beyond the boundaries of the area broken by pegs. If there is hard soil below, it should be dug up with a shovel or loosened with a walk-behind tractor.
- Level the site by moving the soil from the hillocks down. After this, the removed turf should be returned to its place.
- After two weeks, select 9 evenly spaced points on the site and drive pegs into them with marks placed at a distance of 10 cm from their top. The pegs need to be leveled in height using a long block.
- Level the soil over them: where you need to add it or remove excess.
- After finishing the leveling, remove the pegs and compact the soil with a garden roller. It is often made from a steel barrel or a piece of wide pipe filled with cement mortar.
Advice! It is recommended to roll the area lengthwise and crosswise; such maneuvers will allow you to get rid of air cavities in the soil.
Deciding on the sizes
The length of the high bed can be any - as far as the allocated area allows. Calculate the width based on planting in two rows, this is approximately 90–120 cm. Then the bed will be easy to cultivate, and the plants will not lack air and sun.
The height of the bed depends on the quality of the soil on the site. If it is fertile enough, 15–20 cm of bulk will be enough. In case of poor soils, the beds are made higher - up to 30 cm, and compost beds can be half a meter high. Sometimes the beds are raised high enough so that you can work them without bending over. This is convenient, but requires increased consumption of materials and soil.
Advantages and disadvantages
Wooden boxes enclosing the beds improve the appearance of the plantings and make them easier to care for. The box prevents soil from shedding when watering or processing crops. Board fencing makes it difficult for weeds to spread and makes periodic weeding much easier. The soil in such a structure can be filled in layers, forming and maintaining their optimal location.
The main advantages of board beds are:
- maintaining the shape of the beds and preventing them from falling off;
- ease of construction;
- ease of weeding and other care, ease of fertilizing;
- slowing down the penetration and development of weeds and pests;
- creating comfortable conditions for cultivated plants;
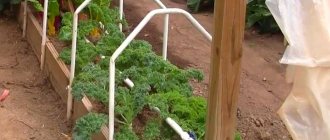
- possibility of attaching film to create a microgreenhouse;
- possibility of fastening arches for film;
- aesthetic appearance.
What do board beds look like? The disadvantage of this solution is its short service life. When wood comes into contact with soil and moisture, it quickly becomes unusable, rots, and is affected by fungus and pests. Boards in strawberry, vegetable and root vegetable beds need bioprotection.
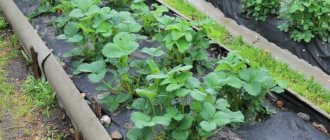
Successful materials for covering paths in a greenhouse and vegetable garden
To organize country paths, you can use any material that meets the requirements - comfortable movement around the site and strength. You can equip garden paths from:
- concrete. Before pouring, make a trench 10-15 cm deep, install the formwork, and add a sand cushion to the bottom. Mix a mixture of quarry sand and cement grade M100-M150, fill the formwork space. Depending on the ambient temperature, the garden pavement will be completely ready for use in 1-2 weeks;
- bricks Dig a shallow trench, add fine gravel to the bottom, and place a sand layer on top. Lay the bricks, depicting masonry, a checkerboard pattern, arrange the elements obliquely, make straight lines. Show your imagination in designing garden paths;
- paving slabs. Level the area between the beds, pour a layer of quarry sand 5-7 cm high, lay out tiled elements, and tap each tile to compact it into the substrate. Fill the gaps between the segments with sand mixture;
- broken bricks, asphalt chips, stones, asphalt chips, slate scrap. Recycled raw materials have high strength characteristics and will last for many years. Create a ditch 5-7 cm deep around the perimeter of the backfill, lay a layer of sand, fill it with the selected material with a layer height of 6-8 cm, compact and compact the backfill;
- crushed stone. Filling the beds with gravel, limestone or granite crushed stone will create a durable non-slip coating through which weeds will not grow. Cover the passages with geotextiles, fill them with sand 3-4 cm high, and evenly place the crushed stone mixture on top. Choose small fractions of material to reduce the risk of injury;
- synthetic materials. For quick installation, use cut pieces of construction sheets, which will become an obstacle to the growth of weeds. Use geotextiles, linoleum, synthetic carpets or roofing felt for these purposes. The disadvantage of this method is the high risk of injury due to accumulation of rainwater or icing on smooth surfaces;
- rubber cover. To arrange garden paths, you can use ready-made rubberized elements, which are used for landscaping local areas, children's playgrounds, and sports grounds. Thanks to the embossed surface, such materials do not slip, do not rot, and are resistant to frost and ultraviolet radiation. Create a level area using a compacted sand layer and lay down rubber elements;
- backfilling with sawdust, pine branches, straw, hay, sand, tree bark. The gaps between the ridges are easy to arrange using available practical, environmentally friendly, cheap materials. Cover the paths on a layer of cardboard, roofing felt or newsprint with a 10-12 cm layer of suitable material to stop the growth of weeds. Among the disadvantages, it should be noted the rapid process of rotting of organic fills (hay, straw, sawdust, bark, pine needles), acidification of the soil. The sand layer will be eroded by heavy precipitation and during snow melting;
- sowing lawn grass. To stop the growth of weeds and create convenient paths for movement, sow special varieties for organizing a lawn. The crop forms continuous plantings, which eliminates the possibility of weeds appearing. The lawn between the beds will need to be mowed from time to time;
- boards, fiberboard, chipboard, plywood. Laying wooden materials between the beds will prevent weeds from germinating, but will last no longer than 3-5 years. Traveling along such paths after rain or frost is dangerous;
- plastic bottles. To arrange garden paths, use inverted, cut-off bottoms of plastic drink containers or lay them with corks. The use of multi-colored elements will allow you to lay out a drawing and organize a colorful coating. To prevent the germination of weeds, fill the gaps between the elements with river sand.
You will need:
Do-it-yourself glass greenhouse Almost every garden plot has a greenhouse. You can see buildings made of polycarbonate or film, but people often give...
Making paths in your dacha with your own hands is easy and quick. It is enough to choose practical materials, use your imagination and carry out careful work. Coverings made of stone, concrete, plastic, and synthetic fabrics will last for a long time. Equip country paths so as not to waste time fighting weeds, ensure the safety of your movement, and create comfortable conditions for working in the garden.
Finding the answer
In the Russian language textbook for grade 6 under. ed. E. A. Bystrova has the word ALIGN. I would like to know how to properly align or align. Thank you.
Russian help desk response
Tell me, is the align/align form not allowed? Just level/do you level? Your answers always contain the letter Y. Thank you.
Russian help desk response
The first couple of options are wrong. That's right: you level, level, level.
Good afternoon Please tell me how to correctly write to straighten bangs or trim bangs? The child wrote “O” in independent work on the Russian language, the teacher corrected it to “A”, explaining that we make the hairs equal. I used Ozhegov’s dictionary, it says “to equalize”, and the phrase “to equalize a beard” is given as an example. So what is the right way? Thank you in advance. Best regards, Ekaterina
Russian help desk response
That's right: straighten the bangs (make them more even).
My students and I had a question: does the verb “you level” form the participle “leveled”? Is this an exception to the rule?
Russian help desk response
Absolutely right. Congratulations! You have made an independent orthographic discovery.
Hello! How do you spell to trim the lawn or to level the lawn? Thank you in advance.
Russian help desk response
Hello! Please tell me, as quickly as possible, whether a comma is needed before “and” in this sentence: “The decision was made and the president gave instructions to level tariffs with the Russian average”?
Russian help desk response
Correct: The decision was made, and the president gave instructions to equalize tariffs with the Russian average. But it’s better: The decision was made, and the president gave instructions to equalize tariffs with the Russian average.
How to correctly: align text to edge or align text to edge
Russian help desk response
You level - make it even, level it - make it equal. Correct: you should align the text to the edge.
Hello! Please help me resolve the dispute. The teachers do not agree. At school the child is told one thing, at the courses – another. It seems like a simple phrase “other. listen to the bushes.” My child and I decided that since the word bushes is used in the plural, it is correct to write A, that is, “trim the bushes” (make all the bushes the same). The school teacher agreed with us. And in the courses they say that it is correct to “level the bushes” (make the bushes even). So which is correct?
Russian help desk response
The letter a is written in words related in meaning to the adjective equal 'identical'. The letter o is written in words related in meaning to the adjective equal 'smooth, straight, without unevenness'. Therefore, writing depends on the meaning. In the case of bushes, two interpretations are possible: they are made the same / they are made even, smooth, straight. Therefore, two spellings are possible. The decision in such cases is made by the author of the text.
Hello! Which is correct, “level the beds” or “level the beds”? Thank you.
Russian help desk response
Equalize - make equal, identical; place in one row in a straight line. To level - to make even, smooth. Choose the right word depending on the meaning.
Hello, dear experts. A question has arisen: marketers are writing a report on prices and want to report in it that they have adjusted prices according to the RRP. How to write correctly - we “aligned prices according to the RRP or leveled them”? I vote for the first option (in the meaning of making something equal to something, the same), but they found an article where it is written that the perfective form for equal is you equal. I understand the difference in the lexical meaning of words, but still, which is correct - with o or a? And is the ending written correctly? Can you explain please.
Russian help desk response
Make prices the same – equalize. We would like to look at the article you are talking about.
What ending are you asking about?
We'll look at how they can all be done.
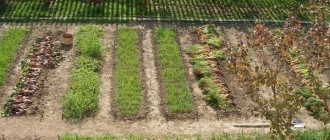
The standard beds that we are all used to seeing, the edges are made of earth without any fences. Such a bed is not deep into the ground, but does not protrude, you can choose the dimensions yourself, but the main thing is that you can easily get to any area, since many people face the problem that they do not reach the middle of the bed, so often the plants in these areas are sick. The size of the bed depends on its placement; if it is located near the fence, then it is made about 70 centimeters wide and 1.5 m long
The most common standard bed has a width of 1 meter and a length of 1.5 meters; it is also important to take into account the depth, it is 30-50 centimeters. Do not forget to take into account the paths, which should be 40-50 centimeters, this is necessary so that they are easy to walk on, the paths should be 30-50 centimeters below the surface layer of the bed
You can make a square bed, the optimal size is meter by meter. For marking, use pegs with a stretched rope, or you can use special markers.
Nowadays raised beds have become very popular; they are easy to make, but you have to try. Such beds have many advantages:
- the bed can be cultivated in a variety of places, it can even be asphalt, which is very convenient.
- the beds need to be dug up only twice, in the spring before planting, and in the fall after harvesting
- This bed is easy to assemble and disassemble
- It is much easier to care for plants in such a bed
- planting can begin earlier, this is due to the drainage that is placed in the bed and the soil warms up faster, accordingly the crop ripens earlier
- there are significantly fewer weeds in such beds, since there is not much room for them
- plants are less susceptible to autumn and spring frosts
- raised beds look beautiful and neat, they can come in a variety of sizes and shapes
For example, let's look at how to make a bed 3 meters long, 1.8 meters wide, 40 centimeters high, you can change all these parameters to whatever you want.
To cultivate such a bed we will need:
- 520 boards, it is advisable to choose wood that is less susceptible to rotting, for example oak
- special impregnation that will protect the boards from rotting
- hacksaw
- miter box
- hammer
- nails
- construction mesh
To begin with, we choose the place where our bed will be located, it needs to be in the sun for at least 5 hours a day, a place where it is not possible to cultivate a regular bed is also perfect, it can be a lawn or a rocky area. All perennial weeds must be removed from the site; if there are any, annual weeds can be left. If you place a bed on the soil, it will be good to dig it up for better moisture permeability. Finally decide on the size.
Protecting wood from moisture
The wooden box for the garden bed is treated with antiseptics before assembly. Otherwise, there will be unprotected areas at the joints that will begin to rot. You can coat wooden parts with liquid paint or impregnation - a difficult-to-wash-out antiseptic for use in harsh conditions (for structures in contact with the ground).
But there are other ways:
- The cheapest solution is used motor oil. But apart from being cheap, the product has no advantages, although it is popular. Exhaust is a concentrate of carcinogens that, when released into the ground, poison everything that grows on it.
- You can cover the boards in places of contact with organic matter with bitumen diluted to paint. However, the environmental friendliness of the method is also questionable.
- Copper sulfate simultaneously protects against rotting and harmful insects. A ready-made solution is applied to the wood, which can be bought at flower shops. The disadvantage of this method is that lumber treated with vitriol must be dried outdoors in the shade for 7 to 30 days. So, you will have to prepare in advance.
- A mixture of propolis and sunflower oil in a ratio of 1:3, respectively, is effective. But if there are a lot of boxes, the costs become significant. In addition, the mixture is flammable and wood soaked in it is a fire hazard.
- You can use the so-called “Finnish composition”. It includes: 700 g of wheat flour, 1500 g of iron sulfate and slaked lime, as well as 400 g of table salt. The flour is diluted with water to the consistency of liquid sour cream, and then, stirring constantly, the remaining ingredients are added. It is advisable to use the composition warm and apply twice.
Proper preparation of beds in the fall. Features of digging. Fertilizer application, liming
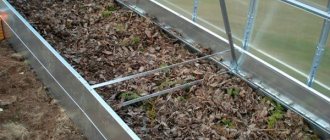
For additional protection from moisture, the inside of the box is lined with spandbond (agro-fabric). The material is attached to the walls using a furniture stapler. However, not all adherents of the organic method agree with this decision. Some argue that, on the contrary, moisture forms under the film, which does not evaporate and, as a result, only accelerates decay.
Spunbond also prevents weeds from germinating, so its use may be advisable if the “pie” has good drainage.
Wood burning as an alternative to impregnation
When making wooden beds with your own hands, you want to achieve maximum environmental friendliness at every stage. Otherwise, there is no point in gardening - it’s easier to buy vegetables and spices at the nearest supermarket. Impregnations protect wooden fencing well, but one can only guess about their safety.
Another thing is the ancient method of burning wood, which today is again gaining fans. When treated with fire, a layer of coal is formed on the surface, like a barrier preventing the penetration of living organisms: insects, bacteria and molds. Firing is best done with a gas burner for roof repairs.
A heavily burnt top layer is cleaned with a stiff brush or a Karcher. At the same time, the wood shows its texture and gets less dirty. Then the surfaces are treated with technical linseed oil or drying oil.
Drying oil creates a water-repellent barrier that prevents coal from washing out
Texture after brushing – brushing:
The box will last from 5 to 10 years if the oil layer is restored annually. You can also varnish the wood.
Basic methods
Today, there are several ways to correct a summer cottage; most often this is done using special equipment or manually. It is necessary to level the territory by determining its purpose (it can be used for construction, for decorating a garden plot, vegetable garden, or for creating landscape compositions). The nature of the unevenness also plays a huge role in choosing the leveling method (an area with a slope must be additionally covered with level earth, and swampy areas with sand). Minor unevenness can be eliminated manually by digging up the area; in winter the soil will be saturated with moisture and in the spring it can be easily leveled with a milling cutter.
Manual
In summer cottages, the area of which does not exceed 8 acres, loosening and leveling the soil is done manually. This method is considered inexpensive, since the work requires only physical strength, rakes, shovels and pitchforks.
Manual leveling consists of several stages.
- Preparation. The territory is marked and 10 to 20 cm of the top layer of soil is removed, which is poured into bags and taken to the edge of the site for temporary storage. It is worth noting that the soil cannot be stored in closed bags, as it may lose its fertility.
- Checking the horizontality of the area. To determine deviations, you need to drive pegs into the ground, pull the rope and check using a building level. All holes are filled with earth.
- Compacting the soil. It is carried out using wooden planks or a hand roller. Then the previously removed soil is poured in. If the soil is too dry, it is additionally moistened by watering it abundantly. Then you need to wait for the soil to settle, this usually takes up to 3 weeks, dig up the area and level the soil surface with a rake.
With equipment
To speed up the process of leveling large areas, agricultural implements in the form of a motor cultivator or tractor are used. The first type of equipment is characterized by its small size and affordable price (often summer residents rent walk-behind tractors while preparing their plots). Such mini-tractors are easy to operate; the operator only needs to follow the device and hold on to special levers to control the process.
The use of walk-behind tractors has one big advantage - when leveling the soil, there is no need to remove its top layer. As for the disadvantages, this technique cannot fill large holes; this must be done manually.
A tractor is most often used to level areas with large areas. This unit has steel knives that remove and move the top layer of soil. The tractor is capable of capturing large layers of soil, first leveling is carried out in one direction, then the equipment moves perpendicularly. Rocky soils are cleared with an excavator before plowing.