When landscaping the area in front of the house, one of the main things is paving. Stone paths provide convenience and a neat, finished look, and also decorate the landscape. Stone paving is beautiful and always modern. Sandstone, slate, quartzite will fit perfectly into any landscape.
The decor with such stones is unique and never repeated. Collected into a huge puzzle, they will turn ordinary paths into an original landscape.
Brief overview of the article
- Natural stone is an “eternal” material
- Advantages and disadvantages of natural stone
- Features of natural stone
- Types of stone for sidewalk paths
- Paths made of natural stone
- Granite tiles
- Paths made of sandstone layers
- Paths made of slate slabs
- Rock paths
- Pebble paths
- Framing for paths
- Fake diamond
- Photo of stone for paths
Natural stone is an “eternal” material
Using natural stone for paths is an excellent way to create a unique design, because... nature created it. Such a stone is not repeated and is always individual. Paving with natural stone is considered the most commonly used. The correct placement of the paths will help to collect all parts of the site and the rest of the decor into one single design.
Natural stone is a sought-after material because it has important properties such as frost resistance, wear resistance and durability. In snowy, frosty winters and rainy autumns, natural stone will retain its original appearance due to its durability and durability.
Inexpensive tile options for a summer cottage
A garden or dacha plot can be decorated with quite inexpensive patterns of tiles, which will delight its owner, and at the same time will not cost a lot of money.
You can use the following options for a tile path in your country house:
- Paving stones are the most durable and durable material that is very easy to lay.
- Maple leaf or clover - this type of tile will give your dacha visual aesthetics and an unusual shape.
- The wave tile gives a pattern that is pleasing to the eye, which is liked by many and is especially popular.
- Tile - coil gives an original pavement pattern.
- The scale path is very easy to lay out and will decorate any area, since this type of tile is offered in a wide range of colors.
Material of any shape makes it possible to achieve a well-groomed appearance of the site without any special investments, using different patterns that can be selected to suit any taste.
Advantages and disadvantages of natural stone
In addition to its decorative properties and frost resistance, this stone has other advantages:
- Big choice.
- Easy to install.
- Long term of use.
Natural stone has a service life of more than 300 years, and can be used in absolutely any design.
But this material has some disadvantages:
- High price.
- Heavyness. You will need transport to transport it.
- You will have to draw up a sketch of future roads in advance and provide specific calculations.
Many may be put off by the price, but it delivers on all the properties listed.
Features of natural stone
The main difference is that this resource was created by nature itself. Natural stone for paths is mined in quarries and undergoes little processing. When obtained, the environment is not polluted; such stone is environmentally friendly and safe for human health.
Natural stone is unique; in nature there are no two identical stones. Even production processing does not make it any less unique.
Over time, it practically does not change, it has no equal in stability and strength, it does not react to exposure to temperatures, does not crack from old age and does not deform.
Placemats
A sleek, simple, elegant and affordable solution that can appeal to many. Small stands are suitable for:
They can be made in any shape: square, rectangular, round and arbitrary. If you wish, you can turn making coasters into a fun activity for children, doing something useful with them and having a great time with your family. And also, this is a great chance to make something unique, inimitable, and beautiful with your own hands.
Mosaic hot pot stand
Types of stone for sidewalk paths
The form of stone for paths is flat slabs and blocks. Using mechanical processing, this material can be used to make tiles, sawn stone or paving stones.
There are various types of natural stone.
Sandstone. In addition to frost resistance and strength, it has a rough surface, which makes it non-slip when it rains.
Slate. Very durable to mechanical stress and resistant to abrasion.
Quartzite. Very durable material, stronger even than slate.
Shungite. Has low water absorption and high strength.
Granite. The best stone for paving. Very durable and beautiful. It is used in the form of chipped, sawn paving stones.
Basalt. It has chemical resistance and high strength.
Any natural stone for paths in a country house will always be modern, unique, wear-resistant, versatile, and resistant to temperature changes and chemicals. Its origin is a guarantee of safety for humans. It will harmonize with any landscape, does not require special care and will retain its properties throughout the entire period of use.
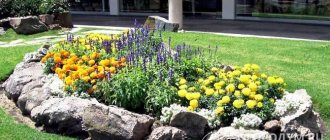
Which tile is suitable for a flower bed
You can make a beautiful flowerbed in your garden using tiles or paving slabs. Glossy ceramics are good to use as a facing material. You can create any patterns from its fragments; the mosaic design will look impressive.
Ceramic tiles can be used in any format as decor for a flower garden; they are good for laying out patterns
Curly elements of paving slabs are good for making fences for flower beds in the garden. Their use will be especially original if the territory of the personal plot is made of a similar material.
Granite tiles
Granite is one of the hardest paving materials. With it you can create an excellent alley. It is naturally very special, with shades ranging from pink to gray to black.
It is permissible to make paths from both treated and untreated stone. You can lay it in a checkerboard pattern, or in the form of a Christmas tree or an arc.
To develop a “antique” design, it is better to use chipped paving stones, to create a smooth surface - sawn paving stones, and for paths - chipped-sawn paving stones.
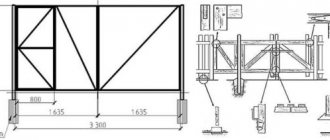
Laying methods
Installation of garden paths is possible in different ways. The choice of technology depends on the type of material and project features.
Laying scheme Source cosmetican.ru
The most commonly used methods are:
- Paving paths with natural stone without the use of cement mixture . This option is optimal if the surface will not experience serious loads: you can walk along the path, but you won’t be able to park a car on it, since the surface will be deformed and sunk into the ground.
- Paving with the creation of a concrete base . This is the most common option; the strength of the path depends on the thickness of the concrete.
- Installation with construction adhesive . This option is usually used to lay flagstones or crushed paving stones. It is important that there are no visible defects on the fragments, otherwise the appearance will be sloppy.
- Laying pebble surface with cementing . The base will ensure a smooth surface and eliminate pattern deformation if the coating has an original combination of colors (for example, mosaic).
For a pebble path with an ornament, you definitely need a cement base. Source pinterest.com
Paths made of sandstone layers
Treated sandstone is an ideal flat stone for alleys and paths.
The color range of this stone is varied, mostly light shades, but there are burgundy, white and other colors.
Appearance, density, texture are directly dependent on the content of its constituent elements. Such paths will look natural. This stone will not absorb moisture and is rough.
What to make from the remains of whole and broken tiles
The renovation is completed, but the tiles remain?
We extract maximum beauty and benefit from it After the house has been renovated, many materials purchased with reserve remain unnecessary. Tiles are no exception. Of course, if there is very little left, it is better to store it just in case: the tiles already laid may break, then it will be nice to have an ideal replacement on hand.
If there are a lot of tiles left, but the store won’t accept them back, or several generations have accumulated, you’ll want to put them to use. Here are some ideas for using leftover tiles:
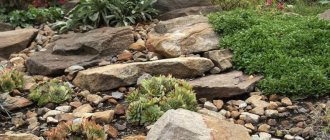
Pebble paths
You can pave an alley of pebbles with your own hands. The bulk surface is the easiest to make. Pebbles can be sea or river, but for the sidewalk it is better to choose a less smooth surface.
The advantage of such an alley is the ability to create patterns of any complexity, strength and stability. The disadvantage is that it tends to disintegrate over time. To prevent this from happening, it is better to mix it with crushed stone.
What to consider when designing
We want to start step-by-step instructions for laying paving slabs with your own hands by creating a project. This is a really important stage. A correctly drawn up project will help you correctly calculate the required amount of materials, find the correct trajectory for the location of a path or platform, and choose an installation technology so that it will last for many years.
If you are designing a path, it is important to lay out a trajectory: this is done along the most “passable” sections. The location for the site is selected in accordance with the site plan. It is important that there are as few “dangerous” objects as possible on the path of the path or near the site (ideally, there should be none at all). Underground communications are considered potentially dangerous. If they are to be laid or repaired, all work must be completed before paving begins.
Close proximity of bushes or trees, especially large ones, is undesirable. Their root system will grow over time and begin to destroy the base of the structure. Therefore, young trees or seedlings need to be transplanted further away. Old trees may need to be removed. If you decide to leave them, build a new path or place the site at a distance of at least 3 m.
After selecting the installation site, the type and condition of the soil are assessed. If it is a relatively flat surface with normal load-bearing capacity, no additional work will have to be carried out. Loam, gravel or sandy loam are good bases. Silty or clayey soil will have to be additionally reinforced with a concrete base. Difficulties will also arise during construction on difficult terrain. Here it will be necessary to arrange flat terraces on which fragments of the path will be located.
Next, determine the size and shape of the paths or platforms. An important parameter is width. There are no strict requirements here, but if you are making a path from paving slabs with your own hands, it is important that it is comfortable for two pedestrians to walk on it and for them to pass easily. The average width is 100-120 cm. The width of the platform is determined depending on the purpose. Well, if it is a multiple of the width of the tile, then the amount of trimming will be significantly reduced.
Another important point is the arrangement of water drainage. Without it, rain and melt water will flow into the cracks between the elements, penetrate into the base and destroy it. Therefore, it is necessary to provide for a longitudinal or transverse slope of the structure. It should not be large: for longitudinal, 3-4˚ is enough, for transverse - 1-2˚. Small gaps can be provided to allow liquid to drain away.
Instagram domozmsk
Pixabay
- Landscape
How to make concrete paths at your dacha with your own hands
Framing for paths
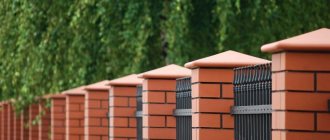
The final part of the path design is creating the curb. It strengthens the edges of the path and creates a finished effect. Granite, marble, and limestone are suitable as curb stones for paths. The border will protect the path from grass sprouting and destruction.
How to lay paving slabs on sand with your own hands
Let us examine in detail the technology for installing cladding on a sand base using the example of arranging a path.
Site marking
Straight lines are marked using pegs with cords stretched between them. They start from any edge, be sure to check the plan constructed in advance. The length of the fragment is measured with a tape measure, and pegs are installed every three to five meters. The width of the path is planned taking into account the thickness of two curbs plus five to ten centimeters for their installation.
After installing the pegs, check the accuracy of their position. On rectangular fragments of the trail, the lengths of the diagonals are measured. They must match exactly.
Then strings are pulled between the stakes, which will mark the contours of the future structure. They are transferred to the ground. The contour can be drawn with a sharp tool or indicated with a sprinkle: chalk powder, lime, etc.
Instagram tanya_landscape
Instagram suvjul
Preparing the base
The quality of installation and the service life of the cladding depend on the preparation of the base. First of all, you need to completely remove the fertile layer of soil. If this is not done, the organic matter will rot and the base will sag, and this is undesirable. All plants and parts of their rhizomes are also removed. Otherwise, they will sprout from under the laid decor and destroy it.
The depth of the resulting trench is usually about 30-40 cm. It is important to make a slope to remove moisture.
The easiest way to level the base is with a regular rake. After this, the earth is compacted. You can lightly moisten the soil to make it easier to compact. The bottom should be level, but with a slight slope.
Instagram miladyknit
Instagram miladyknit
- Landscape
How to make a path from wood cuts with your own hands
Installation of curbs
The technology for laying paving slabs requires the mandatory installation of curb stones. They serve as support for the edges of the structure and prevent it from “creeping” due to swelling of the soil. Curbs are fixed to concrete mortar. The work is performed in the following sequence.
- Preparing seats for curb stones. To do this, small trenches are dug along the edges of the prepared pit. Their depth should be 7-10 cm, width - 3-5 cm more than the width of the curb.
- Mix a concrete mixture of cement, sand and crushed stone. Proportions - 1:3:2. Add enough water to form a thick solution.
- They start by pouring liquid concrete in small portions into the prepared holes. It is distributed over the base, a stone is placed, aligned with a stretched cord, and the part is hammered down with a rubber mallet.
- All curbs are installed in the same way.
After installing all the elements, you need to give the solution a day or a little more for initial hardening.
Fake diamond
A good replacement for natural stone is artificial stone for paths. It consists of high-quality Portland cement, ceramic chips, perlite, pumice, quartz sand and various additives.
At the same time, the stone for garden paths can be very diverse, so the paths can also be different - curved, with rounded edges. They can imitate any surface - brick, cut wood, diamonds, squares or paving stones.
The colors of artificial stone are also varied - from imitation of natural stone to the colors of fantastic stones not found in nature. You can look for tiles with a color that perfectly matches your landscape.
This material is often used when decorating paths near the house. It is easier to lay paths made of artificial material than from natural stone, because it has to be selected according to its shape.
The advantage of artificial materials is their low cost. Another option is possible - using natural and artificial stone together. There are a great many varieties to create, for example, adding decorative elements to a sidewalk made of unremarkable slate. Everyone can do something different.
What materials and tools are needed
Before you start laying paving slabs with your own hands, you need to prepare. Calculate the required amount of materials in accordance with the prepared plan. First, choose the cladding. It can be of different sizes and shapes. The easiest way is to lay quadrangular elements: in a line, herringbone, diagonally. Combinations of “bricks” and “squares” look good.
Particular attention should be paid to the thickness of the tiles. It’s better not to choose the thinnest one at 20 mm. It's too fragile. For pedestrian paths, elements with a height of 40 mm are suitable; for areas where cars will pass or park, choose elements with a thickness of at least 60 mm.
After the cladding is selected, curbs are selected. They should be in harmony with the decor. Concrete stone is a popular choice, but plastic pieces may also be available. Their number is calculated by multiplying the length of the path by two. Then divide the resulting number by the length of the border element.
In addition, you will need crushed stone, sand and cement. They are used to create the basis for installing the cladding. Geotextiles are also needed for laying drainage.
From the tools you need to prepare a rubber mallet, a rammer, usually a cord with pegs, a building level, a rake and a shovel. If trimming is intended, an angle grinder with a diamond disc is additionally prepared for cutting parts.
- Decoration Materials
How to beautifully lay paving slabs: drawings and popular patterns