Pebbles - smooth round pebbles polished by the sea - are a very popular material for garden decoration today. It looks attractive and aesthetically pleasing both as a material for a garden path or patio, and as a decoration or the main material for a fence. Some owners of private houses pave entire yards with pebbles, creating a strong, durable, beautiful coating. By selecting stones by color, shape, size, and skillfully combining them, you can create amazing patterns. What can you build from pebbles in your garden? Let's look at a few simple examples.
- 2 Example #2 – flower pot trimmed with pebbles
- 3 Example #3 – “pebble” rugs
- 4 Example #4 – a basket of sea stones
- 5 Example #5 – pebble path
5.1 Free-fill path
- 5.2 Path with fixed stones
Example #1 – decorative pyramid
The pyramid is very easy to make; this design can be placed in a flowerpot, flower pot, or you can make several pieces for a flower bed.
You will need pebbles, the size of which gradually decreases, like the rings in a children's pyramid, as well as glue. A smaller stone is glued to the largest flat stone, which will be the base of the pyramid, the glue should dry, after which you can move on to the next stone, etc.
For the base, a wide flat stone is taken and dug into the ground so that the pyramid is stable. Top stones may be pointed and irregular in shape
The pyramid is dug with its base into a pot or into the soil of a flower bed; it looks very original.
A pyramid of pebbles is an original garden decor that will attract attention. This design looks very unique and organic among green plants.
Screed and border
The next step, which allows you to make garden paths from pebbles yourself, is laying the border. It can be purchased ready-made, or made independently. The second option will save money, but will force you to work hard.
To begin with, formwork is assembled from boards in the shape of the future border. Then the required amount of solution is poured into the formwork, consisting of one part cement, one part crushed stone and two parts sand. It must be made sufficiently fluid; the product must be dried in the shade, periodically moistening with water. To avoid sticking, it is necessary to use sand that does not contain clay and stones, and disassemble the mold only after the border has completely dried.
The finished border is installed along the edges of the trench, leveled using a level and string stretched over pegs. After leveling it, the next stage of preparing the paving of garden paths begins - pouring the concrete base.
If possible, it is better to prepare the solution at one time - it will turn out to be the same consistency and will dry at the same time. To do this, usually take 1 part cement to 3 parts sand. The consistency of the solution should be similar to batter. After casting, the cement layer must dry.
Next, mix another portion of the solution, keeping the same proportions of cement and sand. But the consistency should be made liquid enough so that it can flow. They need to level the level of the substrate so that the height of the garden paths is the same everywhere. The layer should not be too large.
Example #2 – flower pot trimmed with pebbles
In order to “cover” a flower pot with pebbles, it is convenient to use cement mortar. Select pebbles of approximately the same size and lay them edgewise. Small stones can also be attached with a base. The cement layer can be painted, or the pebbles themselves can be painted in one or more colors - it’s up to you. A large flat boulder, if you can find one, will do as a base or a stand for the pot. Plants in such pots look attractive and natural.
To create this pot, pebbles of various colors, quite large, are used. To line a small pot, select small pebbles (flat or pointed). Several of these pots with green plants will help create a wonderful composition.
How to create an ornament
Patterned paths are the most beautiful. Pebbles are exactly the material from which magnificent ornaments are easily obtained.
- First you need to make a template of the ornament according to the sketch.
- Before paving begins, this template is laid on top of the mortar poured into the formwork.
- Sort the stones by size, shape and color.
- Pebbles can be laid not only flat, but also edgewise.
Some craftsmen recommend creating separate fragments of the future path, and when they harden, laying them in the prepared “bed” of the path. Moreover, the bottom of the “channel” is covered with sand and compacted tightly.
See even more examples in the video:
Example #3 – “pebble” rugs
Laying a path out of sea stones is quite a complicated task, but making a rug out of them is simple and looks great. You will need flat stones of approximately the same size, glue, carpet (preferably thin), and a knife.
First you need to place the stones on the carpet without glue to create a flat surface, then you can start gluing each individual stone
Select stones of the same thickness from your collection to make stepping on the rug comfortable. Then you need to cut a piece of carpet of the required size (you can also use an old carpet or runner). We place stones on the fabric, laying them out so that the coating is smooth and harmonious. Silicone glue is used for gluing. Glue is applied to each stone, and then the stone is placed in the designated place.
The necessary ingredients to create a rug: carpet, glue, knife and flat pebbles. This rug can be used in the garden, at the entrance to the house, and in the interior. You can make stands for garden services in the same way.
When the glue dries, the mat is ready. It can be placed at the entrance to the gazebo, near the bench. If you want to place it in the yard, you can use a rubber mat as a base and glue on the rubber. Such a pebble mat will not be afraid of water. By showing your imagination, you can create a real masterpiece using paints, stones of different colors, and laying out patterns.
Stones can be decorated with painting. Ideas and secrets of technology:
To create this rug, pebbles of the same size and a wide variety of natural shades were used. You can try to lay out a simple geometric pattern using larger or smaller pebbles, it can be painted - working with sea pebbles is doubly pleasant, because... you can create whatever you like
Pros and cons of this solution
The main advantage of this solution is that even a beginner in the construction business can make a path or path out of stones in the country. You don't need expensive equipment. A shovel, a primitive tamper, a rubber hammer and a grinder are sufficient for cutting stones. Even a concrete mixer is practically not needed; the small volume of concrete can be done manually. In addition, you can lay stone on paths without concrete, just on sand or a cement-sand mixture.
If we talk about the cost of the material, then residents of regions in which they can use the available free stone of various types are in an advantageous position. The only thing needed is transportation to get it home. And if we are talking about purchasing, then you can choose materials in different price categories, taking into account your financial capabilities and your own design taste.
In addition, laying stone on paths also has additional advantages:
- Simple technology for preparing the base and laying it.
- High resistance of the material to humidity and low temperatures.
- Significant service life if installation technology is followed.
- Excellent appearance and the ability to implement various landscape design ideas.
If you put in some effort, such a path will look much better than the usual concrete ones.
Example #4 – a basket of sea stones
To create a decorative pebble basket you will need the following tools: two small plastic pots of the same size, scissors, a sheet of plywood (10 mm thick), a pencil, a jigsaw, transparent film, a hammer, several nails, frost- and moisture-resistant cement glue, small flat pebbles (approx. 200 pieces, length – 3-4 cm), wire cutters, spatula, brush, wire mesh.
So, let's get to work. First, cut off the rim (2.5 cm wide) from the top of one of the pots. We compress the rim so that we get an oval, apply it to a piece of plywood, and trace the outline. Then we cut out the resulting figure on plywood with a jigsaw. The rim is placed on a plywood oval and attached to it with nails along the edges of the plywood. This is a template for creating the base of the basket.
The base is laid out with film, its edges should protrude on the sides. The form is filled with a layer of cement mortar 10-12 mm thick. The wire mesh is adjusted to the size of the mold and pressed into the cement. The basket is a garden decoration, you will probably want to plant some flowers in it, so you need to make holes in the base for drainage.
Cement glue is applied to the flat side of the stones and they are glued to the base. Once you have glued all the stones to the base, leave it to cure overnight. After drying, the plastic rim must be removed and the finished base separated from the plywood. Turn it over and remove the film.
The picture reflects the first 4 stages of work: create a template for the bottom, fill it with cement, use mesh and film and start laying stones
Now let’s start “laying the walls” of the basket. Apply glue to the stones and lay out the first row along the edge of the base. The remaining rows are laid out in exactly the same way, only with greater coverage, otherwise the walls of the basket will not be inclined, but straight.
After you have made five rows of masonry, let the glue dry for half an hour; to be sure, you can prop up doubtful places with a mug. Excess cement should be cleaned off before hardening. To remove, you can use a narrow spatula or a modeling tool, and clean the surface of the stone with a brush.
The base is ready, now let's start creating the “masonry”, to lay out the last row you can use round pebbles, as in this case, or select pointed ones
Then another 2-3 rows of pebbles are laid out, the last row, in order to give the product originality, can be laid out with round pebbles. After finishing the laying, leave the basket to harden for a couple of hours.
Recent Entries
Lilac perennials that are beautiful, compact and do not crowd out other plants Why when buying seedlings you should not take the sellers’ word for it and how to determine the age of the plant using 3 signs Tomato seedlings have turned purple or whitish: why the color has changed and how to save the plants
Now you need to make a handle. We cut a rim from another plastic pot and pass it through the center of the product, the handle should protrude above the top edge of the basket. The handle is laid out with flat stones edgewise; use more mortar to create the handle. Place the stones on both sides at the same time, the last one should be in the middle. Dry the solution and remove any excess. After a few hours, when the solution becomes solid, carefully remove the plastic rim and clean the bottom of the handle.
You can even use trash to decorate your summer cottage. How exactly:
A basket of pebbles will look great on the terrace, at the entrance to the gazebo, or in any other corner of the garden. If you won’t surprise anyone with vases and pots, such a small form will inevitably attract attention
Please note that it is better not to take the basket by the handle - in any case, this part of the product will be the most fragile.
Description of material
Pebbles have become widespread among designers and ordinary summer residents due to their originality, inexhaustibility, and diversity. Pebbles were first used in Ancient China; it was then that the custom of placing round stones in the garden arose. This was explained by the fact that these stones symbolize the masculine and feminine principles and their fusion.
It is worth noting that pebble paths are also good for health. The massage that the feet receive when walking this way has a restorative effect not only on the feet, but also on the entire body.
Pebbles are convenient because they provide the opportunity to lay out various patterns and ornaments. For a true master, this opportunity opens up horizons for creating a new type of art, which landscape masters around the world have taken advantage of.
In addition to visual beauty and the personification of masculine and feminine principles, pebbles have won the hearts of people with their practicality and durability. Paths made from such material will fit perfectly and perfectly complement any dacha composition.
Example #5 – pebble path
A pebble path can be of two types: with a free embankment and with fixed stones.
Path with free embankment
The first option is much easier to do, but it doesn’t look as impressive. To create it, you will need pegs, plastic path limiters, a rake, a shovel, landscaping fabric, pins, pebbles, and gravel.
So let's begin. On the prepared area, we mark the boundaries of the path (you can use a hose, pegs), it is convenient to make the width no more than 80-100 cm. The turf is removed along the perimeter of the path, trenches about 15 cm deep need to be dug on the sides. Area limiters for the future path should be installed in them. If the path has curves, use additional corners - they will maintain the integrity of the structure. The cheapest limiter is made of plastic, but you can also use forged, concrete, or wooden ones, which look much more attractive. After installing the curb, fill the trench and reinforce it. The surface level on both sides of the fence should be 3 cm lower.
A special fabric is placed in the recess. The corners can be secured with a stopper, in which case the curb is fixed after laying the fabric, or pressed down with flat stones. The fabric will protect the path from weeds. The resulting base of the path is filled with a mixture of gravel and small pebbles and leveled with a shovel or rake. If you need to add stones here and there, do so. Water the path with a hose - the gravel will become cleaner and the embankment will settle a little and level out.
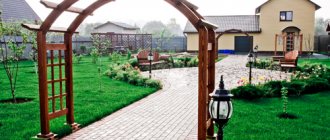
Creating such a path is quite simple, and if you decorate it in any of the described ways, the garden will look modern and attractive
The path is ready. To make it look more attractive, you can install solar lights along the edges, plant flowers, make a lawn - at your discretion. Caring for such a path is simple - you will need to remove weeds and debris from time to time.
Preparatory work
Proper preparation of the site is the key to quick and high-quality paving of the path. The first stage of work on the construction of the path is marking. To perform it, you need to use an angle, a tape measure, a level, and you need to mark the contours with pegs with a string stretched between them. You should not get carried away with too complex forms, otherwise the paving process will be difficult. It is also worth remembering the minimum width - it should be at least half a meter.
Next, a layer of soil 10-15 centimeters deep is removed. If very large stones are used, it is necessary to deepen the trench to 20 centimeters. The bottom must be compacted and covered with a layer of pre-sifted sand. The sand also needs to be compacted thoroughly.
Crushed stone is laid out on the sand. It is necessary to select the thickness of the substrate layer in this way. In order for the trench to be more than half filled, a third of the space must remain free. It is better to use small crushed stone - it is compacted faster and more thoroughly than large ones.
This stage of paving is very important, despite its apparent simplicity. The rubble is necessary to ensure that the soil under the path does not sag over time. Therefore, how long your pebble garden path will last depends on the thoroughness of this work and the quality of materials. The best option would be to use a special vibrating machine, thanks to which the substrate will quickly and significantly compact. If it is not possible to use such a technique, you should wait a few days, periodically compacting the bedding. For this purpose, the simplest device is suitable - a self-made wooden press, which will act on sand and stones under the weight of the builder’s body.