A house, as well as a plot of land, if they are fenced with a temporary fence, sooner or later must be protected by more reliable fence structures. To do this, you first need to carefully develop a fence design. It can be done independently or with the help of professionals. Here you need to focus on your financial capabilities, as well as knowledge and skills, if we are talking about a complex project.
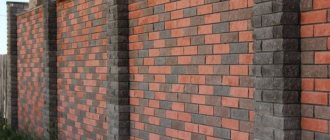
Brick fence
Selection of pipes for supports and cross members
If you approach the design of a fence “by science,” then it is necessary to conduct geological surveys to determine the load-bearing properties of the soil, select the type of foundation (pile or monolithic) and calculate its parameters, depending on the weight of the structure and wind loads.
In principle, such calculations exist, including for a fence made of a metal profile. And since the height and width of the span in each case are not fundamentally different, there are clear recommendations on the sizes of profiles for pillars and veins. Moreover, the correctness of these dimensions has been confirmed by many years of operation of existing fences made of corrugated sheets.
If you look at what is offered on the building materials market, factory poles have a wall thickness of 2 mm and a square profile with dimensions of 50x50 or 60x60 mm, and are made of a round pipe with the same cross-sectional area. But their length does not always correspond to the load-bearing characteristics of the soil on the site. Therefore, when you need to order the production of pillars with an “individual” length, you can focus on these section dimensions.
The use of square and rectangular profiles allows you to assemble an iron fence without welding Source ecomaterial.by
A rectangular profile with dimensions 40x20 mm and a wall thickness of 2 mm is used as crossbars. How many there will be, two or three, is decided depending on the height of the fence.
Bottom line
As you can see, installing a corrugated fence with your own hands is not such a difficult task. The main thing is to approach it responsibly and plan everything in advance. In order to calculate the required amount of building materials and avoid possible mistakes, we recommend drawing up a sketch of the future fence. Draw on the plan the exact dimensions of the site, take into account the terrain, mark where the support pillars, wicket or gate will be located. This will help you determine the length and width of the sheets, their number, and also understand the need to trim the material. In addition to this, you can use the fence calculator.
Use high-quality materials and fasteners, and your fence will last you a long time!
The categories mentioned in the article are:
Profiled sheet
fence frame
What should be the length of the pillar
The length of the pillar is equal to the sum of the above-ground and underground parts.
The overhead part depends on the span design. There are three options:
- the pillar rises above the span;
- the pillar ends at the level of the upper border of the corrugated sheet;
- the post is 10-30 cm lower than the height of the fence.
The size of the underground part is determined by the properties of the soil:
- for heaving - the depth of the heel of the pillar should be 20 cm below the frost line;
- for loose – at least ½ the height of the fence;
- for dense – at least 1/3 of the height of the fence.
Formation of the fence plane
It is most convenient to assemble the sections on a flat surface and attach them ready-made to the racks.
But then you need to carefully check everything so that the pickets are positioned strictly vertically.
If in doubt, it is better to first nail the veins to the posts and then nail the pickets to them, controlling their position with a plumb line.
To prevent the lower edge of the picket fence from becoming limp during mud, it should be approximately 10 cm from the ground.
To prevent small animals from slipping into the gap under the fence, it can be blocked with bricks.
To fix the sections on a wooden stand more securely, it is necessary to make cuttings on the front side of the latter for each vein. The depth of the cutting should be such that the vein enters it by half its width or more. Having installed the section in these grooves, all that remains is to nail it to the posts.
When making cuts, for example, under the upper veins, you need to ensure that they all lie on the same horizontal straight line.
Drawing of a fence with your own hands at the dacha
After assembly, the fence is painted. It is not advisable to paint the entire thickness of the paint with colored paint, since it is an expensive material. It is better to apply a layer of cheaper primer first.
A fence whose pickets are painted in different colors looks very interesting - it gives the impression of a picket fence made of colored pencils. Another option: you can paint the planks white and black, so that the fence looks like a piano keyboard.
To make the section look more impressive, it can be decorated with round “nickels” cut from a log.
Pole installation methods
A fence post performs two functions simultaneously. The above-ground part of the support pipe is a load-bearing element of the span structure, and the underground part is part of the foundation. And since the pipe is essentially a pile, the installation methods are the same:
- Driven . Due to high wind loads on a solid fence, this method is rarely used and only for dense soils. A collapsible design is often used, when only the underground part with the head is driven in, to which a profile pipe is attached.
This is what a collapsible support with a driven underground part looks like Source orgtorg.org
- Screw . This is a standard technology for installing a lightweight screw pile (with a smaller blade diameter). As in the previous method, there is a variant of a collapsible design.
Screw support for a fence made of two types of profile Source tr.skopelitissa.com
See also: Catalog of companies that specialize in the construction of fences and fences.
- With partial or complete concreting of the underground part . This is the most common method, the technology of which does not dictate which pipes to use for a metal profile fence - there are no shock or torque loads for a solid pipe and there is no “link” to the type of head for a collapsible support.
A simple and reliable way to install supports for light fences Source vdom.cn.ua
- Combined . Used for soils with weak load-bearing properties. The pipe is dug to the calculated depth, and “tied” on top with a monolithic shallow foundation. This type of base is also used for combined fences, in which a pillar of brick or stone is laid around the pipe.
A strip foundation for a fence can withstand severe wind loads in open space. Source analytspectr.ru
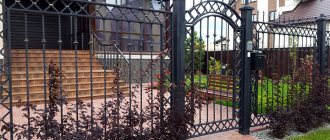
Types of fencing for cottages and private houses
It is worth noting that the choice in favor of one fence or another should be made when there is a clear picture of the entire site: landscape design, the facade of a house or cottage. The fence should fit harmoniously into the exterior of the local area.
Variety of models
There are several types of fencing for homes:
- solid;
- made using a picket fence (subspecies - checkerboard);
- net;
- blinds;
- Christmas tree
Types of wooden fences
Solid
Fences received this name because their walls are made blank, without gaps or crevices. Such street walls can be made of boards tightly fitted to each other, metal sheets or pressed blocks based on wood shavings.
Concrete structure
Solid fences are reliable in operation, they protect against illegal entry and are quite presentable in appearance.
Along with such fences, blind sliding gates and massive gates are often placed at the entrance to the yard.
Scheme and drawing of inlaid fencing
Picket fences
A picket fence is a classic and therefore the most common option for a street wall. The design has the following stages of design and construction:
- A drawing of the fence is drawn up, done independently or via the Internet. Photos of ready-made options can be easily found there, so all that remains is to use them wisely.
- Marking the territory. Along the perimeter of the fenced area, appropriate marks (pegs) are made for installing supports, and cords are stretched along them to ensure the straightness of the future wall.
- Installation of support pillars. The supports are dug to a depth of approximately 50 cm. The holes are filled with concrete. A distance of 2 meters must be maintained between the pillars with a slight deviation in one direction or another.
- Mounting the veins to the posts. They are nailed to the pillars across the top and bottom.
- Attaching the pickets to the veins. They must be positioned strictly vertically in relation to the crossbars.
Classic picket fence
The classic picket fence has many advantages. It has a simple structure, which eliminates the need to obtain special knowledge and skills to install this structure. The picket fence is also popular because it fits well into any exterior of country houses. Picket fences can be made of various materials, and if necessary, combined with each other. The color style is also multifaceted. The fence can be of different colors, the choice depends on the preferences of the owners.
Installation diagram
Picket fences can have a subtype - checkerboard. It will be written about it below.
Preparation
If we compare it with building a house, then this stage is similar to a design project.
markings are made on the site plan - they determine where and how the fence will go, select the location for installing the wicket and gate. If the site faces two streets, then there can be two gates, and with friendly relations with neighbors, the number of gates also increases.
Then the number of supports is calculated . The width of the span is chosen to be no less than two and no more than three meters, and 2.5 m is considered optimal. But it is impossible to achieve exact dimensions, so they use the principle of proportionality so that the distance between the pillars is approximately the same.
Based on the height of the fence, the characteristics of the relief and soil (and it can differ even in a small area), the method of installing the pillars and the size of the underground part are determined.
Calculate the amount of materials : profiles for supports and crossbars, corrugated sheets and fasteners.
For reference . The amount of corrugated sheet depends on the fastening features. You can install the sheets overlapping as a continuous flooring (without gaps) or from pillar to pillar. And in both cases, it is necessary to take into account the overlap of adjacent sheets, trimming when fitting in corners, near the gate and gate.
A fence divided into sections by pillars requires a different approach than a continuous fence from corner to corner Source modernplace.ru
Fencing options depending on material
Fences can be made, as noted above, from various materials. Common materials are wood, metal, and stone. The Internet is full of photos of certain fences, which makes it possible to take a closer look at the various options and decide on your tastes and preferences.
Designer's work
Wood fencing project
This material is an environmentally friendly product. In terms of operation, wooden products are relatively practical, but require additional care in the form of constant painting or impregnation with special compounds. And here we can conclude that wood products are not durable compared, for example, to their metal counterparts.
Fence installation diagram
Separately, it is worth mentioning the wood-polymer composite, abbreviated as WPC. This material, which perfectly imitates wood, has higher quality indicators than wood. Polymers ensure greater safety of wooden boards, increase their strength, wear resistance, and resistance to weathering.
Country house fence
One of the downsides is that WPC is not resistant to mechanical damage. Even small impacts, such as careless removal of construction materials, can leave significant scratches on it.
Installation stages
Installation of an iron fence from a profile differs only in the way the supports are installed.
If the pillars are installed without concreting, then first you need to drill holes in the ground for them with a diameter smaller than the cross-section of the pipe or the underground part of the support when it is collapsible. Then, maintaining a vertical level, pillars are driven or screwed into these holes.
Installing screw piles using technology significantly speeds up the installation of the fence Source moyaograda.ru
If the pillars are installed with partial or complete concreting, then dig a hole or drill holes with a cross-sectional area larger than that of the pipe. The size depends on the load-bearing properties of the soil and the loads that the fence puts on it. For loose soils, formwork is made (for example, from an asbestos-cement pipe), for dense soils, concrete is poured directly into the hole.
The arrangement of a combined type of foundation takes place in several stages:
- dig a trench;
- drill or dig holes for posts;
- install formwork and reinforcing frame;
- install poles;
- concrete is poured.
After installing the pillars (and the concrete has matured), the crossbars are mounted using welding or fastening with self-tapping screws.
Then the entire supporting structure is cleaned of dirt, primed and painted. After which they begin to install the corrugated sheet.
Finishing operations
Prices for popular brands of portable welding machines
Portable welding machine
All that remains is to weld the horizontal elements, make a gate and sew up the fence with profiled sheets.
Attaching the top crossbars
Welding horizontal elements
Fence frame and outer gate frame
Wicket door frame made
The so-called horizontal cross members are made from a 25x30 mm pipe; weld them flush with the surface of the intermediate supports, the distance between them is approximately 150 mm. Use a bubble level and test threads. To hold the profiles in the desired position, you can make a device; it is fixed at the end of the column, and special plates hold the pipe in the desired position.
Sheet holding device
Clean metal surfaces from dirt and rust, prime them and cover them with paints for external use. Make a gate and screw the metal profile sheets. Sheets can also be held with a device; the principle of its manufacture is no different from the first, only the height of fixation of the holding shelf changes.
Checking Sheet Position
Marking for fasteners
Fixing sheets after 1 wave
Prices for popular drill models
Drill
The fence is sewn with corrugated sheets
Fence with a gate after covering with corrugated board
Corrugated fence
One of the most common options. The undeniable advantage of this option is the low cost of the material.
To give the structure the necessary rigidity and stability, it is necessary to properly prepare the base for the fence.
Precautionary measures
Work with corrugated sheets must be carried out with gloves, because... its edges are very sharp. When cutting raw materials, protect your eyes with glasses to protect them from the smallest particles of material.
When priming, even in open space, it is advisable to wear a respirator.
Metal frame project
The frame is mounted using welding. The strength of the entire structure depends on the quality of work. If the total height is more than two meters, then two rows of joists must be installed. The total estimate must include the cost of priming the frame and anti-corrosion painting.
The corrugated sheeting is attached last. The finished sheets are attached to the metal frame using self-tapping screws. Craftsmen recommend choosing fasteners to match the profile, so the fence will look monolithic.
With your own hands
When it comes to finances, it is worth noting that it is better to build a fence around your site yourself. You do not need any special skills or experience for this job.
It is enough to have the desire and detailed instructions for installing the fence. Finding a step-by-step guide is not difficult. Professional craftsmen willingly share detailed recommendations on their websites.
It is extremely irrational to involve representatives of construction companies in this work. The cost of installing a fence may be higher than the cost of the purchased material!
Foundation project
If you plan to install brick columns, a reinforced concrete strip foundation is suitable. The monolithic structure looks more solid and protects the yard from street rainwater and animals entering the site.
If the site area has significant differences, it is more rational to design a stepped foundation structure. Level differences of more than 0.5 meters will lead to significant consumption of building materials. In addition, in some places the foundation will be very high, and it will be impossible to install corrugated sheets on it.
When designing the foundation, remember that its height should not be lower than 10 centimeters above ground level. This is required so that during rain, dirt and water do not accumulate on the top of the base.
You can design a layer of different thickness - a thick foundation under the column, a narrow foundation under the profiled sheets. Thanks to this, you can also save on materials, concrete and earthworks.
Important : The instructions stipulate that the foundation is laid at a level not less than the depth of soil freezing. This will ensure reliable fastening and long service life of the entire structure. The advice concerns places with increased load (gates, wickets). In less critical places, the depth of laying the foundation in the ground can be reduced.