Review author: Terrari School of Design
Topiary is the art of growing trees and shrubs in the form of living sculptures: cubes, spheres, obelisks, animal figures or combinations thereof.
Topiary pieces are great for adding architectural style and clean lines to your garden, are also a great way to introduce children to gardening, and are a great gift for anyone looking for a new relaxing and rewarding pastime.
Photos of topiary with interesting shapes have become increasingly common on the Internet in the last few years. But the history of topiary is much longer: it dates back to the times of Ancient Rome and Egypt. The practice was later revived in Europe during the Italian Renaissance and then became popular in seventeenth-century England.
A few words about art
Art translated from Latin “topiaria” means gardener or gardener.
At first, bushes and ornamental trees were trimmed in the shape of geometric shapes, then gradually they began to create designer designs. After a while they became curly and unusual. Today, shrubs are often created in the form of wild animals and human silhouettes.
Topiary received a big leap in development during the Renaissance. From that moment on, interesting figures not only complemented the yard, but also began to be actively used to form a whole range of green garden systems.
Beautiful topiary figure in the shape of a giraffe Source murmansk1.sletat.ru3
A distinctive feature of the landscape direction is the implementation of not only strict geometric figures, but also more serious structures. Topiary developed very actively in Versailles. This design solution was used a little less in large cities in Holland.
The art was also present in the Netherlands, after which it entered England, where it continues to be used today.
Definition of topiary
Historically, topiary developed as the art of trimming trees to give them certain decorative shapes.
This art’s traditions go back to Ancient Egypt. And the peak of popularity came in the 17th century.
By the way, Peter I was also fond of pretty plantings, and quite a lot of money from the treasury was spent on training Russian topiary masters.
Today, this style is being revived again and is becoming more and more in demand.
What are topiary figures made of?
Landscape figures are made from artificial and live grass.
- Artificial grass models have a metal or wire frame as a base. They are easy to care for and the structures always remain green and neat. There is no need for regular haircuts.
- Figures made from living grass. For these products, different varieties of vines, decorative conifers and climbing crops are used. Each of the structures requires individual care and certain conditions for growth.
Often topiaries made from artificial materials are placed in shopping centers, parks, and large courtyard areas.
Bear made of grass in a landscape on a metal frame in the yard Source zgorod-nn.ru
Candy topiary
This is a great way to surprise a work colleague or relative. Such a bouquet will definitely be remembered for a long time and will appear on all social networks of the birthday boy. Make the craft according to the following instructions:
- It is necessary to take any of the bases proposed above.
- Be especially careful when choosing a treat; regular long caramels are not suitable. It is necessary to take chocolate ones, decorated in a bright wrapper, preferably triangular in shape.
- Next, each candy is coated with hot glue on the bottom and placed on the base.
A beautiful pot is also used as a structure holder. Candy is heavy, so you need to fill the pot with something heavy, such as stones or sand, in advance.
What plants are used to make
To come up with a beautiful landscape object in the topiary style, you need to decide which plants are most suitable for this purpose. They must meet the following list of conditions:
- be frost-resistant;
- not demanding on growing conditions (light, soil fertility and acidity);
- capable of replacing shoots;
- have a specific crown shape (it is selected depending on what design should be made);
- characterized by slow growth.
Various 3D shapes can be created using plants that meet other requirements as a base. But, you need to be prepared to regularly care for and trim them. Otherwise, the product will be permanently deformed.
Topiary figure in the shape of a mushroom near a gazebo in a private courtyard Source zgorod-nn.ru
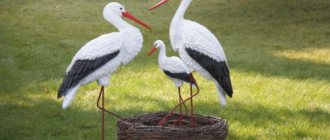
Examples of figures for the garden in the shape of animals and birds
Creating a circle, square and other geometric shapes is much easier than creating birds or animals.
When choosing topiary for the garden, the most popular are:
- Deer. The noble animal can often be found in private gardens. The deer is made in green and white versions. Usually backlighting is added for effect.
- Peacock. To make the bird look more impressive, a multi-colored lawn is planted. Peacock topiary takes longer to make than other birds and animals, because the tail requires special installation.
- Dolphin. The dolphin figurine looks great in green. This topiary is easier to make due to its simple frame and the absence of small elements. A shark and a whale will also be easy to make, but you will have to tinker with the tail of a goldfish.
- Wolf, dog, cat, fox. Making figurines of these animals requires patience, because you will need to work on the figure itself, starting from the muzzle and ending with the tail. All paws must be covered with “fur” so that there are no loopholes left for insects.
Making a topiary figure based on a finished frame
Wire 2-3 mm thick for the frame can be bought at a garden store. Next we proceed like this:
- Prepare the material for decorating the frame: wet moss or any other substrate. Leave it in the moisture for 30 minutes.
- Fill each hole with the composition, provide places where you can then plant small climbing plants.
- Distribute the climbing crops evenly along the frame and secure them with special clips.
- In case the figure turns out to be too weighty, add pieces of polystyrene foam to the solution while the substrate is soaking, having first placed them in bags. This will make the structure easier after drying.
- Wait for the mold to dry and complete formation. After this, continue to care in accordance with the requirements for the selected plants.
During the frost period, it is better to bring the finished figure indoors. If the figure is heavy and transporting it is problematic, it is necessary to prepare a wooden box, insulate it on the inside with straw and polystyrene foam, and then cover the topiary figure with this structure.
Wire frame for landscape topiary figures Source gardenia23.ru
Felt topiary
A large number of toys and useful household items are made from this material. Therefore, if there is some free felt left in the house, you can make a cute gift in a pot. Peculiarities:
- Flowers play a key role. Making them is not so easy, since the felt is not so voluminous. The equipment can be found in the public domain.
- Each flower should be attached to a round base using hot glue. The tape will not support the weight of the material.
To make the decor item look neat and unusual, you should add a little greenery. Leaves are also cut using scissors.
Option with self-fabricated frame
You will have to make the frame yourself according to an individual scheme. Create a sketch of the future figure and decide on the amount of material.
- Take the desired length of wire with a diameter of 2-3 mm.
- Form the intended shape of the frame and securely fasten all the ends.
- Fill the frame with substrate, leaving holes for planting.
- After the frame shell has dried, place the plant with soil in the hole.
- You can leave it in a plastic container, the main thing is to provide access to watering.
- Distribute the branches of the weaving ornamental crop evenly along the contour.
To prevent the finished figure from drying out, provide it with proper irrigation. To do this, you can organize drip irrigation.
On a note! Don’t forget that to make the structure lighter, you need to add foam inside the frame.
Developing Your Form
In most cases, start shaping your plant when it is young. However, you could make a topiary out of an old, overgrown yew because yew grows densely and sprouts freely during the growing season.
Perhaps the growing plant will suggest a form that you can then develop. You can even juxtapose two plants or let one grow through the other to create, for example, a pedestal on which an animal figure sits.
In any case, topiary lends itself more to bold shapes than intricate patterns whose details are swallowed up between trims. Position the topiary so that it is well lit from all sides so that it grows over the entire surface.
Most young topiaries that are still in the formative stage require nothing more than frequent pruning or trimming of stem ends to promote dense branching.
Trimming individual stems is the preferred method for plants with large leaves, as trimming will damage individual leaves. Obviously, if the stem is sticking out in the direction you want it to grow, leave it.
How to make express topiary with your own hands
Express topiary is considered quite simple and organic. Even a person without special experience can implement it with his own hands.
- Prepare the place where the topiary figure will be installed.
- Add soil and, if necessary, fertilizer.
- Plant small-leaved climbing plants in this place: periwinkle, hops, ivy.
- Prepare a metal frame of the desired shape.
- Place it on top of the plant so that the stems grow freely.
- As the frame overgrows, trim off excess branches to form a crown.
Creating express topiary is considered the simplest of all those listed. The main thing is not to forget to timely water the decorative crops.
Express topiary figures on a finished frame Source flo.discus-club.ru
Technique #2 – espresso topiary
In an effort to further speed up the process of creating a green sculpture of complex shape, express topiary was invented. The essence of this method of forming topiary is simple - in the spring, climbing plants such as periwinkle, virgin grapes, ivy or hops, which tend to quickly form shoots, are planted in open ground.
Then, a metal mesh frame is installed on top of the planting, which serves as the basis for creating the topiary. As they grow, the branches of the plants are distributed along the frame and secured with a rope made of natural material or trimmed. By the end of the season, the frame will be overgrown, the metal rods will be completely hidden under the green cover - you just need to remember to water and feed the topiary.
Recent Entries
Lilac perennials that are beautiful, compact and do not crowd out other plants Why when buying seedlings you should not take the sellers’ word for it and how to determine the age of the plant using 3 signs Tomato seedlings have turned purple or whitish: why the color has changed and how to save the plants
Just a couple of months will pass and the frame of a retro car will turn into a green sculpture of unprecedented beauty
The pyramidal shapes of trees, created using the topiary technique, add solemnity and elegance to the garden landscape
How to make a classic topiary
The classic topiary figure differs from the rest in the absence of a frame. That is, the gardener comes up with a masterpiece with his own hands and realizes it from a living plant. To make an original decoration you will have to get a little skilled.
- Choose a voluminous plant bush that is ideal for decor.
- Trim it so that it has a neat shape.
- If you need to create a ball, first shape the plant into a square.
- Then remove the extra corners and get a neat figure.
- If the plant is tall, then make a pyramid out of it.
- Pre-form the crown in the form of an elongated oval.
For this work you will need pruning shears, trellis and classic garden shears. Remember that as new leaves or stems grow, they should be removed. Otherwise, the appearance of the topiary will be ruined.
Saving the form
Once the topiary is fully grown and formed, it needs to be pruned at least once a year, and in some cases two or three times a year.
If the plant only needs pruning once a year and is frost-hardy, prune just after mid-summer. By then the spring flush of growth has stopped and pruning is less likely to stimulate regrowth until the following spring.
Cut by hand or use a guide to ensure that the topiary does not change shape over the years. Guidance regarding guides is also useful if you have several suitable topiaries. If you're cutting by hand, step back often to check and admire your work.
What to do with neglected topiary? Severe cutting may be required to stimulate plant growth. If major cutting is necessary, restoration is only possible if the plant is able to germinate from the old, possibly leafless wood. Otherwise, start over with a new plant.
Making topiary with simple geometry
Before you start shaping the figure, choose the right bush or tree. His age must be at least 5-6 years. Also consider the condition of the root system. It should be strong and formed.
Topiary figures of rectangular shape for landscape design Source ast75.ru
On a note! Ideal plants for creating topiary are prickly or common spruce, shiny cotoneaster, and hawthorn.
- Choose favorable spring or summer days (do not cut hair in the fall).
- On the ground, draw a square directly under the crown around the trunk of the crop.
- Install high bamboo slats at the corners of the square.
- Fasten them together with transverse horizontal strips.
- Using trellis shears, make a rough cut to form an outline.
- Start cutting from the top edges, gradually move to the bottom ends.
- Check the sides of the cube for evenness and begin trimming.
- Double-check the finished figure and remove small branches that spoil the look.
On a note! To clearly see the forms, you need to move 3-5 meters away from the topiary. As you trim, you will have to check the evenness several times.
Ways to create topiary
In order to make a beautiful garden plot even more beautiful by placing unusual green figures there, it is not at all necessary to wait for decades until the selected tree and bush has collected a sufficient amount of greenery, to form a crown, being afraid to cut off something unnecessary.
Today this process has been simplified and accelerated so much that pretty topiary figures will decorate the selected area in just a couple of months.And the topiary installation procedure itself will only take a day.
Two quick ways to make your landscape look even more intricate using a topiary frame.
And two long methods will give you the opportunity to feel like a real gardener, something like the 18th century.
Step-by-step execution of topiary of complex shape
Topiary of complex shape requires care and preliminary preparation. Ideally, make yourself a sketch so that you can do the work step by step and not miss important steps. The principle is similar, but it is important not to overdo it with rounding the shapes.
- Draw a circle on the ground under the crown.
- Install guide stakes.
- Then form the crown into a cylinder.
- Next, cut the top so that you get a truncated or regular cone.
Regularly monitor the growth of the crop; it is highly undesirable to leave excess stems. Over time, the entire structure will be overgrown with them. The haircut will need to start all over again.
Caring for frame topiary
Caring for such a prominent inhabitant of the garden involves watering and fertilizing, pruning and pinching out excess shoots.
During the winter cold, topiaries are placed in an unheated room, trying to keep the temperature inside at five degrees. In a warmer room, plants may begin to grow; in a colder room, they will freeze.
If it is not possible to move the frame, it should be insulated with straw or polystyrene foam.
Features of preparing filler for frame figures
A frame topiary needs to be formed correctly. To do this, follow the formula for planting crops. Let's look at the example of a wild animal - a lion.
- A “skin” is planted, and small weaving flowers serve as filler.
- Next is lawn grass, which is complemented by long stems (serves as a mane).
- Small details are formed: ears, tail, muzzle. Soil with seeds or rooted plants is sent to these places.
- The remaining holes are covered with damp moss.
- Just in case, install supports, they will hold the structure.
- Water the vegetation using a watering can or sprinkler system.
Next, monitor the integrity of the structure. It is necessary to protect it from gusts of wind in the first days. Therefore, it is better to install a protective box for a while until the figure gets stronger.
Topiary figure in the shape of a lion in the courtyard of a multi-storey building Source pushkin.build2last.ru
Topiary made of satin ribbons
Atlas is regularly used for crafts; it is an excellent material that is accessible to everyone. The process of making topiary, in this case, will be similar to the quilling technique. What should be done:
- The barrel is made from a clean and neat stick.
- Small details are created using the quilling technique. Each ribbon is carefully twisted into a flower; it is better to use double-sided tape to secure it.
- The parts are attached with glue to a stick, which is inserted into the base.
At the end, add other decorations if desired.
Advantages and disadvantages of topiary figures in the garden
Beautiful topiaries, like other objects on a personal plot, have their advantages and disadvantages. First, about the pros:
- original and unique exterior;
- the design is preserved in any season;
- the design is stable;
- the figure can be easily transported.
These types of jewelry have several disadvantages:
- the need for regular haircuts;
- correct planting scheme;
- Not every culture is suitable for creating a masterpiece;
- you need to fill your hand.
In recent years, similar decorations in the garden have begun to be used for the purpose of functional delimitation of space.
Topiary “Money Tree”
A pleasant activity for those who want to add a little symbolism to the interior of their home or give an unusual gift. You can use both real and counterfeit money, which can be purchased at any joke store. Master class on making a money tree:
- Take a base - you can quickly make it from polyurethane foam.
- Next, each bill is twisted into a flower or tube.
- Double-sided tape is used for fastening, especially if the money is real. If glued, a person will not be able to use them in the future.
The design is placed on a small pot, which is stylishly decorated with additional elements or simply a wish.
General tips for decorating topiary for beginners
If you are just starting to try your hand at creating landscape design, we recommend that you consider a few useful tips.
- Use only wire frames. They are more flexible and easier to fill with vegetation.
- Start practicing on climbing type plants with large leaves. These are easier to make corrections in case of an incorrect haircut.
- If the area allows, make several identical topiary figures, thereby highlighting the garden area.
Tools
Having simple tools will be enough. All you need is: wooden slats, pruning shears, garden and trellis shears, and a lopper.
To create an incredible masterpiece, it’s worth working hard; the main thing here is patience and imagination. Simple figures can be easily converted into complex ones. For example, a cube into a ball by applying certain actions.
Step by step
To figure out how to make topiary, it’s best to keep the step-by-step instructions for beginners on hand for the first time. Its benefits are difficult to underestimate.
For those who are just trying their hand at any kind of creativity, it is like a lifeline - it will tell you in detail how to make topiary correctly, quickly and beautifully.
Caring for express topiary
Such care involves directing the shoots in the right direction, tying them to frame posts, trimming excess branches, watering and fertilizing.
Winter-hardy plants do not need to be removed for the winter; capricious vines are protected from frost in the usual way.
Selecting a location
To create a full-fledged figure, the presence of sunlight is necessary; in the shade, most plants will not feel very comfortable, and, therefore, the crown will be weak and thin.
However, in winter, left topiary can get sunburned, so during this time it will have to be shaded.
The soil under the figure must be fertile and nutritious, since pruning requires a lot of effort from the plants. If the soil does not have these properties, you should think about fertilizing with fertilizers.Features of formation
When creating topiary there are two important processes - pruning and shearing. It is important to immediately remember the difference between them and not confuse them, because each of them has its own time.
Pruning is a rather rough process, but very important for the formation of the overall picture, the main forms - for this, all large branches are trimmed so that they fall under the desired contour. The formation of each branch is a purely individual process, and therefore requires special attention.
The best time for circumcision is during the subsidence of winter frosts - late February, early March. Conventionally, this is the period when it starts to get warmer outside, but the plant has not yet had time to activate the movement of juices through its system.
Shearing is a more decorative process, which is applied to the entire plant, and not just its individual branches.
The best time for this will be the period when the plant begins to actively sprout shoots. When this process has begun, wait a little until they grow a little more actively, and then return your plant to the shape you need.
Material for classic topiary
The future sculpture will be a bush and a tree that has been growing for at least five years and has a well-developed root structure and a fluffy crown.
The best time for artistic pruning is considered to be March or early April or July-August. It is not recommended to trim just before winter, so as not to weaken the plant.
Topiary in the modern world
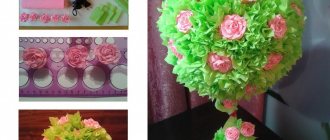
Today we can make topiary ourselves. In today's world, it is not at all necessary to have your own garden to have a topiary. Today it is a small original tree, which is also called the tree of happiness or money. Making it yourself at home is not at all difficult.
In order to have a tree of happiness at home, you will need just a few things:
A small pot or stand. A very important nuance - the pot or stand should not be larger than the diameter of the base of the tree.
A small stick that will serve as a trunk. The base of the tree. There are quite a few shapes of the base, but the most common is the ball shape.
Tree crown. To decorate a more beautiful crown, you can use a variety of improvised means that any person can always find in their home: coffee beans, pistachios, fancy-shaped pasta, acorns, buttons, beads and others.
The base can be purchased ready-made (ready-made foam blanks are sold in craft stores) or you can make it yourself from available materials.
The trunk can be made of thick wire, a pencil or a dried twig, which is pre-wrapped with twine or tape.
In order to make a crown, take plain paper, corrugated paper or multi-layer napkins. The ball can be formed from newspaper and wrapped with thread or twine. For strong fixation, cover with a small layer of PVA glue.
Once the glue has dried, coat the ball with paint or varnish. Next, you can stick on the selected flowers, moss or other decorative elements.
To decorate the crown, you can use any available materials - leaves, coffee beans, satin or silk ribbons, acorns and others. The finished design can also be supplemented with colored pasta of intricate shapes, buttons, and pistachios.

