Grafting an apple tree in spring for beginners: timing, video, grafting time, methods - copulation, splitting, bark, budding, will be described in detail in this article.
Grafting is one of the methods of vegetative propagation of apple trees. It consists of merging a part of a tree with a shoot of another plant, variety or species.
When an apple tree ages, it stops producing crops, and its fruits become smaller and less tasty. To prevent this and to preserve the variety, grafting is carried out. In this case, the apple tree will be a rootstock, and the shoot of another tree will be a scion.
Why graft an apple tree?
Grafting makes it possible to grow a demanding and capricious variety on a stable rootstock.
The main tasks of apple tree grafting:
- Cultivation of wild apple trees and grafting onto it a varietal apple tree for propagation.
- The planted variety is not satisfactory, so it is re-grafted with a more suitable one.
- Grow several varieties of apples on one tree.
Interesting! You can graft varieties with different ripening periods. Then it will be possible to pick apples throughout the summer and autumn.
- Acceleration of fruiting.
- Increasing the tree's immunity to diseases and bad weather conditions.
- Rejuvenation of old wood.
- Saving a damaged tree.
- Propagation of your favorite variety.
Spring vaccination dates
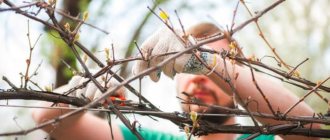
In the spring, it is necessary to graft an apple tree before the buds begin to bloom. If this procedure is carried out later, then a characteristic liquid will be released on the shoots and trunk. It negatively affects the development of the tree and reduces its frost resistance.
Important! It is necessary to graft an apple tree on a dry, cloudy day.
In the spring, apple trees can be grafted not only before buds open, but also during the growing season during active sap flow.
Note! The timing depends on the method of grafting the apple tree.
Time to graft apple trees: spring and summer
When to vaccinate an apple tree in spring and summer? Depending on the climatic conditions of the region, vaccination is carried out from early March to early May. In this case, it is necessary to focus on the weather conditions in a certain season and the condition of the tree.
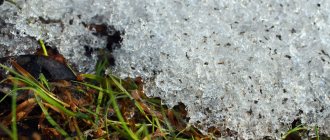
During the day, the air temperature should not be below zero. Typically, prolonged sub-zero temperatures lead to scion rejection.
Important! Short-term frosts do not affect the survival rate of grafted cuttings.
Apple tree grafting by budding (by eye) is carried out in the summer - at the end of July and beginning of August. By this time, the buds on the current year's growths will ripen, and the shoots will stop growing.
Scion cuttings can be cut in the spring just before grafting, before the buds open. However, they may freeze. Therefore, it is recommended to harvest the scion in the fall or early winter, before severe frosts occur. They are stored until spring.
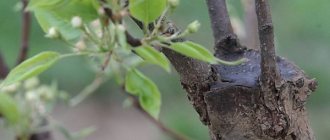
How to make an apple tree ablation step by step: diagram, description
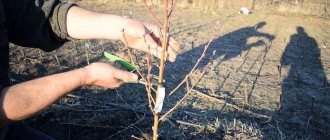
Many gardeners use this method, using it to save a damaged apple tree. It is held in May, no later. To get excellent results, follow these steps:
- Make a cut on the scion and a cut on the rootstock. Please note that the resulting cuts must be identical. If necessary, you can remove a small layer of wood.
- Place the cuts next to each other, they must match.
- Lubricate the joint with var.
- Wrap with film.
Ablation
After some time, when the graft has grown together well, remove the winding and cut off the growth from the shoot. Then cut off a branch of the rootstock.
What trees can an apple tree be grafted onto?
It is best to graft an apple tree onto a wild apple tree or another variety.
Important! Stone fruits are grafted onto stone fruits, and pome fruits onto pome fruits (apple trees are classified as pome crops).
You can also use other types of trees:
- Pear.
Important! Pear and apple trees are considered incompatible crops, so after a couple of years the grafted cuttings will most likely be rejected.
- Quince.
- Rowan.
- Chokeberry - chokeberry.
- Cotoneaster.
Some sources indicate that hawthorn and viburnum can also be used to graft an apple tree. However, it is worth understanding that it is better to vaccinate on an apple or game tree, otherwise the procedure may be unsuccessful.
Choice of rootstock, scion
The choice of scion and rootstock plays a significant role in the fusion of seedlings. Recommendations when choosing:
- to change the crown and growth of the apple tree, it is recommended to use trees no older than 3 years;
- the scion and rootstock must be adapted to climatic conditions, otherwise the material may not take root;
- It is better to take the scion from an apple tree that has bear fruit for at least 2 seasons;
- The rootstock and scion should not have damage or deformation of the trunk.
The effectiveness of the procedure is also reflected in the relatedness of the varieties. The closer the variety, the higher the likelihood of engraftment. This condition is not necessary to comply with, but if you have one cutting from a valuable apple tree variety, it is worth taking into account. Apple trees can be grafted onto various trees, but the best survival rates are observed when seedlings of the same species are combined.
Important!
The best rootstocks for apple trees: pear, quince, plum. Apple tree cuttings can be grafted onto rowan, cherry, shadberry, and hawthorn.
Parameters of a good rootstock
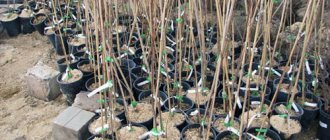
For rootstock, it is best to use young seedlings, 1-3 years old.
Important! Grafting of young trees is carried out at a height of 3-25 cm from the soil surface or above the root collar. Grafts made below, closer to the root, grow best, and then a powerful seedling grows.
Older trees can also be used for rootstock. Then their skeletal branches are taken for grafting. However, it is better not to use trees older than 10 years for these purposes.
Important! Cuttings (scion) on very old bark (rootstock) practically do not take root.
To graft apple trees in the regions of the Middle Zone and the Moscow region, as well as in other cold regions of Russia, only winter-hardy varieties must be used for rootstock.
For the rootstock, choose strong, healthy trees, without damage or disease, with good immunity and endurance to weather conditions.
On it, select a branch at the base of the skeletal branches, which is located no further than 20-40 cm from the trunk. It should be directed upward or positioned vertically. Such branches grow best, so the survival rate of the cuttings will be much higher.
Advice! Typically, annual shoots (rootstock) are chosen for grafting from annual cuttings (scion) because they have the same diameter.
Watch the lessons of the course Grafting and re-grafting of fruit trees:
Video tutorial Nr.1
Introduction to the video course
Duration: 6:42
In the introduction, we will talk about different methods of grafting, especially tabletop grafting or, as it is often called winter grafting - why in winter?
Video tutorial Nr.2
Tool - sharpening. Banding material for vaccinations.
Duration: 07:37
In this lesson we will show you what tool we use and how to sharpen it.
For successful grafting, maintaining moisture in the grafted cutting is extremely important.
You will learn what is the best and most reliable way to seal and press the grafts.
Video tutorial Nr.3
Winter vaccination. Copulation
Duration: 08:58
If you have free time in winter, if you plan to graft several seedlings at once for your garden and shorten the growing period for a whole year, then this grafting method is for you.
It will also definitely be useful to those who will plant hundreds and thousands of seedlings.
In this lesson we will show you copulation in detail - we will show and tell you all the possible nuances so that all your vaccinations are guaranteed to take root!
Video lesson Nr.4
Improved copulation and self-destructive ribbon operation
Duration: 05:30
A simple copulation is done a little faster, but the improved one holds stronger and more reliably - neither birds nor the wind will break it. It’s not for nothing that they called it improved! I have seen more than once on YouTube how inexperienced gardeners show how they make improved copulation. You heard, you may have read, but the tongue is done incorrectly, and such a graft may simply not take root. But thousands of novice gardeners watch them and then make thousands of mistakes! Thanks to our Video Tutorial, you will do improved copulation like a real professional. And in this lesson I will show you how to use Japanese self-destructive film and tell you about all its advantages.
Video lesson Nr.5
We graft a family (multi-varietal) plum seedling
Duration: 22:30
Multi-varietal (family) seedlings are a very interesting and promising direction in nursery farming. Roman and I were convinced of this from our own experience: zero competition and a very high price. If you want to grow multi-varietal seedlings for your garden, we will answer all your questions: What rootstocks should you use? At what distance from the handler should I vaccinate? How to care for implanted vaccinations? How many varieties can be grafted onto one seedling?
See everything about grafting multi-varietal (family) plums in this Video tutorial.
Video tutorial Nr.6
About cuttings and rootstocks for winter and spring grafting
Duration: 14:00
This lesson will be especially relevant for those who will be involved in winter or tabletop grafting. I will show you how to determine whether cuttings are freezing. I’ll show you which cuttings will work and which ones won’t if we take them for grafting directly from the tree in the spring. You will see what freezing of the cambium looks like. I will show you which rootstocks I plant for summer budding, and which I graft in winter or spring. You will see how I sterilize the roots of rootstocks purchased from someone else's nursery so that pathogens do not enter my farm with them.
Video tutorial Nr.7
Storage of rootstocks and grafts
Duration: 5:52
The rootstock dug up in the fall, cuttings prepared in the fall for grafting, seedlings grafted in winter - all this must be preserved from frost and drying out. The novel will show where and how he stores the rootstock and scion for winter grafting.
Video tutorial Nr.8
What to do with excess seedlings?
Duration: 2:44
Sometimes we have extra seedlings left over. For some gardeners this sounds strange, but nevertheless it happens. I myself didn’t know what to do with them before. Now everything is going well for us.
See a very simple, and at the same time very effective idea on how you can very easily expand the variety of options in your garden or nursery assortment. And without any additional costs - just vaccination.
Video tutorial Nr.9
We graft plums (grafting pruners, bugs)
Duration: 13:30
I always consider mistakes to be the most valuable thing in learning. When I grafted these plums, I, as always, was confident that everything would take root perfectly. However, that was not the case: nothing took root! What is the reason? All the details are in the video. Here I will show how I work with a grafting pruner for winter (tabletop) grafting.
Video lesson Nr.10
Grafting into cleft and wedge. Protecting grafts from drying out with bags
Duration: 26:08
In this lesson we will graft a paradise apple tree blooming with red flowers onto a clonal rootstock and a large-fruited hawthorn onto a rowan tree. We will show three different grafting methods, and our main goal will be to produce seedlings that will bloom immediately after grafting and bear fruit in the first season. Such vaccinations must be sealed. Roman will show his method of protecting grafts from drying out.
Video lesson Nr.11
Grafting in the butt and in the butt with a tongue.
Duration: 16:54
Grafting into a cleft is quite simple, but we cause quite a large wound to the rootstock. The method in the butt allows you to graft parts that do not match in thickness without causing too large wounds, and the butt with a tongue will also be very durable.
Video lesson Nr.12
Grafting with insert
Duration: 15:14
Seedlings grown with the insertion of a clonal rootstock are the highest aerobatics in gardening. After all, in this way we can grow dwarf trees with a root system that grow vigorously! Such trees will not need supports and will not require watering, but they will be truly short-growing.
We will show how, with the help of grafting, you can make such a tree faster by a whole season.
Video lesson Nr.13
Re-grafting for the bark
Duration: 14:10
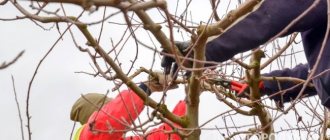
This method, as well as the splitting method, is used for grafting mature trees with thick branches.
Compared to “split” it has some advantages and disadvantages. Which method you choose will depend on your situation. However, I believe that you need to master both ways.
Video lesson Nr.14
Grafting an apple tree into a cleft
Duration: 43:03
When we need to re-graft an already mature tree, copulation will no longer help us, since we have to graft thick branches, the thickness of which is even 10 times greater than the thickness of the scion. This is where we have to use the cleft grafting method. This is a serious job for which you will need additional tools, certain skills and some tricks.
Which branches to graft, which ones to leave, and which ones to simply remove? At what distance from the trunk to vaccinate?
Where should the split be made? How many cuttings should I insert?
You will see all the answers in the detailed Video Tutorial.
Video lesson Nr.15
Result of re-vaccination
Duration: 05:04
We love to show not only the work, but also its results!
In this Video tutorial you will see how the grafting we did in the split and behind the bark on an adult tree took root and you will receive our recommendations for further care of the overgrafted tree.
Video lesson Nr.16
Preparation of cuttings for winter and spring grafting
Duration: 20:10
In areas with a mild, southern climate, cuttings can be taken directly from the tree even in winter or spring. And where there is a risk of cuttings freezing, it is better to prepare them in advance and save them until grafting begins. For all the details about preparing and preserving cuttings for winter and spring grafting, watch the video tutorial.
Video tutorial Nr.17
Is it possible to “cut off the head” of a pear?
Duration: 6:06
Here you will see how Roman did an experiment - he cut down a 10-year-old pear tree at a height of 1.5 meters and grafted the bark into this stump. It would seem that such a tree has no prospects. However, the cuttings took root and began to grow. See the video for all the details.
Video tutorial Nr.18
Results of re-grafting a pear into cleft
Duration: 4:54
Here we will show one of the results of regrafting a pear.
Video tutorial Nr.19
How to sharpen a grafting knife and pruning shears?
Duration: 21:37
Vaccination should only be done with a very sharp instrument. The grafting knife must shave! Only then will your vaccinations take root perfectly, and the work will go quickly and easily. The blades of the pruning shears do not need to be sharpened before shaving, but the pruning shears should also be sharp so that the cuts heal as quickly as possible. I will show you my method of sharpening grafting knives and pruning shears.
Video lesson Nr.20
Results of grafting by improved copulation
Duration: 7:41
In this video I will show several successful graftings and show the difference between two grafted trees: one was grafted on the root, and the second was transplanted immediately after grafting.
Video lesson Nr.21
How to graft coniferous plants?
Duration: 28:41
Our course is devoted to grafting fruit trees, but I decided that it would be extremely useful for you to master the skill of grafting coniferous crops. However, everything there is completely different from fruit...
My colleague Voldemar Bartoshevich is a great master in this matter - he annually grafts thousands of pines, fir trees and larches.
Now you can grow a variety of decorative forms of conifers yourself: weeping, dwarf, with interesting colors. Or maybe you want to graft Siberian cedar pine? After all, when grafted, it begins to bear fruit already in 4-5 years, but a seedling can bear fruit only after 30 years!
Video lesson Nr.22
How to regraft an old pear tree?
Duration: 24:03
But what should you do with a rather old and very tall pear tree that has been bearing fruit for a long time, but with very small fruits, can it be re-grafted, or maybe just cut down? Don't saw! See how you can re-graft even a 40-50 year old pear tree.
Video lesson Nr.23
We create family seedlings from annual plants
Duration: 14:49
This is my author’s method of grafting and you will not find its description in any book. I have developed and successfully used it on my seedlings since 2012. My students also successfully use this method in their nurseries.
Thanks to it, you can make a multi-varietal (family) seedling from an annual seedling. In this case, you will form the skeleton of the future tree the way you want. You yourself will determine the location of the skeletal branches, their direction of growth and the angle of departure.
This grafting method allows you to create multi-varietal seedlings faster by a whole year!
Video tutorial Nr.24
How to form the crown of an overgrafted pear?
Duration: 6:01
After regrafting, the growth of established cuttings goes up.
The novel will show how he shapes the crown of an overgrafted pear so that the branches still grow horizontally, so that the tree does not “run away” too high, so that all the fruits are within reach of an outstretched arm.
Video tutorial Nr.25
Spring budding of a cherry with an awakening bud
Duration: 11:32
Another non-standard method of grafting is spring budding with an awakening bud. It works great for stone fruits. It is especially relevant for nursery growers who do summer budding. With the help of spring budding, you can increase the yield of stone fruit seedlings to 95% and even higher. And it also guarantees that you are grafting a living kidney - after all, at this moment it is already waking up!
Video lesson Nr.26
What is better to seal vaccinations: bags or ribbons?
Duration: 8:20
In this lesson I will analyze the advantages and disadvantages of sealing vaccinations with bags and tapes, and I will show everything with specific practical examples.
Video tutorial Nr.27
Cherry grafting
Duration: 16:21
Cherries do not take root as easily as apple and pear trees. Here only certain methods of vaccination are suitable and certain rules must be followed. You will see all the nuances in the Video Tutorial.
Video tutorial Nr.28
What to do with constrictions on vaccinations?
Duration: 4:38
The graft took root and began to grow - hurray! However, you forgot to remove the straps - the ribbons that held the graft and protected it from drying out.
What is the result? – the constriction and, as a result, the graft breaks off even under the pressure of its own weight.
What to do if you are still late, and the constriction is already suffocating your vaccine? See the video tutorial for the solution.
Video tutorial Nr.29
Vaccinations have taken root - what next?
Duration: 10:12
Hurray - your grafts have taken root and produced very good shoots! Then the question arises: “What to do next?” .
We will come to a specific young apple tree, which I regrafted into skeletal branches and grafted onto very large shoots. We will take up the formation and further planning of its growth and development.
Video tutorial Nr.30
How and when to vaccinate with cuttings in the summer?
Duration: 12:06
There is a stereotype that in the spring we graft with a cutting, and in the summer we bud with a bud. However, I maintain that cuttings can be successfully grafted in the summer.
You will see how I made such a vaccination and how it took root perfectly - you will learn how to vaccinate at any time !
Video tutorial Nr.31
What grafting methods are used for which crops?
Duration: 22:25
There are many methods of vaccination. However, this seemingly most universal method of grafting, such as copulation, for example, on dogwood, does not take root at all. We have verified this with hundreds of our seedlings. And precisely so that you do not repeat our mistakes, we recorded this video lesson in which we will tell you for which cultures, which methods are suitable and which are not.
Video tutorial Nr.32
How to do ablactation?
Duration: 9:09
You can use ablactation in many cases. I will show ablactation using the example of creating an apple tree on three legs. Such a tree does not need any support for any crop load. I also use ablactation to create interesting decorative forms of trees, for example, to create living arched structures. If you are interested in the topic of living architecture, this Video Lesson is for you.
How to select and store a scion
Next, we will describe in detail how to properly prepare a scion in the fall and store it until spring grafting.
Important! The scion must have the same vitality as the rootstock or even be stronger. Only then will the procedure be successful.
Characteristics of a quality scion
The success of the apple tree grafting itself depends on the quality of the scion.
Cuttings for the scion are harvested from one-year or, in extreme cases, two-year branches located in the upper part of the crown on the south or west side. Only the middle part of the shoot is cut. The cut is made on the annual ring between this and last year's growth.
A high-quality scion has the following characteristics:
- in diameter 8-10 mm;
- 20-40 cm long. It is cut to the required level during grafting, leaving 2-3 buds.
Important! For grafting it is necessary to use cuttings with vegetative buds. Cuttings are not used with fruit buds.
- Fresh, without signs of freezing or damage. The cut color should be light green.
Important! If the cutting bends easily, then it is suitable for rootstock.
Scion harvesting time
It is best to harvest cuttings in the fall, before the onset of frost.
Important! Rootstocks are cut exclusively from fruit-bearing trees.
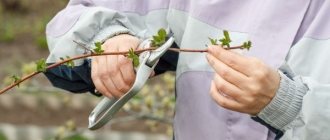
However, you can cut cuttings before grafting when pruning an apple tree in spring.
The main thing is to carry out this procedure before the sap begins to flow and the buds open. At this time, the tree should still be in the dormant stage.
Watch the video! Cuttings for grafting - how, where and when to cut?
Storage rules
When harvesting cuttings in the autumn, they must be preserved until spring, and the growing season must not be allowed to begin.
It is best to wrap them in a damp cloth, moss or sawdust, and put them in a perforated bag. They can also be stored outside in the ground or under the snow.
The main thing is to maintain low temperatures and make sure that the cuttings do not dry out.
Therefore, it is still worth storing cuttings in a basement, cellar or refrigerator, where the air temperature is kept within 0..+4 degrees.
Advice! Periodically, at least once a month, the cuttings are taken out and inspected. Those that become moldy and have fungi appear on them are thrown away.
How to do budding step by step: diagram, description
This grafting method is as follows: only a bud taken from another tree can be grafted onto the rootstock. For grafting in the spring, as a rule, a bud that was left last year is used. The most ideal time for work is April, the end of the month. At this time, the bark is already beginning to peel off, and the cambium is actively growing. Consequently, the scion will take root quite quickly.
Budding
Tree grafting using the budding method is carried out in the following sequence:
- Cut a bud from the main cuttings prepared in advance.
- Cut the bark of the rootstock at the internode in a "T" shape.
- Bend back the bark, drive the bud into the formed base.
- Lubricate the area with varnish and wrap it with twine.
Rules for grafting cuttings
For this procedure, prepare in advance:
- Cuttings.
- Sharp knife.
- Electrical tape, strips of polyethylene 25 cm long and 1 cm wide, twine.
- Hand saw.
- Small sharp axe.
- Garden var.
- Grafting pruner.
- Clean rags.
- Marking tags.
Important! All instruments must be clean and disinfected.
The grafting is carried out in different parts of the trunk depending on the purpose of its implementation.
- If the rootstock variety needs to be replaced completely, then the grafting is carried out at a distance of 30 cm from the ground.
- To replace 1-2 branches of an apple tree, the rootstock must be well lit, so it is necessary to shorten all the branches that block the passage of the sun to the rootstock.
The grafting must be carried out in such a way that the rootstock enters the active phase of development, and the scion remains in the cold, in the dormant stage, as long as possible. Then it will be possible to achieve the expected result.
It is very important that the rootstock and scion are compatible with each other.
Vaccination must be carried out at a certain time in good weather. If this procedure is carried out in early spring, it is necessary to wait for warm weather, but it should not be dry and hot.
Important! There should be no rain for 2-3 days before the procedure.
It is better to vaccinate in the morning.
The location on the rootstock is chosen from the north side so that it is not exposed to direct sunlight.
Important! You should not graft on the south side of the trunk, as the sun will dry out this place and rejection will occur.
Before the procedure, the rootstock branch is wiped with a cloth.
It is very important to make correct oblique cuts of the cuttings. They must be perfectly even and smooth. No roughness or bending is allowed.
Interesting! The length of the oblique cut should be 3 times the diameter of the scion.
Ideally, the diameter of the rootstock and scion together with the graft should be the same. If the rootstock is thicker than the scion, the latter is shifted to one of the edges, aligning the cambial layers.
Important! The graft will not take root if the scion is larger or smaller in diameter than the rootstock, since there will be no contact of the cambium.
The grafting is carried out as quickly as possible so that the surface of the cuts does not oxidize or dry out. At the same time, you should not touch the sections with your hands to avoid infection. All instruments must be sharp and sterile.
The grafting site is wrapped with polymer film, electrical tape or special tape. The exposed parts of the graft and the cut tops of the cuttings are covered with garden pitch. Then the grafting site will not dry out, and air and moisture will not get inside.
Some gardeners put a plastic bag on top of the grafting for better fusion. However, this is not so important; the main thing is to record the vaccination site well.
It is recommended to tie the tree to a peg, which is driven in near it. This is necessary, especially in the first years, since the fusion may not be very strong.
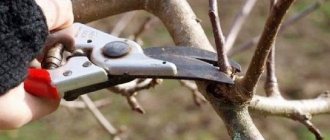
Preparing garden tools for grafting trees
To graft behind the bark you will need special tools:
- well-sharpened grafting (copulating) knife, pruning shears;
- garden putty (garden pitch, drying oil, oil paint, etc.);
- material for strapping (the most convenient is electrical tape, but if you don’t have it at hand, you can use adhesive tape or strips of plastic film).
To ensure the vaccination goes without complications, use a sharpened tool. Before carrying out the procedure, do not forget to disinfect it.
- Gardening tools for grafting plants - everything you may need
Are you planning to graft a tree or bush? Then check if you have everything on our list.
Care after vaccination
The success of the grafting will be determined after 3-5 weeks, when the buds open and green leaves appear.
Until this point, the grafting site is periodically inspected so that the sections do not dry out. If necessary, adjust the binding and cover the cuts with garden varnish.
After the graft has grown together, the apple tree needs care, thanks to which the graft will take root better:
- It is better to shade the grafting site and protect it from the sun's rays.
- It is best to graft from the north side of the rootstock.
- The binding is removed 2 weeks after the buds open and the leaves appear. This will allow the trunk to thicken without hindrance.
- Young shoots that appear below the grafting must be cut off in time. Otherwise, the apple tree will direct nutrients to the greens and not to the cuttings.
- If flowers appear on the scion, they are also removed.
- The grafted cuttings are formed 1-2 years after grafting.
How to care for a grafted tree
borggarden.info
Grafting is stressful for plants, so make sure they are well cared for. If the living conditions of the rootstock (trunk or branch of a tree) have not changed significantly, then of the grafted cuttings absolutely everything has changed - the root system, trunk, nutritional conditions. Therefore, it is necessary to ensure that external factors do not worsen his living conditions. These tricks will help you:
- if the summer is hot, protect the graft from the sun (for example, wrap the cuttings with cloth or cover with a plastic bottle);
- if wild growth begins to appear near the grafting site, it must be removed, otherwise it will take away nutrients from the cutting;
- when new branches appear on the grafted cuttings, they need to be cut off, leaving only one - this way the shoot will form healthy and strong;
- in the first year, the grafting site is not yet ready for open wintering, so before the onset of frost, wrap it with burlap, spunbond or other material.
You need to inspect the grafted cuttings every 20 days, remove shoots that grow around it and take away nutrients. Loosen the bandage at the grafting site at the same intervals. Otherwise, when the branch thickens, the bandage will begin to cut into the trunk.
If you did everything correctly, the grafted cutting will quickly take root, and in a year or two you will be able to taste the first fruits from the branch that you grafted with your own hands!
Grafting errors
Typical mistakes when grafting an apple tree:
- It is best to graft from the north side of the rootstock to avoid direct sunlight. Otherwise, this will lead to rejection of the cutting.
- Vaccination is not carried out during rainy weather.
- Fresh cuttings cannot be used as a scion. They should be cut only during the dormant period.
- The grafted tree must be carefully looked after in order for high-quality fusion to occur.
- After fusion, the winding is removed to ensure proper growth of the tree.
- All shoots appearing below the graft must be removed.
Even a novice gardener can learn how to properly graft an apple tree, thereby obtaining the necessary varieties and rejuvenating their trees.
Watch the video! Grafting an apple tree with several varieties
What you will need
For grafting manipulations, you need to have a set of tools and some materials. A good cutting tool and disinfectant are a must.
What a novice gardener will need to graft apple trees in the spring:
- A knife with a sharp and short blade and a hacksaw. The gardener uses them to make cuts in the wood.
- Special knives – budding (for buds) and copulating or grafting (for cuttings).
On the market today, gardeners are offered a new tool - a grafting pruner with an unusual blade shape. It is less traumatic, makes shaped cuts that allow you to perfectly connect parts of plants, and makes perfect cuts.
What can be done with grafting pruners:
- budding;
- cutting cutting;
- cut for the cutting.
Materials:
- Garden var. They coat the scion - the stalk inserted into the groove of the rootstock - and all injured parts. This composition increases the chances of engraftment, prevents the risk of infection, protects against insects, and promotes healing.
- Insulating tape. It is used to wrap a cutting inserted into the groove of the rootstock. It also protects the scion from infection, rain and other negative factors. Electrical tape can be replaced with polyethylene strips, twine or grafting tape.
- Paint/drying oil. Select a composition suitable for treating trees. Painting is carried out after all work is completed.
You can prepare the brew yourself. The procedure for preparing “village” brew:
- Mix cow dung and resin thoroughly (1:1).
- Throw a handful of fluff or fine wool into the mixture for thickness.
Attention!
All cutting tools are sharpened and disinfected before use - this reduces the risk of infection and injury.