Where to plant clematis.
Wet, swampy soils are completely unsuitable for the plant, so we exclude areas where there is stagnant water or water from roof drains for planting them.
Such places guarantee fungal diseases and death of the vine. Also, you should not plant the vine near large trees - the roots of the plant are large and will begin to compete with the huge roots of the tree. I would like to remind you that the flowers of the vine love a sunny place, and the roots love the shade. Therefore, it is good to plant low-growing flowers or ornamental grasses next to it. For example, hostas are excellent companions for vines. Another option is to mulch the roots. Pine needles, sawdust or straw are ideal as mulch.
Soil for decorative and edible honeysuckle
Honeysuckle is famous for its unpretentiousness and ability to grow in any climate. The culture prefers areas with loose, well-drained, nutritious soil. The optimal type for garden and edible honeysuckle is loam fertilized with organic matter.
The plant does not grow well in wetlands with heavy, clogged soil lacking moisture. Places with low groundwater levels are chosen for planting. Excess moisture leads to rotting of the root system. Experienced gardeners recommend planting bushes not only on loam, but also on sandy loam soil and black soil. This type of soil promotes the growth and development of honeysuckle and increases its productivity.
The loam is loose and has excellent air permeability, which helps saturate the root system with oxygen and moisture. This soil consists of 70% turf and 30% coarse sand.
Sandy loam consists of silt and sand, quickly allows moisture to pass through, warms up after the snow melts and is considered an excellent alternative to loam. Chernozem contains organic matter and minerals that promote the growth and development of bushes. Every year, plant residues remain in the soil, saturating it with humus, phosphorus and calcium. Sandy soil dries out quickly, nutrients are washed out of it, and water-soluble fertilizers seep into the lower layer, so it is not suitable for cultivating honeysuckle.
Gardeners in Siberia, the North-Western region and the Far East do not pay attention to the composition of the soil when planting honeysuckle, and residents of the southern regions complain about the poor growth of the crop on black soil. This is due to the characteristics of the honeysuckle root system.
The plant has a tap root, but it is short - only 0.5 m, and there are many lateral roots. During periods of drought, the hard, cracked earth literally tears apart the thin shoots. During the rainy season or active watering, chernozem turns into a sticky, airtight mass. The solution to the problem is to annually improve the soil structure.
Optimal pH level
Let's figure out what kind of soil honeysuckle likes - acidic or alkaline.
Soil acidity is not the least important when growing crops. She prefers soil with a neutral pH and does not like acidic or alkaline soil. The fruiting and appearance of the bush depends on the level of acidity.
pH is measured on a scale from 1 to 14. Soil acidity is checked using litmus papers. They can be purchased at gardening stores. Before planting, soil is collected from different parts of the site, placed in fabric bags and immersed in clean water for 5 minutes. The test strip is lowered there and the result is assessed after 10 seconds.
An indicator in the range from 5 to 7 indicates neutral acidity, from 1 to 5 - acidic, above 7 - alkaline. The soil is brought to normal six months before planting the crop. To do this, dolomite flour is added to the ground: 0.5 kg per 1 m² - in acidic soil, 0.4 kg per 1 m² - in slightly acidic soil.
The best soil for honeysuckle
In what soil should honeysuckle be planted? The soil for decorative and edible honeysuckle must be structured, moisture- and breathable. To determine its composition by eye, dig up the soil at least 10 cm with a shovel, throw it up and inspect the formation:
- if the earth fell like a solid pancake, it contains a lot of clay;
- if the formation has completely crumbled, there is a lot of sand in the composition;
- if the top layer has scattered into lumps of different sizes, the structure is excellent.
Humus and peat, turf and river sand are added to the composition of the soil for honeysuckle. In alkaline soil - red peat, in acidic soil - ash or slaked lime.
Planting clematis in the Moscow region in open ground
The best time to plant clematis in the Moscow region is spring and the first half of summer; autumn planting is not advisable, the plant will not have time to take root before frost.
Planting begins as soon as the ground warms up to the point of a spade, provided that the planting site has been prepared in the fall. Frosts down to -5°C at night during early spring planting are not dangerous for clematis if they are covered with a double layer of non-woven material.
How and where to plant clematis
- For planting, choose a sunny or semi-shaded place (shade is allowed no more than 2-3 hours a day).
- Prepare the planting hole thoroughly. With proper planting and sufficient nutrition in one place, clematis can grow for up to twenty years without replanting.
- Prepare a planting hole about a meter deep and from 70 cm to one meter wide. If groundwater is close, place drainage at the bottom with a layer of about 20 cm, then fill the hole with nutritious soil.
- If there is fresh or rotted horse manure, it is placed on top of the drainage in a layer of about 40 cm. When the roots of the plant reach it, it will turn into humus.
Photo: Planting in open ground
What soil does clematis need?
This is how I prepare the soil for planting clematis. The base is rotted compost, to which I add a little of the top layer of soil taken out of the hole, then ash, bone or fish meal, complex mineral fertilizer marked “spring” (if planting occurs in spring or the first month of summer) and double superphosphate.
How to plant a clematis seedling
It is important to properly prepare the seedling for planting. A day before planting, the seedling is soaked in any of the stimulants: epin, zircon, nb-101 or in sodium humate according to the instructions
The solution is prepared in a plastic container and the entire pot is immersed in it. A seedling with an open root system is soaked in the same way, but only for a few hours. Planted in the evening or in cloudy weather, the roots are carefully straightened. There is one secret when planting clematis, which helps to get a powerful plant with numerous shoots the very next year. Clematis shoots are laid in a spiral around the base of the plant or directed in the desired direction and buried about 1-2 cm so that the leaves remain on the surface and the stem itself is underground. This planting stimulates the formation of additional roots and shoots from each internode. I press the shoots additionally with stones.
Photo: Preparing a seedling
Selection of seedlings
Experienced gardeners recommend purchasing young plants 3-4 weeks before planting in open ground. The seedling is stored in a place with diffused sunlight. If there are buds on the vine, they should be cut off.
Selection of seedlings for planting in spring:
- You need to make sure that the shoots of the plant are not damaged or stretched due to lack of sunlight.
- It is necessary to carefully examine the roots. They should not show signs of rotting or drying out.
- There should be accessory buds on the roots. Lateral underground shoots develop from them.
- Annual seedlings do not bloom. If there are open buds on the shoots, this is a sign that the plant is dependent on mineral supplements, and its vegetative rhythm is disturbed.
- Young clematis should be well moistened.
- Plants with signs of fungal or bacterial diseases are not allowed to be planted in open ground.
When selecting seedlings, you should pay attention to the color of the shoots. If they are whitish, it is most likely an unhealthy plant.
Methods for insulating plants for the winter
Hilling
We have already written about how a mound of earth is formed near the trunk of a plant. The top of the mound is covered with natural materials. The best shelter for clematis for the winter is snow. Care must be taken to ensure that the wind does not carry it around the site. You can put up a temporary fence for this. What is the best way to cover clematis for the winter? Tops, leaves, weeds, sawdust can insulate the soil, but there are disadvantages.
These materials absorb moisture, which is then absorbed into the soil. Pests also like to breed in such plant debris. They lay eggs, which will have a detrimental effect on clematis. It is more advisable to use needles for the lower part of the plant. You can use plastic bags filled with shavings or sawdust.
Combined shelter
The branches that remain after pruning also need insulation. Hilling is done for the lower part of the plant. The shoots must be bent to the ground and secured. You can use staples or lay a board with nails driven in next to it, and tie the branches to these nails.
The shoots are covered from above with old branches or spruce branches. Snow will fall on them, this will be a reliable shelter for the winter. You can make a “blanket” from plastic bags and dry plant material by laying it on the shoots.
Air method of shelter
The air insulation method is suitable for all regions of the Russian Federation. By winter, clematis are completely covered to isolate them from the environment.
Covering individual bushes
To insulate one plant, you need to place a plastic box or cardboard box over it. The top of the constructed clematis shelter is covered with plastic film. Instead of this frame, you can use arcs that are installed crosswise. Film is placed on the arcs. The edges of the canvas must be fixed using bricks or pipe scraps. This method has its drawback. If you do not check the area during winter, when a thaw occurs, clematis may hide under such a cover. We need to figure out how to create minimal ventilation. You can bend the film on one side to allow air to flow. And for areas near the house, this method is ideal.
Clematis group shelter
This method is used to cover several bushes at the same time. All branches of clematis are bent and placed in a horizontal position. A series of arcs are installed on top. Covering material is placed on the arches. So that it does not damage the shoots left for the winter and holds well, they are tied to the trellis supports, on the sides, along the arcs, closer to the top. Another one is in the center to prevent the cap from deforming under the weight of snow. Having built this complex structure, it is easier to organize ventilation of clematis. You can open the end parts so that the air blows dampness out from under the shelter.
How to cover clematis for the winter? For the first layer, you can use roofing felt or any other soft insulation. The second layer can be a thick polyethylene film. This will be quite enough even for a harsh winter. When covering, you need to take into account that the top covering can blow away. Therefore, it is better to install another row of arches, which will fix the laid coating.
Enhanced insulation
How to preserve clematis in the northern regions? Enhanced insulation is used only for regions of the Far North, or where there is very little snow, wind, or low temperature. Insulation is carried out according to the previous method, but the arcs of the second row are installed above the base of the structure with a slight elevation. This creates an air gap that acts as an excellent heat insulator. This gap can be filled with insulating material if the weather is too cold. Just don’t use covering materials that absorb large amounts of moisture, because it cannot be ruled out that the outer film will accidentally be damaged during the long winter.
Diseases
Clematis are affected by fungal infections; the signs of the most harmful diseases and preventive measures are described below.
- Septoria blight is characterized by the appearance of brown or light brown spots on the leaves with a purple border. The affected tissues dry out and fall out.
- Fusarium disease affects annual cuttings and the bases of young shoots. The lesion appears in the form of a pale pink coating, impairs the conductivity of blood vessels and leads to rapid withering and death of plants.
- Gray rot appears as a dirty white fluffy coating on the green parts of plants, as well as on cuttings during storage. It develops more often in cold, damp weather.
- Brown-red, raised rust , covered with a powdery substance consisting of fungal spores.
- The main sign of Alternaria blight is the appearance of oblong spots with a dark coating on the leaves; on the shoots, the lesion is expressed as dark depressed ulcers.
- When infected with powdery mildew, become covered with a thin white coating, then the leaves and young shoots dry out. Outbreaks of this disease can be observed in dry, hot weather; the lesion is more typical for the southern regions.
Prevention of fungal diseases
- Before planting, seedlings are immersed for 1.5–2 hours in a solution of copper sulfate at the rate of 5 g per 10 liters.
- After planting, dust the soil and shoots with foundationazole powder.
- Before sheltering for the winter, the bushes and the ground under them are treated with one of the fungicides (copper sulfate 2%, Kuproksat, Blue Bordeaux).
- In the spring, as soon as the weather permits, remove all leaves, remove weak and affected shoots and spray with 1% iron sulfate.
- During the season, if there is an outbreak of a fungal infection, the plants are treated with one of the garden fungicides (Strobi, Topaz, Split).
Step-by-step instructions for planting clematis in open ground in spring
Knowledge of all the preparatory stages and the scheme of the event itself will help to correctly plant a clematis seedling on a site in open ground in the spring.
Choosing a place and soil for planting
Before starting the event, you should choose the most suitable place for spring planting clematis in open ground. This step must be taken responsibly, because the flower does not like transplants and can grow in one place in the garden for many years.
It is recommended to choose a place and soil taking into account the following recommendations:
- The place should be illuminated by the sun, but the plant should be protected from direct scorching rays. Light partial shade is welcome. This is especially true for varieties with bright colors (they fade in bright rays).
- The flower garden in a dacha or a private house area must be protected from winds and drafts.
- Lowlands, areas where moisture stagnates, and places with high groundwater levels should be avoided (they should be at a depth of at least 1-1.2 meters). Growing clematis in such a place is especially critical, since the roots may rot.
- You need to choose a place for planting taking into account the installation of future support, which is necessary for the climbing plant. That is, a small piece of land should remain next to the planting hole.
- It is recommended to avoid planting next to a metal fence, which can become hot on hot days. Such a proximity can negatively affect the flower.
- Also, if you choose a place in the country near buildings, then choose a place so that water from the roof does not flow onto the plant.
- The soil for growing clematis should be neutral (pH 6.5), loose, light, and nutritious. The plant does not tolerate acidic soils. It is optimal to plant on loamy soils.
- It is better to plant on a small hill or high bed. This will protect the root system from rotting.
Preparing the soil and planting hole
The soil and pit should be prepared in advance so that the soil has time to settle. Preferably in 1-1.5 months or at least a couple of weeks. Rules for preparing the site and soil:
- The first step is to clean the area, remove stones, debris, and weed rhizomes.
- If your site has acidic or slightly acidic soil (which this plant does not accept), then you need to neutralize it. To do this, you should dig up the soil on the site with the addition of wood ash or dolomite flour (a glass of the substance (200 grams) per square meter), or use a special deoxidizer (according to the instructions). And then loosen it with a rake so that the substance is evenly distributed and deoxidizes the soil.
- If your garden has heavy, clayey soil, then it is recommended to dig it up with the addition of lowland peat and sand (one bucket of each ingredient per square meter).
- If the soil in the area is too light (for example, sandy), then it is recommended to make it heavier, that is, put turf soil at the bottom of the hole.
Stages of preparing a planting hole for planting clematis:
- Dig a hole, depth and width - 60 centimeters (or even 70).
- Place a drainage layer about 15 centimeters thick at the bottom of the planting hole (this is especially true if you are planting on heavy soils or in an area with high groundwater levels). Expanded clay, gravel, pebbles, and broken bricks can be used as drainage.
- Fill the hole 2/3 with a mixture of the following ingredients: river sand + lowland peat + humus or compost + turf soil or fertile topsoil (all components in equal proportions).
- Mix the ingredients well in the pit.
- You can also add 150 grams of complex mineral fertilizer, for example, “Nitroammofoska” and a glass of wood ash, to the pit.
- Afterwards, water so that the soil with fertilizers has time to settle before the procedure.
Seedling preparation
It is recommended to prepare purchased clematis seedlings with an open root system before planting in open ground (planting material with a closed root system does not need to be prepared).
As preparation:
- A day before the event, you should soak the roots in a solution of a growth stimulant drug, for example, Kornevin.
- If you see traces of mold or rotting on the roots, then you need to trim these places to healthy tissue, and then soak them in a fungicide solution, for example, Fitosporin-M.
- Roots that are too long can be cut off by a third.
- If there are leaves above the root collar, then they need to be cut off, because the neck needs to be buried.
Soil mixture composition
Having chosen a suitable place for growing clematis, you should prepare planting holes for the seedlings. The average diameter of the hole should be about 0.6 m, and its depth should be at least 0.7 m. In order to avoid stagnation of moisture, which is detrimental to flowering vines, drainage of the planting hole will be required. Broken brick, pebbles, and expanded clay are suitable for this. To ensure rapid adaptation of seedlings to a new location, you need to place a nutrient mixture in the holes, which you can prepare yourself. It should include the following components: equal shares of garden soil, peat and humus. It is also recommended to add sand to the mixture to make it lighter and looser. It won't hurt to add a little superphosphate. Depending on the soil characteristics of the site, other components can be added to match the needs of the clematis. For example, loamy soils can be fertilized with compost, and sandy soils can be made more nutritious with black soil. It is most difficult to prepare acidic soils, since it does not like them. Before adding the nutrient mixture to the holes, you need to treat the area with lime mortar at the rate of about 0.2 kg per 1 sq.m.
Description
Previously, clematis was considered a greenhouse plant - in Russian fiction it was mentioned exclusively as clematis. Everyone, seeing these huge colored stars for the first time in the park, at a flower exhibition or in a neighboring summer cottage, was fascinated by them
It doesn’t matter whether it’s a monochrome bouquet or an interweaving of vines of different varieties with contrasting flowers - this spectacle is mesmerizing. Clematis will rightfully be able to perform a solo part in your garden
Most clematis are perennial vines, and leaf-climbing ones: they are attached to supports by leaf petioles, but shrubs and subshrubs are also found. There are about 300 species in total.
Clematis are divided into small-flowered and large-flowered. Small-flowered species are less popular, but are unpretentious and have better winter hardiness. Among them the following types are known:
- Tunguska,
- Alpine,
- Chinese,
- Virginia.
There are a lot of large-flowered species of clematis:
- Jacquemant (abundant flowering from June to September, color: mainly violet-lilac, white, pink, cherry);
- Viticella (purple, 3m);
- Langunosa (last year's shoots bloom in early summer and buds re-bloom in August - September on young shoots);
- Texas (Taxensis) (blooms and blooms between June and September).
There are 3 trimming groups:
- The liana is not pruned, because blooms on last year's shoots. There are practically no flowers on new shoots. If the above-ground part freezes out, there is no longer any need to wait for flowering this summer. Experienced gardeners can grow clematis of this group, because... requires careful shelter for the winter. The same group of pruning includes the unpretentious “princelings”. Their flowers are small, significantly inferior in appearance to varietal large-flowered clematis, but the plants are more winter-hardy.
- Requires cutting by 1/2 or 1/3. Representatives of this group bloom both on the shoots of the past and on the shoots of the current year. Moreover, on the shoots of the current year, the flowers are, as a rule, simple, while on the shoots of the previous year they are double (if this is typical for this variety).
- The liana is cut off almost completely, leaving only “tails” of 10-20 cm. Flowering occurs on the shoots of the current year, and clematis belonging to this group grow very quickly: 10-15 cm per day. It is worth taking care in advance about reliable and high supports: trellises, arches, obelisks, nets, etc., because The dilapidated support may not be able to withstand the weight of this vine and your charming blooming cloud will end up on the ground.
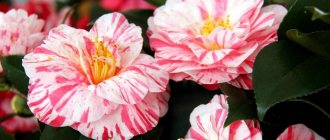
Popular types and varieties
Clematis includes more than 300 valuable noble varieties, which differ in color and shape of flowers. New varieties continue to be developed to increase plant resistance to frost, adapt them to growing in containers, or try to create varieties that can replace ornamental shrubs.
Depending on the variety, you can grow species with large or small flowers, which grow well in the southern and northern parts of the garden. Varieties differ in appearance, vigor, flowering period and frost resistance. When growing clematis, it is worth considering that large-flowered varieties are much more sensitive and demanding than perennial and botanical varieties.
Large-flowered
The most popular in our gardens are large-flowered clematis. Their flowers are the most attractive - large, reaching 15 cm in diameter. They are magnificent and last a long time on the plant. Multi-flowered clematis often bloom twice and can decorate the garden all season long:
- flowers appear for the first time in May–June;
- then they repeat flowering on the shoots of the current year until autumn.
Among the easiest to grow large-flowered clematis are the following varieties:
- "Comtesse de Bouchau";
- "Gipsy Queen"
- "Hagley Hybrid";
- "Huldine";
- "Jackmanii";
- "Ramona"
- "The President".
Clematis varieties are described in more detail in the following article -
Grape leaf
Noteworthy is the climbing clematis or clematis (Clematis vitalba), characterized by strong growth. The shoots reach a length of 10 meters in a short time. It is often planted in containers on the balcony. This is one of the most attractive climbing plants available for cultivation in our climate. The liana forms small flowers that densely cover the plant. There are really a lot of flowers, usually they are white.
Nowadays varieties with increased frost resistance are being developed, because previously these perennials often froze in severe winters. The most valuable variety of clematis with high frost resistance and magnificent, delightful lush flowers - “Summer Snow” Summer Snow has white, relatively large flowers.
Tangut
Interesting is the Tangut clematis (Clematis tangutica), characterized by drooping single yellow flowers appearing on thin stems. Tangut clematis has the advantage that its fruits are very decorative - fluffy and silky.
Notable varieties are “Anita” and “Bill McKenzie”, growing up to 6 meters in length. Tangut clematis is also available in varieties with intense orange flowers.
Alpine
Alpine clematis is excellent for growing in our gardens. These garden flowers are especially valued for their resistance to adverse weather conditions. They are great for any garden; you can even plant them in areas where cold winds often blow. Alpine clematis is suitable for cooler regions of the country, so it is very popular. The species is distinguished by bell-shaped flowers hanging from long peduncles, taking on beautiful, intense colors.
Alpine clematis has colorful varieties that are great for growing. It is even more frost-resistant than grape-leaved and grows well anywhere. Intense red or burgundy varieties are popular. Violet and blue shades are interesting - these are relatively rare flower colors, so it is worth making such a contrasting accent in the garden. The most popular varieties of alpine clematis include:
- "Blue Bird" Blue Bird;
- "Cecile" Cecile;
- "Frankie" Frankie.
Straight
In gardens you can find straight clematis, which also grows in wild form in our country. This is a small-flowered clematis with a stunning scent. The flowers are quite small, but numerous, so they do not lose their attractiveness. They look great in the garden; ornamental shrubs are good company for them.
Manchurian
Manchurian clematis (Clematis mandschurica) is unpretentious in care. This is an extremely undemanding plant that blooms beautifully almost all season. This is a vine reaching a height of 2 meters. The distinctive features of the species are small white flowers, reaching a maximum diameter of 2 cm. Their shape resembles scattered stars. Flowering period: July-September. An additional advantage of the plant is its wonderful aroma. White flowers look interesting against the background of green leaves. After the flowering period, characteristic fruits appear in place of the flowers, consisting of tiny hairs that form small “doughnuts”.
Further care for clematis
After planting, the plant needs further care: tying it to a support, watering, fertilizing, pruning shoots.
In spring and summer, shoots are tied to supports. Otherwise they will randomly intertwine with each other.
Care must be taken to ensure that the branches are not damaged or become infected. Supports are installed before planting or immediately after planting.
Otherwise, there is a possibility of damage to the root system.
Ready-made buildings are for sale. Most gardeners make their own special pyramids, arches, and stuff a large metal mesh or wooden mesh structures onto the wall of a building. The growing shoots are first tied up and directed along the support.
The supports must be strong, but not more than 1 cm thick in diameter.
It is recommended to regularly loosen the soil around the bushes, remove weeds, last year's cut shoots and leaves.
Watering
The plant needs weekly watering in spring and autumn, and 2-3 times a week in summer. A young bush needs at least 20 liters of water, a mature one - up to 40 liters. Drip irrigation is effective.
Mulching the soil allows you to retain moisture longer and eliminates the appearance of weeds.
Feeding
Clematis need regular feeding. Before carrying out this work, the area is watered.
At least 5 feedings are required per season:
- Late April-early May, the first fertilizing with ammonium nitrate (20 g per 10 liters of water) is carried out. 5-10 liters of fertilizer are poured under each bush. Depends on the size and age of the bush.
- After 7-10 days, an infusion of mullein (1:10), fermented grass (1:10) or chicken manure (1:15) is used for fertilizer. In the absence of organic fertilizers, use a urea solution (10 g per 10 liters of water).
- Two weeks after the second feeding, water with complex fertilizer. You can take 1 tablespoon of “Kemira universal” and dissolve it in 10 liters of water. It is advisable to alternate the application of mineral fertilizers with organic ones.
- The fourth feeding is carried out with the onset of budding - phosphorus-potassium fertilizers.
- The last fertilizing with a complete complex fertilizer is after flowering and pruning.
Attention! During flowering, shrubs are not fertilized. Flowering time is reduced.. Between the second and third feedings (in May) it is useful to water with lime milk
100-150 g of lime are dissolved in 10 liters of water. Use on 1 square meter
Between the second and third feedings (in May), it is useful to water with lime milk. 100-150 g of lime are dissolved in 10 liters of water. Use on 1 square meter.
In summer, for monthly fertilizing, use a weak solution of boric acid (1-2 g) and potassium permanganate (2-3 g) per 10 liters of water. The bushes are sprayed with urea (½ tablespoon dissolved in 10 liters of water).
What to add to the planting hole?
So, you have found a suitable place to plant your clematis, and it’s time to root it. Dig a hole with a diameter of 60 cm and a depth of 70 cm. In order to protect the plants from flooding with groundwater, a drainage layer must be laid at the bottom of the hole. And here's what else you'll need to put in there:
- peat – 1/3;
- soil taken from the garden – 1/3;
- humus – 1/3;
- a little sand to add airiness;
- superphosphate.
You can change the composition of the proposed fertilizer based on the characteristics of your own soil. If your garden plot is dominated by loam, you can fertilize it with a compost mixture. If sandstone, add chernozem.
If there is highly acidified soil, it should first be treated with a solution of lime or chalk in a proportion of 150-250 grams per 1 square meter.
Clematis - care and cultivation
The beauty of this plant can be compared with exotic flowers due to the large size of the buds and varied colors. To successfully grow clematis in open ground, you need to take into account a number of requirements for this garden crop:
- They are light-loving and grow better in areas flooded with light, but protected from open wind.
- Planting and caring for clematis flowers should take into account that excess water provokes the appearance of putrefactive diseases of the stem.
- In hot weather, protect foliage and flowers from wilting by spraying them with a spray bottle.
Caring for clematis in autumn
A special feature of gardening this season is the need to prepare shoots for wintering. They consist of three stages, none of which can be excluded:
- Pruning vines.
All shoots are shortened to a length of 25-30 cm, each of them must have at least three healthy buds. This will encourage side shoots to grow next spring. - Applying fertilizers to open ground.
Without them, preparing clematis for winter and caring for it in the fall is impossible, because otherwise its immunity to infections will decrease. - Preservation of summer growth.
Flowers on last year's shoots should not be touched, but if they have diseased leaves, they should be removed and the cut area should be treated with a disinfectant solution.
Clematis - wintering in open ground
The more elite the variety of this crop, the lower its ability to frost resistance
Therefore, proper wintering of clematis is important to preserve the viability of the flower. It is recommended to minimize harm from temperature changes in one of the following ways:
- Covering the tree trunk circle with a layer of river sand mixed with ash. The thickness of the shelter should not be less than 15 cm.
- If planting and caring for clematis in open ground involves the use of supports, then the vines are removed from them, laid on the ground sprinkled with peat, and covered with spruce branches.
- The shoots can be covered with a 20-25 cm layer of a mixture of rotted manure and sawdust, and then covered with film.
Caring for clematis in spring
With the arrival of the first warm days, the vines seem to come to life and an intensive growing season begins. Spring care for clematis begins with loosening the soil. This will saturate the open ground with oxygen and make it easier for fertilizers to reach the root system during subsequent feeding. By May, the plant begins to gain 6-10 cm in length per day, so it is placed on supports made of rope, wire, linen twine or a metal frame. The lower parts of the vine should be tied to prevent the risk of mechanical damage to the plant.
Clematis - feeding care
After planting, the plant needs careful supervision. Lianas respond well to care with abundant flowering. For their full development you will need:
- Watering.
This species does not tolerate excess water, but it must penetrate deep into the soil in order to fully moisturize the roots. It is recommended to water clematis at least once a week; planting and caring for them in open ground also requires spraying the leaves with a spray bottle in hot weather. - Fertilizer.
It is applied during the period of active growth - exactly until the moment when the first flowers appear on the vines. One soil enrichment per month is enough to avoid nutrient deficiencies. In the spring, feeding and caring for clematis should include copper sulfate, a mixture of organic fertilizers for strawberries and milk of lime. - Removing weeds.
In the open ground, they take all the minerals and moisture for themselves, so they must be removed from the flowerbed in a timely manner. You can sow its surface with special grass to protect the flowers.
Recommendations
When planting vines in spring, it is recommended to follow a number of tips. This is necessary to prevent common mistakes among novice gardeners.
Basic recommendations:
- In early spring, the soil under clematis should be dug up so that the pest larvae inside die.
- If the acidity of the soil is increased, add lime to a depth of 20-25 cm.
- After planting, the flower should be given partial shade to prevent sunburn.
- To stimulate root growth, you can pinch strongly growing shoots.
- When deepening the vine during planting, you need to take into account the pruning group and the location of the tillering unit.
- In the first year, it is recommended to remove early buds from the flower to speed up the growth of shoots.
Following these recommendations will help you grow a beautiful vine with lush and bright buds. The tips presented will be useful for both beginners and experienced gardeners.
Further care for clematis
After planting, the plant needs further care: tying it to a support, watering, fertilizing, pruning shoots.
In spring and summer, shoots are tied to supports. Otherwise they will randomly intertwine with each other.
Care must be taken to ensure that the branches are not damaged or become infected. Supports are installed before planting or immediately after planting.
Otherwise, there is a possibility of damage to the root system.
Ready-made buildings are for sale. Most gardeners make their own special pyramids, arches, and stuff a large metal mesh or wooden mesh structures onto the wall of a building. The growing shoots are first tied up and directed along the support.
The supports must be strong, but not more than 1 cm thick in diameter.
It is recommended to regularly loosen the soil around the bushes, remove weeds, last year's cut shoots and leaves.
Watering
The plant needs weekly watering in spring and autumn, and 2-3 times a week in summer. A young bush needs at least 20 liters of water, a mature one - up to 40 liters. Drip irrigation is effective.
Mulching the soil allows you to retain moisture longer and eliminates the appearance of weeds.
Feeding
Clematis need regular feeding. Before carrying out this work, the area is watered.
At least 5 feedings are required per season:
- Late April-early May, the first fertilizing with ammonium nitrate (20 g per 10 liters of water) is carried out. 5-10 liters of fertilizer are poured under each bush. Depends on the size and age of the bush.
- After 7-10 days, an infusion of mullein (1:10), fermented grass (1:10) or chicken manure (1:15) is used for fertilizer. In the absence of organic fertilizers, use a urea solution (10 g per 10 liters of water).
- Two weeks after the second feeding, water with complex fertilizer. You can take 1 tablespoon of “Kemira universal” and dissolve it in 10 liters of water. It is advisable to alternate the application of mineral fertilizers with organic ones.
- The fourth feeding is carried out with the onset of budding - phosphorus-potassium fertilizers.
- The last fertilizing with a complete complex fertilizer is after flowering and pruning.
Attention! During flowering, shrubs are not fertilized. Flowering time is reduced
Between the second and third feedings (in May), it is useful to water with lime milk. 100-150 g of lime are dissolved in 10 liters of water. Use on 1 square meter.
In summer, for monthly fertilizing, use a weak solution of boric acid (1-2 g) and potassium permanganate (2-3 g) per 10 liters of water. The bushes are sprayed with urea (½ tablespoon dissolved in 10 liters of water).
HISTORY OF CLEMATIS
There are many natural species of clematis that grow wild in Japan, Korea, Australia, New Zealand and both American continents.
A beautiful climbing plant came to Europe from the East at the beginning of the 18th century. The French especially loved it. It was here that the first large-flowered vines with unusual bright colors of flowers were bred, which decorated the walls of houses and decorated high stone fences.
The vine was brought to Russia at the beginning of the 19th century to decorate palace walls, gazebos and pavilions. A very unpretentious plant quickly spread throughout the country.
The selection of clematis in our country began to be seriously pursued only in the 50s of the last century. Scientists and breeders of the Nikitsky Botanical Garden were the first to begin this work.
To date, more than 2.5 thousand varieties of this stunningly beautiful vine have been created in the world. Among them you can find plants from 1.5 to 25 m in length and with amazingly beautiful bright (single-color and multi-color) small and large (from 2 to 25 cm in diameter) flowers of the most bizarre shapes and with a variety of aromas.
Clematis are very unpretentious and durable. Even with little care, they will delight you for many years with their amazing sophisticated beauty and lush flowering.
Planting clematis in autumn in open ground
Soil for clematis
Clematis can grow in one place for up to 30 years, so when choosing a place for them, be extremely responsible - although clematis is not capricious, there are conditions under which you cannot achieve normal plant development. For example, in warm areas, clematis should not be planted in bright sun or too close to an iron fence, or near the walls of buildings, since water should not be allowed to drip from the roof onto the clematis.
Do not plant clematis in places where there are drafts, since its flowers are large and heavy, and its shoots are fragile and thin, easily broken by a gust of wind.
Clematis is undemanding in terms of soil composition, but growing it in acidic soil is undesirable - the optimal pH for the plant is 6.5, and the groundwater level should be no higher than 120 cm. Low-lying and wetlands are unsuitable for growing clematis.
When to plant clematis in autumn
Clematis is planted in both spring and autumn. If you purchased a seedling in the summer, then it makes sense to plant it in the garden without waiting for spring. When is clematis planted in the ground in the fall? The best time for this is September. If you plant clematis later, it may not have time to take root and will die in the winter. And if you plant it too early, then, having taken root, it can begin to grow, which is also detrimental to the plant on the eve of winter. Therefore, if you received a seedling in November, it is better to leave it in the cellar or basement for the winter and start planting in the spring.
How to plant clematis in the fall
Planting clematis in the fall is done in the same way as in the spring - it is planted in the ground with deep penetration, that is, not only the root collar of the seedling should be underground, but also the first pair of buds of the shoot. This planting stimulates tillering and develops plant resistance to diseases.
A hole for clematis is prepared with a depth of at least 60-70 cm. To fill the hole, prepare an earthen mixture consisting of humus, peat, turf soil and sand in equal parts. Add a couple of glasses of wood ash, one glass of lime and 150 g of complex mineral fertilizer to the soil mixture.
Lower the seedling with the earthen ball into the hole, fill it with sand first, and then fill the free space with the earth mixture, lightly trampling it down so that there are no voids left in the soil. After planting, be sure to water the clematis. In the spring, the seedling will begin to grow, but its development will be slow and its shoots will be thin. Don’t despair, this is quite normal - clematis will become a full-fledged ornamental plant only by 3-4 years.
Contraindications when choosing soil for clematis
When choosing a site for growing clematis, you should avoid soils with the following characteristics: 1) An absolute contraindication is acidic soils, as well as too salty ones. Heavy and overly moist soil is also not suitable for growing clematis. 2) The close location of groundwater to the surface of the earth on the site makes it unsuitable for growing flowering vines. If there is no other way to plant clematis, you can place the seedlings in portable containers with suitable soil and place them on the site. Another way to get out of this situation is to plant clematis bushes on specially heaped hills about a meter high. 3) For the successful cultivation of clematis, only soils whose acidity level ranges between 5.5 pH and 6.5 pH are suitable. Other indicators mean that the soil does not meet the requirements of a given crop.
When is the best time to plant clematis?
It is important to observe the correct time for planting a flower. The plant belongs to the crop with early growing season
If you do not plant it in a timely manner, the biological rhythm will be disrupted. This will lead to the fact that the flower will not have time to take root before the cold weather.
The timing of planting depends on the region:
- If the procedure is carried out in the spring, it should be done before the buds swell and open. For the central part of Russia, this time begins in mid-April and lasts until early May.
- Clematis that were grown in an apartment are not recommended to be transplanted into open ground until the frosts have passed. A change in temperature will be detrimental to the plant.
- If planting occurs in autumn, it should take place no later than the end of August. This will help the plant take root before frost sets in.
Disembarkation rules
In summer you can plant clematis with a closed root system. To do this, choose a cloudy day. For the winter, the plant is transferred to a greenhouse or apartment, where it grows until it can be transplanted into open ground.
Important! If you purchase a rooted cutting in a store, packaged in a bag with a peat mixture, it cannot be planted in open ground. In the first year, it can only be grown in a deep container, kept warm for the winter.
Only the next year the seedlings are moved into open ground to a permanent place.
Features of planting clematis in the autumn season
Gardeners consider autumn the most suitable time for planting clematis. The plant manages to strengthen the root system before the beginning of winter. The most optimal soil and air temperature for planting is observed in September.
Despite the fact that many varieties of flowers have been bred that tolerate frost well, the autumn plant requires special care. To prepare it for wintering, you will need to carry out a number of activities:
Young seedlings must be covered for the winter. This can be done with dry leaves, branches or improvised material, for example, film, roofing felt. No later than October, the bushes are fed with a mixture of humus and ash. In autumn, stop watering the plant.
It is important to follow this rule, since during night frosts the moisture will destroy the roots. Bushes that are already one year old are completely freed from dry foliage and trimmed. Only the trunk, up to 30 centimeters long, remains. After pruning, clematis is spudded, then covered with branches and film.
Important! If the plant has long shoots, it is rolled up, wrapped in material, laid on the ground and covered with roofing felt. This will protect the roots from moisture
Features of planting clematis in spring
Most varieties of clematis are recommended to be planted only in spring. The vine needs time to properly take root and prepare for winter. A perennial plant planted in the spring will develop a good root system before frost, allowing it to grow for at least twenty years.
Spring planting has its downsides
It is important to meet the deadlines, since the bush begins its growing season very early. If you plant a plant with bare roots and budding buds, it will react sharply to the slightest damage
Therefore, it is important to have time to plant it before the buds open.
Useful tips
Next, we will consider the nuances of caring for clematis so that it grows, blooms and delights you with its beauty. By the way, with proper treatment, this vine can live for about 25 years.
- First of all, even before you go to the store to buy clematis, decide where it will “live”. The fact is that he does not like to be transplanted often.
- You have chosen a place, and it’s time to purchase a seedling. Be careful: when buying a plant that has barely reached 10 centimeters in height, you may encounter its non-viability. Even if such a clematis survives, it will be frail and more demanding of care than is usually the case. Therefore, it is recommended to choose a sprout about 20 centimeters in height and with well-developed closed yellowish roots in the amount of 5-6 pieces. You should see 2-3 shoots with developed leaves and buds. This appearance of clematis corresponds to two or three years of age.
- The plant can be planted both in autumn and in spring. Spring planting is preferable: the vine will grow, strengthen over the summer and be able to withstand winter cold.
- The location of the vine should be sufficiently isolated and protected from the wind. At first, young shoots will have to be covered with non-woven material and shaded. For the winter, clematis must be covered so that it does not freeze.
- Sometimes it happens that an amateur gardener, without waiting for the vigorous growth of a recently planted plant, decides that, most likely, the wrong place for planting was chosen and replants the vine. However, there is no need to rush: the fact is that in the first couple of years, clematis “throw all their energy” into growing and strengthening the roots, which is why the surface greenery seems scanty.
- Young shoots require special care in the first years of life. Weed around them, but be careful not to damage the delicate rhizome of the clematis. Attach the stem to the support. If there is a strong wind, it is raining, or, conversely, it has not happened for a long time, and the sun is “hot,” cover the seedlings with a light non-woven fabric. Even better would be a mini-greenhouse made from a 5-liter plastic bottle with a cut-off bottom, the lid of which you can open and close when needed.
- Pruning clematis in the first couple of years of life is prohibited, as the plant must grow and become stronger. This is especially true for plants planted in the ground in late summer and early autumn. In general, all that is required of you during this period is to water, feed and treat the vine from pests.
- We mentioned earlier that in order to avoid flooding with groundwater, drainage mass must be poured into the clematis hole. It can be formed from crushed stone, broken brick and coarse sand. The drainage layer must be at least 15 centimeters thick.
- In the spring, in order to feed your clematis and increase its resistance to disease, you can water it with the following mixture: dilute 1 glass of dolomite flour or crushed chalk in 5 liters of clean water, add a tablespoon of a preparation containing copper.
- Fertilizing with ash has a very good effect on clematis - they begin to bloom better, the roots stop rotting, and harmful insects bypass the plant.
Take care of your green “pets”: water, fertilize, protect from unfavorable climatic conditions and pests - and then they will decorate the landscape of your garden for many years.
For information on how to properly plant clematis, see below.
Clematis diseases and their treatment
The most dangerous pathology for clematis is wilting. This is a pathology that manifests itself in the drying out of branches. If a plant gets sick during the growing season, this leads to its death. To prevent the problem, it is necessary to ensure proper nutrition of the roots.
Flower diseases also include:
- Spotting is the formation of fungi carried by snails. Brown spots appear on the leaves, causing necrosis. The leaves begin to fall off. Treatment is carried out using copper sulfate.
- Powdery mildew is a pathology that affects the ground part. Growth and flowering stop, the branches become covered with plaque, and the plant gradually dies. Salicylic acid is used for treatment.
Among the pests that clematis are afraid of are nematodes, spider mites and scale insects.
Plant diseases
Why doesn't clematis bloom?
Lack of flowering can occur for various reasons. This may happen if:
- the bush is planted in the wrong place;
- soil is too wet;
- a diseased seedling was used;
- there are not enough nutrients in the soil;
- There are a lot of weeds around the bush;
- The rules were broken during circumcision.
The lack of flowering can be caused by several reasons.
Important! The plant does not bloom in the first year
What and how to deoxidize the soil in summer
We have determined the acidity of the soil. Now you need to decide what to do to change it. In summer, you can deoxidize the soil with the help of mineral and organic substances. Planting some green manure plants will also be effective. Each method has its adherents.
In order not to harm the plantings, in summer substances such as dolomite flour and gypsum are used as deoxidizers. Dolomite flour is suitable for light and clay soils. Thanks to it, the former are enriched with magnesium, which they always lack. For the latter, the composition and structure of the soil improves. You can recall other beneficial properties of dolomite flour.
9 beneficial properties of dolomite flour that you didn’t even know about Find out how to effectively use dolomite flour on your site.
Dolomite flour does not burn the roots and leaves of plants, so it can be used all year round. It is scattered over the surface or mixed with soil. Application doses depend on the acidity level of the soil and range from 350 to 600 g per 1 sq.m.
On acidic soils, apply 500-600 g per 1 sq.m, on medium acidity soils - 450-500 g per 1 sq.m, and on slightly acidic soils - 350-450 g per 1 sq.m.
To maintain the neutral composition of the soil, it is recommended to periodically add 100-150 g of dolomite flour per 1 sq.m.
Good for deoxidizing soil and gypsum
It has one important advantage: it requires acid, not water, to dissolve in the soil. Having neutralized the soil, the mineral substance ceases its effect
As soon as the acid level in the soil increases, the gypsum reacts again.
On slightly acidic soils it will be enough to add 100-200 g per 1 sq.m, on moderately acidic soils - 300 g per 1 sq.m, on acidic soils - 400 g per 1 sq.m.
How to deoxidize the soil with ash
Natural deoxidizers include ash and eggshells. But they are less effective than mineral ones. And they need to be added much more, which makes it difficult to collect the required amount. Thus, wood ash for normal soil deoxidation requires 1-1.5 kg per 1 sq.m, and ash from burnt grass and weeds, which contains less calcium, is already 2.5 kg per 1 sq.m.
Ash contains microelements, but introducing large amounts of it into the soil can lead to an excess of them. Therefore, it is better to use this substance on slightly acidic soils, where less of it is needed.
How to deoxidize the soil with eggshells
To deoxidize the soil, it is better to use eggshell flour rather than pieces of it. It's easy to prepare. The dried shells are crushed with a rolling pin or pestle in a mortar, then ground in a coffee grinder or food processor.
Eggshell flour should be added at 500 g per 1 sq.m. Its efficiency is even lower than that of ash. It can revive acidified soil only at the initial stage. Calcium from the shell passes into the soil long and slowly. So it is of little benefit to plants.
Slightly acidic soils should be deoxidized once every 5-8 years, acidic soil - once every 3-4 years.
Growing green manure to deoxidize the soil
Some green manure plants not only fertilize the soil well, but can also deoxidize it. Phacelia, white mustard, sweet clover and alfalfa are better suited for these purposes. With proper crop rotation, you can even do without using minerals altogether.
Phacelia, regardless of its predecessors, is sown from March to August (the norm is 10 g of seeds per 1 sq.m.), and mowed after a month. But white mustard is not sown after all types of cabbage, radishes, turnips and radishes. After other crops, it can be sown at any time (the norm is 2 g of seeds per 1 sq.m.), and mowed 40 days after the first shoots.
Beans, peas, soybeans, chickpeas and lentils are prohibited precursors for alfalfa and sweet clover. The first one is planted from mid-April to mid-May, from mid-July to mid-August (the norm is 15 g of seeds per 1 sq.m.) and mowed after 1.5 months. Sweet clover - from March to August (the norm is 2 g of seeds per 1 sq.m.), and is mowed after 3 months or the next year.
When and how to sow green manure correctly - all the information in one article. What do some weeds, grains, fodder and ornamental crops have in common? All of them can become excellent fertilizers with the right approach!
When deoxidizing the soil, it should be taken into account that not all plants are harmful to acidic soil. Rhododendrons, blueberries, hydrangeas, conifers, heathers, etc. grow well on it. And most vegetable and garden crops receive all the essential nutrients from slightly acidic soil.
Growing clematis from seeds
It is useful for beginners to know that clematis, which can be planted in open ground in spring and autumn, can be grown from seeds, the main thing is to provide them with proper care. The growing process should begin with stratification.
The process involves placing planting material in the freezer for half an hour. After this, the seeds are transferred to a room at room temperature. Here they need to be kept for 2 hours, then placed in the cold again. A sharp change in temperature should be carried out three times.
After which the seeds are soaked in a growth stimulator for 2 hours, washed and laid out on a flat surface. Planting material is covered with a plastic bag in a dark room.
It is important to periodically open them and ventilate them.
At a temperature of +25 °C, seedlings begin to germinate already on the tenth day; they can be planted in a container with soil. Planting should be done while maintaining a small distance between seedlings.
The ground should be mulched with sawdust
If cold weather sets in, it is important to build a shelter from sawdust or polyethylene. You need to care for a flower in the same way as other types of seedlings:
- water;
- loosen the soil;
- remove weeds;
- add fertilizers.
To strengthen the rhizome, young shoots should be pinched, as well as weak and damaged branches should be pruned. Healthy shoots need to be tied to the base so that they become stronger and can continue to develop.
Interesting! How to plant beets correctly in spring
Pest Control
Clematis is threatened by aphid colonies
The greatest harm comes from soil contamination with nematodes, plant damage by spider mites, mealybugs, and aphids.
To prevent infection with nematodes and scale insects , before planting, the roots of the purchased seedling are immersed in hot water (50°C) for half an hour. Mulching the soil with wormwood leaves or planting marigolds or calendula nearby inhibits the development of the nematode.
In hot weather, young shoots attack colonies of aphids ; to combat this pest, plants are treated with soap emulsion or pesticides (Bi-58, Decis).
against spider mites - spraying with Arcerid, infusion of garlic or dusting with colloidal sulfur.