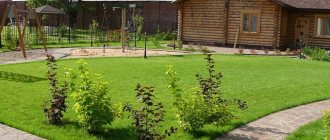
A sports facility or football field, recreation area or playground in a country house requires a wear-resistant, weather-resistant coating.
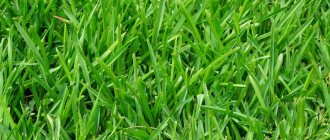
Modern technologies used in the production of artificial turf allow it not only to meet all these requirements, but also to be almost identical in appearance to natural grass.
The advantages of synthetic greens also include the speed with which you can acquire your own lawn and the opportunity to save money if you install the covering yourself.
Of course, it is better to trust any work to professionals. If you decide to do without the help of specialists, then you need to carefully understand what the technology for laying artificial grass consists of.
Even if installing artificial grass with your own hands is not part of your plans, understanding the process of how this should happen will be useful to you if you simply need to decide what kind of covering to purchase. After all, the installation method depends on the type of artificial turf. This means possible associated additional costs for the purchase of all necessary materials.
Types of artificial grass by type of installation
Artificial grass is sold in rolls, ranging from 1.8 m to 4 m wide. Laying artificial grass will have its own characteristics, depending on which type you purchase:
- non-backfilling;
- half-fill;
- backfill;
Non-fill (decorative) - a type of lawn for which no filler is required. It looks almost natural, but just as quickly loses its attractiveness with intensive use.
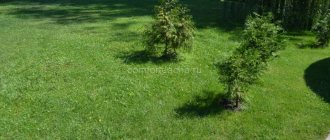
It is usually used for laying artificial grass where increased load on the surface is not expected: on alpine hills, to give a well-groomed appearance to cemetery areas, to implement various ideas of landscape designers.
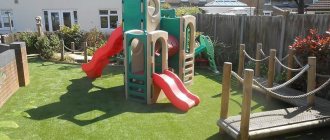
Semi-fill or combined turf - to increase its wear resistance, the spaces between the fibers are filled with quartz sand. Used on children's playgrounds, tennis courts, and landscape design.
The backfill (special) type is laid using a large amount of filler. It is used to create football fields and other sports facilities. Quartz sand and rubber granules as bedding prevent slipping on the grass and minimize the consequences of falls.
Laying a non-fill lawn
The technology for laying a non-fill lawn is extremely simple and consists of the following:
- Clearing the area of large debris (glass, stones, branches) and leveling the soil.
- Compacting the soil with a special roller or a suitable means at hand (a heavy pipe of suitable diameter, a barrel, etc.)
- If necessary, if there is a possibility of seasonal flooding of the site, it is necessary to make drainage or create a slight slope of the ground for water drainage. The role of drainage can be performed by a ditch dug along the perimeter of the lawn and filled with crushed stone.
- Cut the rolled material to the size you require.
- Laying artificial grass on the ground.
- If necessary, gluing parts of the artificial lawn together (more details about this process will be discussed below).
Artificial turf in Moscow
Buy in St. Petersburg
Buy in Krasnodar
Drainage layer
Drainage can be open or closed.
An open drainage system is created by creating a slight slope of the site. It can be made either in one direction or from the center of the lawn to the periphery: hipped (“envelope”) or gable.
Trenches filled with crushed stone are placed along the perimeter. If necessary, pipes can be placed in them to drain water outside the site.
A closed drainage is built under the lawn. It is a complex pipe system and requires a large amount of excavation and design work for its construction. As a rule, such work is performed by specialists.
If the soil drains well, a complex drainage system of perforated pipes and drainage channels filled with untreated gravel may not be necessary. However, it is recommended to provide at least an open option for draining water away from the artificial turf area.
Laying semi-fill and infill lawns
These types of lawns require intensive use and are used, among other things, for children's playgrounds and sports grounds and therefore require careful adherence to installation technology.
Miscalculations can lead not only to a reduction in the service life of the coating, but also to injuries.
Just as when installing a non-fill lawn, you need to start with careful preparation of the base.
What to collect from
There are two fundamentally different approaches here: use ready-made modules created by professional florists and almost indistinguishable from real ones in appearance, or assemble everything yourself, from commercially available artificial flowers, lichens and other imitations. It is better to choose those varieties that are used in “real”, living compositions - this way you will create a more realistic decor.
The option with a ready-made decoration system will be very expensive: one square meter of wall made of such artificial plants can cost tens of thousands. If you are ready to incur such expenses, you should pay attention to companies specializing in vertical gardening - specialists can not only make the modules themselves, but also develop the design of a specific structure, and also install it in your home. With such large costs, the difference in the estimate will be small.
If you are going to assemble everything yourself, the costs will be significantly less. However, there is one point here: not everyone can group the components correctly and make a really beautiful design. We will have to collect information about what principles florists use when assembling such compositions and what imitations of flowers to use to make everything look beautiful.
Artificial turf base
To achieve a high-quality result, it is necessary that the soil is dry during preparation of the base. The air temperature should be about 10 degrees Celsius or higher. The required weather for work is without precipitation.
The choice of the optimal method of preparing the base from the possible options depends on the following factors:
a) the purpose for which the future lawn is intended;
b) the intensity of the upcoming load on the coating;
c) the type of soil that is supposed to be used as a foundation;
d) your financial and technological capabilities;
In the event that you need to lay artificial grass for a medium-intensity use of the future artificial lawn, you can handle the preparation of the base yourself, without the involvement of professionals and special equipment.
After clearing the area of large debris and leveling the area, it is necessary to make more reliable drainage from crushed stone than in the case of an unfilled lawn.
To do this, you need to excavate the soil to a depth of about 50 cm and lay a geotextile backing. Its task is to prevent soil from mixing with artificial grass and increase the service life of the surface.
Rolls of substrate should be laid overlapping and secured with staples. Along the perimeter, the canvas should extend beyond the base by 15 - 20 cm.
After this, a layer of sand is laid, followed by coarse crushed stone, then fine crushed stone. All layers are carefully compacted.
If there is a possibility of flooding the site due to too intense precipitation, or due to a high groundwater level, it is necessary to lay drainage pipes at a depth of 50 cm along the bottom of the excavation.
The type of soil is one of the important factors influencing the process of preparing the base for artificial turf. Therefore, those who take on this work for the first time may have a question: how to lay a coating on sand?
As a rule, manufacturers do not recommend doing this at all, because sandy soil is unstable. It is necessary to remove the surface layer of sand, thoroughly compact the soil, and only then begin further work on installing the coating.
If you use concrete as a base, you need to make a slight slope for water drainage and before laying artificial grass, lay a special 1 cm thick asphalt backing or foam rubber mats. This will reduce the abrasion of the lawn and extend its service life. In addition, the substrate will act as a shock absorber. Before pouring concrete, it is also necessary to prepare drainage layers of sand and crushed stone.
As for the preparation of the base for laying infill lawns used as football fields in stadiums, in this case the laying of complex drainage systems with pipelines and trays for collecting water is required.
How to do
Unlike living components, such greenery does not require any special materials or tools from you in order to create a green wall. You only need to prepare the base to which everything will be attached and decide on the place where you will place the finished structure. A green wall of artificial plants is assembled approximately according to this scheme:
- The base is cut out of thin plywood or other durable sheet material. You can assemble a wire frame. It’s easier and faster to immediately mount everything directly on the wall, but in this case you will get a structure that cannot be moved or removed without damage. Therefore, it is better to attach greens to a separate base.
- Next, in accordance with the previously drawn diagram, you attach the greenery to the base. This can be done with a glue gun or other method.
- The finished module can be installed in place. If desired, it can be small or occupy the entire wall. Small parts are easier to work with and you can constantly move them, creating a new composition each time.
Please note that the principles of combining plants that apply to fresh flowers, even if they are fake, are best observed. This will make the composition more realistic. If you use artificial moss, it can become a background for brighter and larger leaves or simply act as a continuous covering - it looks no less beautiful.
- Author: Maria Sukhorukikh
(0 votes, average: 0 out of 5)
Share with your friends!
Trimming and joining grass
Rolls of artificial grass need to be rolled out, observing the direction of the blades of grass, and laid so that the material rests for 12-24 hours. If the lawn fibers are directed in different directions, its color may be uneven.
Artificial turf is laid end-to-end or overlapped by 1.5-3 cm if the edges are uneven. Precision cutting using a utility knife and a metal ruler is necessary to achieve an ideal joint. It should not exceed 1mm.
All material is cut in the same way according to the required size of the site or lawn.
Please turn JavaScript on and reload the page.
It is used to create trees and shrubs.
There are special sponges for layouts (Noch, Auhagen, Faller).
However, it is not at all difficult to make a sponge at home.
How to make a sponge for creating trees and shrubs yourself?
1. Prepare the adhesive solution. Mix PVA glue with water in a 1:1 ratio;
2. Using a color scheme, we will give the solution the required color. For example, dark green. Green can be obtained by mixing yellow with blue;
3. Mix the solution thoroughly;
4. Dip a piece of foam rubber into the previously prepared solution and wet it thoroughly;
5. Let the painted foam rubber dry for 24 hours.
6. Now the dried foam rubber needs to be crushed. This can be done using a mixer or coffee grinder. If they are not at hand, then an ordinary iron grater will help out.
Natural materials for creating trees, grass and shrubs on a model.
- Thin branches . Used for making trees and large shrubs.
- Crushed dried leaves. Used as a powder to imitate the foliage of trees, bushes and flower beds.
- Moss. Used to imitate small shrubs.
In our mock-up workshop, all employees undergo training under the guidance of a master.
Return to blog posts
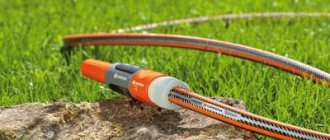
Gluing the canvas
Once you are sure that the lawn fabric lies flat and has no defects in the form of swellings or bumps, you can begin gluing the parts together.
To glue parts of the lawn together, special connecting tapes (sutures), about 30 cm wide, and polyurethane glue are used.
The tape is placed under the edges of adjacent parts, glue is applied to it with a notched trowel, the edges of the sheets are lowered, and the seams are pressed with a roller or heavy pipe of a suitable diameter.
The work should be done carefully, avoiding getting glue on the lawn fibers.
If the lawn area is large, it is advisable to additionally secure the seams with staples.
Step-by-step instructions on how to make a grasshopper.
1. Cut the stocking with scissors so much that you get a piece of nylon in the form of a “sleeve” 10-15 cm long. You can immediately cut the material across into thin strips - these will be the ties.
2. We tie one end of the stocking and tighten it with a tie or strong thread. Turn it inside out to create a bag with a knot inside.
3. First pour grain inside the bag (it would be good to soak it for 5-6 hours in advance), and then sawdust. We compact it with our hands and form the “body” of the grass so that the grains are on one side of the bag. It is better to moisten the sawdust before doing this. We also tie the top edge of the bag.
4. Now let’s turn on our imagination. Who is your herbalist? Try to spot a hedgehog, a turtle, a frog, a tiger cub, a dog, a bear, a caterpillar - whatever you want! Even a miracle Yudo or an alien. You can find ideas on children’s creativity websites or come up with something of your own.
How to make an animal? To do this, you just need to separate part of the “body” and use ties to form either a muzzle, or ears, or horns, or paws, or a tail. Don't forget to check how stable the grass is.
5. We revive the grasshopper. Glue or sew on the mouth and eyes. You can use buttons, pieces of cardboard drawn and cut out in the shape of an oval, or eyes from an old plush toy. If desired, you can add brightness to the figure by painting the surface with acrylic paints. Watercolor and gouache are not suitable, as they stain your hands and will then be washed off when water gets on the grass.
Marking
If the artificial turf will be used as a sports ground, then markings will be necessary. This can be done in two ways:
— painting;
- “inset”;
The first option is more economical and easier to implement, but less durable. Such markings, applied with polyurethane paint, will last from 3 to 5 years.
The second option is more labor-intensive, but the service life of such markings is equal to the service life of the site itself. It involves inserting markings made of the same artificial grass, only white.
To install the ribbon, strips of the required thickness are cut from white blades of grass on a green field. Then a connecting tape is placed under the resulting edges of the lawn, polyurethane glue is applied to it, and the edges of the lawn and the white marking insert are carefully placed, avoiding the glue getting on the fibers. Everything is pressed carefully.
Step-by-step guide with photos of the process
Artificial decorative greenery for bouquets should be more or less similar to natural greenery in both shape and color. You need to start with layout and cutting.
Layout - cutting leaves for flowers and sprigs of greenery
Cut the wire into pieces approximately 7-10 cm long. If twigs are needed, the length of the wire should be longer.
Cut the tape and place it on the table, securing the edges so that it does not curl. Then carefully place the wire scraps on the sticky surface. The distance between them should be approximately 3-4 cm, the same as the width of the leaf. And it is better to lay out the wire in a checkerboard pattern - the tips are in different directions, this way you will save a little tape when cutting.
Cut a strip of tape the same length as the first piece. Carefully cover the wire tape with it. Try to ensure that no creases form anywhere, although they will not particularly spoil the result of the work.
If you need 1-2 leaves or you can’t work with a long strip of tape (it constantly tries to curl up or stick to something else), then make leaves one at a time. To do this, cut the tape about 6 cm, place a wire on it at one edge and bend it in half.
Next, everything is exactly the same as with leaves from a long ribbon.
I think it’s clear how to cut leaves of artificial greenery. They should not be exactly the same, because in nature there are no perfect copies.
Corrugating leaves and applying veins
How to make leaves for flowers more similar to natural ones? Add veins and bends. To do this, bend the cut leaves in half. If the wire is not in the middle, then there is nothing to worry about.
Now bend the leaf diagonally, as if making an accordion. You need to squeeze firmly so that the folds retain their shape later. The more folds you can make, the more interesting the leaf will be, the smaller you make it.
Unfold the leaves and straighten them. You should end up with corrugated foliage like this.
Coloring leaves for bouquets
Green branches in a bouquet can be rich in color, or they may not be so noticeable if their color is pale and not bright. Choose a shade for the bouquet if you have plenty to choose from. If not, use whatever paint you have on hand for painting.
Backfilling of the coating
Work on filling the lawn with quartz sand and rubber crumbs should be done in dry weather. The algorithm of actions is as follows:
1. Dry sand, with a fraction of no more than 0.6 mm, is applied manually or with specially equipped machines to the surface of the lawn and evenly distributed, “combed” with rakes or brooms so that it ends up “at the bottom” of the covering.
2. The lawn is covered with rubber granules ranging in size from 1 to 2.5 mm, which, just like in the case of sand, are evenly distributed over the surface. Rubber crumbs come not only black, but also colored. It costs more.
3. At the end of the installation process, it is recommended to water the lawn.
Crafts with children. Do-it-yourself herbalist
Do you want to expand your child's horizons? Then make your own grasshopper! Such an original craft with children develops responsibility, gives an understanding of the growth of a living organism, and is also ideal as a visual aid for independent study of natural history at home and for a living corner in kindergarten.
Read in this article:
The herbalist, or eco-man, is very popular these days. This is a craft, a toy, and a pet at the same time. This is such fun - three in one! In appearance, the herb is a small fabric bag or vessel on which grows a cute little forelock of grass, a kind of miniature green lawn.
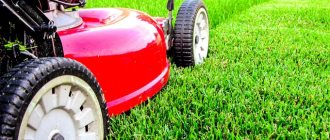
Artificial turf care
Caring for artificial grass will not require as much time and money as natural grass. However, compliance with proper operating conditions will increase the life of the lawn and maintain its aesthetic appearance.
Artificial turf care measures include:
- removing large debris (especially glass and stones) with nylon brushes or garden vacuum cleaners;
- periodic washing with a hose and removing dirt;
- if necessary and desired, disinfection can be carried out (on lawns where children and animals walk);
- once a season it will be necessary to update the backfill;
- It is advisable to make punctures in the lawn once every two weeks to avoid water accumulation and rotting;
- removing weeds that have sprouted on the sand;
- moistening during hot dry periods to increase the adhesion of the lawn to the soil;
If any seam ruptures that occur are repaired in a timely manner and operating conditions are observed, artificial lawn grass will last for many years, maintaining its functional and decorative properties.