- February 15, 2019
- Houseplants
- Natalia Miroshnikova
If you are an inexperienced gardener and have just begun your acquaintance with indoor plants, then you should take a closer look at croton or codiaum. This attractive decorative deciduous compact shrub will decorate your interior, and caring for it does not take much time and effort.
Botanical description
This decorative deciduous shrub belongs to the Euphorbiaceae family. And like most plants of this family, croton is poisonous. Therefore, when caring for him at home, do not forget to wear gloves. Otherwise, you risk being poisoned by the milky juice, which will lead to nausea, vomiting, contact dermatitis and diarrhea. For the same reason, the flower pot should be kept away from children and pets.
The Pacific Islands are considered the birthplace of the croton plant, but the flower is also found in Northern Australia, India and Southeast Asia. According to various estimates, up to 1200 species are included in the genus Codiaum. But at home, only hybrids of the variegated variety are grown.
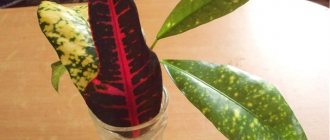
Croton is an evergreen shrub up to 1.5 meters high. But at home, the size of the plant is somewhat more modest (35-70 cm). The elastic stems of codiaum are covered with large, leathery leaves of oblong, asymmetrical or broadly ovate shape. Depending on the variety, the tips of the plates are pointed or blunt.
Initially, the leaves of the plant are colored in light green shades with a yellowish tint. But as they grow, they acquire a bright color and can be either emerald or burgundy, but in any case they will have noticeable veins and spots.
The plant produces buds every year. But you hardly want to watch the croton bloom, because this spectacle does not add decorative value to the culture. Codiaum buds are small, inconspicuous, and they also draw juices from the crop. And if you do not plan to propagate the shrub by seed, then it is better to immediately cut out the flower stalks.
Common mistakes when breeding
Although the processes described above are not at all complicated, inexperienced flower growers often make mistakes that cause their flowers to grow poorly.
Did you know? When croton came to Europe, local residents believed that the flower could only be grown at high temperatures, so it was impossible to grow it at home. Accordingly, it was planted only in the southern regions in gardens.
Common mistakes include the following:
- Early separation of the mother leaf from the young shoots. There is no need to rush to cut it off, since it is a source of nutrition for the young plant - let the shoots grow and get stronger.
- Incorrect transplantation of young plants. When removing them from the soil, do not pull them, but rather dig them up from below so that the small roots remain intact. You can simply turn the container over onto your palm, then the earthen lump will crumble on its own, exposing the roots.
- Incorrect landing. The growth point cannot be deepened. Also, the first pot should be chosen to be the minimum size.
Where to keep the pot?
Croton is a light-loving plant, but prefers diffused light, since direct sunlight leaves burns on delicate foliage. In this regard, it is advisable to keep the pot on an east or west window. In summer, it is better to move the flower deeper into the room, to a northern windowsill, or at least shade the plant from the midday rays.
But in winter, croton may suffer from a lack of light, and this causes the variegated color of the leaves to fade. To avoid such problems, move the codiaum to a southern window sill or provide additional illumination with a phytolamp.
At any time of the year, regularly ventilate the room, because without fresh air, croton does not develop well. But make sure that the flower does not suffer from drafts - it absolutely cannot stand them. Therefore, when airing, take the pot to another room. In summer, take the pot out onto the balcony, but choose quiet places away from gusts of wind and direct sunlight.
Types and varieties
In indoor culture, variegated croton is grown, the distinctive feature of which is the ability to change the color and shape of the leaves depending on living conditions. It was this quality that made the species the basis for experiments in selection, which culminated in the development of many varieties, hybrid forms and varieties.
In the photo: Croton variegated (variegatum)
Croton variegated (variegatum)
grows in nature in Pakistan and China, sometimes reaching three meters in height. The leaves are short-petioled. The color of the leaves is green and brown. This species has several forms, differing in the shape of the leaves: adventitious, lobed, flat-leaved and decorated, which served as the basis for the development of many remarkable varieties.
Varieties:
- Mrs. Eyeston - grows as a large tree or bush with leaves brightly colored dark burgundy with bright pink spots, although there is a variety with golden leaves with almost black fragments and a variety in yellow-pink tones;
- Petra - in nature it grows to a height of up to four meters, branches well, the shape of the leaves is oval, lobed or pointed, the color is dark green with a bright yellow edging and contrasting veins and specks of the same color;
- Black Prince - its wide oval flat leaves of black-green color with many yellow, red and orange spots look very exotic;
- Disraeli has lobed leaves, colored green at the top with yellow veins and specks, and brick-brown at the bottom;
- Excellent is distinguished primarily by the shape of the leaves, reminiscent of oak leaves; the color of the lower part of the leaf is red-burgundy, and the upper part is yellow-green.
The following varieties of variegated croton are also of interest: mollucian, minus, genuine, oval-leaved, tortoiseshell, curly and spiral. But no matter what type you purchase, you can believe that it will become the most noticeable decoration in your interior.
How to water a flower?
Croton is a moisture-loving plant, but you should not overwater it, because the flower does not tolerate both drought and stagnation of moisture at the roots. Therefore, you need to water the soil often, but in small portions. In this case, it is advisable to increase the humidity in the summer and reduce it in the winter. How do you know when it's time to water a flower? Test the soil; if it has dried to a depth of 2 cm, then it’s time to moisten the soil. As a rule, in summer you need to moisten the substrate once every 2-3 days. In winter, it is enough to water the flower once a week. In general, be guided by the conditions in your apartment.
Croton cannot be watered with regular running water. He could die from this. Therefore, use exclusively soft, filtered water and leave it for at least a day before watering.
Care at home.
The plant is demanding on environmental conditions, this is due to its tropical origin. For a comfortable stay, it needs light, high humidity, and warmth.
For active and successful growth, the plant needs loose, fertile soil. You should mix turf, nutritious leaf soil and washed coarse river sand in equal proportions. Or you can purchase a ready-made mixture designed for milkweeds.
The drainage layer prevents moisture stagnation in the root zone. Expanded clay or any other suitable drainage material is poured onto the bottom of the pot.
Croton flowers.
The flower is comfortable at a temperature of +20…+25 degrees. It does not tolerate sudden temperature changes. In winter, the codiaum is removed from the windowsill and moved closer to the heat source.
When the temperature drops below +18 degrees for a long time, the leaves lose their brightness and fall off. The edges of the plates become brown. The plant is afraid of drafts.
Codiaum needs bright, but diffused light. The most suitable place is at the western or eastern windows. With a lack of lighting, the bright color of the leaves is lost, becomes green, and the plant loses its decorative effect. Prolonged lack of light will lead to wilting and shedding of leaves. Do not allow such stress for the plant.
Bright colors of codiaum leaves.
Tip: in the cold, gloomy season, a good solution would be to use additional lighting.
Croton will have to be watered frequently and abundantly: this plant loves moisture very much. The guideline is the drying of the upper layers of the earth mixture. Codiaum will appreciate sprinkling with soft water. He also likes to have his leaves wiped with a damp cloth. A lack of moisture is indicated by the dry tips of the plant's leaves.
Important: a beautiful crown is formed by pruning. The upper part is removed when the croton grows to 10-15 cm, then every 15-25 cm. If there is no pruning, the plant will stretch and lose all its attractiveness.
From April until the end of summer, codiaum is fed once every 2 weeks. It is recommended to alternate mineral and organic fertilizers.
Yellow leaf croton.
At least once every 2 years, the codiaum should be transplanted into a slightly larger container. You should use a pot that does not absorb moisture through the pores of the walls - plastic or glazed.
We create optimal conditions
The croton plant prefers a humid environment, because under natural conditions it lives in tropical forests. And dry air is contraindicated for it. To create optimal conditions, place a special device next to the codiaum - a humidifier. If you do not have such a device, then you can make do with improvised means. For example, containers with water or damp moss placed next to the croton will help increase humidity.
When caring for a flower, do not forget to spray the foliage and wipe it from dust with a damp sponge. Carry out these procedures in warm weather at least every other day, and in winter at least once a week. In the summer, it is advisable to give the tropical beauty a warm shower. But during this event, wrap the pot in plastic to prevent water from getting into the soil.
Propagation by part of the root
Croton has the ability to form basal shoots. As a rule, this ability appears in mature and well-developed plants. To get a new copy by dividing the root system, you should follow a certain procedure:
- The day before the procedure, the plant should be watered well. This will make it easier to separate the root system.
- After removing the plant from the pot, separate the basal shoots from the main root.
- The adult plant is transplanted into a new pot, and the young seedlings are placed in separate containers with a shelter installed on them.
This method is very effective. Its only drawback is that it is applicable only if there is a well-developed plant with basal shoots.
How to feed a plant
Croton needs regular feeding, because from a lack of nutrients its foliage loses its variegated color. To avoid this, apply fertilizer once every two weeks from late March to early November. For fertilizing, use liquid mineral formulations and apply them strictly after watering. Otherwise you will burn out the tender roots of the flower.
In winter, croton, as a rule, does not need fertilizer. But if you notice that the flower is “withering,” then feed it. But do not apply medications more than once a month.
Rooting process and planting
For effective rooting of young plants obtained by cuttings, layering, seeds or division, certain conditions must be met.
Rooted cuttings
- The seedlings are planted in nutritious and light soil. It is best to purchase it in a specialized store.
- To speed up root formation, you should treat the cuttings or cut leaves with a preparation to stimulate growth.
- After the young plants get stronger and begin to grow, they can be transplanted into a larger pot. After this, we can say that a new full-fledged croton has been obtained.
How and when to replant a flower?
Indoor croton is a plant that develops well with proper care. And after a while he becomes cramped in the old potty. Therefore, it is advisable to transplant the flower into a larger pot. Such an event should be carried out at the beginning of spring, then the plant will more easily withstand the stress of the procedure. Replant young crotons annually, and adult specimens once every three years.
First, prepare a new pot. Please note that water will accumulate in a pot that is too large, which will lead to rotting of the roots. To prevent this from happening, choose a shallow container with a diameter 2-2.5 cm larger than the previous one. Moreover, the material of the pot does not play a special role. If your croton already “lives” in a flowerpot with a diameter of 25 cm, then do not replant it anymore, but annually change the top layer of soil to a depth of 3-4 cm.
As for the soil, croton takes root well in a universal store-bought mixture for decorative foliage crops. If you want to make the substrate yourself, then mix peat with humus, sand and turf soil in equal proportions. Be sure to disinfect the mixture before planting, otherwise the flower may die from pests and bacteria living in the soil. To disinfect, keep the mixture in a steam bath or bake in the oven.
Carry out the transplant itself using the transshipment method, that is, carefully remove the plant from the old flowerpot and, trying not to disturb the earthen lump, place it in a new pot. Then fill the voids with substrate, compact it slightly and water. Be sure to add a drainage layer of pebbles, broken bricks or expanded clay to the bottom of the new pot. Please note that these materials should occupy ¼ of the volume of the flowerpot.
How to propagate croton by seeds
Croton seeds can be purchased at a flower shop, or you can collect them yourself. From the experience of breeders, to collect seeds of domestic crotons you need to have two plants of both sexes and cross-pollinate them. Seeds without such manipulations have poor germination, which is why this method is not successful.
Seeds obtained at home retain their properties throughout the year. But it is better to sow them immediately after ripening. Before sowing, it is important to treat against fungi and infections, for example, with epin. It protects the seed from pests and diseases, and also stimulates growth. Soak for two hours, and then immediately into the soil.
First of all, immerse the seeds in an aqueous solution of phytohormones for about 2-3 hours. Some amateur gardeners simply soak the seeds in very warm water (60 degrees Celsius), keep them there for 30 minutes, and then leave them to swell for 24 hours.
- Lay the soil in layers - expanded clay, then earth (peat is possible), and sand on top.
- Sprinkle the seeds on top with sand. We put the box in a warm place (the optimal temperature is 21-23 degrees above zero) and cover it with cellophane or glass. We make sure that the top layer of soil is always moist.
- Watering exclusively by tray method.
- Heating should also be from below, cover the top of the pot with film or glass, but ventilate every day.
- After 30 days, the seed material sprouts. When each of them produces 3 leaves, they need to be planted in different pots of small diameter - 5-7 cm.
Sowing depth is 10 millimeters.
After the first shoots, the time for ventilation should be gradually increased so that the sprouts get used to natural growth conditions. In just a couple of days it will be possible to evaluate the seeds for germination, as they wake up and begin to open.
The first leaves will appear only after a month, after the third leaf you can plant the sprouts in separate pots. The size of the cutting will be 10 cm no earlier than in 4 months.
Forming the crown
The croton plant, photos of which are given in the material, develops unevenly. And its side shoots grow more slowly than the main stem. Therefore, prune to form a lush bush. To do this, remove branches that are too elongated, weak or damaged. It is also helpful to pinch the top of the central stem. Carry out this activity for the first time when the height of the flower reaches 15 cm. Pinch the top again when the shoots extend by 20 cm.
Temperature
Codium is sensitive to temperature conditions and reacts especially poorly to its frequent fluctuations. For this reason, the following conditions must be created:
- In the cold months of the year, the thermometer shows +17-19 degrees.
- In the warm months of the year - about 20 degrees (a little more).
At any time, the main thing is to maintain consistency in the thermometer readings. If the leaves begin to curl and take on an unnatural dark brown color, it means the guest from the tropics is cold. You should pay attention to the temperature in the room. To prevent the leaves from being dropped, move the pot closer to the radiator.
Growing from seeds
If you happen to see a croton bloom, then you can use this phenomenon to grow new specimens. Just collect the seeds and sow them in suitable soil. But keep in mind that this method of reproduction takes a lot of time. In addition, plants grown from seeds do not retain maternal characteristics. But in any case, it's up to you to decide.
Start sowing in mid-winter and first prepare the seed. To do this, dip the grains in water at a temperature of 60 degrees for half an hour, and then soak them for a day in a solution of a growth stimulator, for example, Epin or Zircon.
Heat the universal mixture for seedlings to +22 °C, fill containers or pots with it and bury the seeds 0.5-1 cm into the soil. In order for the grains to germinate, keep the substrate warm. To do this, place the seedlings on the battery.
Be sure to stretch polyethylene on top or put glass. Regularly ventilate the greenhouse and wipe off condensation, and do not forget to moisten the soil. But use the bottom watering method for this, that is, place the container in a basin with warm water until the ground absorbs moisture through the drainage holes.
About a month after sowing, the first shoots of the indoor croton plant will appear. How to care for seedlings? Move the planting to a brighter place and begin to acclimate the seedlings to normal conditions. To do this, gradually remove the cover for an hour, then two, and so on. Regularly spray the soil with warm water from a spray bottle; when the seedlings become stronger and a pair of true leaves appear on them, drop them into individual containers.
Diseases and pests
Among the diseases and pests of croton, there are several that are most common. These include anthracnose and root rot, and pests include scale insects and spider mites.
Anthracnose is a fungal disease caused by overwatering or too cold roots. Hypothermia is usually caused by watering with cold water. The appearance of gray and red spots on the leaves are the first symptoms of this disease. At the first signs, you should immediately resort to treatment with special preparations.
Root rot is also caused by excess moisture in the soil. It can be caused by improper soil composition or lack of drainage in the pot. If your croton leaves turn pale and fall off, there is a high chance that these are signs of root rot. In this case, it is better to transplant the plant into a new pot and change the soil. After transplantation, chemical treatment is also necessary.
Spider mites and scale insects are the most common pests that can harm croton. Signs of spider mite infestation are the appearance of white spots on the leaves and cobwebs. When a scale insect attacks, dark spots appear on the stems of the plant. Special preparations for treatment and regular washing of leaves will help in the fight against these pests.
Croton - interior decoration
Important! To prevent diseases, it is necessary to regularly wash the leaves of the plant and spray them.
Croton is quite difficult to reproduce and grow. Only experienced gardeners can do this. But with due diligence and perseverance, you can still achieve success in this difficult task. The reproduction process can be carried out in several ways. Croton allows propagation by leaves, cuttings, seeds and layering. For each case, you can choose the most convenient and acceptable one. With proper care, young seedlings can become a full-fledged plant that will become the highlight of the interior. It would not be a shame to show such a handsome man to his fellow flower growers.
Plant propagation by cuttings
Such an event can be held at any time of the year, with the exception of winter, when the plant rests. To propagate a croton plant, select the apical woody branches and cut them off with sharp scissors. Please note that each cutting must have a pair of leaves and at least one strong growth bud. Ideally, the length of the workpieces reaches 10–15 cm.
After cutting, place the cuttings for 2 hours in a bright, warm place so that the milky juice dries slightly. In the future, such preparation will prevent the evaporation of moisture from the leaves. Then heat the water to 25–30 degrees, add a few drops of a growth stimulator to it and place the cuttings of the homemade croton plant there.
How to care for plants? Try to keep the water warm and keep the container in a bright place out of direct sunlight. Add new water as needed, while diluting the growth stimulator in it.
The cuttings will take root in 1–2 months. When the roots reach 2-3 cm in length, transplant the young flowers into individual pots, and then provide them with normal care.
How to propagate croton from cuttings
The cuttings already have a folded stem, in contrast to leaf propagation, where you need to wait for the bud to awaken. The roots will not appear as quickly, but the plant will be stronger and stronger. It is necessary to cut off the top of the stem 10-12 cm long.
Step-by-step preparation of cuttings for planting:
- The cut must be made in one motion with a sharp knife.
- Treat the cut area on the mother plant with charcoal; pruning will stimulate the shoot to branch.
- On a cut cutting, the cut area is washed with water and treated with charcoal.
- The stem should be exposed to air for two hours after cutting.
- We remove the lower leaves and cut the upper ones in half so that there is no waste of force on these leaf plates.
- Place the cutting in a glass of water and maintain the water temperature at 25-27 degrees.
The cuttings can be immediately rooted in a mixture of sand and peat in equal proportions. How to root croton as comfortably as possible - in a bag. The greenhouse created will accelerate growth and create the necessary humidity conditions. The flower along with the pot should be placed in a bag with holes to allow fresh air to enter.
In the ground
Step-by-step process of cutting propagation:
- Prepare the shoot, cut off all its lower leaves, wash off the milky juice released at the cut site, thoroughly blot the “wound” with a paper napkin and sprinkle it with crushed activated carbon. Let the cutting dry a little, at least 2-3 hours.
- Tie all the leaves remaining on the shoot into a tube, and if there are large leaves left on top, cut them in half so that the “baby” croton can retain moisture inside.
- Prepare the container in which you will grow the “baby”. Pour a drainage layer there (for example, expanded clay), then fill it with a sand-peat mixture. Plant the cutting there, cover the top with cellophane with small holes made (for “breathing”) and place it in a warm place where diffused light reaches.
- After a month, you will see that the cutting has begun to grow. This propagation method is suitable for all varieties of crotons. The “parent” flower, after cuttings, as a rule, soon produces new shoots.
Propagation by cuttings in water
There is another method of growing cuttings - using water.
- We take settled water with a temperature no lower than room temperature (optimally 26 degrees above zero) and place the “baby” in it.
- After the white roots appear and reach a length of 3 centimeters, we transplant the sprout into a container with the mixture mentioned above. Cover with cellophane.
- Be sure to monitor the ambient temperature. It should not fall below +23 degrees and rise above +28. But we also adjust the lighting - it should be diffused light, soft, without direct burning rays. Provide the croton with long daylight hours - at least 12 hours. If necessary, “extend” it with the help of a phytolamp.
- After 30-35 days the sprout will take root. Transplant it into a small pot with a drainage layer and nutritious soil mixture. After the croton begins to grow and its roots fill the container, transplant the plant into a pot larger in diameter - about 15 centimeters.
Growing problems
The flower is quite unpretentious, but if there are mistakes in care, the croton indoor plant begins to act up. And when growing crops, flower growers may encounter the following problems:
- The leaves are falling. The lower leaves die off due to natural processes, but the top of the flower becomes bare if you keep the tropical beauty in a cool room, or it suffers from drafts.
- The pattern fades. Lack of light leads to this. Move the pot closer to the window or light it with a phytolamp, and the croton will quickly restore its bright color.
- Brown spots on leaves. Such damage is the most common sunburn. To avoid such troubles, do not forget to cover the plant from midday rays or move the pot deeper into the room.
- The leaves are drying. This is how the plant reacts to low indoor humidity. To restore the decorative appearance of the croton, spray the foliage more often and place containers filled with water next to the pot.
- The leaves dry out and brown spots appear on them. A similar phenomenon indicates that the plant is freezing on a cold windowsill, or you are watering it with cool water.
- Croton grows poorly. Most likely, the plant suffers from a lack of nutrients in the soil. Don’t forget to feed the flower, and it will quickly grow green mass.
As you can see, growing attractive croton at home is not that difficult. It is enough to provide the tropical beauty with minimal care, and he will definitely reward you with rapid growth and an attractive appearance.
Croton propagation by air layering
Propagation of croton at home using air layering is most effective. This method may seem complicated at first glance. In fact, this is a quick way to get a strong and healthy plant, since all the forces for the development of the root system are taken from the mother flower. When the root system is fully formed, the flower painlessly tolerates separation from the mother trunk and continues to actively grow foliage.
- We select an adult plant that has shed some of its leaves in the center and below. We retreat 15-20 centimeters from the lowest leaf or soil, if there are no leaves at all below. Using a very sharp knife (scalpel, razor), cut the bark in a circle. The width of the cut should be no more than 10 mm.
- We blot the bare area with a paper napkin and remove any juice that appears.
- We treat it with the drug “Kornevin”.
- Take a piece of wet peat or moss and wrap it around the cut area.
- Now we take a dark piece of cellophane (a garbage bag will do), put it on the plant through the top, and use it to close the “wound” lined with peat. At the bottom of the bag we carefully fix it with a lace or soft thread to avoid slipping, at the top we tighten the thread a little, leaving a gap for oxygen and for moisturizing.
- We wait a month and a half. During this time, roots form at the cut site.
- When they reach a size of 5 centimeters, cut off the stem and plant the resulting plant in a prepared container filled with suitable soil mixture and drainage.
- Croton should “gain strength” for two weeks - to do this, it is worth covering it with film in order to maintain high humidity. It should be watered using the “bottom” method (pouring water into the pan).
Roots will appear from bare areas within a month, but you need to wait for their intensive growth so that the plant, after pruning, can continue to grow on its own.
A more convenient way is to place a cut glass or plastic bottle on the bare area of the trunk, securing it with tape or film. Fill the cups with peat and wait for the roots to appear.
Soil method
Air layering can also be obtained by digging a bare section of the trunk into the soil. To do this, you need to lower the shoot and secure it in the ground with a separate pot.
“Soil” method step by step:
- Produced if there are bare side stems (thrown leaves).
- We prepare a wide container and bend the selected side shoot to it - directly to the soil.
- We cut the bark from the bottom of the stem, blot the “wound” with a paper napkin, and then sprinkle it with “Kornevin”.
- Next, we attach the notched stem to the soil by fixing it with a “horn” in the shape of the letter V. Even a hairpin is suitable for these purposes.
- Sprinkle the cut area with soil mixture.
- Cover the container with cellophane to maintain a constant level of humidity.
- When you notice that new leaves have formed on the “bent” trunk, separate it from the “parent” plant and replant it in another pot.
Preparing the soil for planting
It is important to first loosen the soil mixture and ensure good drainage. Croton reacts negatively to stagnation of liquid in the ground. Soil acidity should be between 6.1 and 6.5. The best option for the soil would be the following proportion: turf soil, leaf soil, sand, coal. All components are taken in the ratio 1:2:1:0.5, respectively.
It is also important to sterilize the resulting soil by boiling it in two containers. To get rid of stagnant water, you need to place a layer of expanded clay, charcoal and clay shards on the bottom of the pot.
About the history of the creation of the variety
Codium variegated has been known in Western Europe since the mid-19th century. Its most famous variety is called the decorated Codiaum (C. variegatum var. Pictum).
In the 1970s, Italian breeders worked to develop varieties of Codiaeum vasculum adapted for indoor conditions. In the largest nursery Azienda Floreale Diem, the cultivar “Norma” was first obtained by crossing the varieties “Bravo” and “Ernest de la Rue”. Taking the variety "Norma" as a basis and crossing it with 'Fournieri', in turn, we got the cultivar 'Petra'.
Externally, these plants are very similar in shape and arrangement of leaves, and the differences relate to the color of the leaf blades.
Sometimes in the literature and catalogs you can find the name 'Yellow Petra' - a variety of the Petra variety with a yellow main leaf color and a green pattern.
One of the features of the Norma and Petra Codiaums is the need for less light. The bright colors of their leaves do not fade due to insufficient lighting.
Currently, cultivars of Codiaeum variegata are actively grown throughout the world. Many copies are imported to Russia from Western Europe, especially from Holland.
Trimming
Probably every owner of Codieum sets the goal of growing a beautiful bush with an evenly leafy crown. This can be achieved by pruning. Formation begins in the spring. In a young plant, it will be enough to pinch the top; this procedure causes branching. In an old plant, the crown is formed by pruning shoots and removing excess branches.
To prevent fungal diseases, the cut area should be sprinkled with crushed coal. Cut branches are used for cuttings. Different varieties need to be pruned based on their characteristics. Codiaum Petra does not branch too much so that a beautiful lush bush grows; several pieces of future beauties can be planted in one pot.
Which method to choose
Cuttings or leaves
Most often, croton propagation is carried out by cuttings. Not only apical shoots take root well, but also cuttings with one leaf or a dormant bud. Croton propagation by leaves without a bud will not occur.
The best time for pinching is the first months of spring, when the shoots are actively growing. You need to cut off a fragment that contains a bud and an adult leaf blade. You need to pinch the top within 6–10 cm, then the future croton will have a strong trunk and rhizomes. In order for a piece of the stem to take root in the future, it must be cut from a healthy shoot.
We offer step-by-step instructions for preparing planting material:
- Dry the cut areas with a napkin.
- Large leaf plates that take away nutrients from the cuttings are cut in half.
- If the lower leaves also interfere with rooting, remove them.
- We keep the cuttings in the air for a couple of hours.
- Place the planting material in a glass of water.
It is very important that the temperature of the liquid is 24–30 °C. If it cools down, the roots will develop slowly and the seedling may eventually die.
Planting material should be exposed to the diffused rays of the sun throughout the day.
When roots appear on the cuttings, you can transplant them into the ground. It is enough that the shoots are 2–3 cm long, then they will not be damaged during transplantation, and the plant will quickly grow. If you have chosen the correct composition of the soil mixture, then within a couple of weeks the croton will acclimatize and quickly take root.
Video “How to propagate croton by cuttings”
Video about how to propagate codiaum (croton) by cuttings at home.
Air layering
When the trunk or branches are left without leaves, croton propagation is carried out by air layering. This method is interesting, but very painstaking. The summer months are most suitable for this procedure. Let's consider two methods of such reproduction.
The pouch method involves cutting off the bark in a circle at a distance of 10–15 cm from the top of the shoot to create a ring 1 cm wide. This place will be the launching pad for new roots.
The cut site is treated with a special rooting agent and covered with peat. A film is placed on top like a bag, which is tied at the top and bottom so that a gap remains, through which the peat is moistened for 60 days until roots 5 cm long appear from it. After which the cutting can be cut and transplanted into a pot.
You can also propagate croton using the buried shoot method. To do this, the branch on which the bark has formed is pressed to the surface and sprinkled with earth. Then the bottom edge of the branch is cut. Any juice that comes out must be wiped off, as it is poisonous. The incision is treated with a special agent to root it. The shoot is separated from the mother branch after rooting and transplanted into a flowerpot.
Seeds
Like other plants, croton can reproduce by seeds. But this method is rarely used. If a gardener decides to undertake such an experiment, then he needs to know the following:
- this is a long process;
- plants that appear in this way rarely retain the characteristics of the variety.
They should be planted in February. First, the seeds are poured with warm water. After 15 hours, they are soaked for a couple of hours in a solution of phytohormones. Next, prepare the soil mixture and fill the containers with it. The prepared seeds are buried 1 cm into the soil and a small greenhouse is made, covered with a jar or film.
Seeds are germinated at a temperature of +24 °C. Watering the seedlings is carried out through a tray. After 30 days, the first shoots will hatch. They require attention because they are weak and develop very slowly. When a couple of leaves appear on them, they can be picked. Care for seedlings is the same as for adult plants.
At the final stage, the seedlings are planted in separate flowerpots.
We told you how to propagate homemade croton. Some methods were simple, others could only be done by experienced gardeners. Which method to choose is up to you.
Growing conditions for codiaum "Petra"
Supplementary lighting, completely artificial office lighting or a bright window sill - “Petre” is good in any place with bright but soft lighting. It does not tolerate direct sun in the same way as other croton varieties. And it almost loses color spots even in partial shade. The Petra codiaum retains its intense, interesting shades and compactness only in sufficiently bright lighting, similar to eastern windows. The variety often suffers from stretching, shrinking of leaves and loss of color in winter (if the plant is not illuminated or moved to a brighter window).
The more stable the conditions, the better. Leaves age faster in hot conditions; it is no coincidence that a temperature of about 20 - 23 degrees is considered ideal. The minimum temperature that codiaum “Petra” can withstand is 18 degrees (many modern varieties successfully tolerate 16 degrees). “Petra” is afraid of drafts and sudden changes in conditions; it can be taken out into the fresh air only in the summer, controlling night temperatures.
This variety of codiaum is better suited than others for creating groups and floor placement. It grows well in areas with high humidity, including bathrooms and conservatories.
A few words about croton (Codiaeum), or the conviction of the unconditional benefits of the flower
The oval, slightly elongated, leathery leaves of croton attract with their density and various shades.
But few people know that “codeia” means “head” in Greek. Probably, in those days, when the Greeks first saw the codiaum, they were preoccupied with styling their voluminous and colorful hair! But this is humor, and the facts are as follows:
- Croton can become a real tree with professional care. Its height can reach 1.5-4 m;
- it has a positive effect on the nervous system, calming and uplifting. There cannot be depression where codiaum grows;
- the flower disinfects the air, so it is simply necessary in the nursery.
Croton can disinfect the air in a room.
For these reasons, both beginners and experienced gardeners want to grow more than one specimen on the territory entrusted to them. And here they know exactly how to do it!
Interesting! Indoor oak, as croton is also popularly called, can be not only variegated. If you want only light green and yellow, choose the Sunny Star variety; the Variegatum variety will appeal to those who adore sangria, burgundy and Marsala in various shades, but the Mammy variety will delight you with its compactness and classic colors!
Popular varieties
Tamara Branch
Croton Tamara Branch has elongated leaves that are shaped like feathers. The tips of the leaf plates are spiral. The foliage color is whitish-light green, and like most varieties it is spotted.
Variegatum
Codiaum Variegatum is the ancestor of all cultivated varieties of the genus. In the wild, it grows either as a shrub 1.5 m high or as a tree that grows up to 4 m. At the same time, on a windowsill it grows only up to half a meter.
Variegatum forms large leaves up to 30 cm long. Dense leaf plates are arranged alternately on the stem. Stem growth is very slow.
Zanzibar
Codiaum Zanzibar is distinguished by thin and long leaves. The color of the leaf blade is uneven, but most of it is green with small yellow dots.
Codiaum Petra
The green plant with large yellow veins looks great. This compact bush grows up to half a meter in height. Large, veiny leaf plates grow alternately and point upward. A special “accessory” is the bright yellow veins, which make the flower even more extravagant.
Mrs Eyeston
As an adult it resembles a mini tree. When young, the leaves have a delicate creamy tint. As the leaves on the tree mature, they first turn yellow and then bright green. Mrs. Eyeston amazes with its originality, since on one plant you can see all the colors at the same time.
If you care for the plant correctly, the entire tree will be covered with variegated foliage. The plant loves good lighting, but avoids direct sunlight; an extra portion of ultraviolet radiation can lead to burns.
Excellent
This oak-leaved compact indoor flower looks unusual: a bright emerald-colored top with yellow blurry spots, and below the leaves are a crimson shade. Each leaf blade is clearly outlined with brown veins. The flower stands out not only for its original color, but its leaves are shaped like oak leaves.
The perennial loves abundant watering. It should be watered when the top layer dries out. Excess water is immediately removed from the pan to avoid rotting of the roots. This variety is most popular among gardeners.
Mammy
Codiaum Mammi has narrow leaf blades, coquettishly twisted in spirals. The orange-red color of the leaves always lifts the mood, and the dark emerald stripes dividing the plate in two give the flower some intimacy.
Mammy looks bright. Yellow veins mixed with red ones add some severity to the leaves. Such a decorative element will decorate any interior.
Sunny star
The leaves are colored in warm sunny colors. The olive tip and edging at the edges make the foliage more defined. The young leaves of Sunny Star have a beige tint. As they “grow up,” they become scarlet and sunny yellow with pink splashes.
With insufficient lighting, the indoor plant begins to stretch and loses its attractive variegated shades.
There are also other varieties:
- Codium Mix. A variety that has many varieties. The mix with sharp edges on the tops of the leaves looks very original;
- decorative Gold San with yellow veins on a green background is very demanding in terms of lighting;
- the elongated glossy leaves of the Golden Ring are decorated with a scattering of spots as if they were gold;
- Gold Star looks like a branched bush with green plates bordered with gold;
- a beautiful and unpretentious plant with narrow leaves, Pictum Spot, is ideal for an apartment;
- the Nervia variety is good for decorating a workplace, as it helps to achieve recognition and increases perseverance;
- the decorative deciduous shrub Vilma is valued for its variety of variegated shades and unique leaf shapes;
- The rare variety Eburneum is also called the “white chimera”, since the color of the leaf blades has a milky tint. As the leaves mature, they turn pinkish;
- Spray champagne has oblong thin leaves, on which small spots are located, like splashes;
- The main decorative feature of Croton Aucubofolia is the color of the leaves. The plant blooms with delicate fluffy balls, which are collected in inflorescences. In order to enjoy the bright colors of Aucubofolia, bright lighting is necessary.